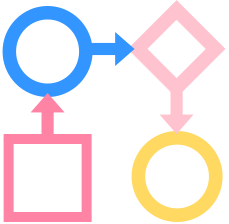
ObjectiveThis cookbook describes how to create and/or update your Quable PIM workflows.
| Workflows allow you to define processes for the progression of your product information. They're automated sequences of operations and validation steps for specific tasks between various parties (purchasing department, marketing department, photographers, translators, etc.). |  |
Process Overview
Creating or updating your Quable PIM workflows is a straightforward process, you just need to make a simple POST or PUT call to Quable PIM API.
Create Workflow
To create a workflow, you only need to send the request. There are no attributes required, however the properties of the workflow must be defined.
| URL Parameters | |||
| Endpoint | /api/workflows | API v5 endpoint | |
| HTTP Method | POST | ||
| Request Body | |||
| The request body must include the information to define the two elements that make up a workflow, its steps and links. | |||
| Nodes | | An array of unique codes for the main key of each workflow step. Every workflow step needs to be defined in the Node array. You also need to define each step's properties:
| |
| Links | | A unique code for the transition to the next workflow step. You also need to define the link's properties:
| |
Update Workflow
To edit a workflow, you must identify the workflow's unique code.
| URL Parameters | |||
| Endpoint | /api/workflows/ | API v5 endpoint | |
| HTTP Method | PUT | ||
| Request Body | |||
| Required Attributes | | string | The workflow's unique code. |
| Nodes | | string | An array of unique codes for the main key of each workflow step. Every workflow step needs to be defined in the Node array. You also need to define each step's properties:
|
| Links | | string | A unique code for the transition to the next workflow step. You also need to define the link's properties:
|
Examples
Request
The following code example shows the basic structure of a request:
{
    "id": "{{workflow_code}}",
    "documentType": {
        "id": "{{document_type_code}}",
        "objectType": "document"
    },
    "name": {
        "fr-FR": "{{workflow_label_fr-FR}}",
        "en-US": "{{workflow_label_en-US}}",
        "pl-PL": "{{workflow_label_pl-PL}}",
        "es-ES": "{{workflow_label_es-ES}}",
        "ro-RO": "{{workflow_label_ro-RO}}",
        "ru-RU": "{{workflow_label_ru-RU}}"
    },
    "chart": {
        "hover": {},
        "hovered": {},
        "nodes": {},
        "links": {},
        "offset": {
            "x": 0,
            "y": 0
        },
        "selected": {}
    }
}
Because a workflow is defined for a specific document type,documentTypeand its properties must be included.
Steps
The following shows an example of the code for creating nodes:
"{{step_code}}": {
    "id": "{{step_code}}",
    "orientation": 0,
    "ports": {
        "bottom": {
            "id": "bottom",
            "position": {
                "x": 75,
                "y": 88
            },
            "type": "bottom"
        },
        "left": {
            "id": "left",
            "position": {
                "x": 0,
                "y": 44
            },
            "type": "left"
        },
        "right": {
            "id": "right",
            "position": {
                "x": 150,
                "y": 44
            },
            "type": "right"
        },
        "top": {
            "id": "top",
            "position": {
                "x": 75,
                "y": 0
            },
            "type": "top"
        }
    },
    "position": {
        "x": 405.875,
        "y": 168.375
    },
    "properties": {
        "code": "{{step_code}}",
        "color": "#00FF00",
        "name": {
            "fr-FR": "{{step_label_fr-FR}}",
            "en-US": "{{step_label_en-US}}",
            "pl-PL": "{{step_label_pl-PL}}",
            "es-ES": "{{step_label_es-ES}}",
            "ro-RO": "{{step_label_ro-RO}}",
            "ru-RU": "{{step_label_ru-RU}}"
        }
    },
    "size": {
        "height": 88,
        "width": 150
    },
    "type": "regular"
}
Theports,position,size, andtypevalues shown in the example are default values that must be included.
Links
The following shows an example of the code for creating links:
"{{link_code}}": {
    "id": "{{link_code}}",
    "properties": {
        "code": "{{link_code}}",
        "name": {
            "fr-FR": "{{link_label_fr-FR}}",
            "en-US": "{{link_label_en-US}}",
            "pl-PL": "{{link_label_pl-PL}}",
            "es-ES": "{{link_label_es-ES}}",
            "ro-RO": "{{link_label_ro-RO}}",
            "ru-RU": "{{link_label_ru-RU}}"
        },
        "roles": [
            "{{role1_code}}",
            "{{role2_code}}",
        ]
    },
    "from": {
        "nodeId": "{{step_code}}",
        "portId": "right"
    },
    "to": {
        "nodeId": "{{step_code}}",
        "portId": "left"
    }
},