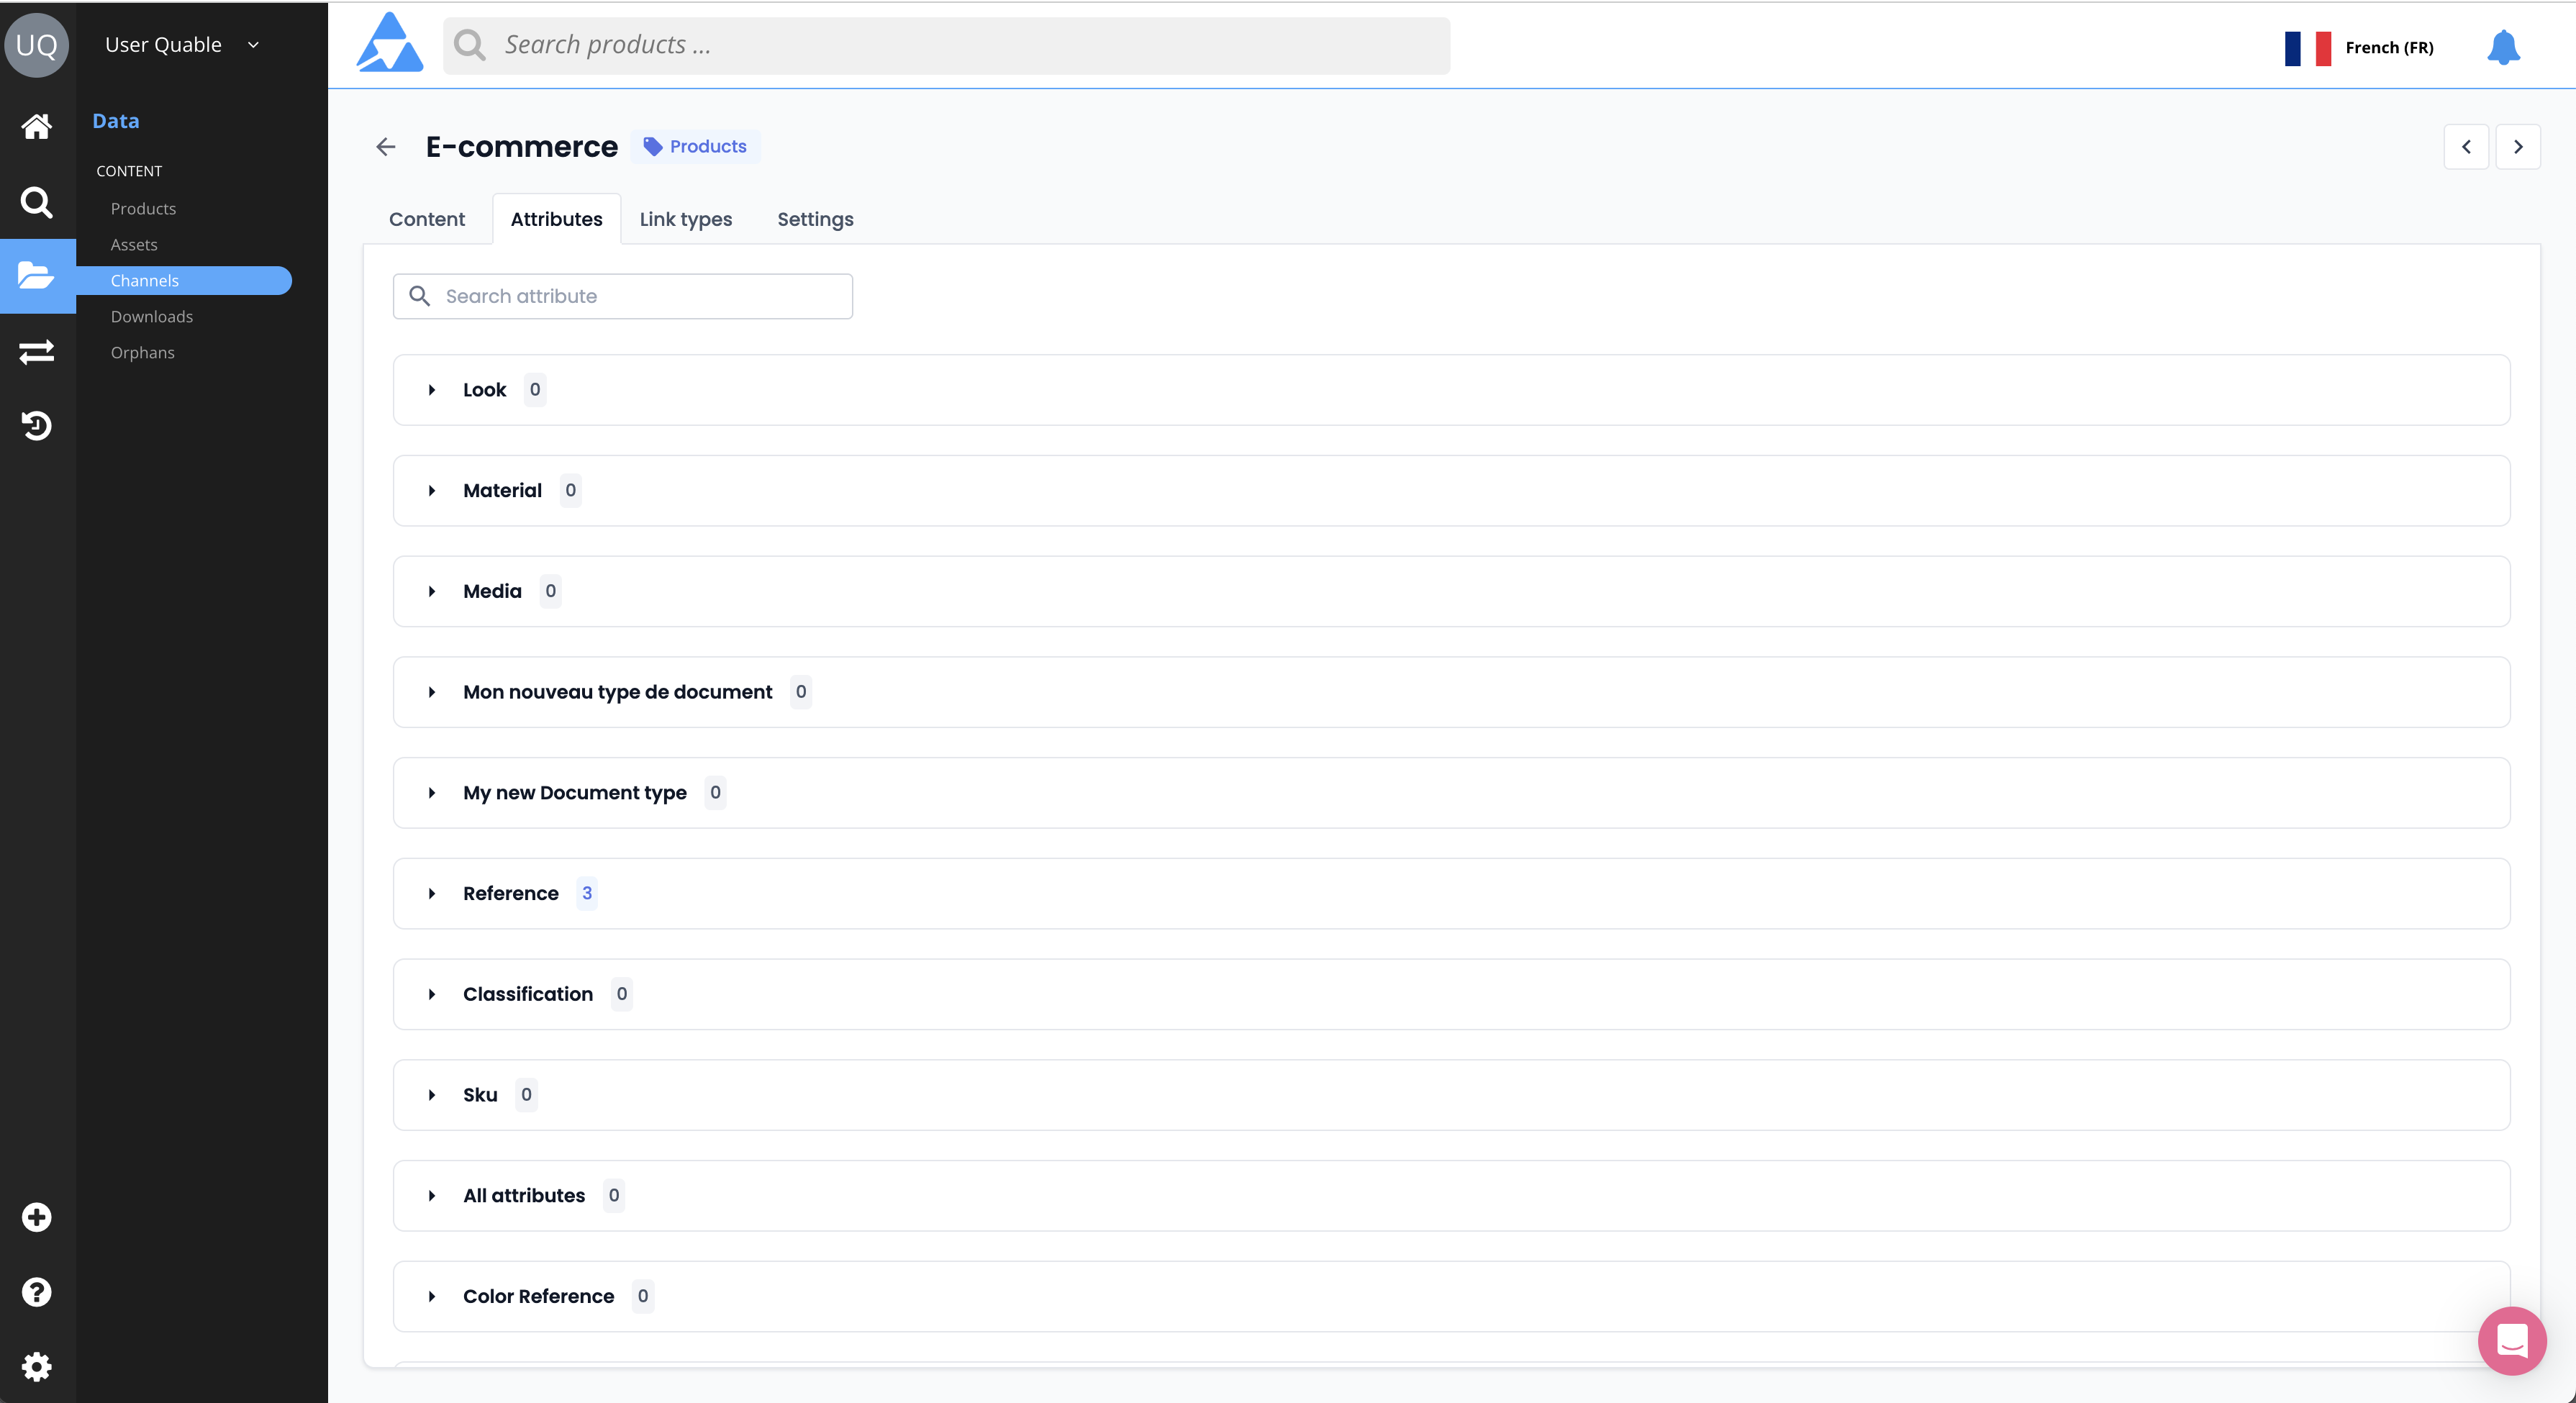
Channels
Distribute your content!
Channels allow you to distribute your product information to defined recipients, such as e-commerce platforms, marketplaces, brand Portals, printed catalogs, point-of-sale systems, etc.

Channels page
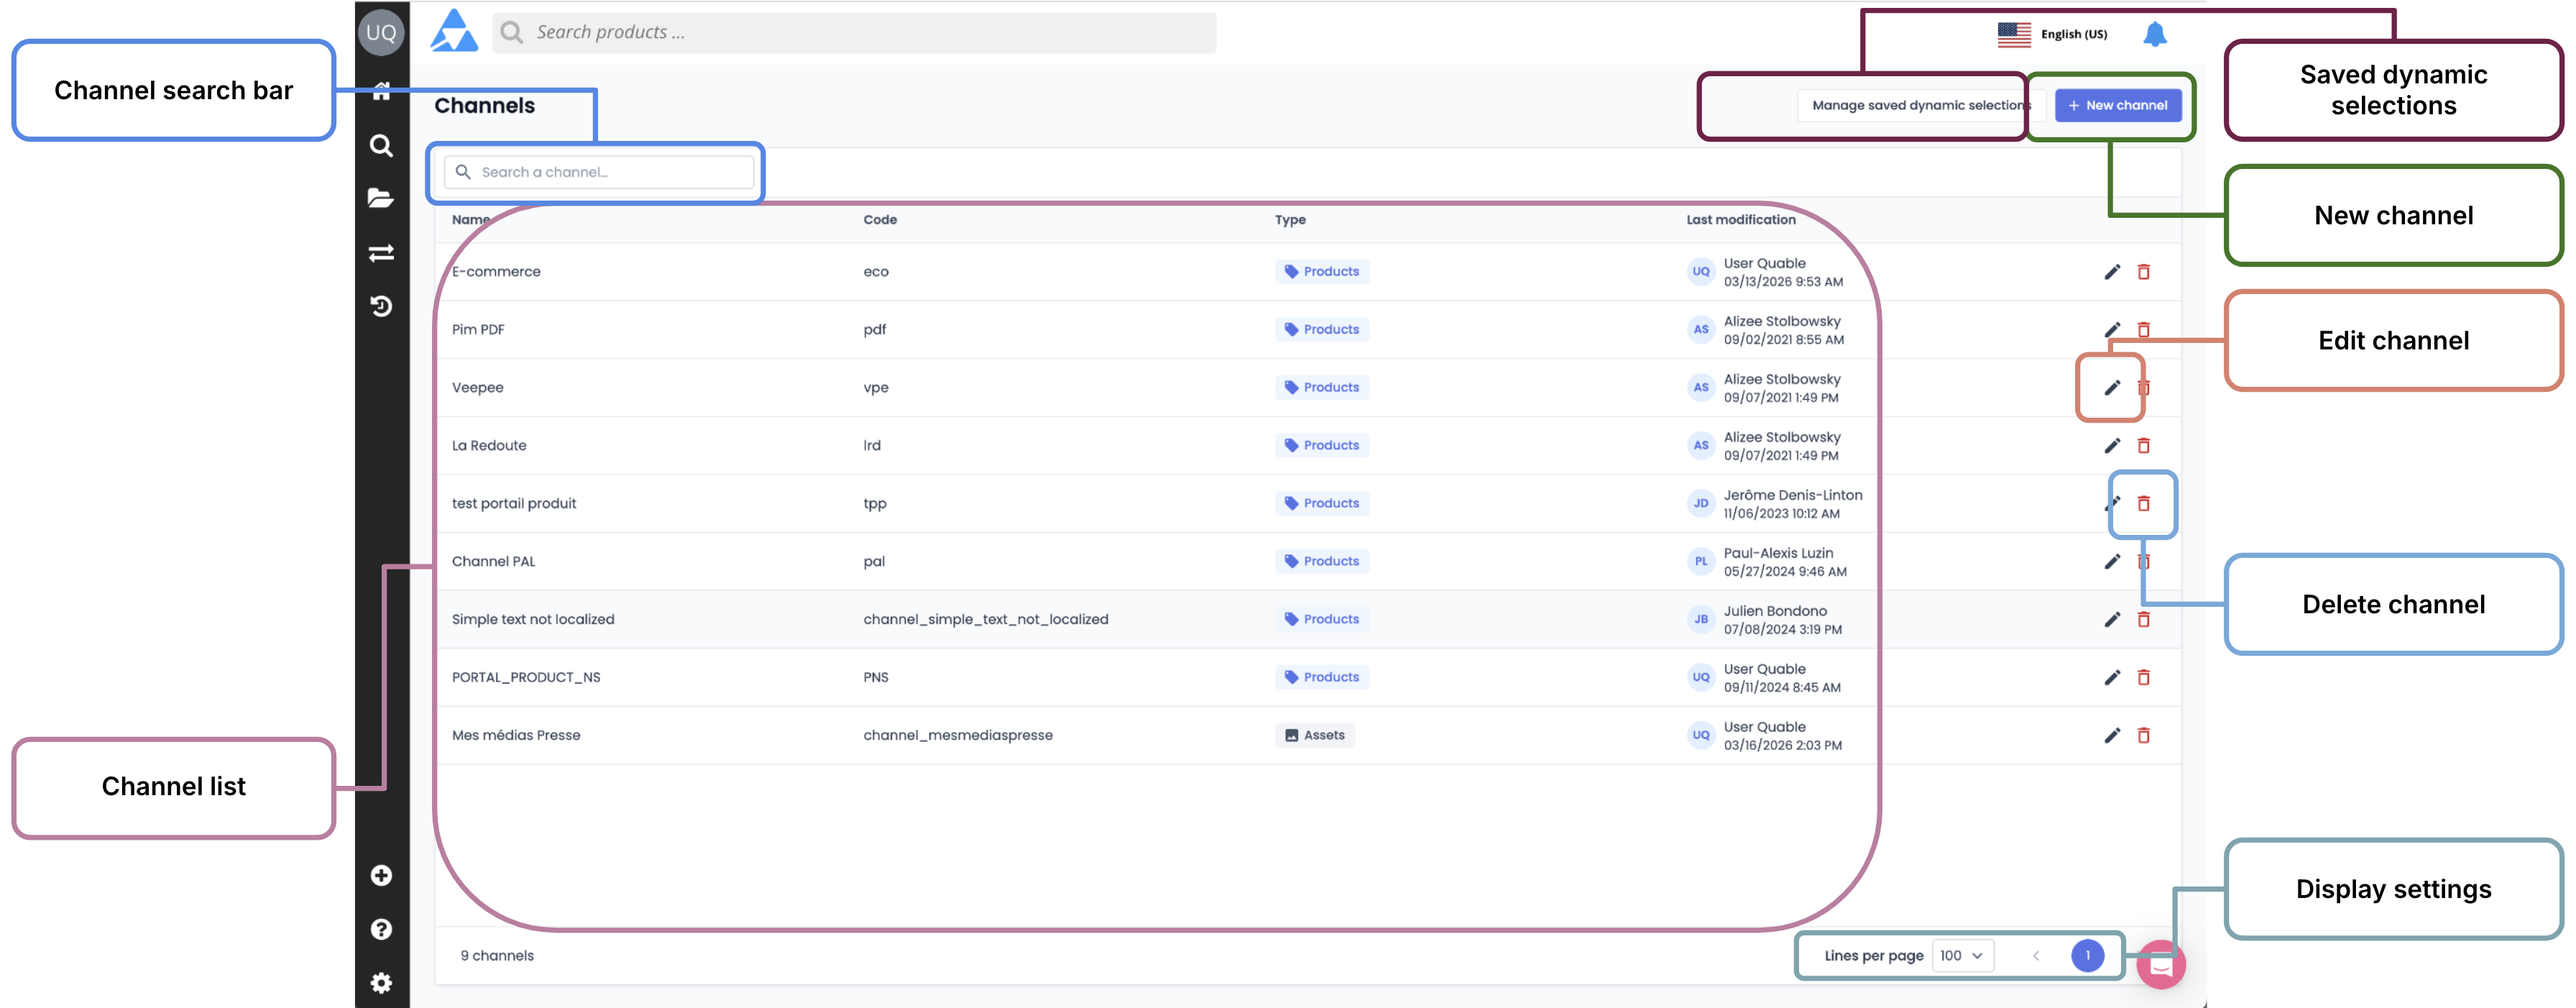
The Channels page is where you can create and manage your distribution channels and their content.
This page contains the following sections:
| Section | Description |
|---|---|
| Search bar | Allows you to search and quickly find the desired distribution channel. |
| Channel list | Displays the list of all available channels along with the following information (from left to right):
|
| Saved dynamic selections | (SDS) Feature allowing you to create content selections, product sheets or assets, based on dynamic filters and save them. |
| New channel | Allows you to create a new distribution channel. |
| Edit a channel | Allows you to edit and manage a distribution channel. |
| Delete a channel | Allows you to delete an existing distribution channel. |
| Display settings | Allows you to modify the number of channels displayed per page. |
Distribution channels
The channels defined in your PIM are used to distribute different content to distinct destinations, such as:
- e-commerce platforms,
- marketplaces,
- the Quable Brand Portal - To easily share your Quable PIM product sheets, assets, and variants.
- PDF Product Sheets - To create read-only copies of your Quable PIM product sheets.
- and more!
LimitationsWe recommend creating a maximum of 10 channels.
Add a distribution channel
To create a new channel, click on the + New channel icon in the top right corner of the page.

A dialog box appears to define the new channel:

Enter the following information:
| Information | Description | Mandatory |
|---|---|---|
| Name | The channel name. It is recommended to make the name as descriptive as possible so it is easily identifiable. | Yes |
| Code | The unique channel identifier. Note: This setting can only be modified during channel creation. Once the channel is created, its Code can no longer be changed. | Yes |
| Type | Select the channel content type (Assets or Products) from the drop-down list. | Yes |
Important
- Only the channel name can be modified later.
- The Code and Type information are final and can no longer be changed.
- Once you have entered the information, click the Create channel button.
Products Channels & Assets Channels
- Products type channels allow you to distribute product sheets, along with their attributes, linked products, and associated assets.
- Assets type channels allow you to distribute only assets and their associated attributes.
Edit a distribution channel
To manage the information in a channel, click on the pencil icon at the end of the row corresponding to the channel you want to edit.

You can edit and manage the following elements within a channel:
- classifications,
- channel name,
- products, their attributes, and distributed linked items.
Delete a distribution channel
To delete a channel, click the trash can icon at the end of the row corresponding to the channel you want to modify.

A dialog box appears to confirm the deletion. Follow the instructions to delete the channel or click the Cancel button to cancel the deletion.

Warning
- Deleting a channel also leads to the deletion of all the information and settings it contains.
- Deleting a channel is irreversible.
Manage a distribution channel
To access the channel management settings, click the Edit a channel button.
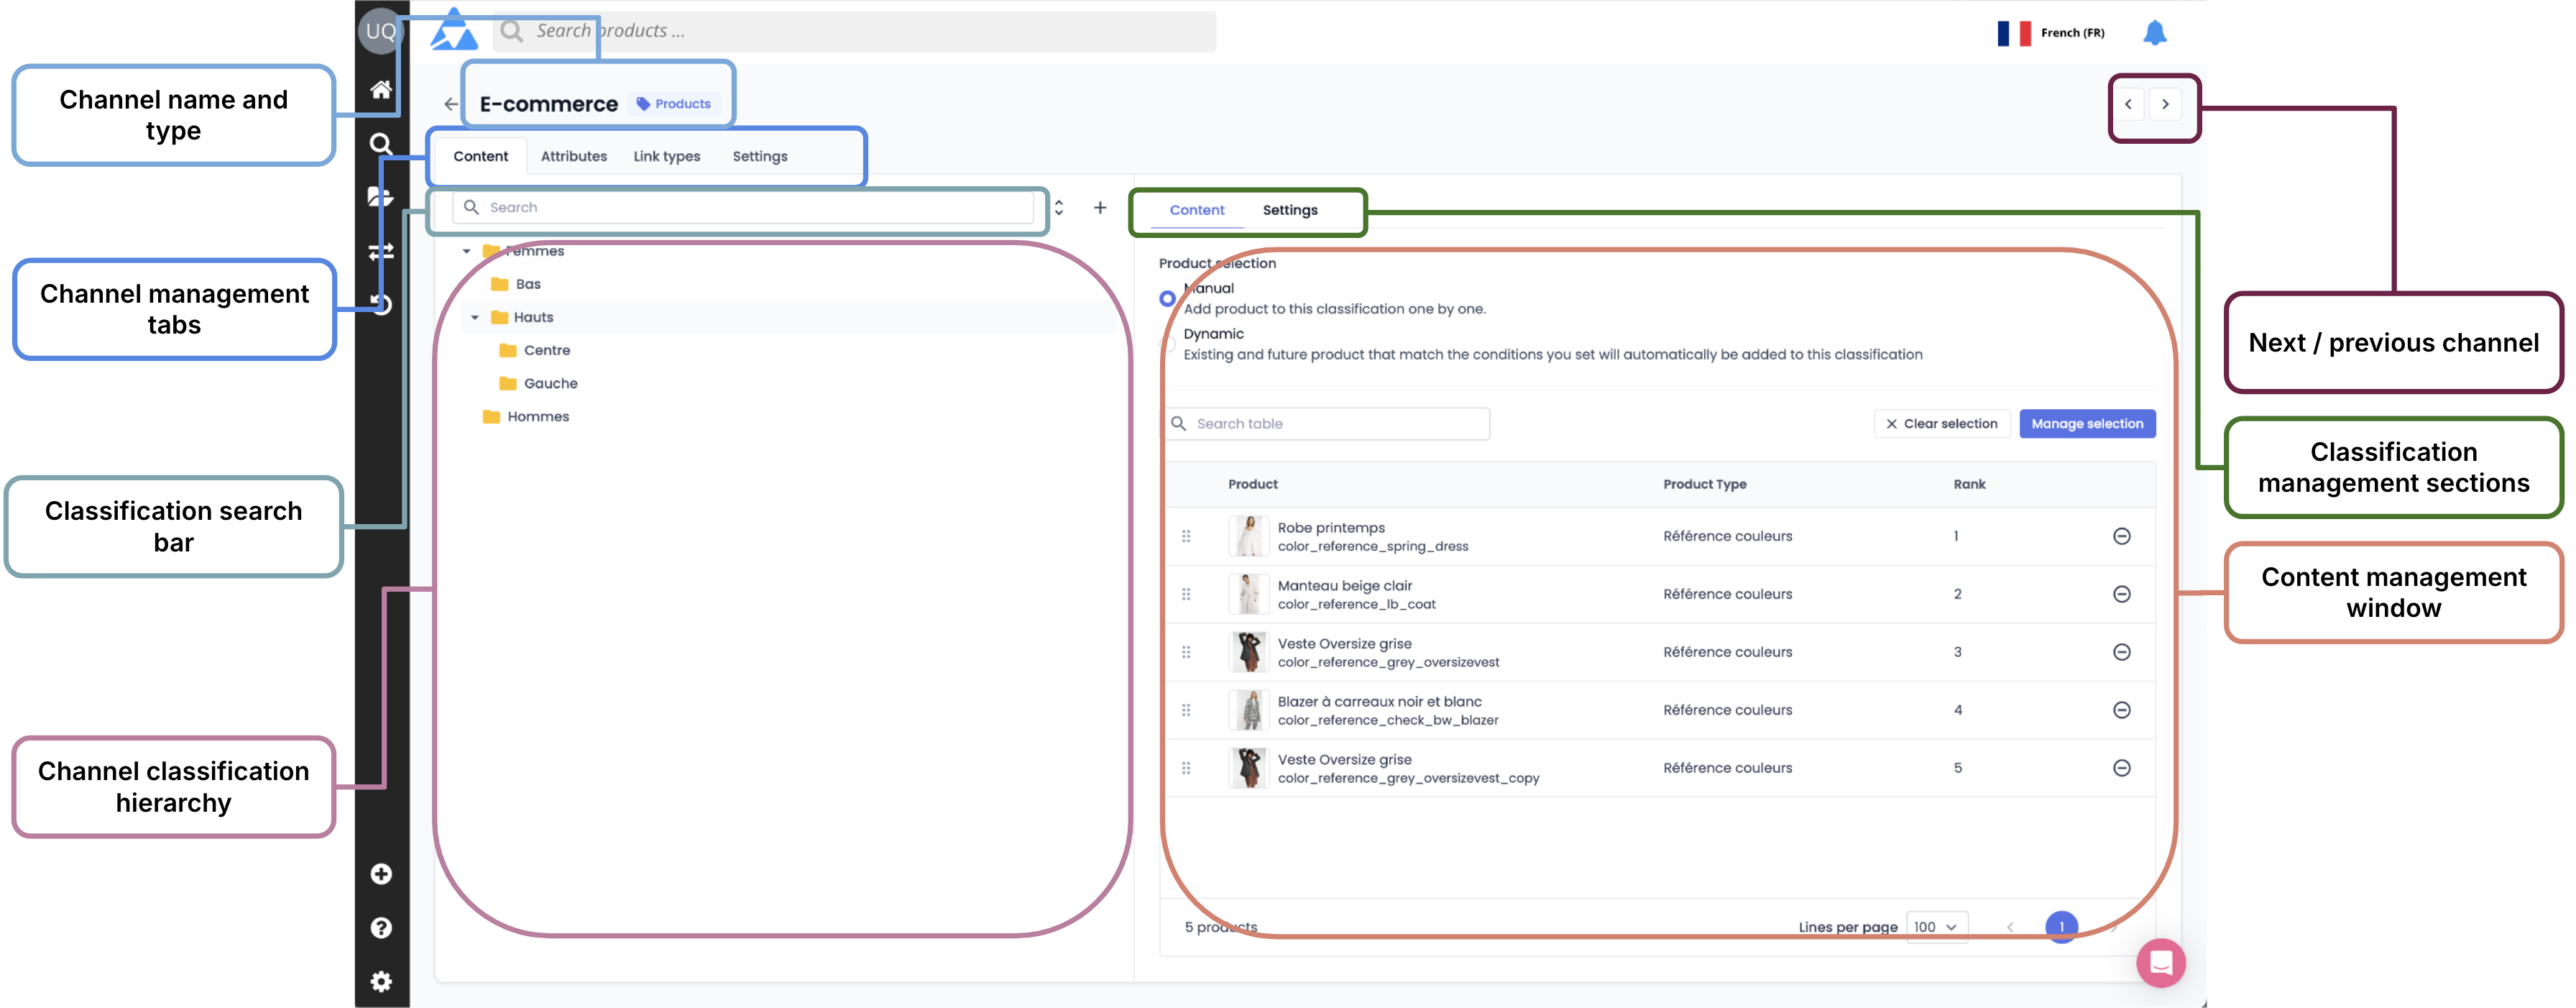
The channel page contains the following sections:
)
| Section | Description |
|---|---|
| Channel name and type | Identifies the name and content type of the current channel (Assets or Products). |
| Channel management tabs | Allows access to channel management settings:
|
| Classification search bar | Allows you to search and quickly find the desired classification. |
| Classification hierarchy | Custom classification hierarchy tree of the distribution channel. |
| Next / previous channel | Allows navigation to the next or previous distribution channel. |
| Classification management sections | Only available in the Content tab.
|
| Content management window | Allows you to manage the content distributed in the classification in Manual or Dynamic mode. |
Content tab
Manage distribution channel classifications
Classifications are the categories and sub-categories used to organize your product sheets or assets in your channel. This directly corresponds to the structure displayed on your channel, so it is important to keep the marketing aspect in mind when creating your channel's classification hierarchy.
To access a channel's classification management from the channels page, first click on the pencil at the end of the row corresponding to the channel. The classifications are accessible in the channel's Content tab.

Item limit:
- The classification can contain a maximum of up to 10,000 classification sub-nodes.
- To ensure optimal performance, it is recommended to segment the classification hierarchy so as not to reach or exceed this limit.
Good to know
You can search for a classification node directly from the search bar. This is particularly useful when your channel contains many classification nodes.
You can change the order of the nodes in your classification hierarchy by drag and drop into the desired order. The new position of each classification node is automatically saved.
Each level of a channel's classification hierarchy can host both classification sub-nodes and content (product sheets or assets).
You can expand or collapse all the channel's classification nodes at once by clicking the double arrow next to the search bar.

Add a classification
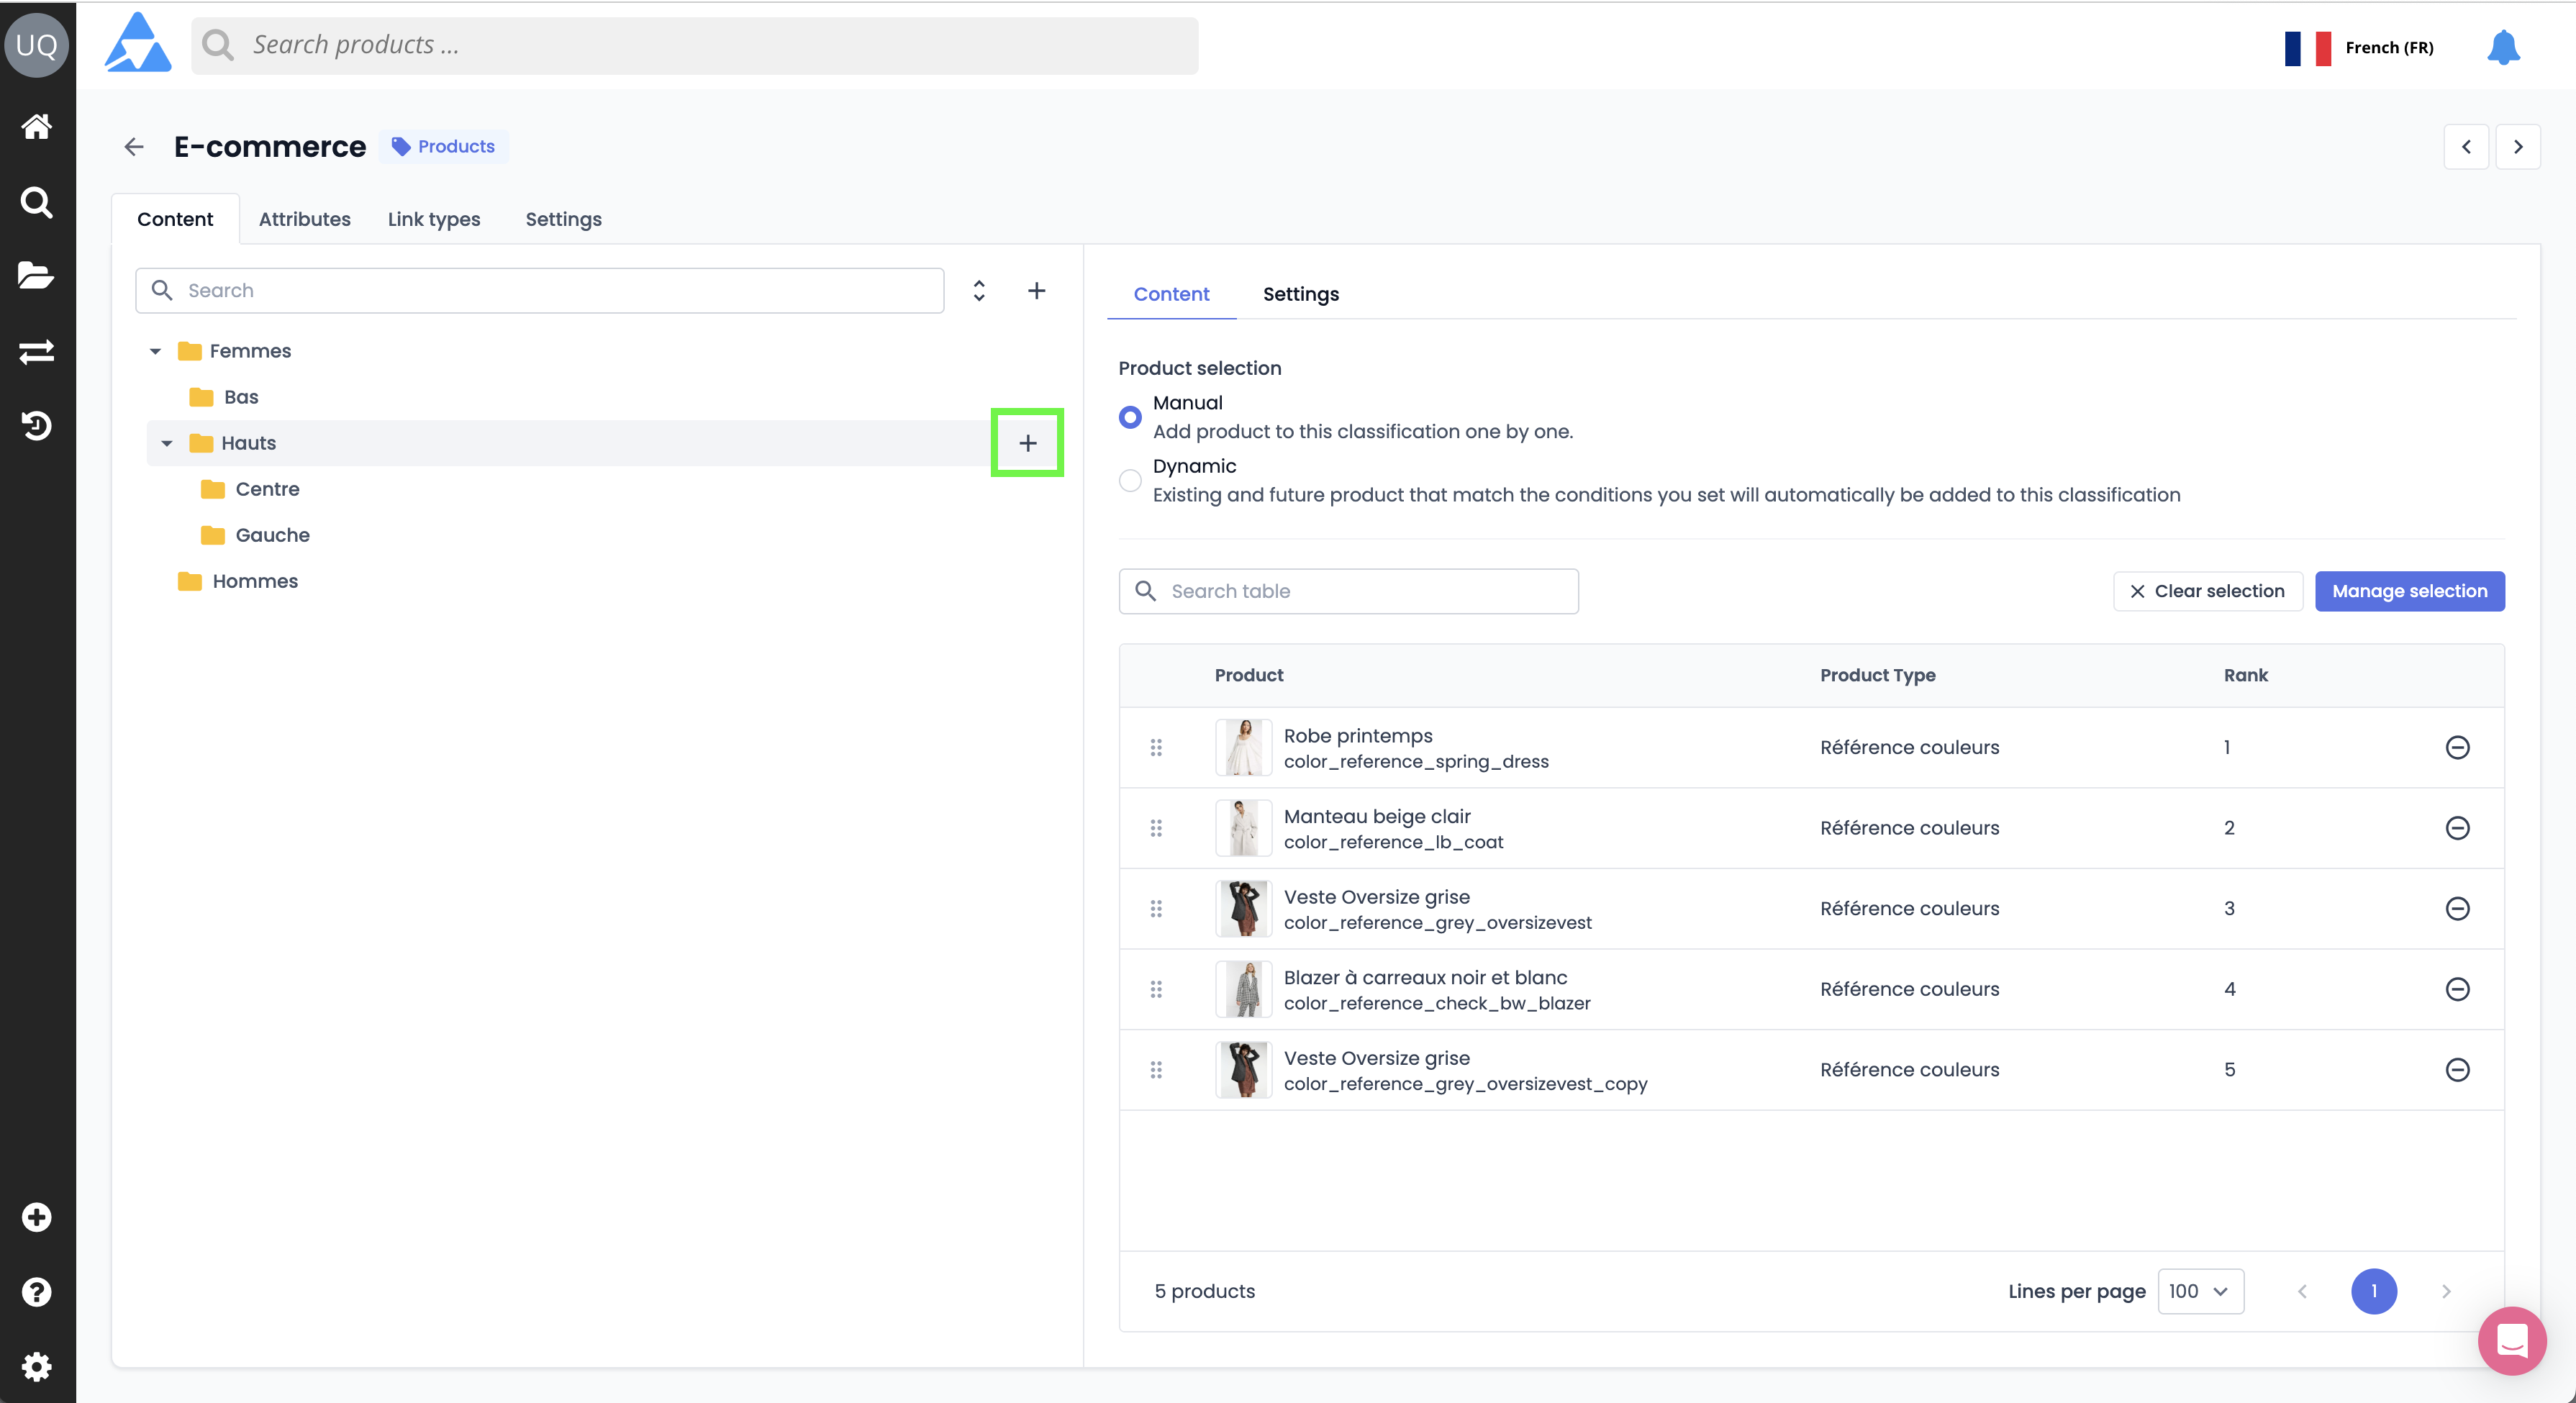
To create a new classification at the root of the channel, click directly on the ("+") icon next to the search bar.

Alternatively, to create a new classification in a classification sub-node, select the classification level (the parent) where the new classification will be located and click the ("+") icon at the end of the row.
A dialog box appears to define the new classification:

Enter the following information:
| Information | Description | Mandatory |
|---|---|---|
| Name | The classification name. | Yes |
| Code | The unique classification identifier. | Yes A code will be automatically generated if left blank. |
Once you have entered the information for the new classification, click the Create classification button.
Delete a classification
To delete a classification node from a channel, from the Content tab, select the desired classification level, then click the Settings section in the right window, and finally click the Delete button at the bottom of the page.

A dialog box will then appear to confirm the deletion. Click the Delete button to remove the classification.

Warning
- Deleting a classification node in a channel also leads to the deletion of all classification sub-nodes and all the content it contains.
- Deleting a classification is irreversible
Configure classification attributes
Each node in the classification hierarchy has its own settings: you can assign information as well as an illustration image to them. The classification Name is available by default, but additional attributes can be defined by the administrator.
To access these settings: from the Content tab (1), select a classification node (2) and click the Settings section (3).
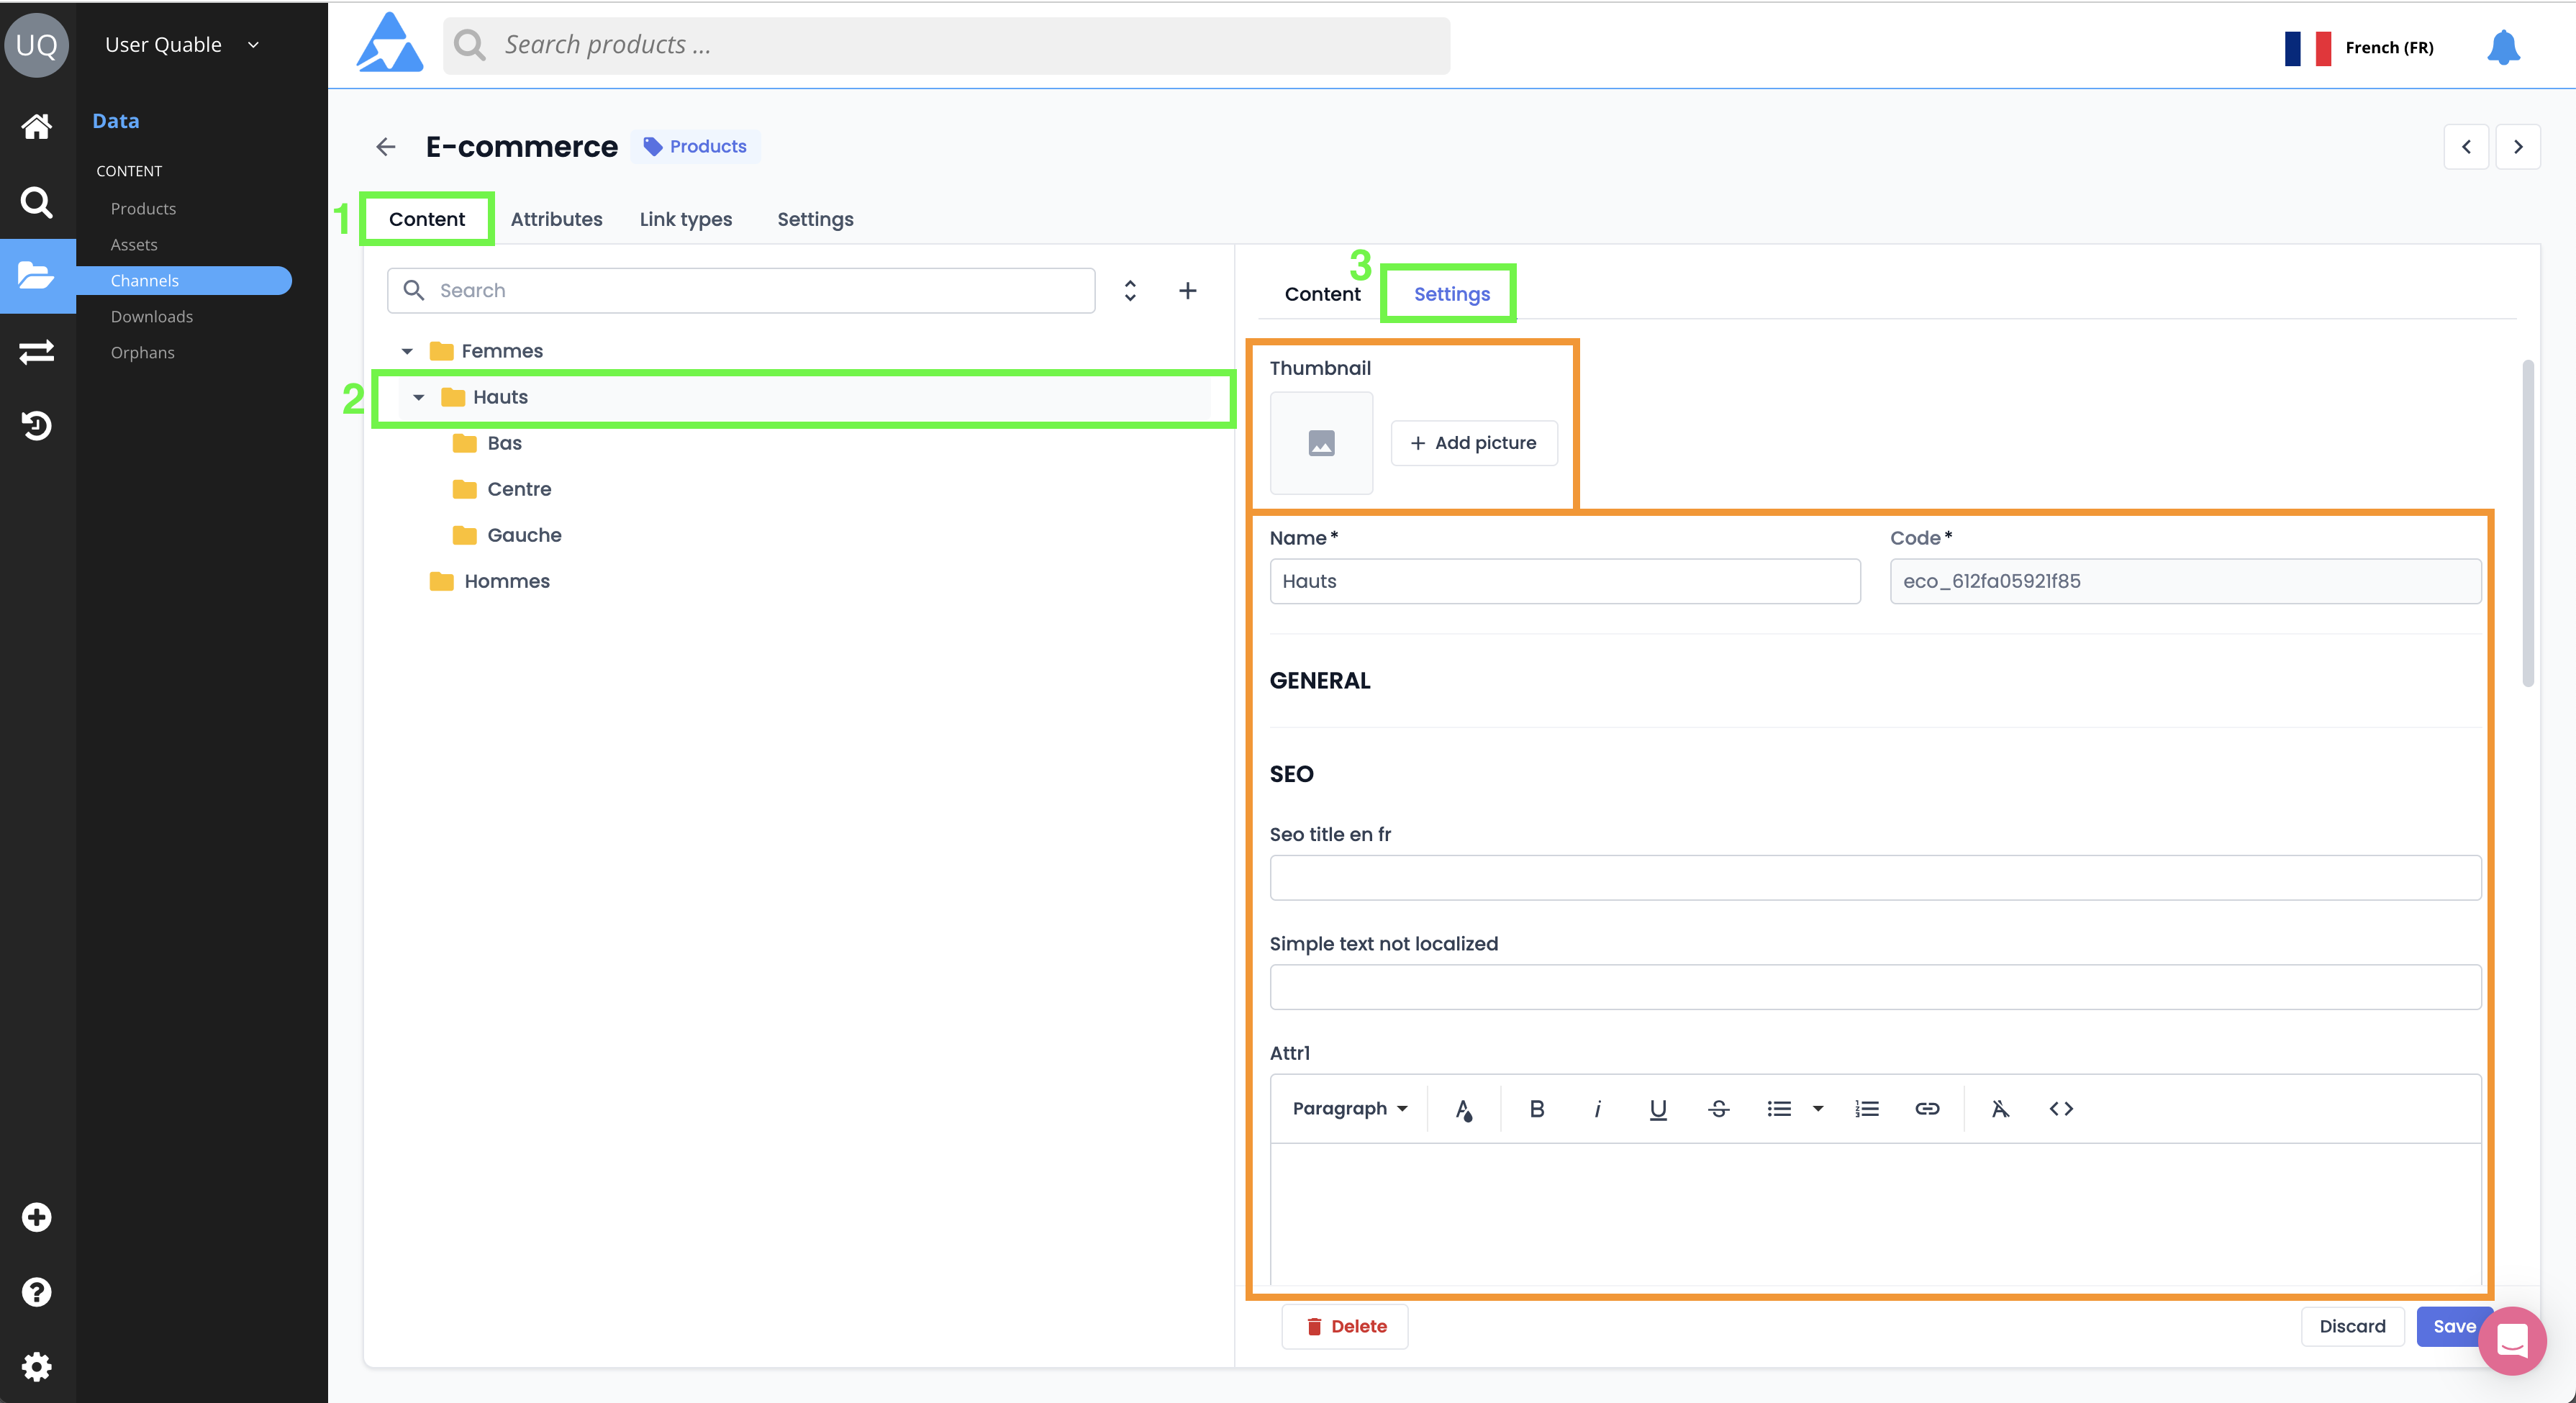
- To add an illustration picture (thumbnail) to the classification node: click the Add picture button and follow the instructions.
- To add description information to the classification node: enrich the available attributes.
- Once you have entered the classification information, click the Save button.
Good to know
- If the classification code appears instead of the name, it means the name attribute has not been entered in the current working data language. You must complete the name attribute for all data languages, as no name inheritance mechanism is available.
- It is not possible to modify the classification code.
- Classification description attributes are customizable by the administrator from the Attributes page in the administration console.
Manage the content distributed in the classification
Content refers to the product sheets or assets distributed within the channel's classifications.
To access the content management of a classification from the channels page, in the Content tab (1), select a classification node (2) and click on the Content section (3).
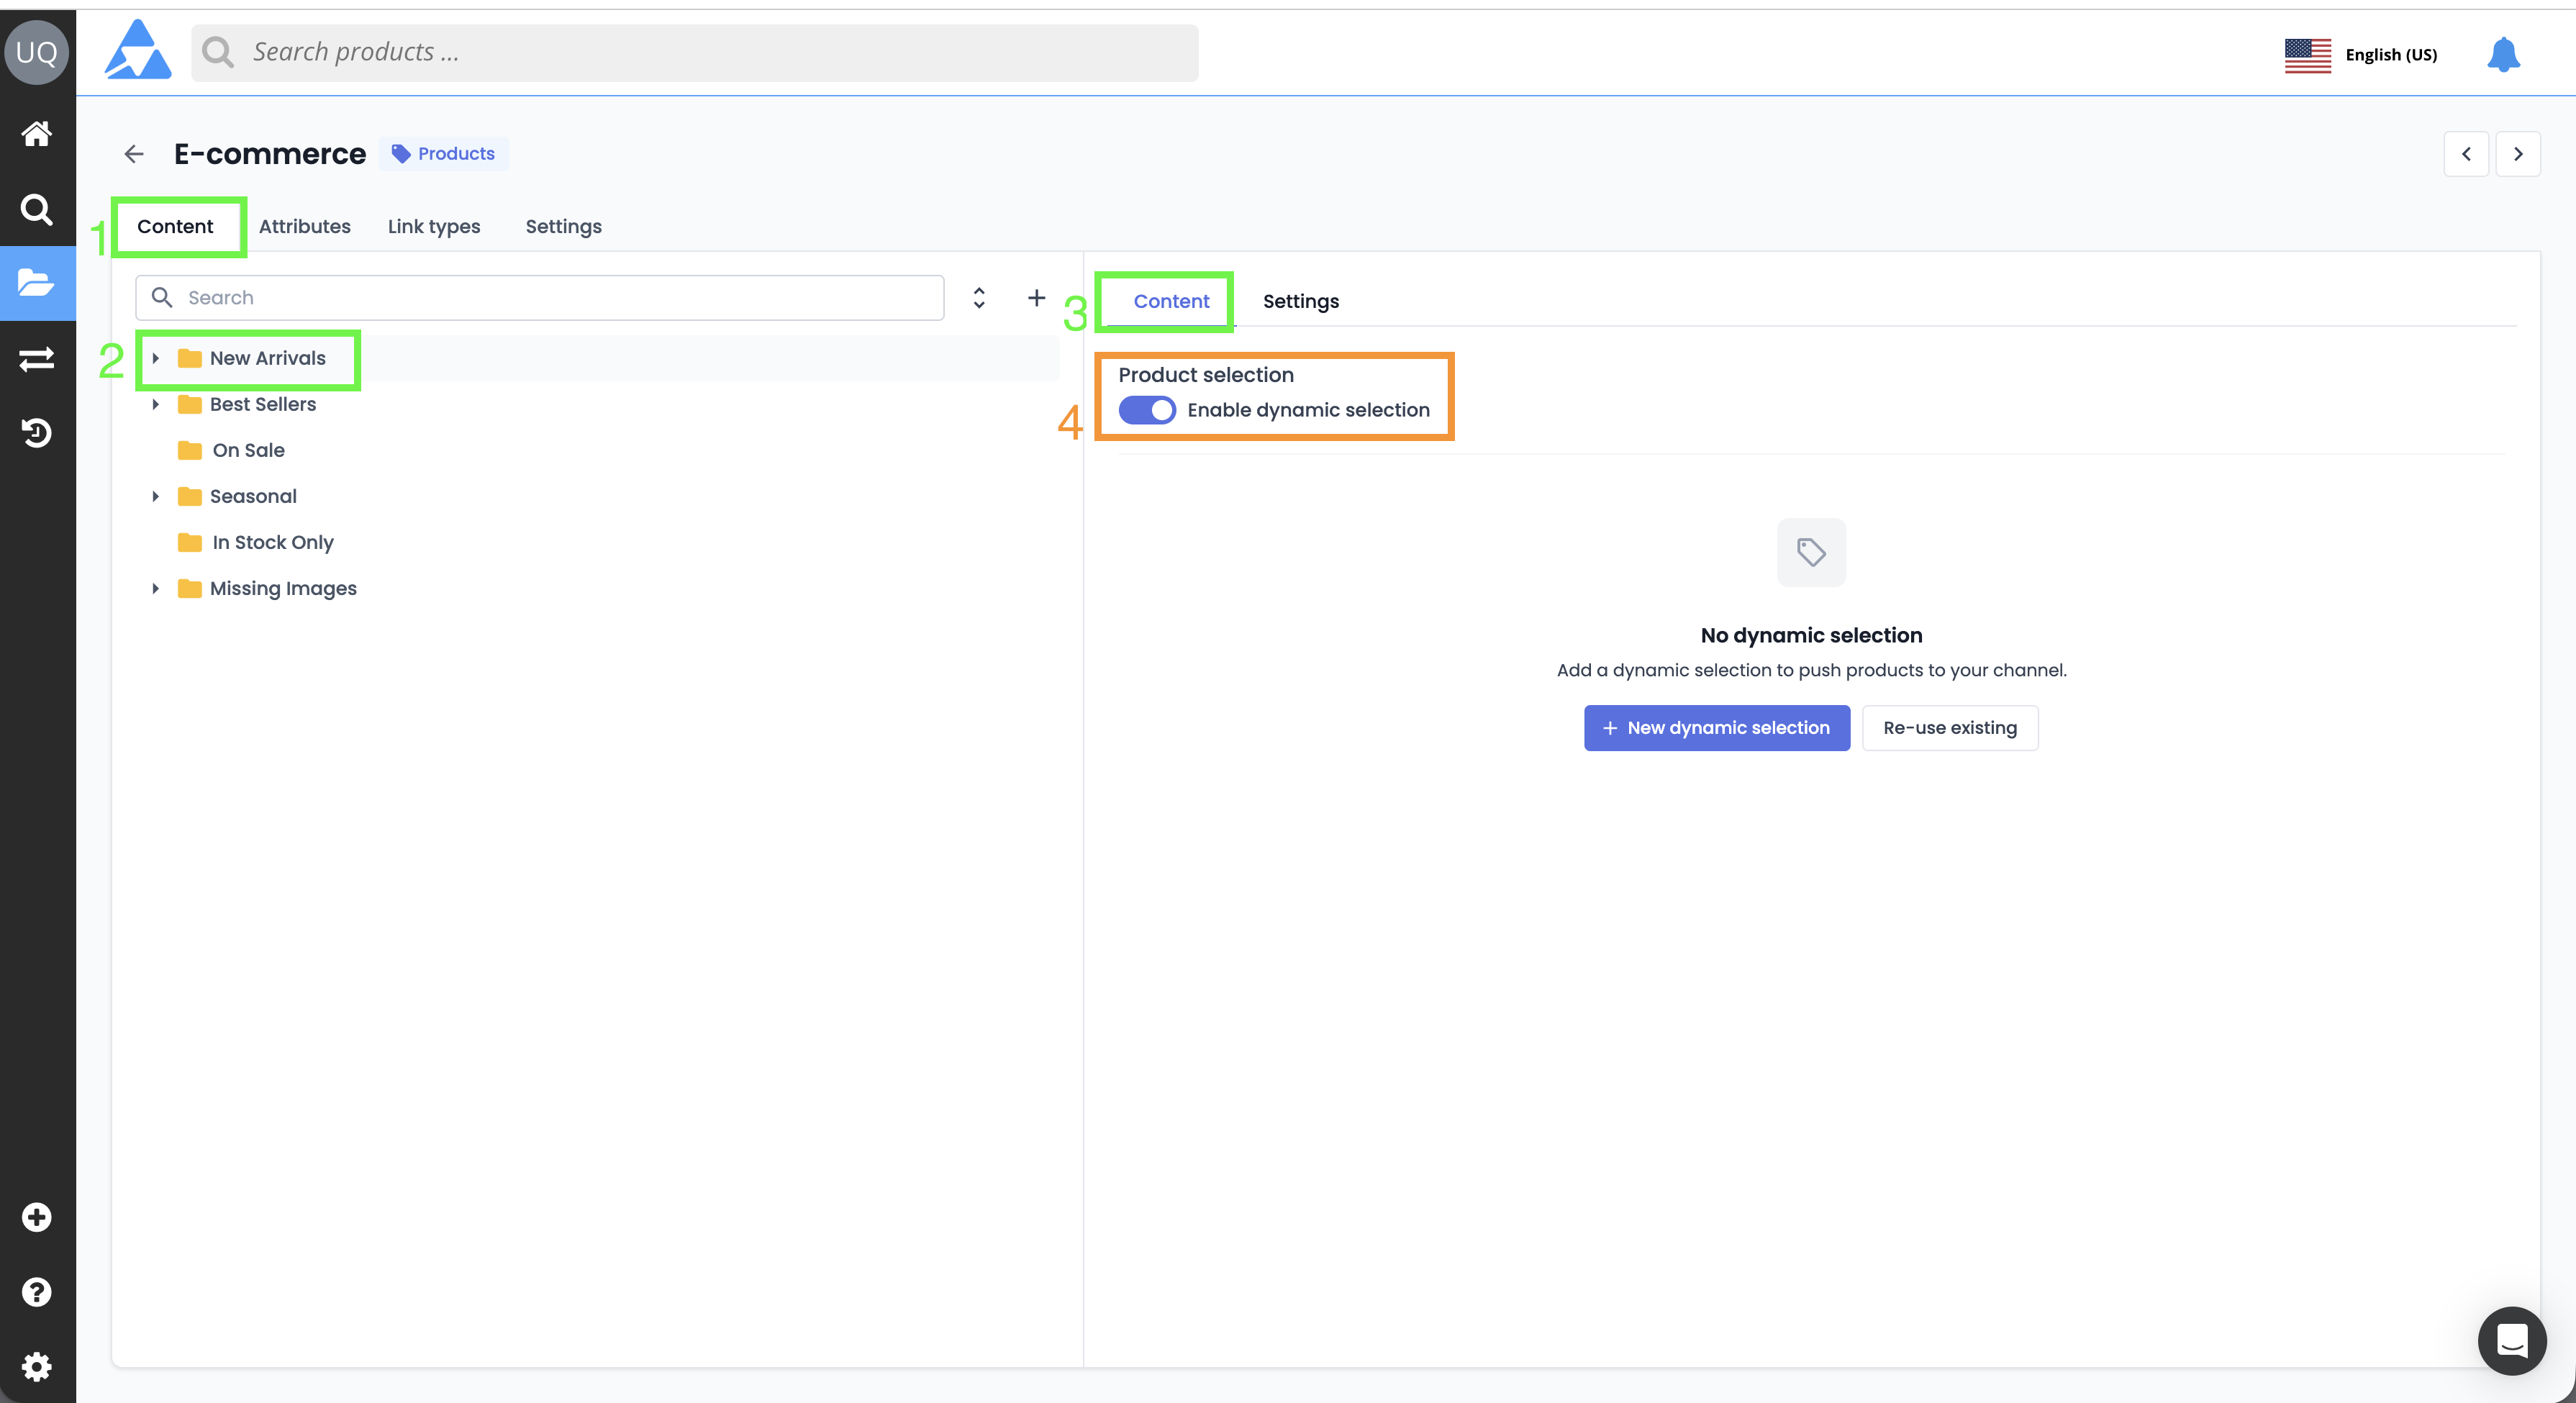
You can configure the addition of content using two distinct methods (4):
- in Manual mode, or
- in Dynamic mode.
Choosing the selection modeWhen you change the selection mode from Manual to Dynamic, or vice versa, the previously selected content will be reset. This reset is irreversible.
Configure content in Manual mode
Good to knowThe behavior of manual content selection is the same for product type and asset type channels.
The manual selection mode allows you to select content individually, choosing them manually one by one.
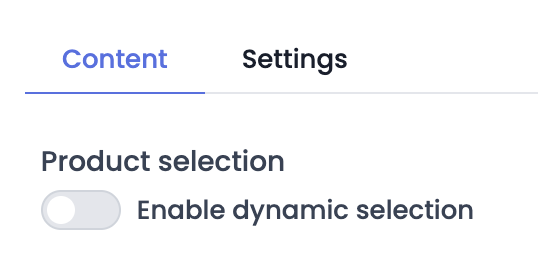
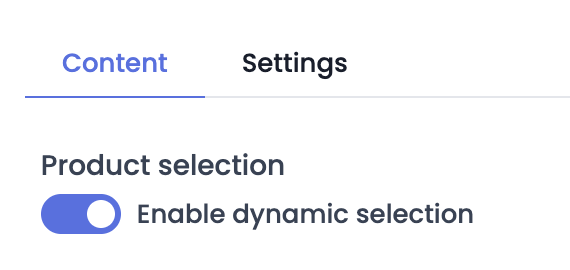
In the Product/Media Selection section, the dynamic selection slider is not enabled, so the selection is in Manual mode.
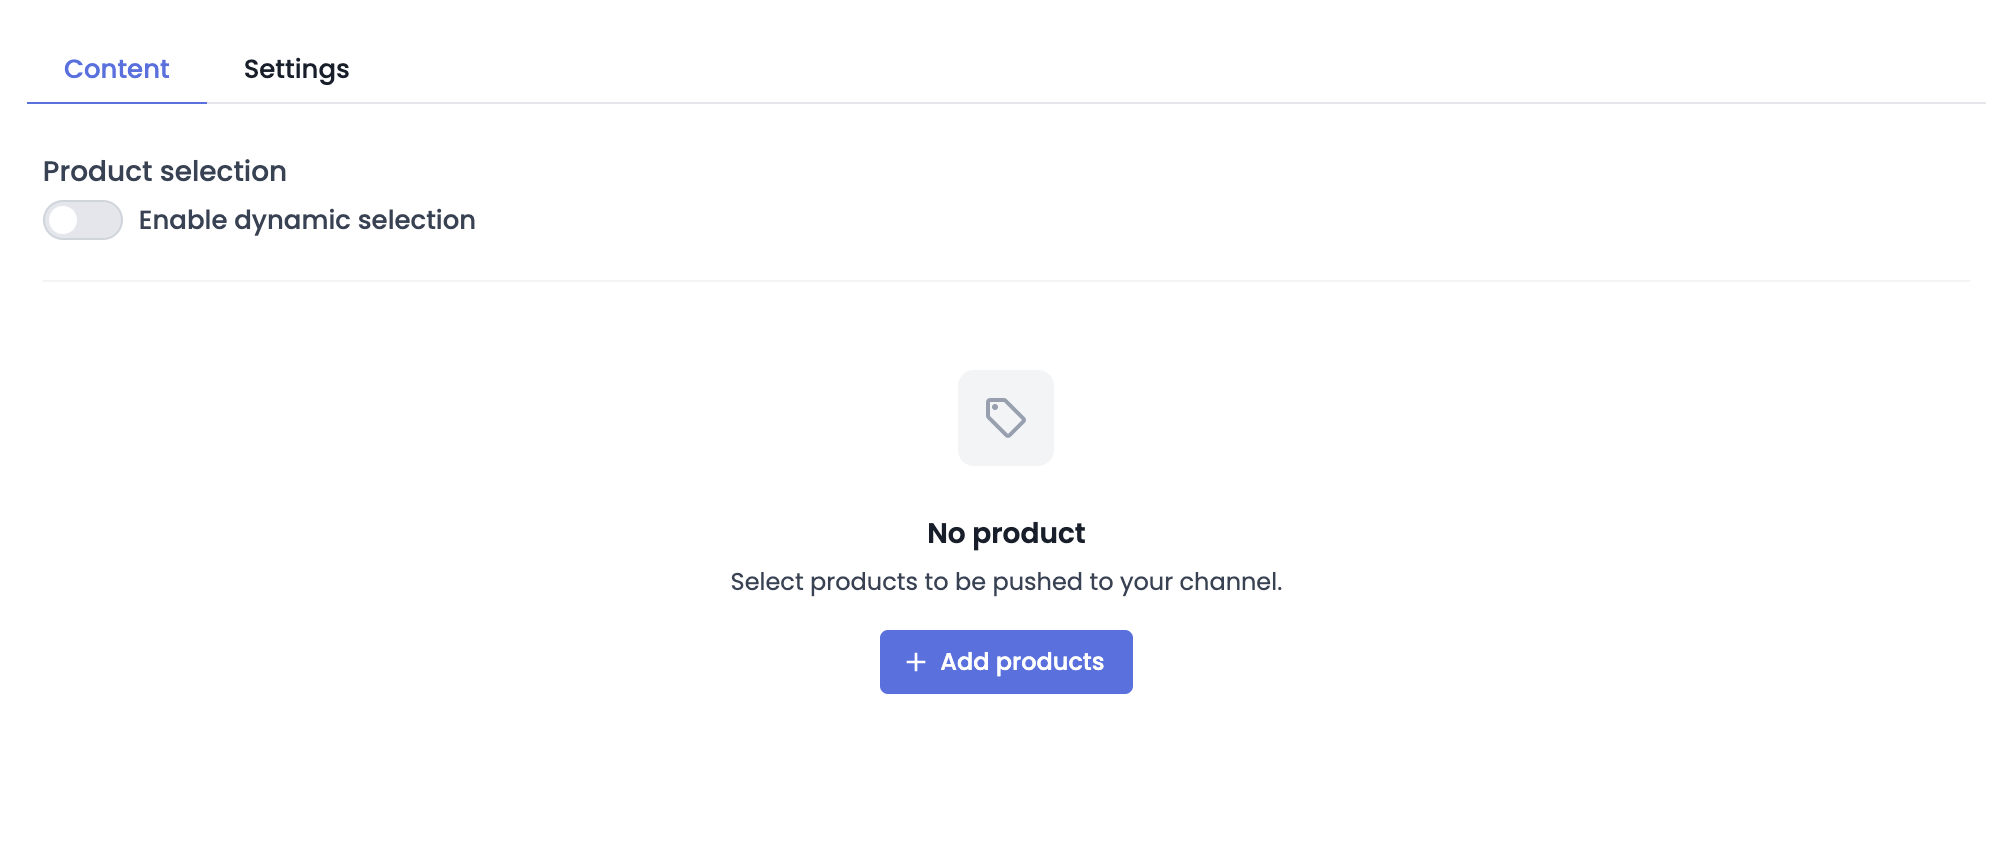
- If the classification is empty, the following window appears:
- If the classification is not empty, the following window appears:

- A search bar allows you to quickly find a product in the list
To add a product:
- Click the Add a Product / Asset button if the classification is empty, or on Manage selection if it is not empty
- In the window that opens, type the first 3 characters of the Product / Asset name or code
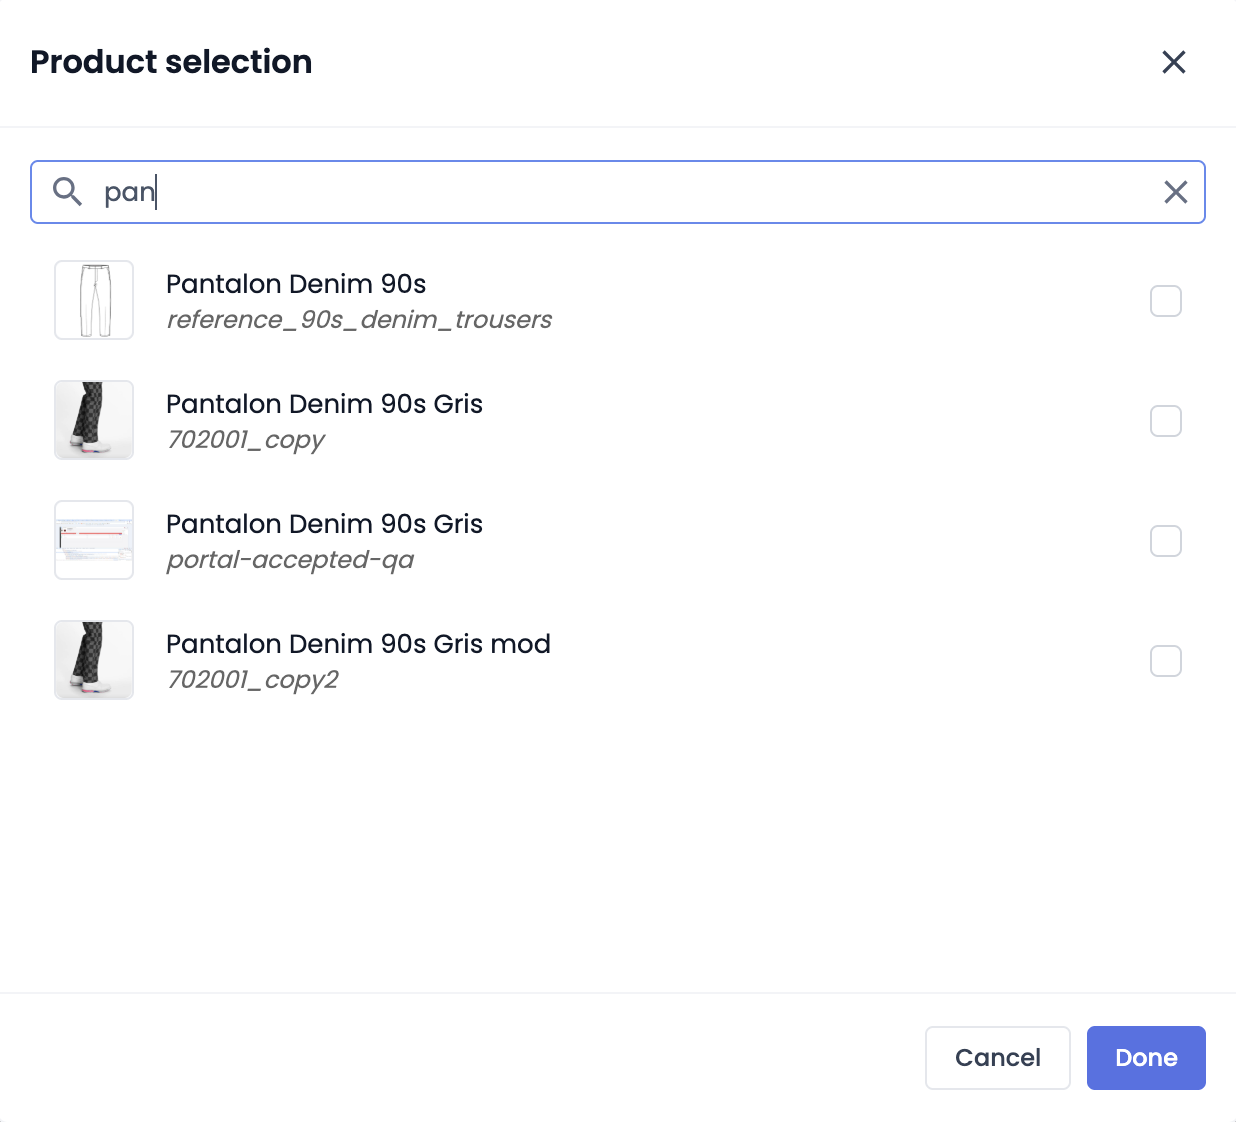
- Click the checkboxes to select the Products / Assets to add,
- Click the Done button when you have completed your selection.
Configure content in Dynamic mode
Good to knowThe behavior of saved dynamic selection is the same for product type and asset type channels.
Limitation – Dynamic Selections and Data LanguagesWithin a single classification, dynamic selections can only use one data language across all search filters.
⛔ Risks if this rule is not followed:
- Associated channels become inoperative if multiple data languages are used within the same classification.
- When a different data language is selected, the dynamic selection creation buttons are greyed out, an error message appears, and a tooltip on hover explains the reason for the block.
- 💡 Tip: To distribute data filtered on different locales, create separate classifications — one per locale.
The Dynamic selection mode allows you to select content based on the results of an advanced search.
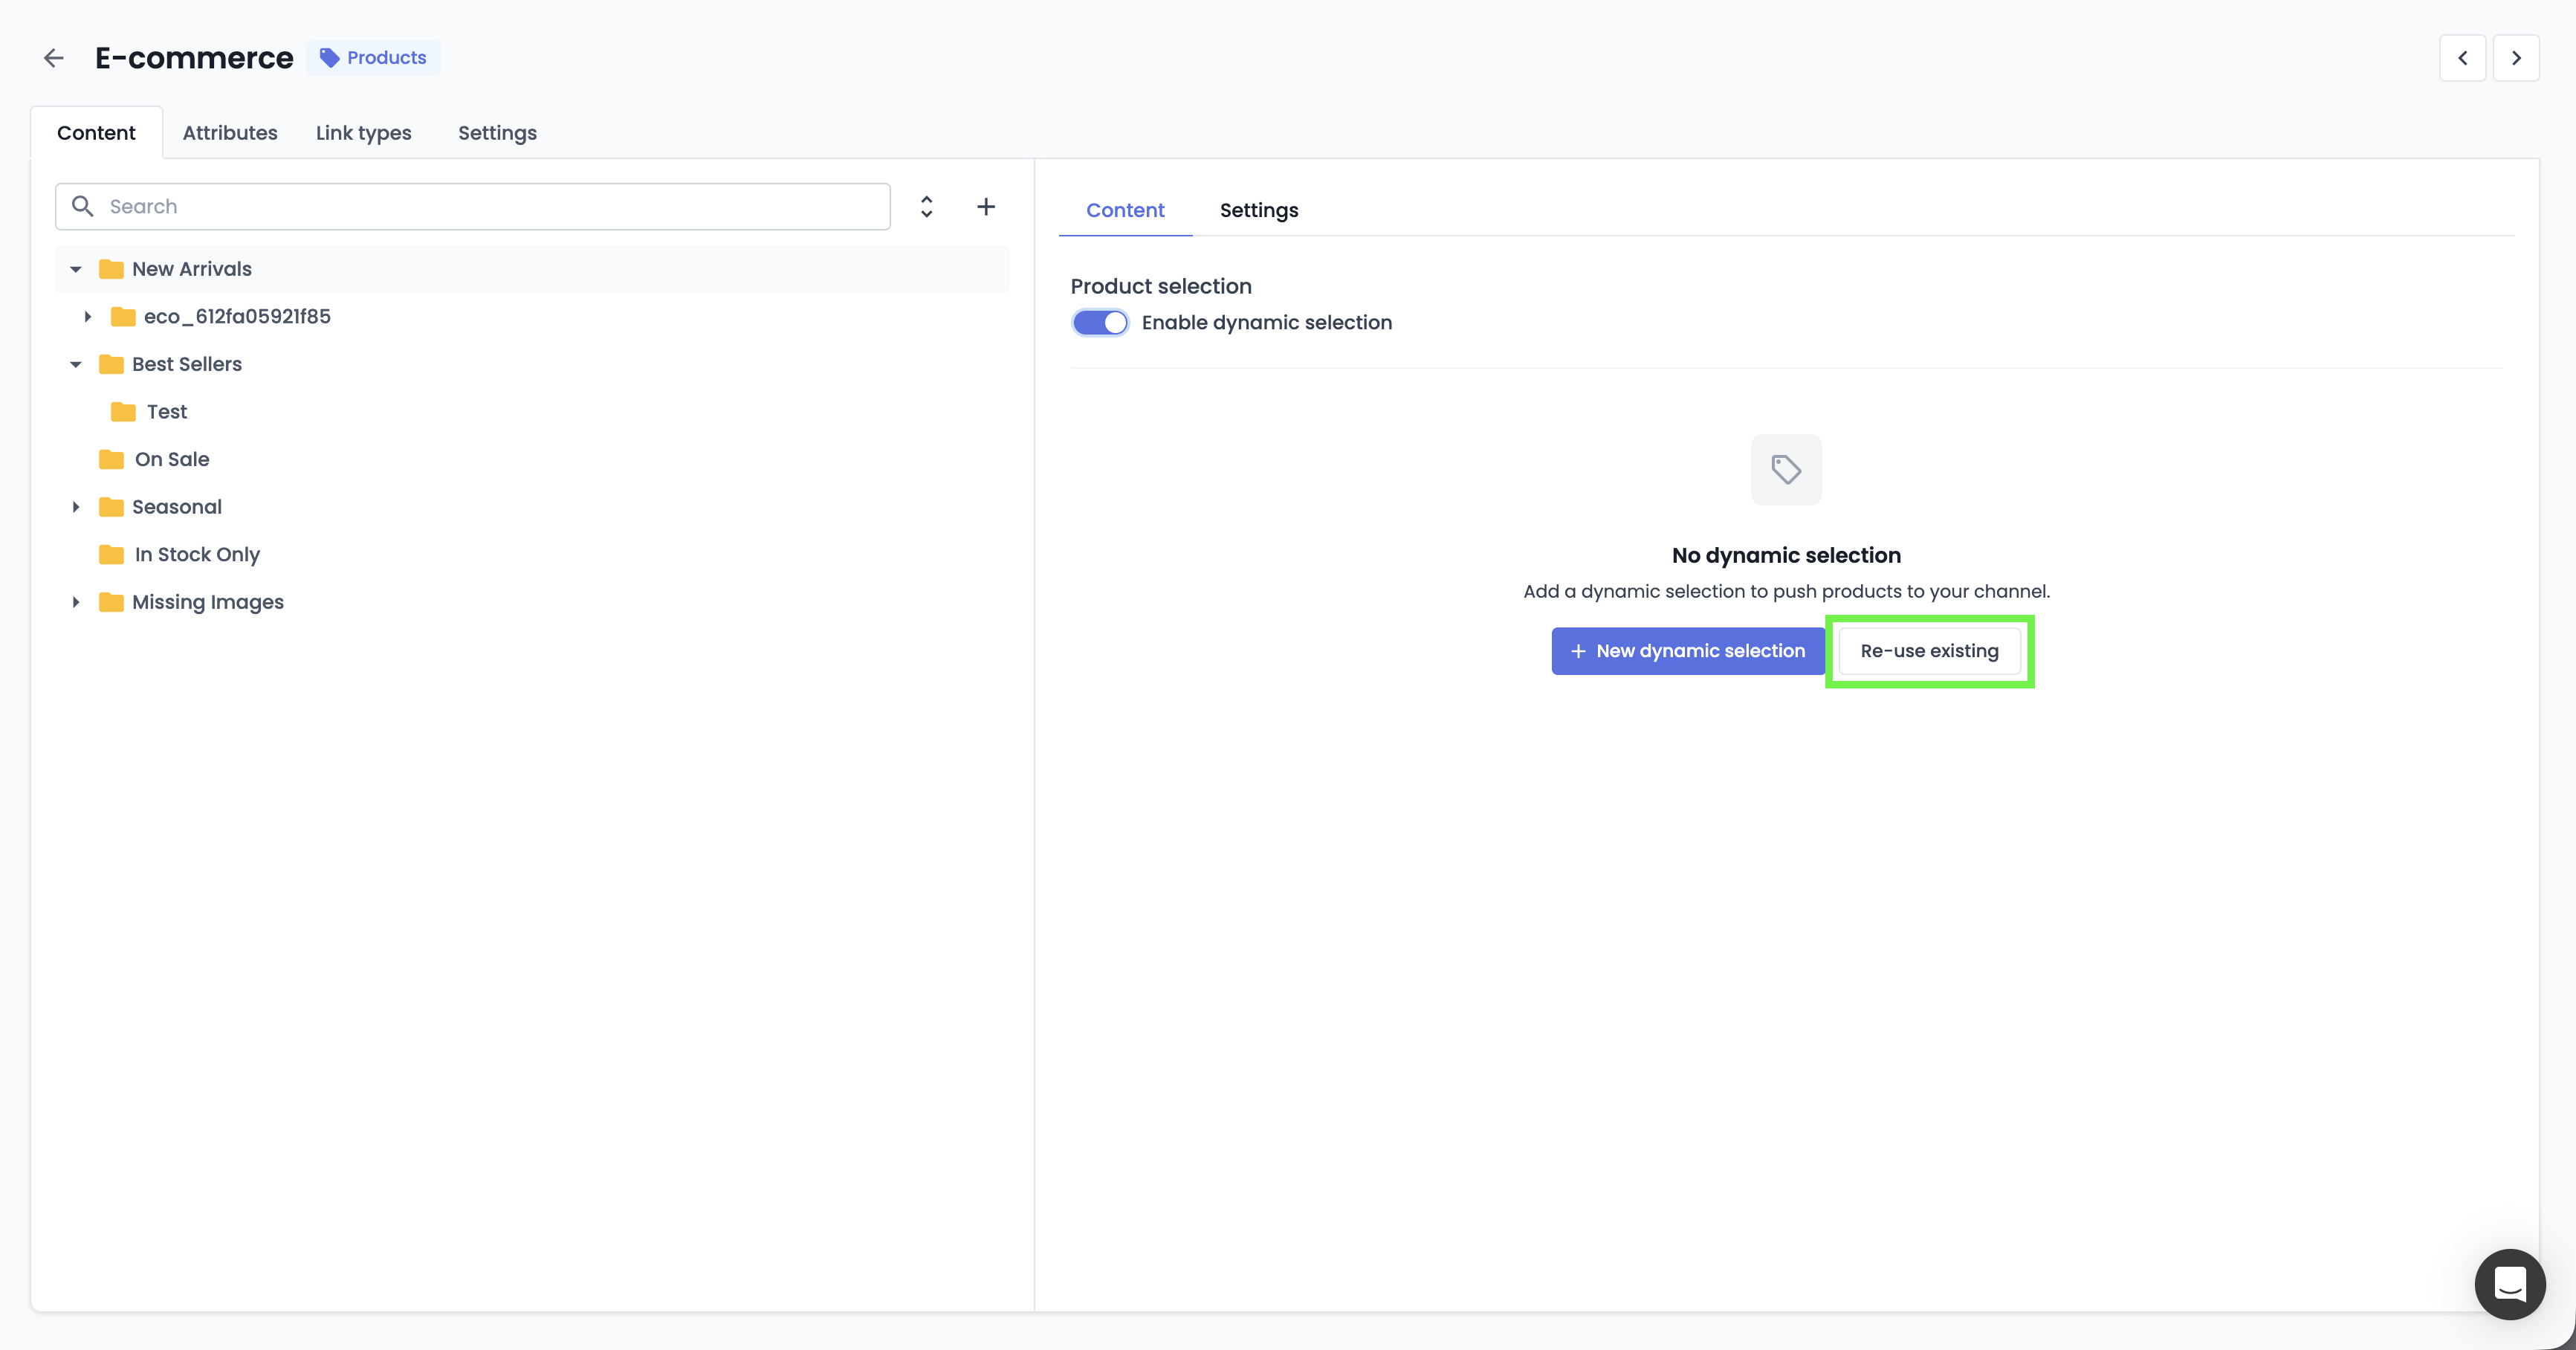
In the Product / Asset Selection section, click the Dynamic button
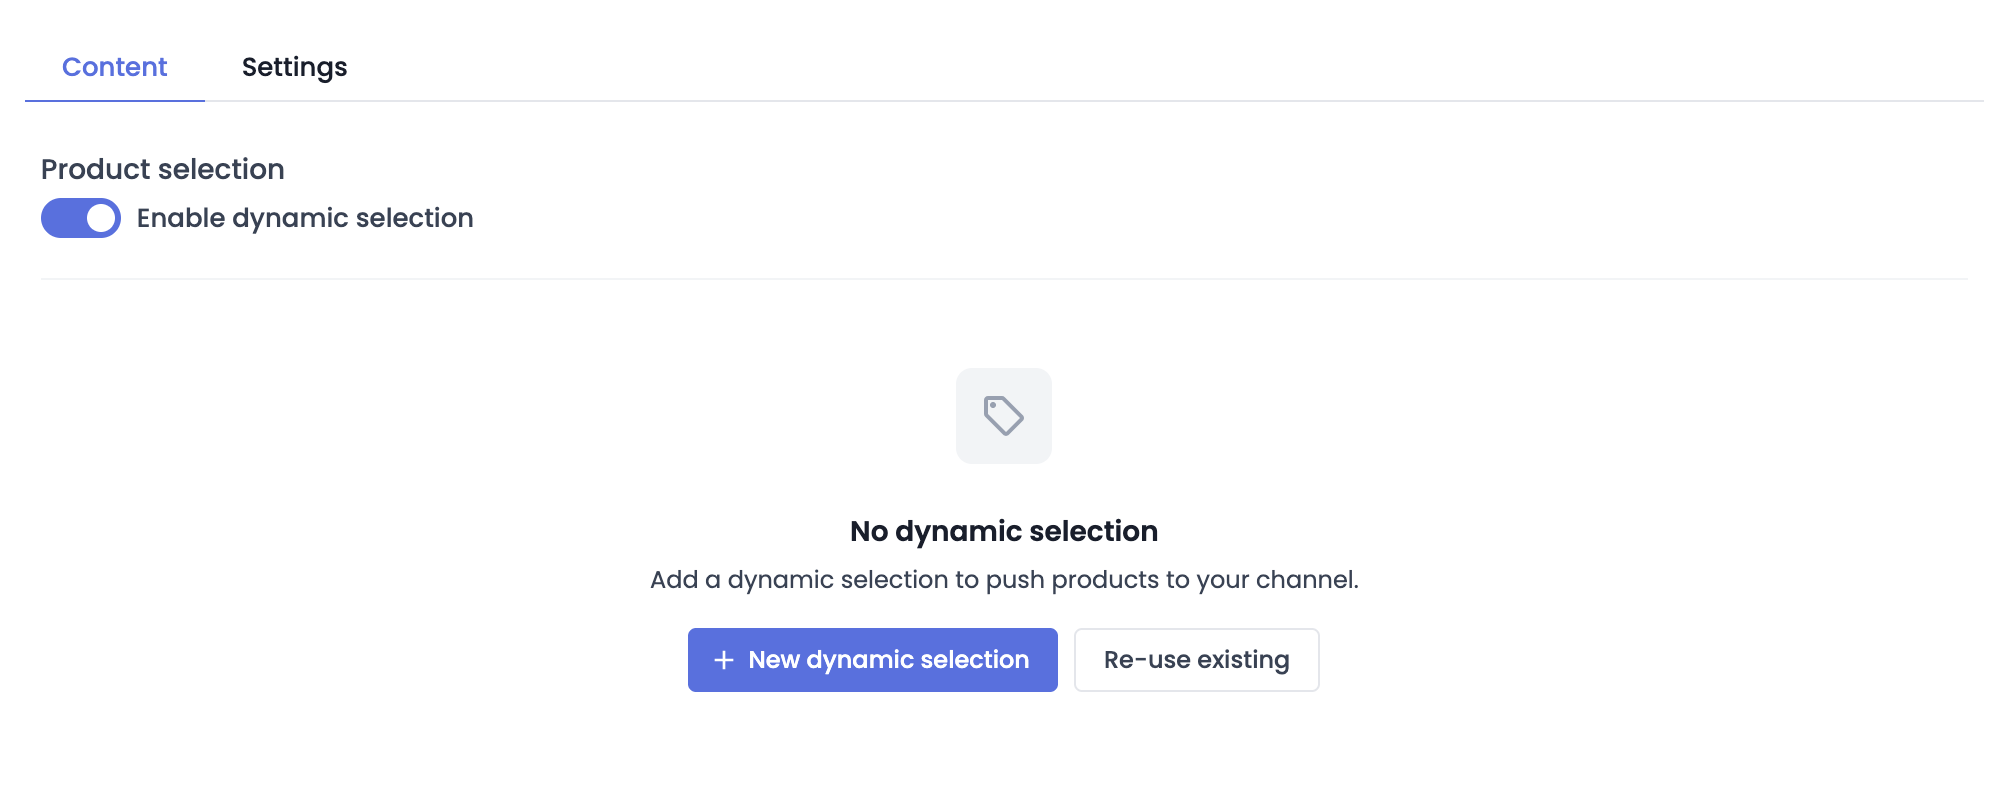
- If the classification is empty, the following window appears:
- If the classification is not empty, the following window appears:

Good to know
- A dynamic selection created from a classification is a selection of products or assets used only in the classification in which it was created. By default, this type of selection is not present in the list of saved dynamic selections.
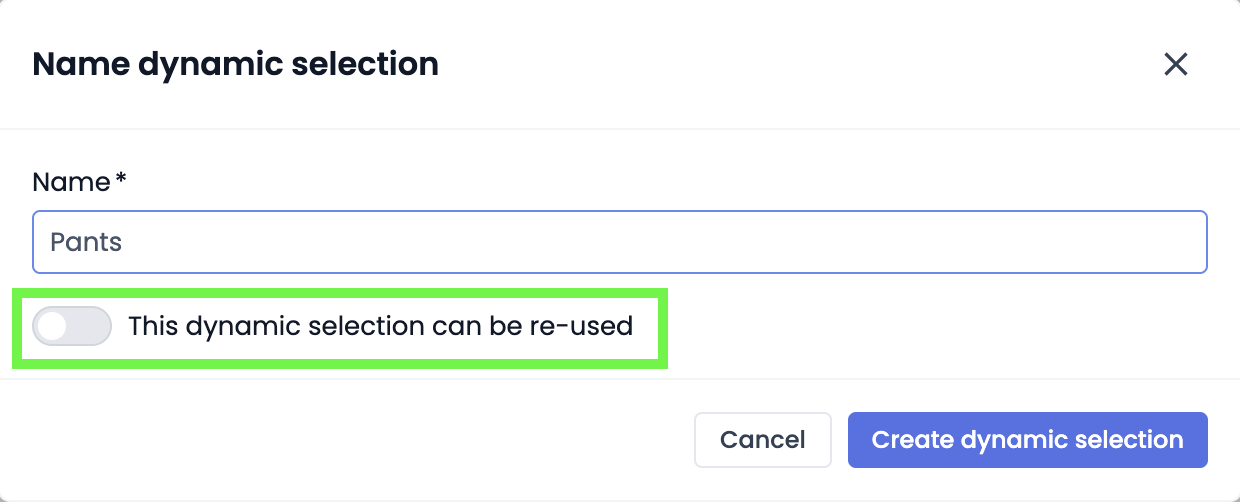
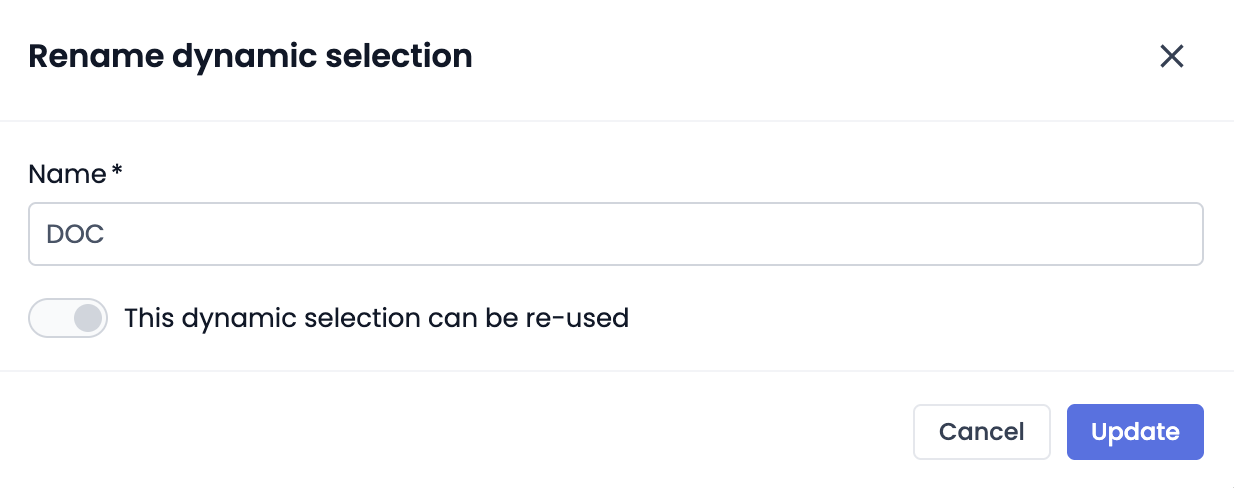
- A dynamic selection can be saved and become a saved dynamic selection, by activating the This dynamic selection can be re-used toggle button during creation:
Manage Saved Dynamic Selections (SDS):
Saved Dynamic Selections (SDS) allow you to define a list of content according to rules based on filters and conditions, similar to an advanced search. Thus, dynamic content selections based on SDS will evolve according to the advanced search results.
For example:
- The SDS is based on products containing the text pants, so all new products containing pants in their name or code will automatically be added to the selection and distributed,
- The SDS is based on product sheets stored in a PIM classification, so all product sheets added (or removed) from this classification will automatically be added (or removed) from the selection and distributed,
- The SDS is based on asset sheets created after January 10, 2024, and containing the red tag in the ID-color attribute, so all corresponding assets will automatically be added to the selection and distributed,
- etc.
Create a new saved dynamic selection:
There are 2 possibilities to create a new SDS: either from the channels home page, or from the content management window within a classification.
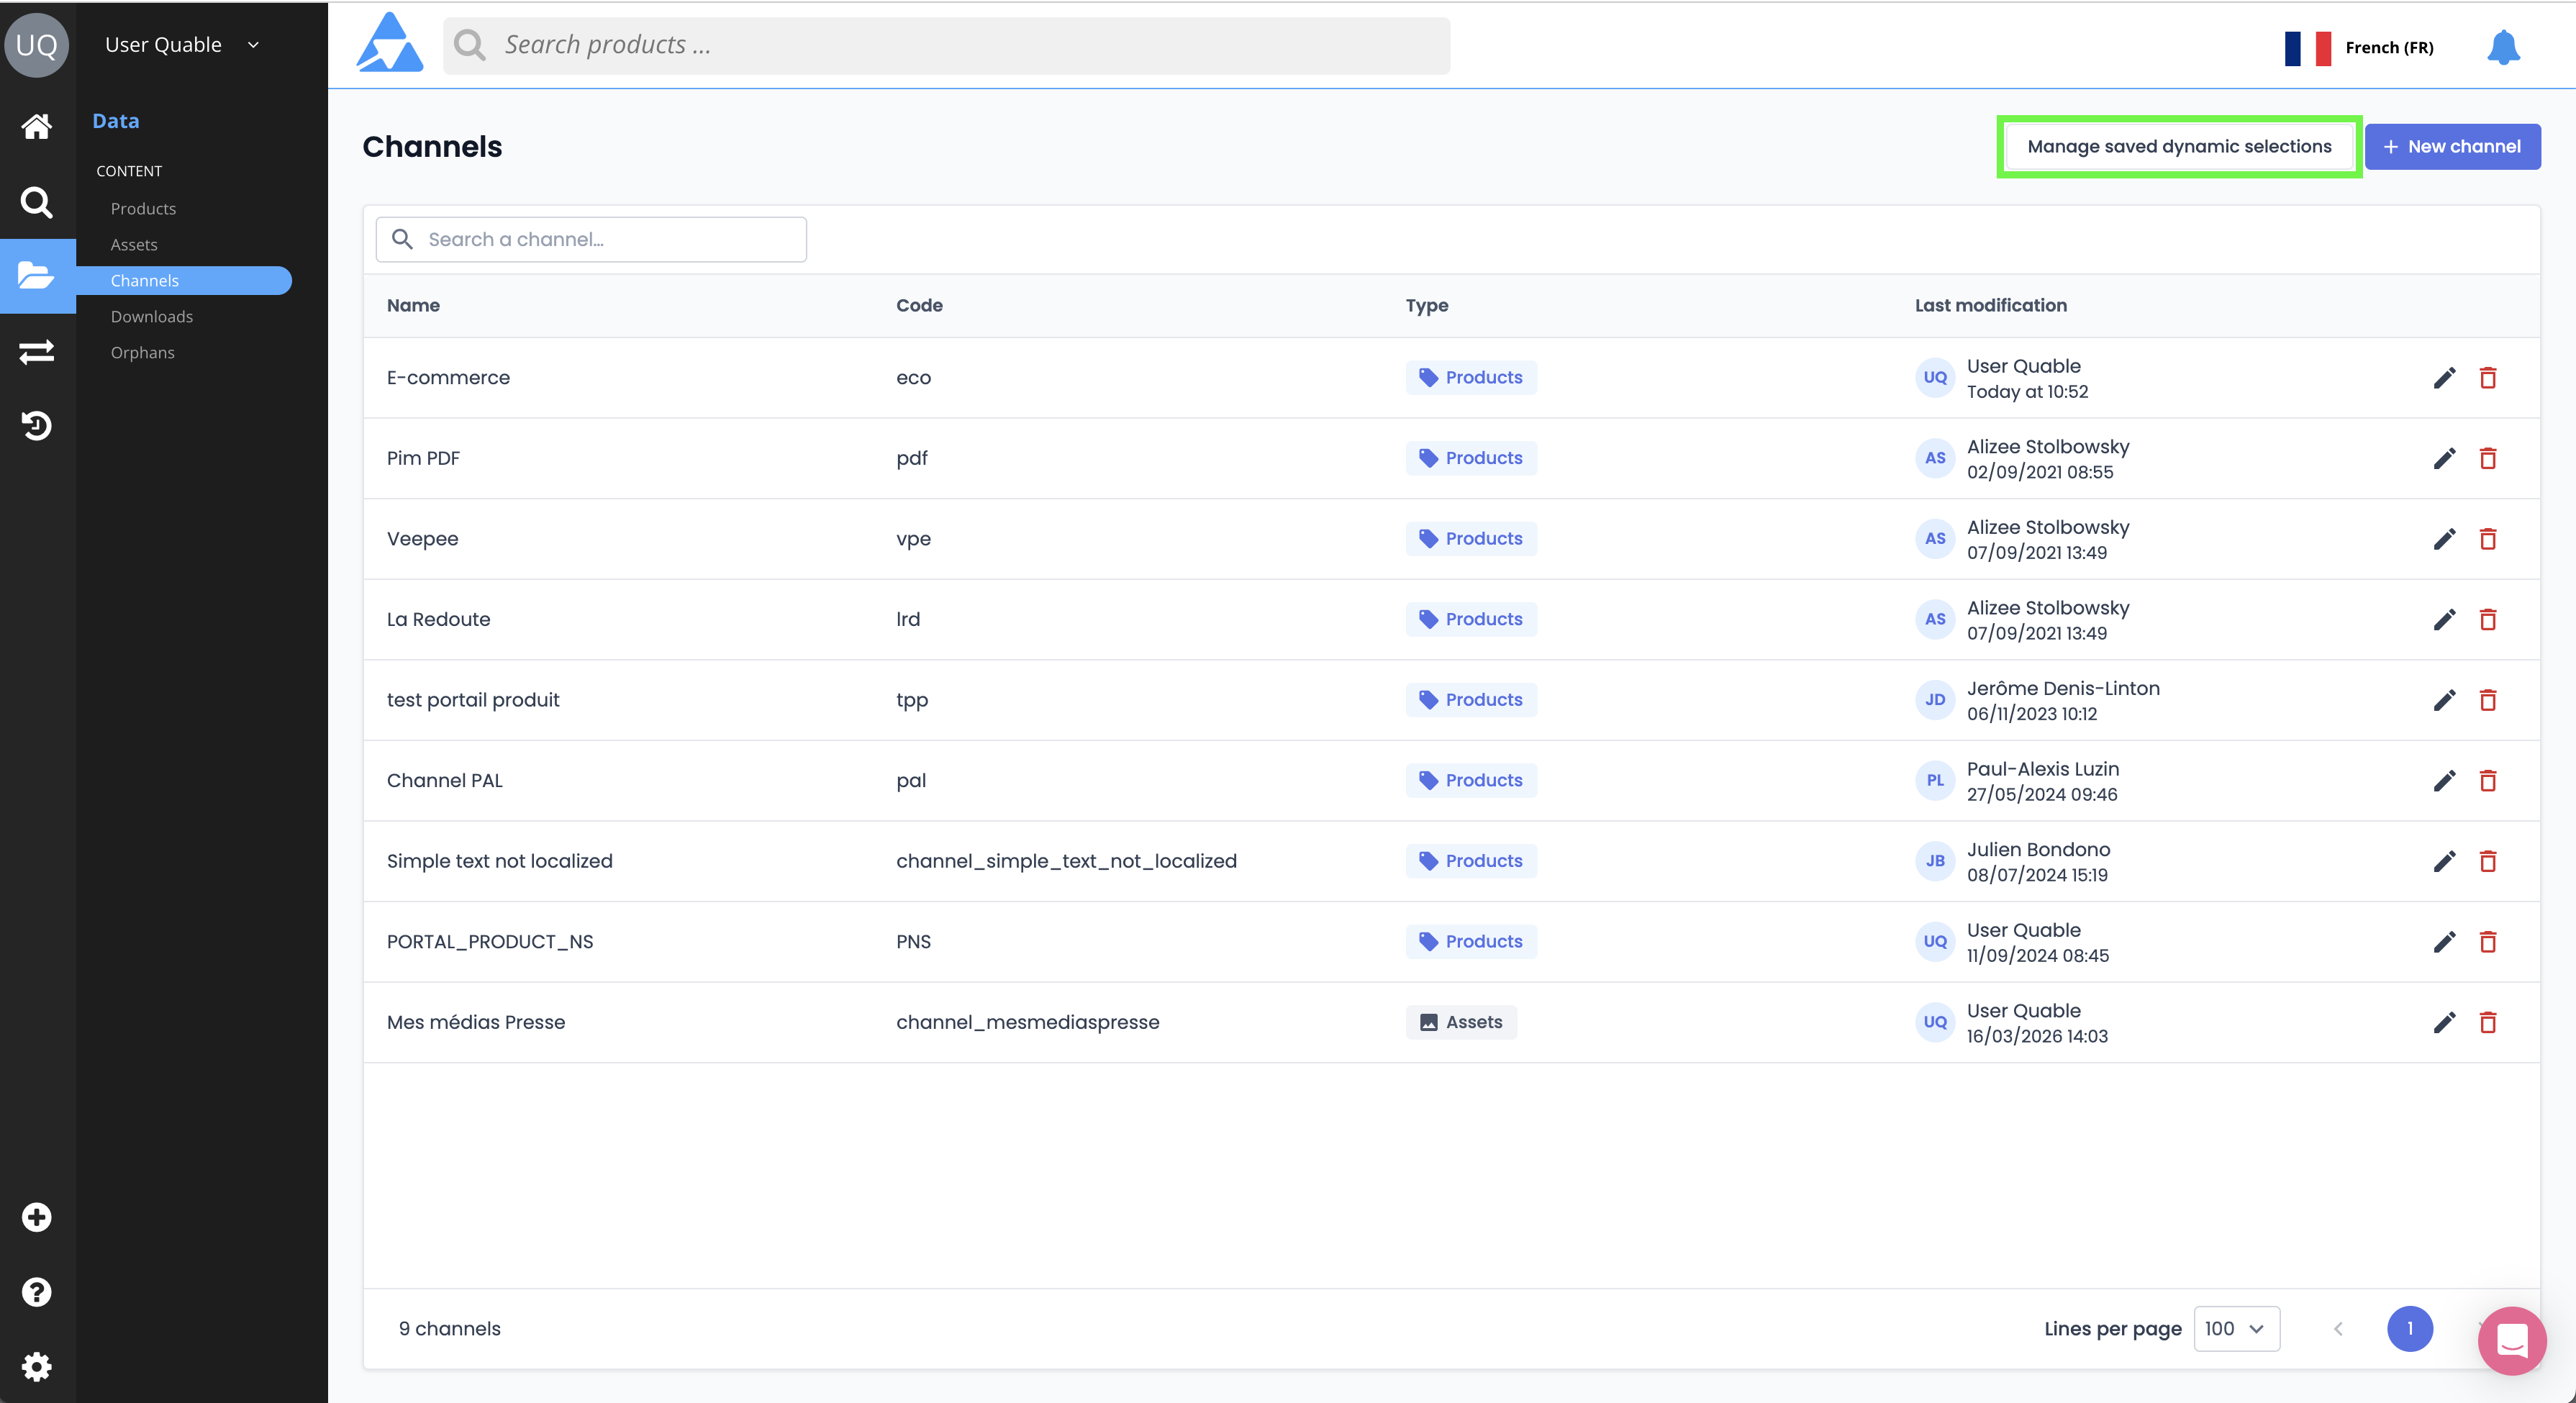
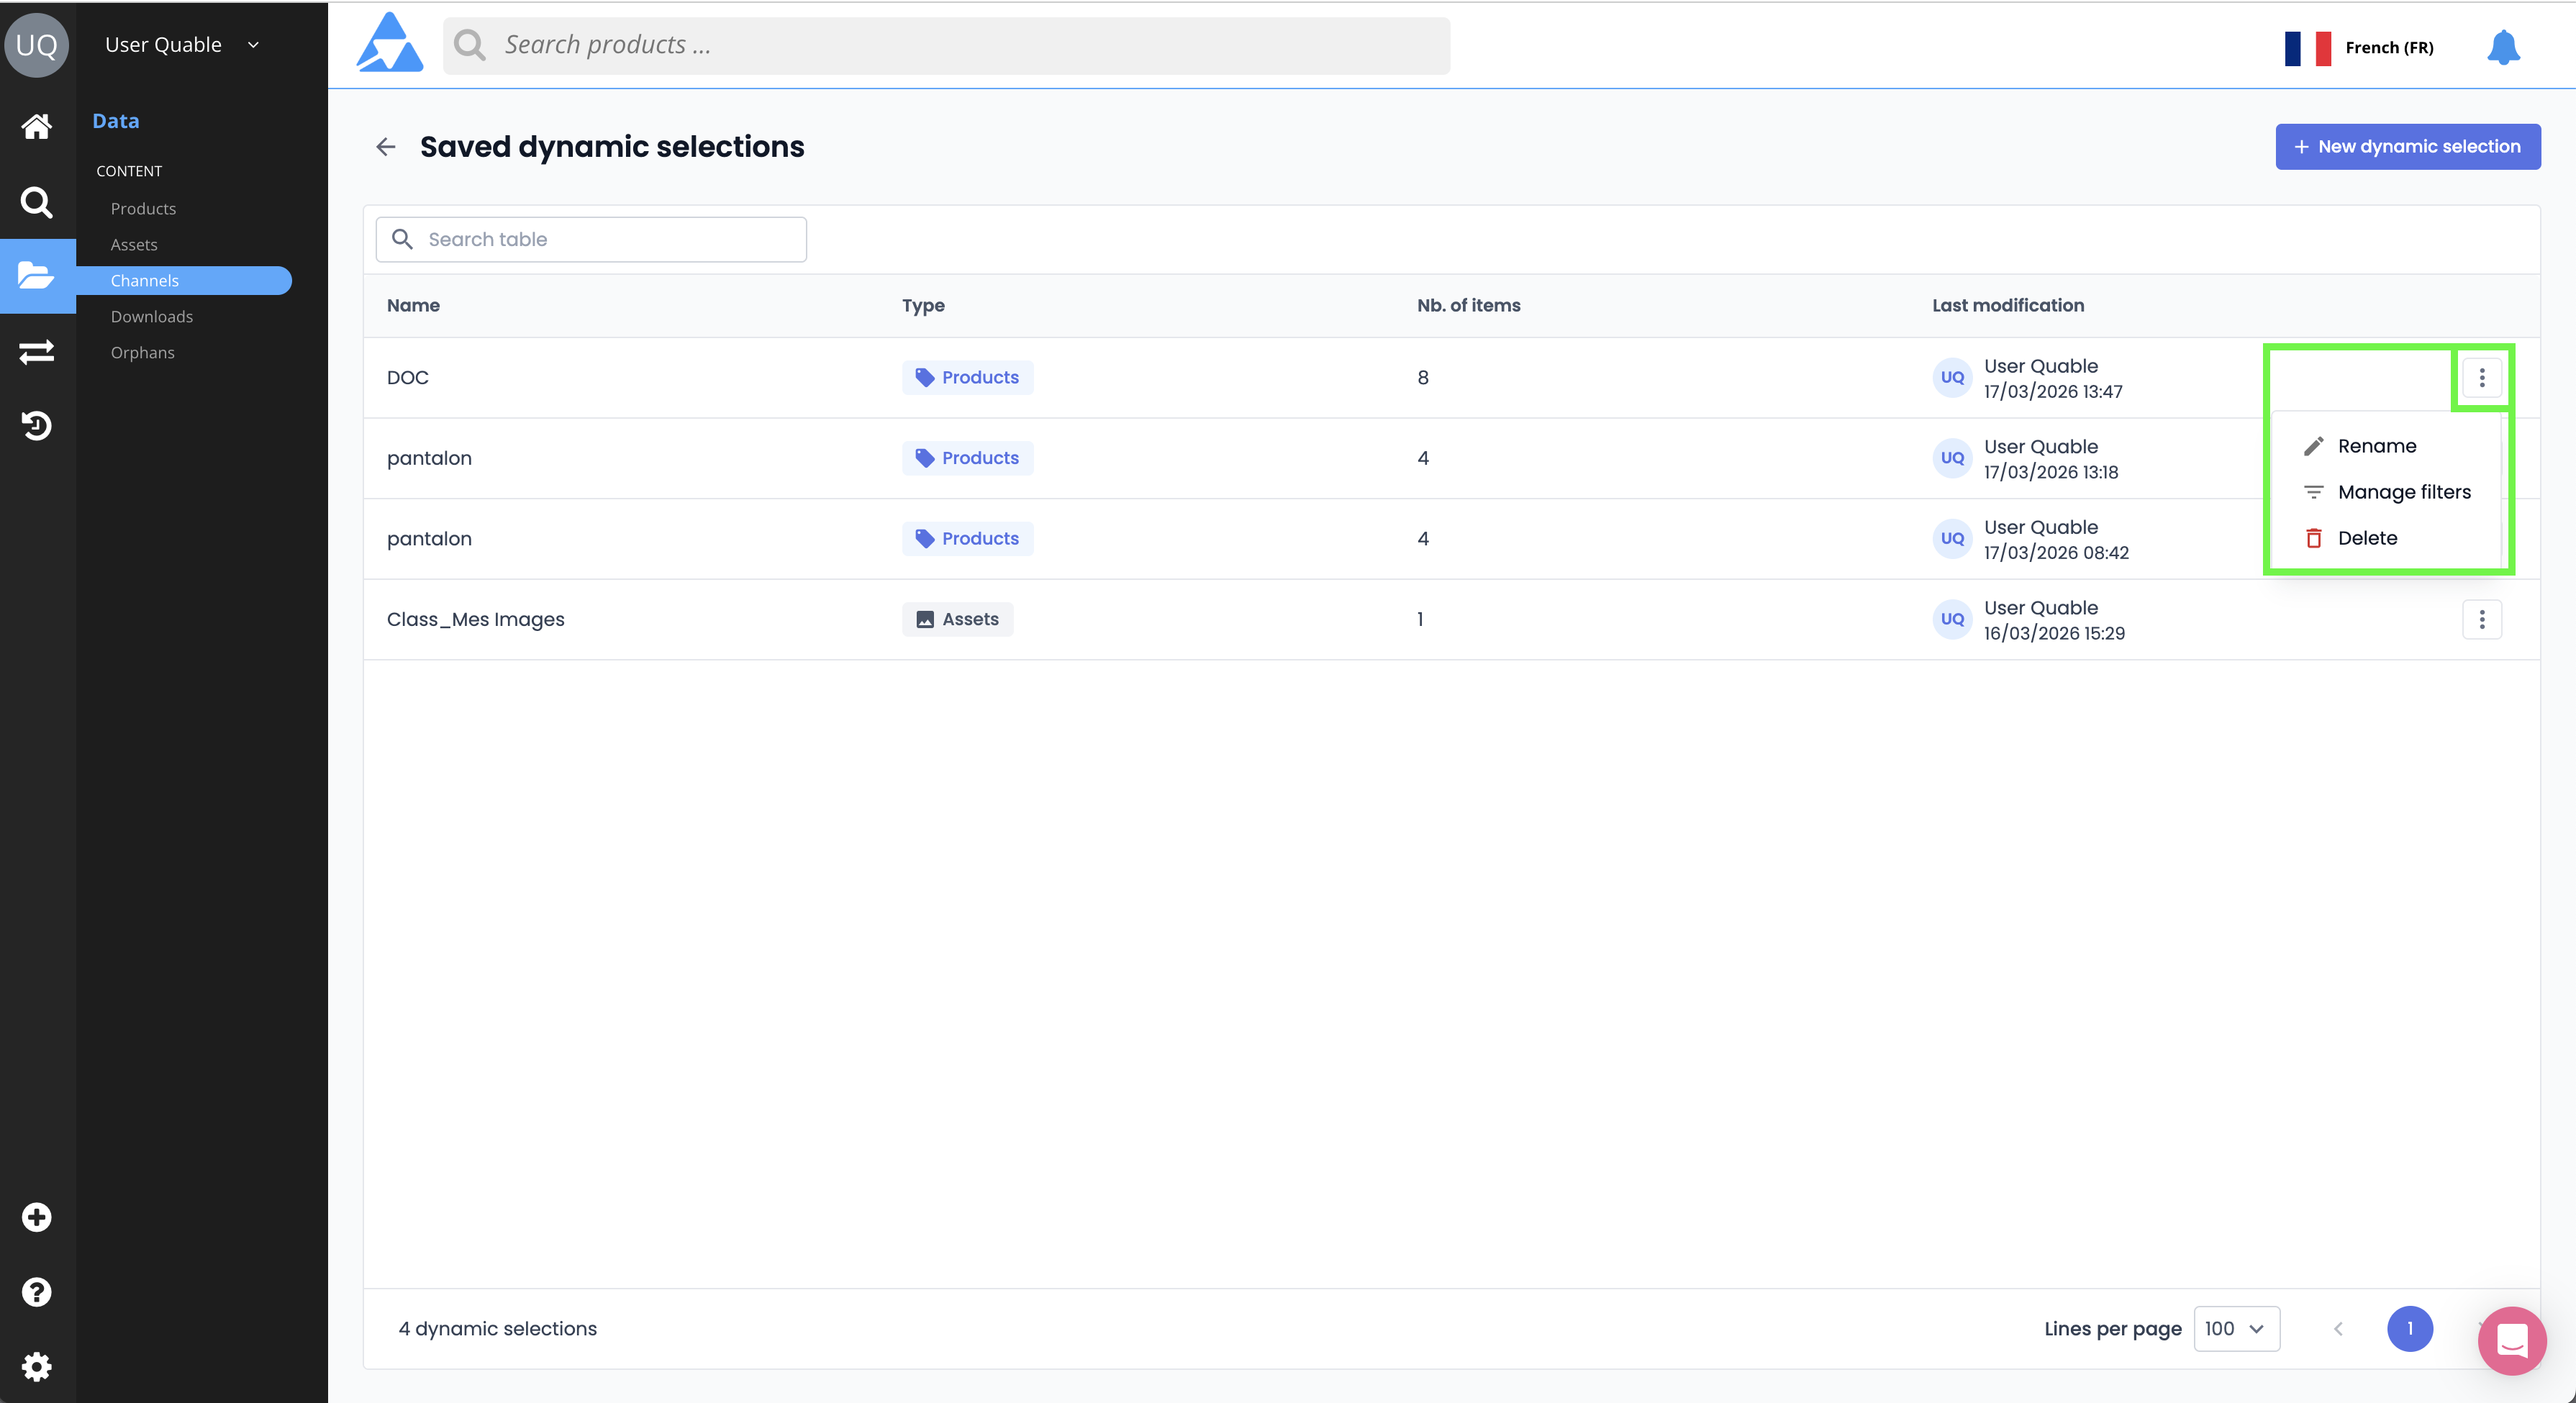
- From the channels home page, click the Manage saved dynamic selections button

- The saved dynamic selections management page opens. Click the New dynamic selection button in the top right of the page

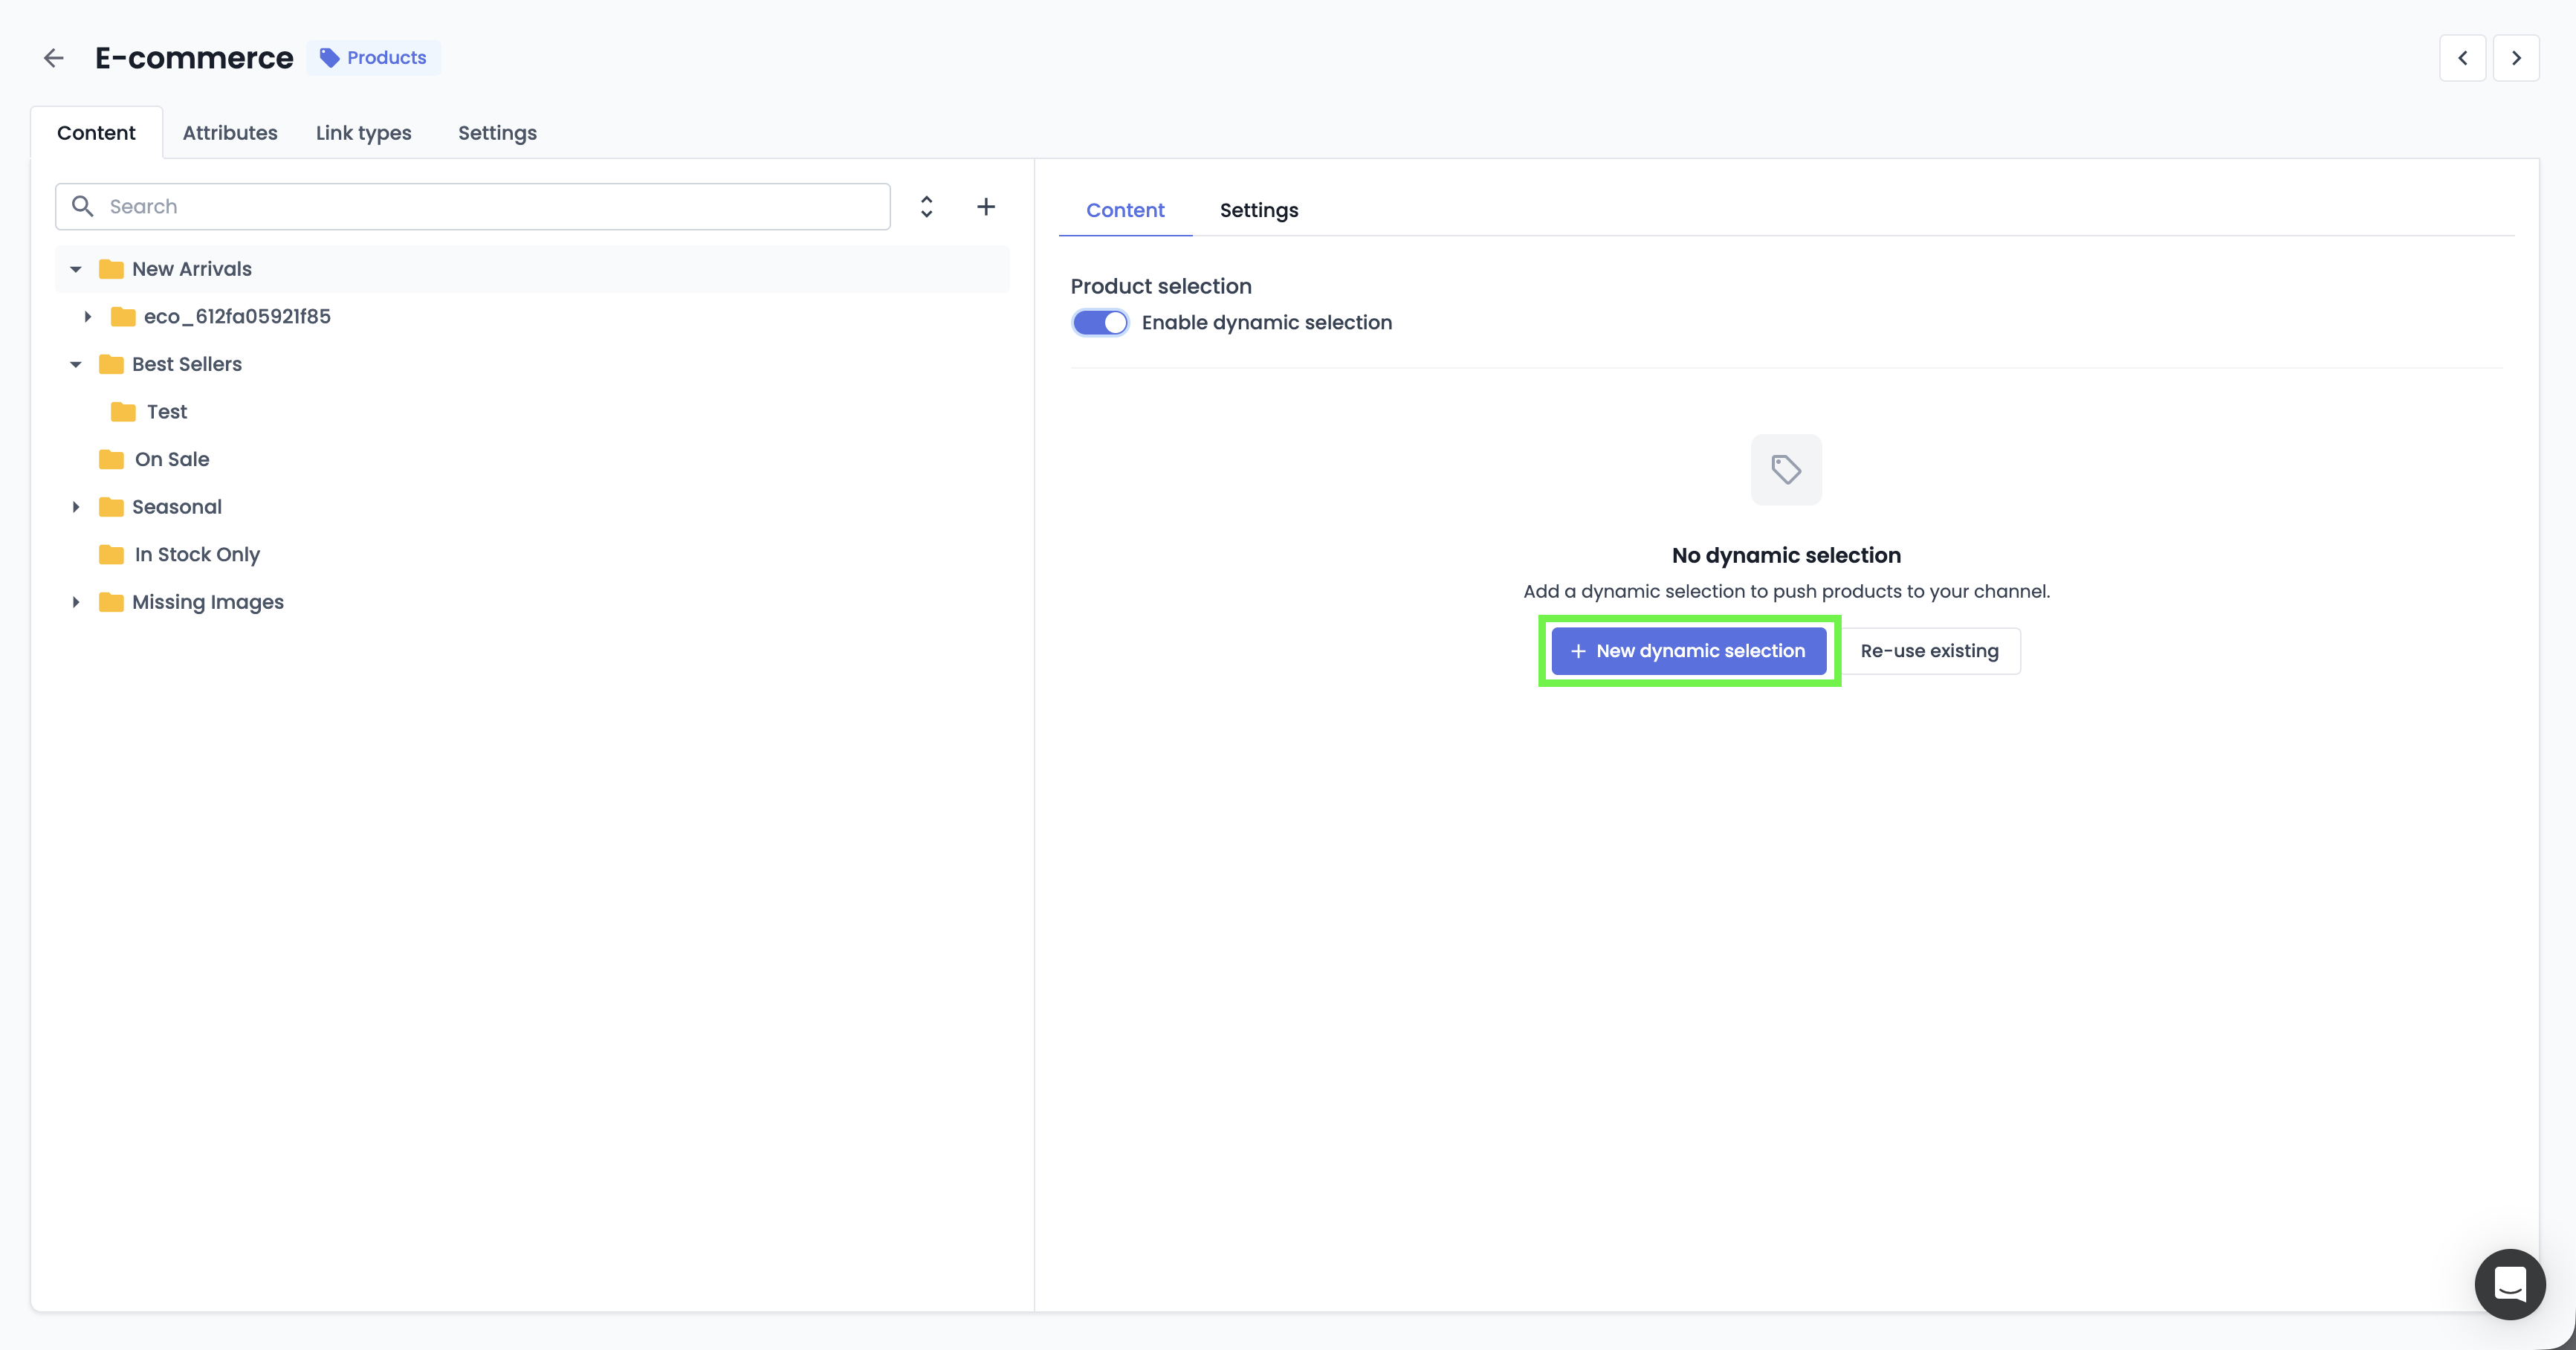
- Or, directly from a classification's content management window, click the New dynamic selection button
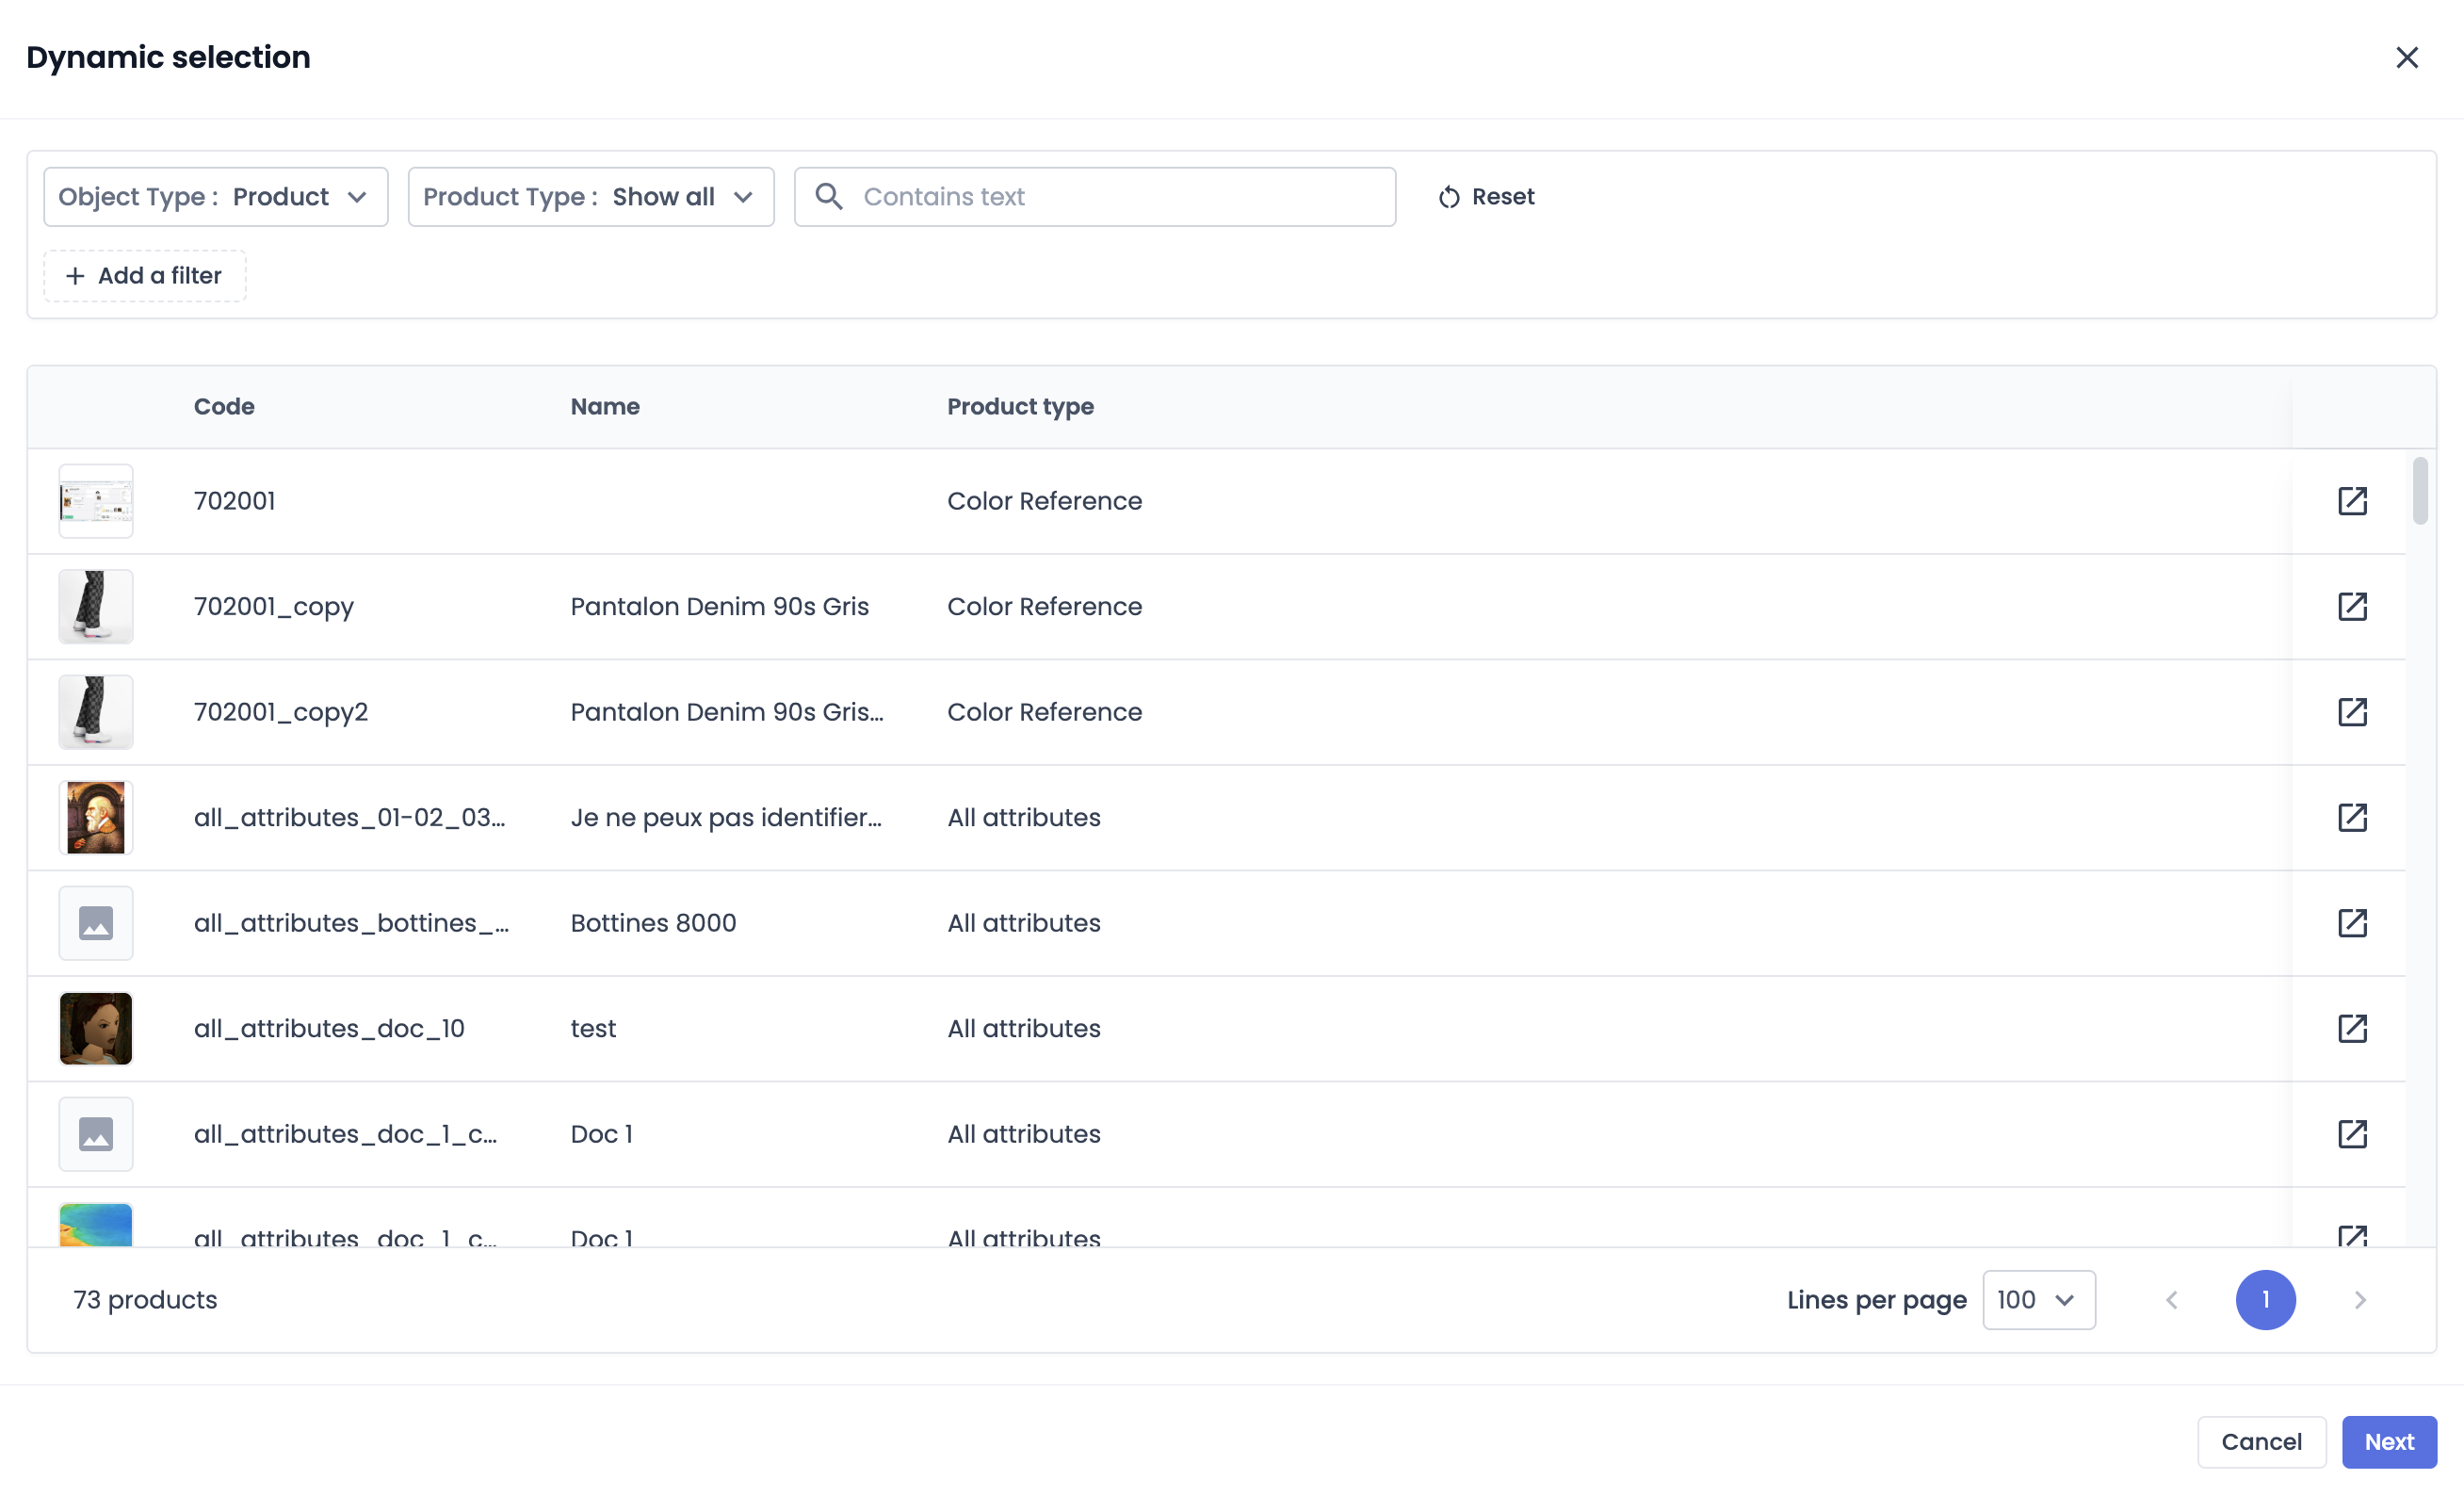
- In both cases, the Dynamic selection window opens,

- Choose the Object type and product type for product-type objects,
- Type the first 3 characters of the name or code of the Product / Asset
- and/or perform an advanced search by product type and filter
Good to know
- The operation of saved dynamic selections is the same as advanced searches. For more information, see the Search Options on the Advanced Search page,
- You can combine as many filters as you wish to define your dynamic selection,
- Click the Next button when you have finished your dynamic selection.
- In the following save window, Choose a name for your SDS.
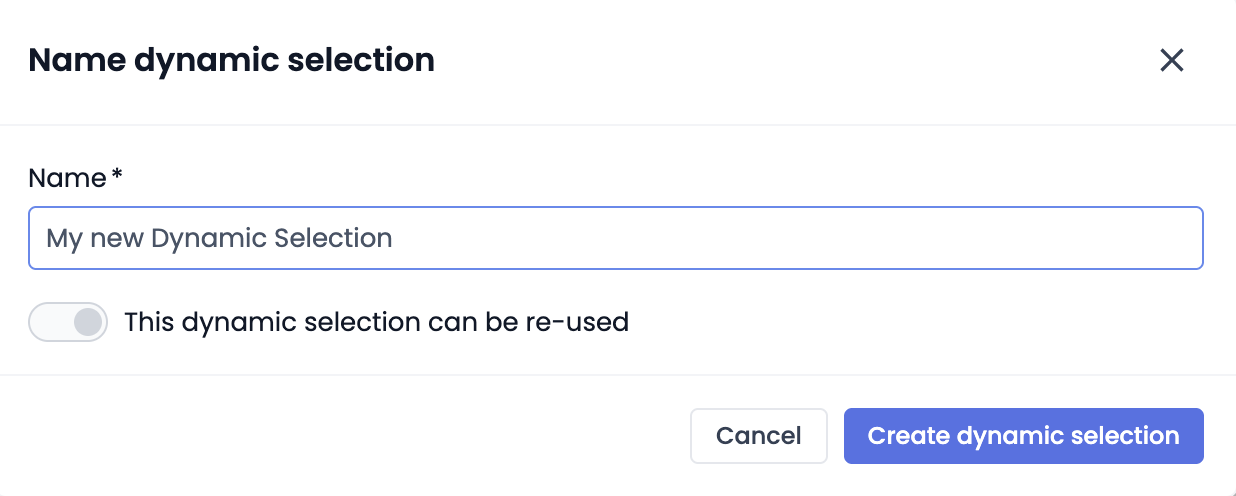
- Choose whether you want the SDS to be reusable (in all classifications of all channels) by toggling the This dynamic selection can be re-used button on or off.
Good to know
- SDS created from the SDS management page are automatically configured to be re-used across all classifications of all channels.
- Dynamic selections created directly from a classification's content management window are by default non-reusable across all classifications of all channels.
- A saved dynamic selection cannot be "unsaved".
- The name assigned to an SDS can be changed later.
- Click the Create dynamic selection button to save.
Add a saved dynamic selection
Good to knowYou can add as many saved dynamic selections to a classification as you want.
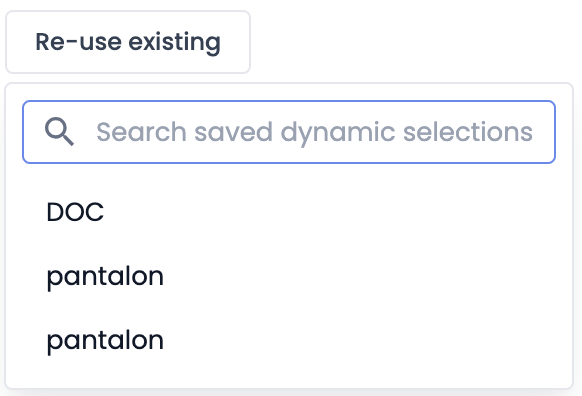
- From the channel's content tab, choose a classification and in the Content section under Dynamic product selection mode, click the Re-use existing button
- In the pop-up that opens, type the name of the SDS you want to add in the search bar or click directly on it from the drop-down list
Edit a saved dynamic selection
There are 2 possibilities to edit a Dynamic selection: either from the channels home page, or from the content management window within a classification.
- From the channels home page, click the Manage saved dynamic selections button
- The saved dynamic selections management page opens. Click the ⁝ button at the end of an SDS row to access the edit options
- Or, directly from a classification's content management window, click the ⁝ button at the end of a dynamic selection row to access the edit options.

)
-
In both cases, the following options are available:
- Rename allows you to change the save name of the SDS. Click it, and the following window opens.
) Important
ImportantDuring creation from a classification's content management window, the dynamic selection can be made reusable by activating the This dynamic selection can be reused toggle, but note that it is not possible to deactivate this toggle!
- Manage filters allows you to modify the filters and conditions of the SDS. Click it, and the Dynamic selection page opens. Make the modifications and click the Edit button to save.
) Good to know
Good to knowModifying a dynamic selection from the SDS management page automatically updates all content in all classifications where this SDS is used.
Remove a saved dynamic selection
It is possible to remove a dynamic selection from a classification's content management window. This implies that the content pulled by this dynamic selection will be removed.
From a classification's content management window, click the ⁝ button at the end of an SDS row to access the edit options.
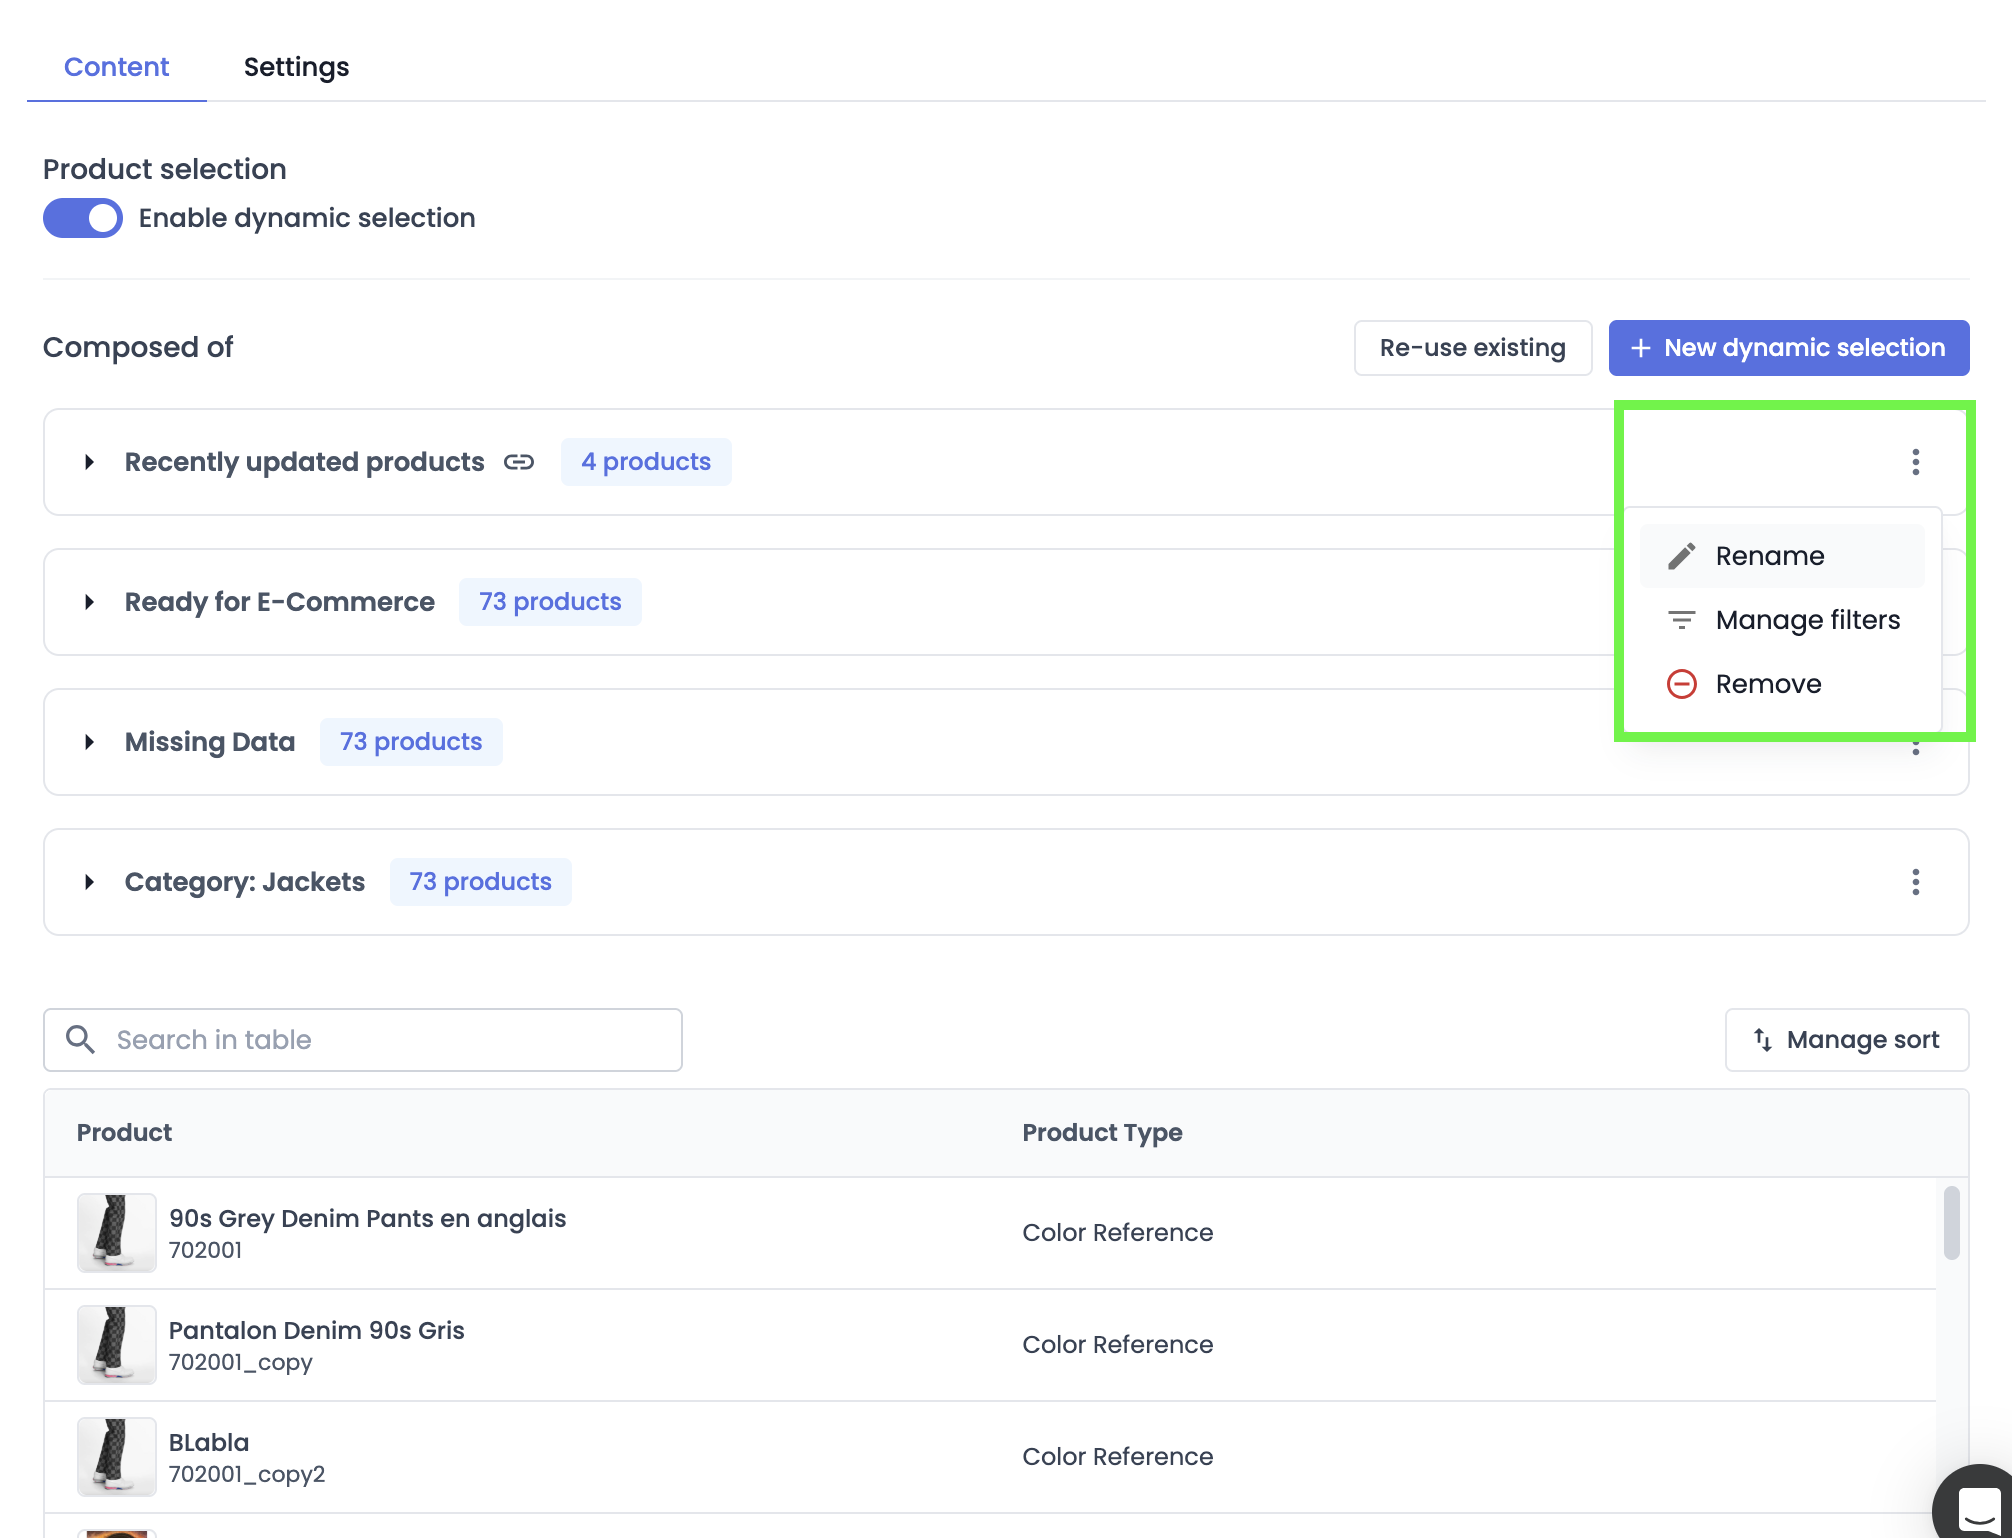
- Click the remove button to remove the SDS from the content distributed in the classification.
Important
- Removing a dynamic selection that has not been saved implies its deletion. This action is irreversible.
- On the other hand, removing a saved dynamic selection does not delete it. It is still available in the SDS management page.
Delete a saved dynamic selection
From the channels home page, click the Manage saved dynamic selections button to access the saved dynamic selections management page. Click the ⁝ button at the end of an SDS row to access the edit options.
)
- Click the delete button to remove the SDS from the list of saved dynamic selections.
Important
- Saved dynamic selections are all centralized from the SDS management page. Deleting an SDS removes it from all classifications where it is used.
- Deleting a Saved Dynamic Selection is irreversible.
Attributes tab
To access a channel's Attributes tab from the channels page, first click on the pencil at the end of the row corresponding to the channel, then click on the Attributes tab in the upper part of the left window.

This tab allows you to define which attributes, for Product sheets and Assets, and for each Product type, are authorized to be distributed in the channel. This lets you maintain control over the attributes you want to share or not by creating an attribute distribution list.
- A search bar, located above the list of object types, allows you to quickly find an attribute in the list.
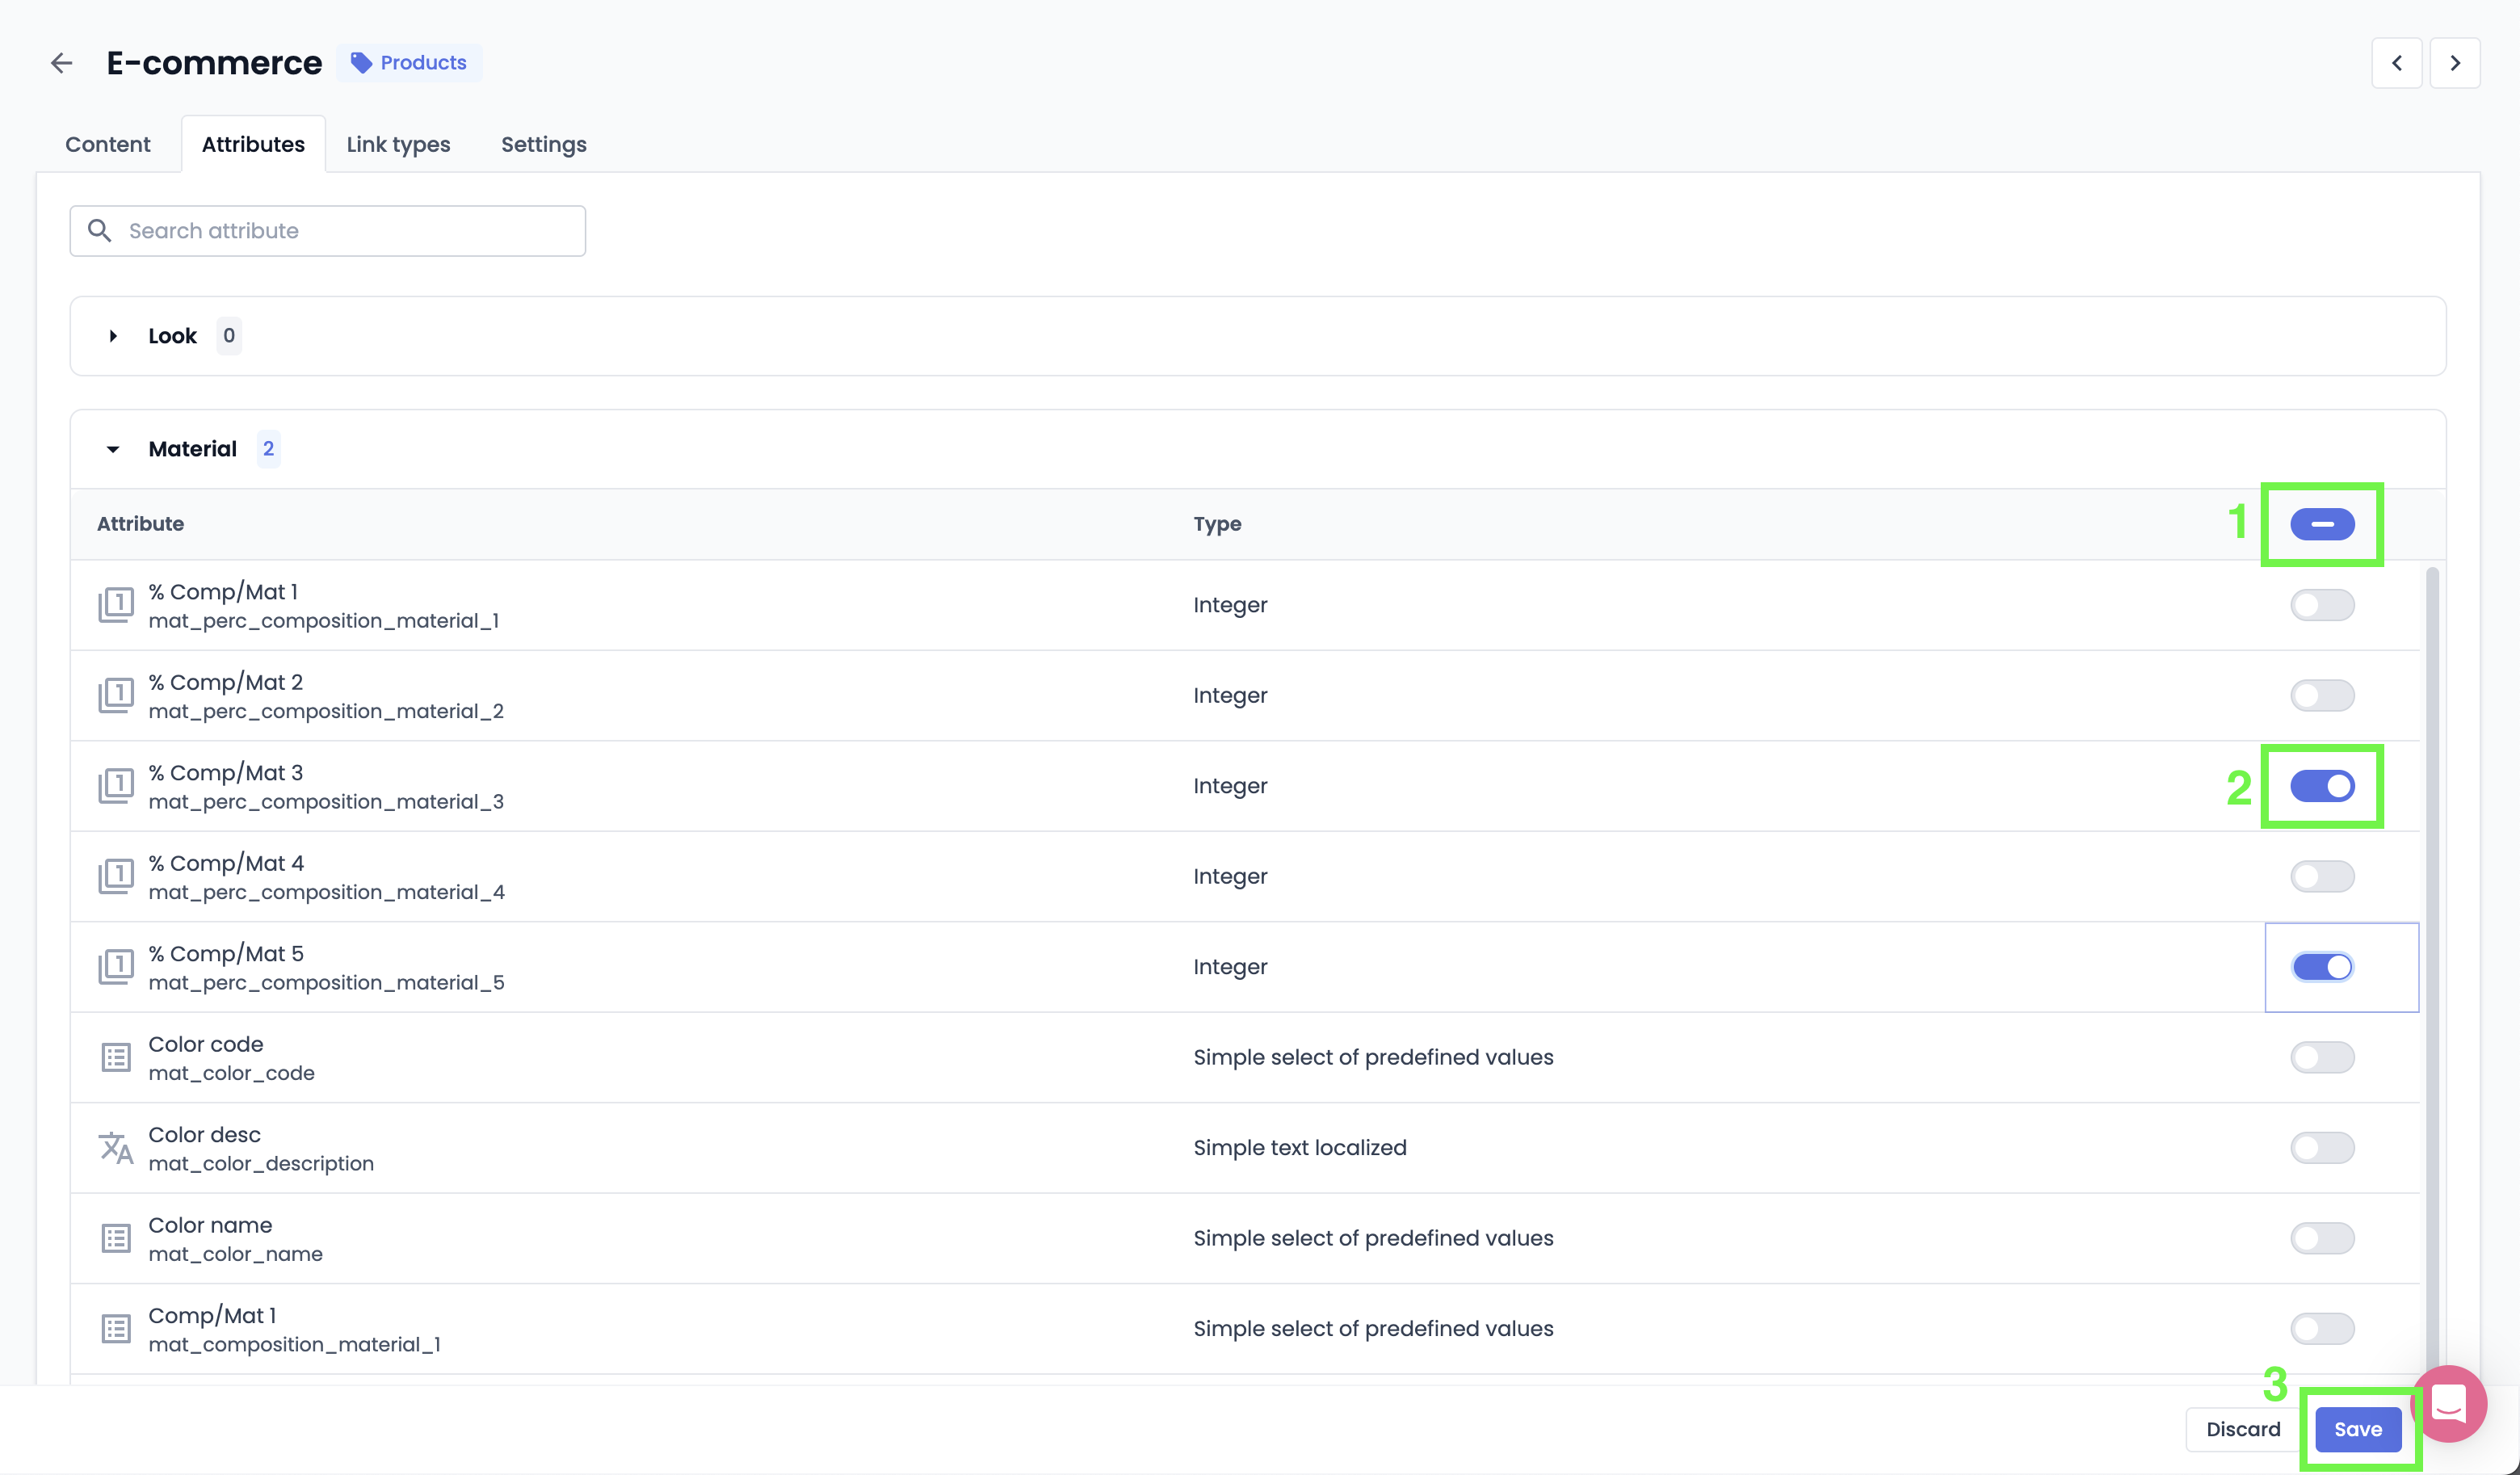
Manage authorized attributes in the distribution list
- To add/remove all attributes of an object type to/from the distribution list, expand the object type and activate the toggle button at the top of the attribute list (1).
- To add/remove attributes one by one to/from the distribution list, expand the object type and activate the toggle button for the relevant attribute (2).
- Once you have finished adding/removing attributes from your distribution list, click the Save button to save (3).
)
Limitations
- Attribute distribution settings apply only to API channels.
- Channels distributed via flat file data feeds are excluded as only Product codes can be exported.
Link types tab
To access a channel's Link types tab from the channels page, first click on the pencil at the end of the row corresponding to the channel, then click on the Link types tab in the upper part of the left window.

This tab allows you to define which link types, for Product-Product links and Product-Asset links, and for each Product type, are authorized to be distributed in the channel. This lets you maintain control over the linked content you wish to share or not by creating a link distribution list.
Manage authorized Link types in the distribution list
- To add/remove all link types to/from the distribution list, activate the toggle button at the top of the link types list (1).
- To add/remove link types one by one to/from the distribution list, activate the toggle button for the relevant link (2).
- Once you have finished adding/removing link types from your distribution list, click the Save button to save (3).
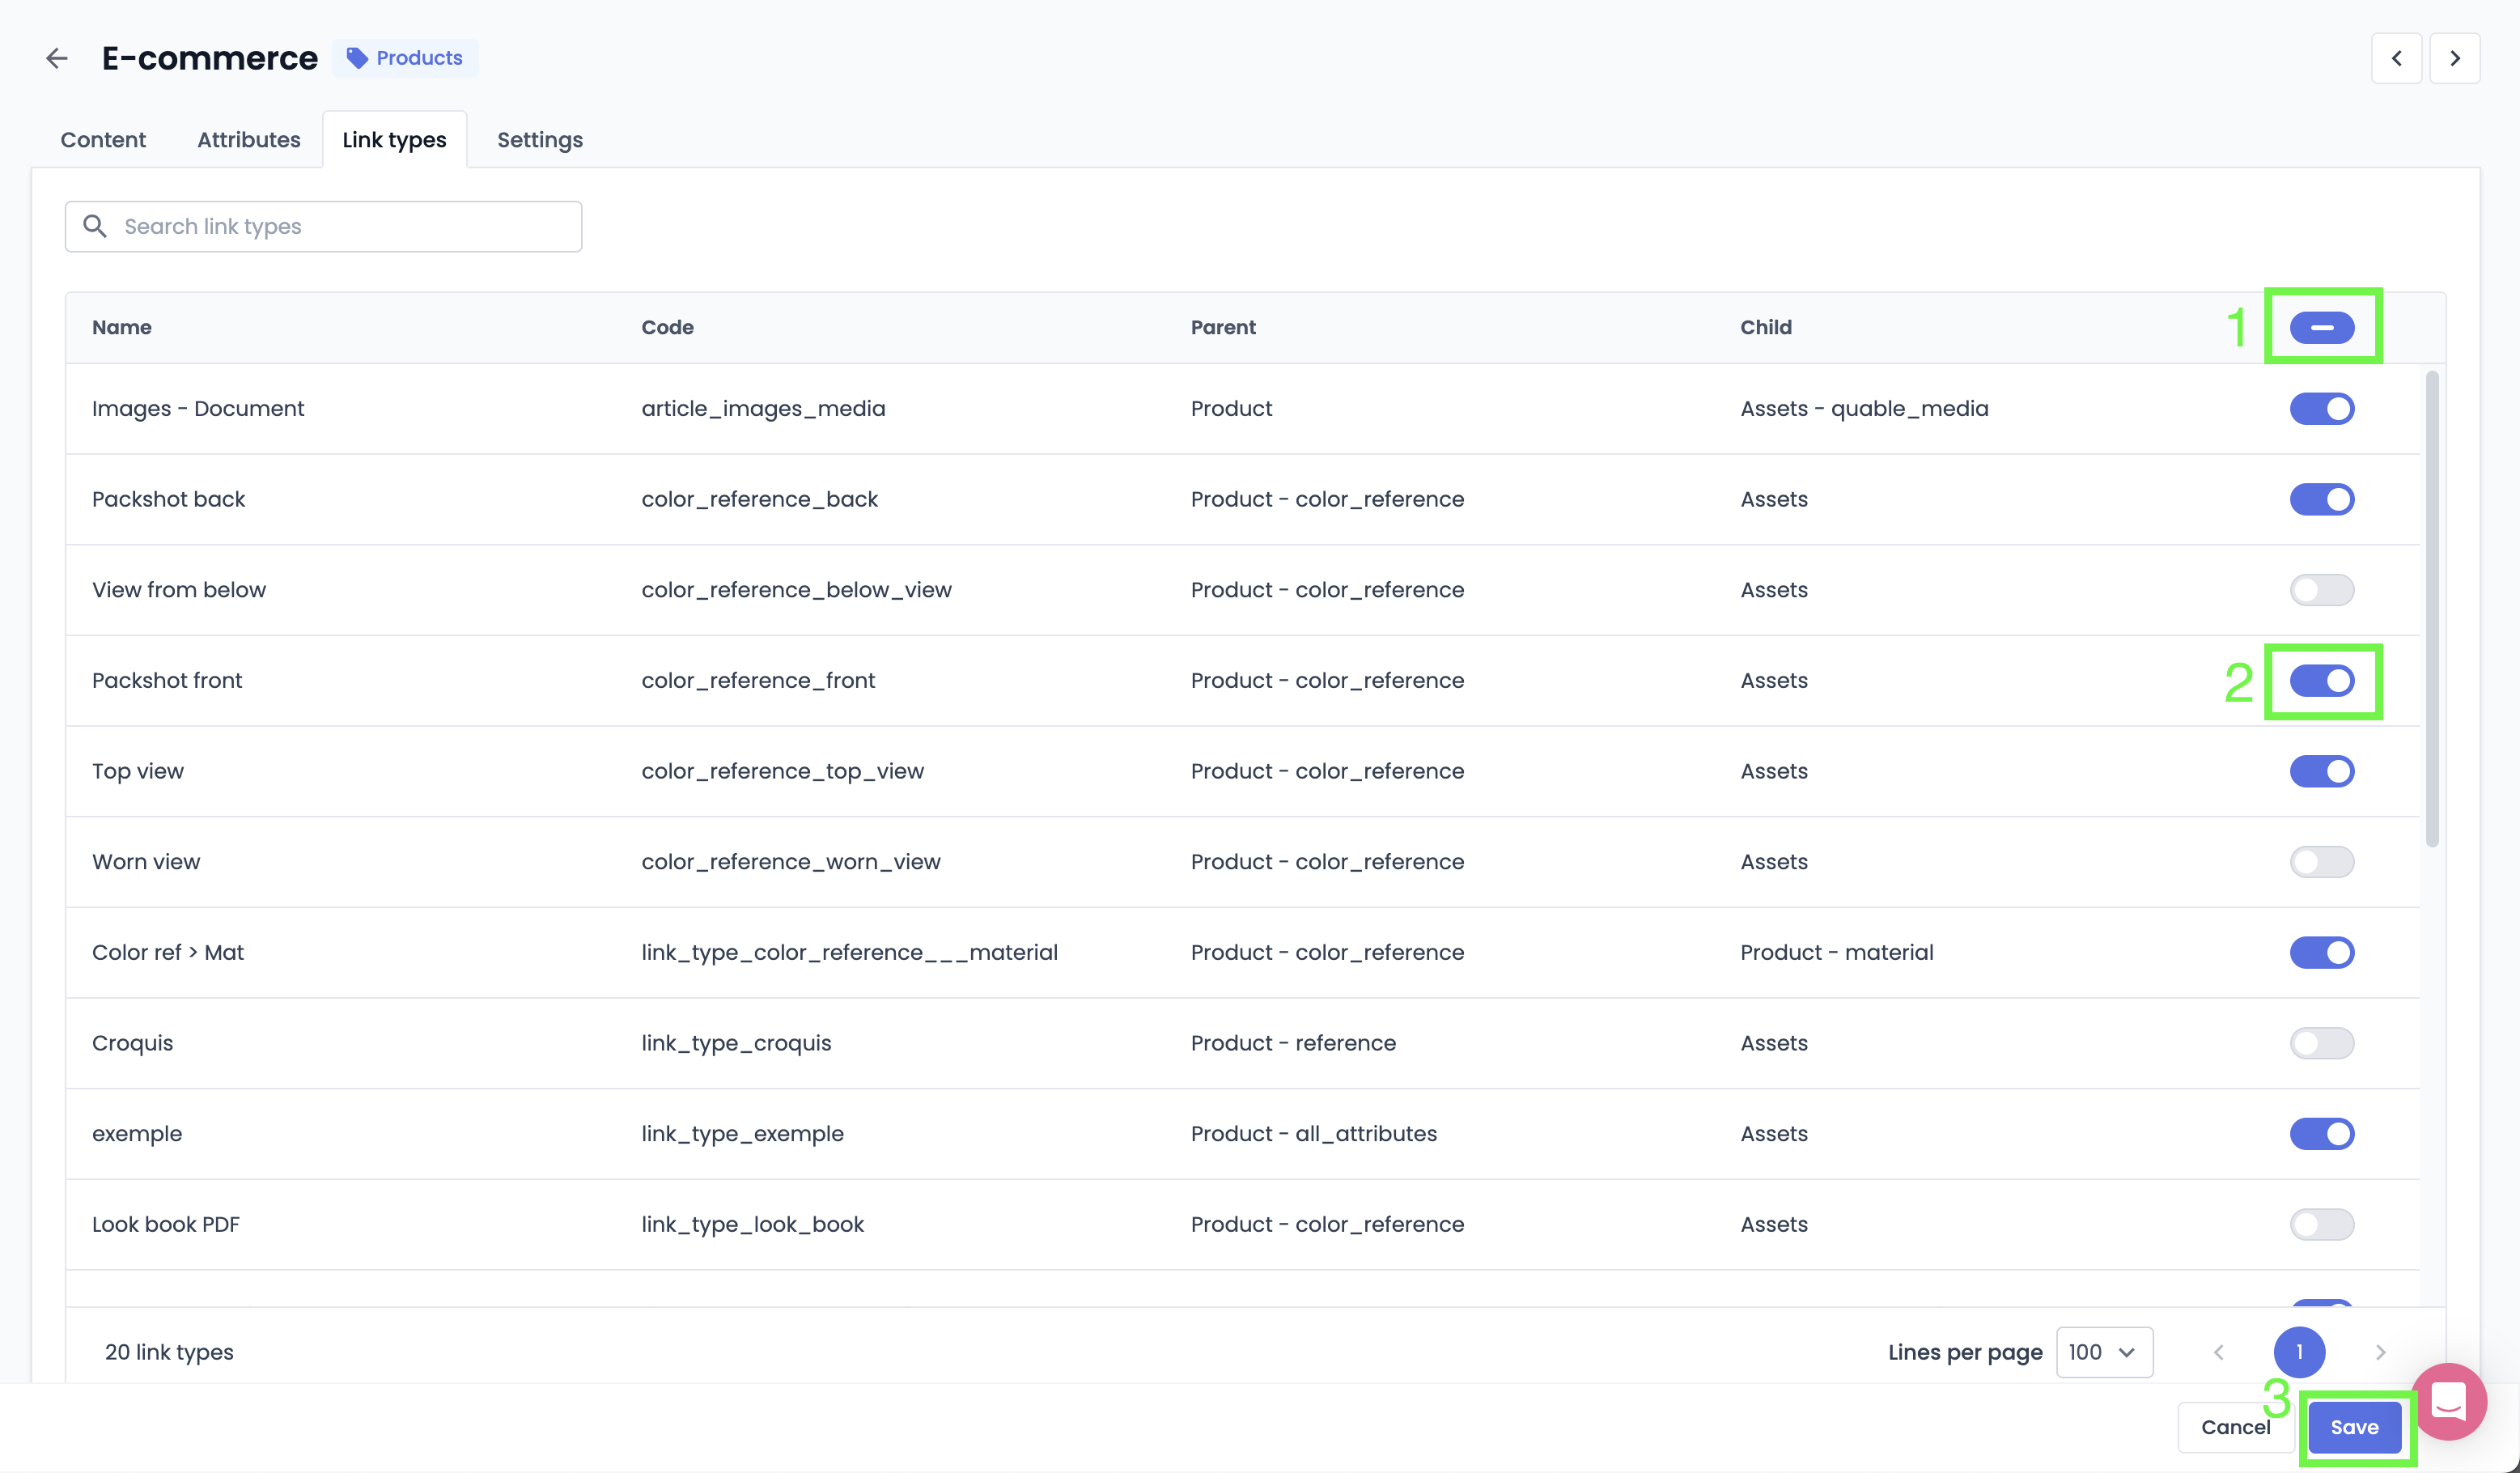
- A search bar, located above the list of link types, allows you to quickly find a link in the list.
Limitations
- Link type distribution settings apply only to API channels.
- Channels distributed via flat file data feeds are excluded.
Settings tab
To access a channel's Settings tab from the channels page, first click on the pencil at the end of the row corresponding to the channel, then click on the Settings tab in the upper part of the left window.

This tab allows you to:
- Modify the channel name,
- Copy the channel code,
- Copy the Quable PIM instance URL of the channel.
- Delete the channel
Limitations
- Only the channel name can be modified; it is not possible to change the channel code.
- Deleting a channel is irreversible
Quable-specific channels
Quable Brand Portal
The Quable Brand Portal boosts your activities by easily displaying and sharing the content of your Quable PIM with your entire professional ecosystem (employees, suppliers, partners, etc.).
By default, your Quable Brand Portal is populated from your default Quable PIM (Product sheets) and DAM (assets) classifications, including all content. The Quable PIM administrator can, however, create custom classifications for your Quable Brand Portal channel.
Good to know
- Product types will not appear in the Quable Brand Portal if no attributes are authorized in the attribute distribution list. Therefore, you must activate at least one attribute in the attribute distribution list to display the corresponding Product type.
PDF Product Sheets
PDF product sheets are read-only copies of your Product sheets exported in PDF format. They can be accessed from the PIM, or from the Brand Portal.
On Quable PIM
PDF product sheets, available via the Print button in your Quable PIM Product sheets, use a dedicated Print channel to print PDF files from Quable PIM.
This channel is automatically created for you and can be seen in the list of your existing channels. You can customize the attributes that will be included in your PDF Product Sheets by following the steps to specify the attributes to include in the distribution list.
Good to knowThe document Name attribute is automatically distributed.
On the Quable Brand Portal
You can also print product sheets in PDF format from your Quable Portal product sheets by selecting the attributes to distribute in your Print channel.
Header and footer settings
The Quable PIM administrator can configure a header and a footer for your PDF product sheets to include your company logo and custom copyright text.
Would you like me to translate another section of your documentation or clarify any specific terms used here?
Updated about 2 months ago