Asset classification
The Assets page in the DAM
Item limit:A classification can contain up to 10,000 items per classification node.
To ensure optimal performance, we recommend segmenting your classification so that you do not reach or exceed this limit.
Overview
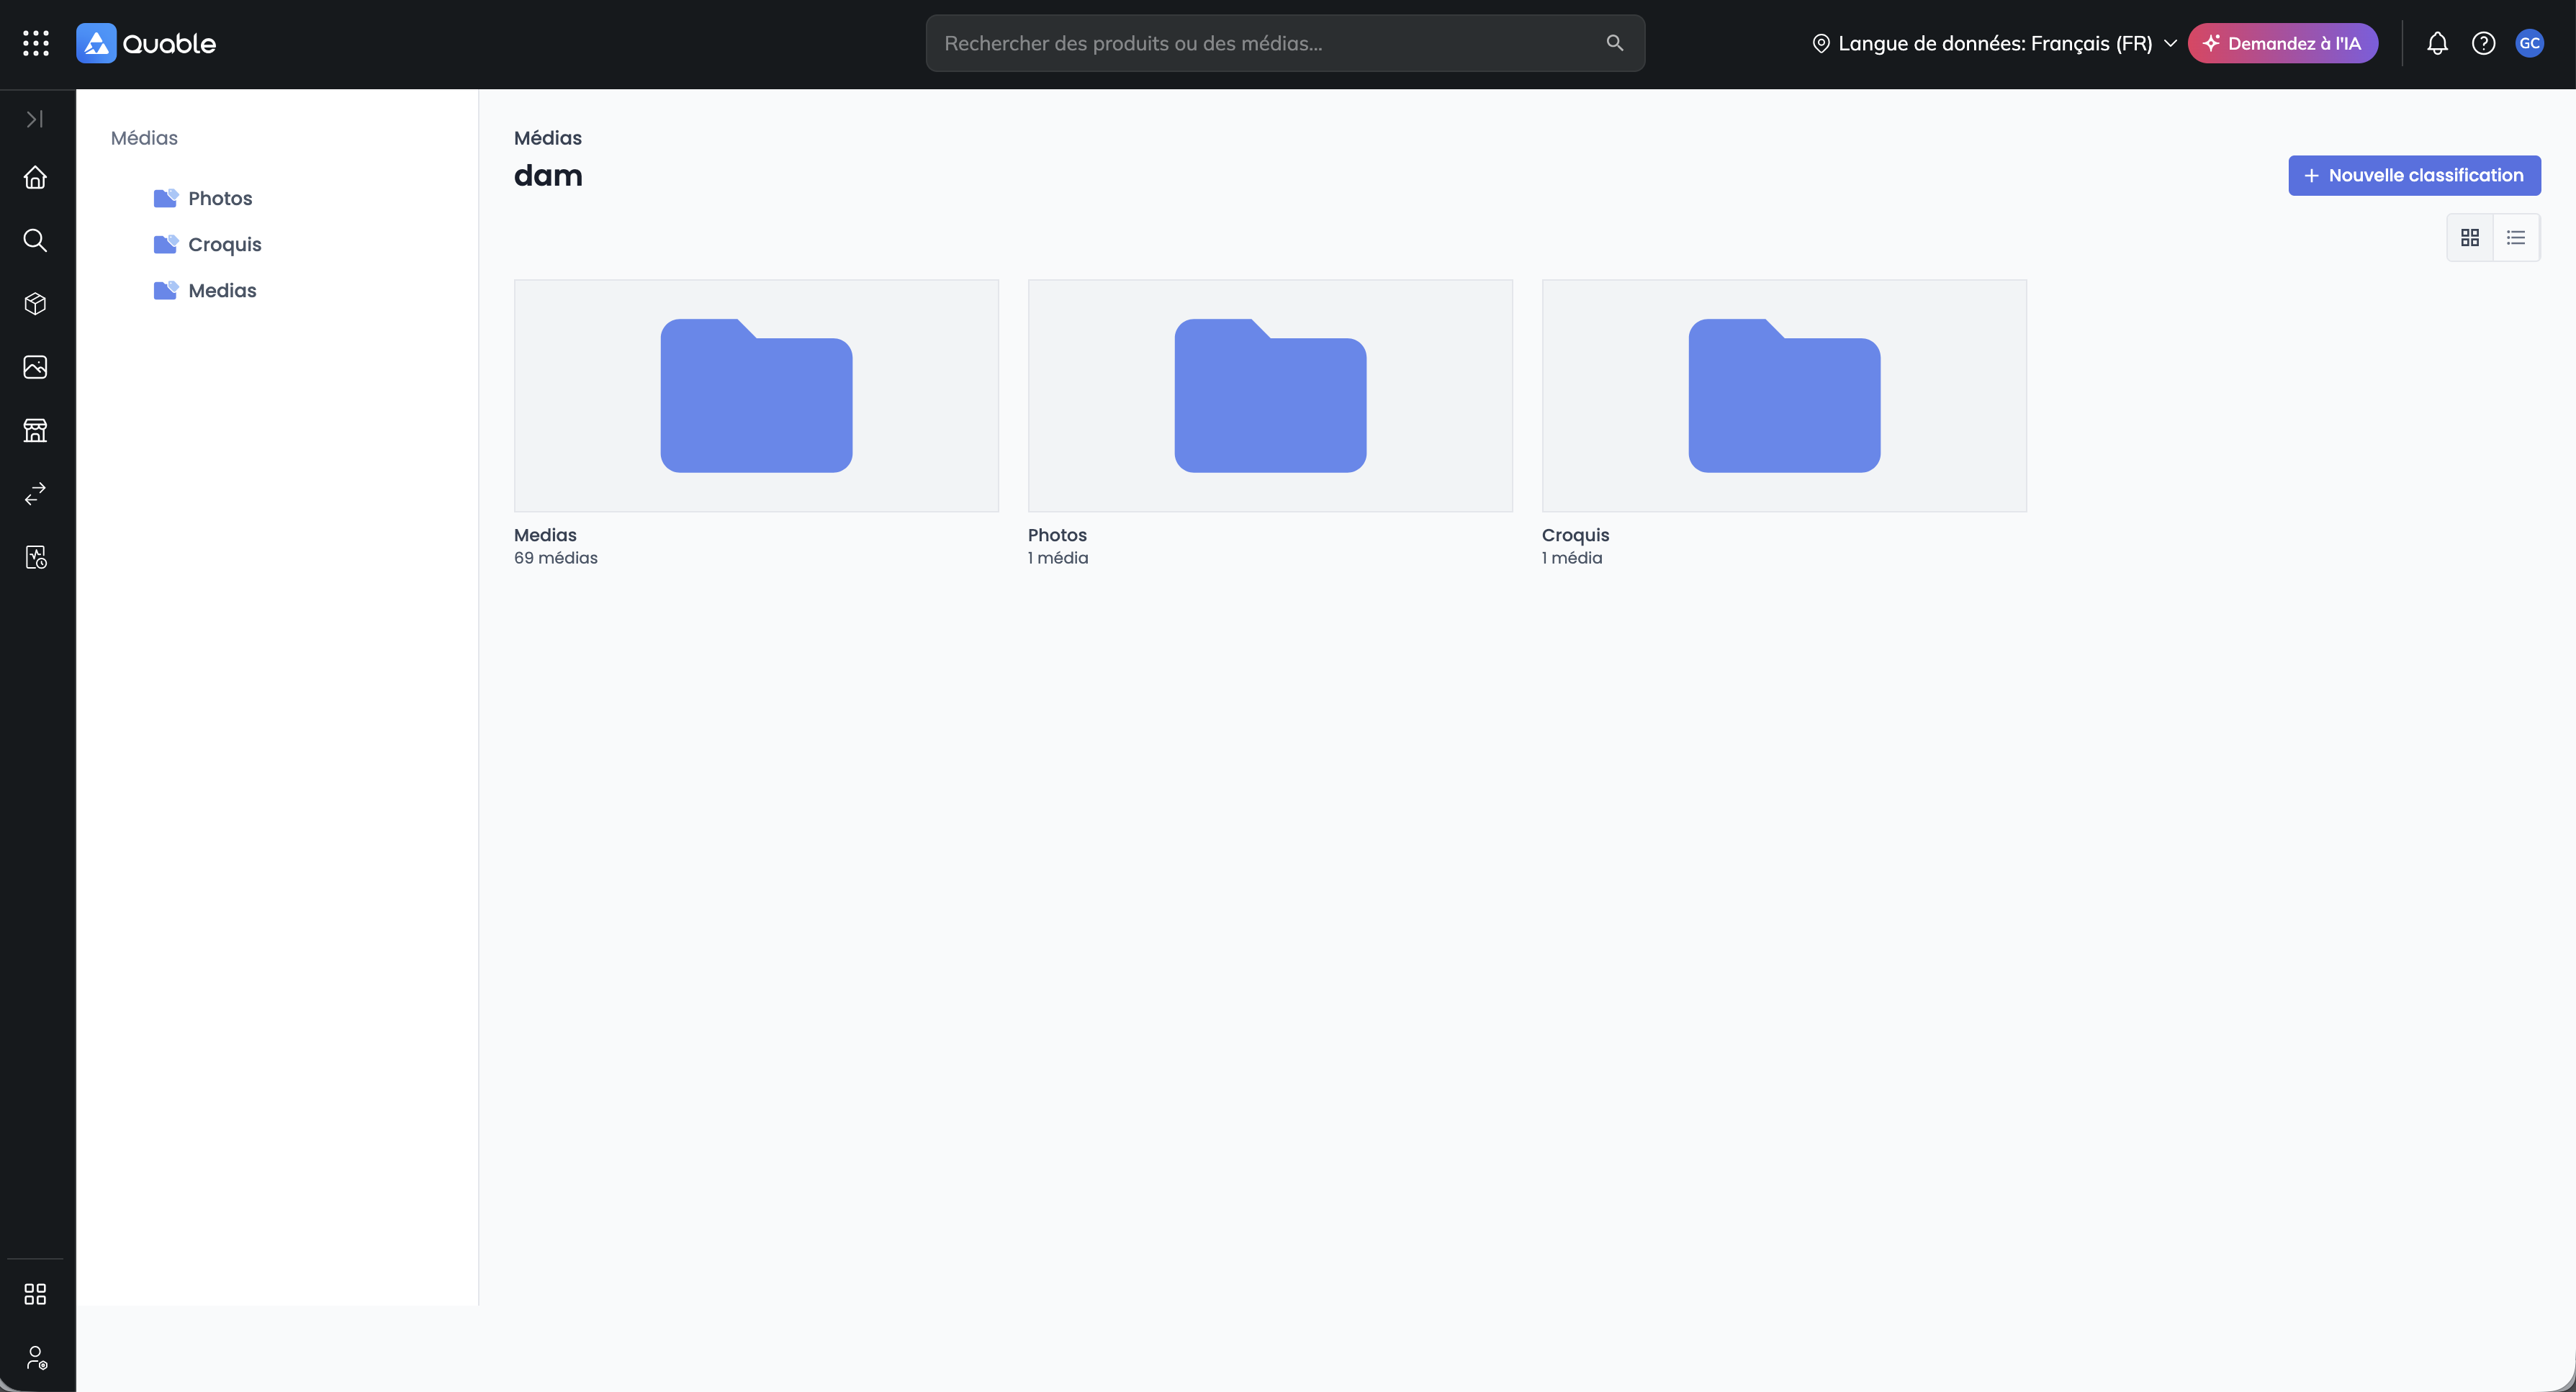
The Assets page is where you can create and manage your Quable PIM asset classifications. It lets you organize your images, videos and documents, then quickly find them to associate them with your products.
This page includes:
- your classification hierarchy,
- a button to add classifications or assets,
- options to edit or delete classifications,
- options to control the asset display,
- a search bar to filter the assets in a classification,
- bulk actions on selected assets.
Good to knowDepending on your permissions, you may only see some of the classifications and assets. See Access rights to asset classifications.
The page is divided into two panels:
| Left Panel | Right Panel |
|---|---|
The Left panel displays your classification hierarchy in the CLASSIFICATION tree. This panel is always visible. Each level can be expanded and collapsed using the arrows ( > ) next to it. The list can be expanded until the lowest classification level is displayed. Clicking a classification displays its content in the Right panel. | The Right panel displays the content of the selected classification: its sub-classifications, or its assets if you are at the lowest level. At the top of the panel, a clickable breadcrumb (Assets / …) shows your location. Click a level in the breadcrumb to return to it. You can also navigate to lower levels by clicking a sub-classification in the Right panel. |
The main button, at the top of the Right panel, adapts to the content of the classification:
- New classification if the classification contains sub-classifications (and always at the root of the DAM);
- Add asset if the classification contains assets;
- both if the classification is empty.
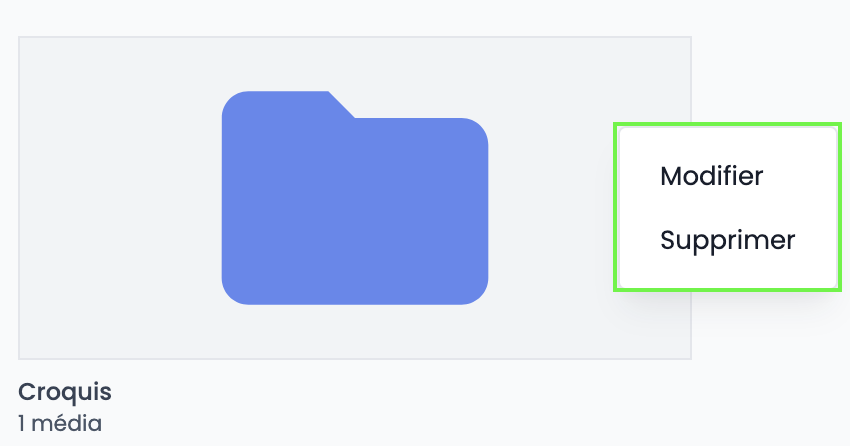
The new folder icons identify sub-classifications. In Gallery view, each sub-classification is displayed as a card, with a cover image (or a folder icon) and the number of assets it contains, including sub-classifications. The card's ⋮ menu gives access to the Edit and Delete actions.
Asset display
Once you have reached the lowest level of a classification, three views are available. Use the view selector at the top of the Right panel to switch between them.
-
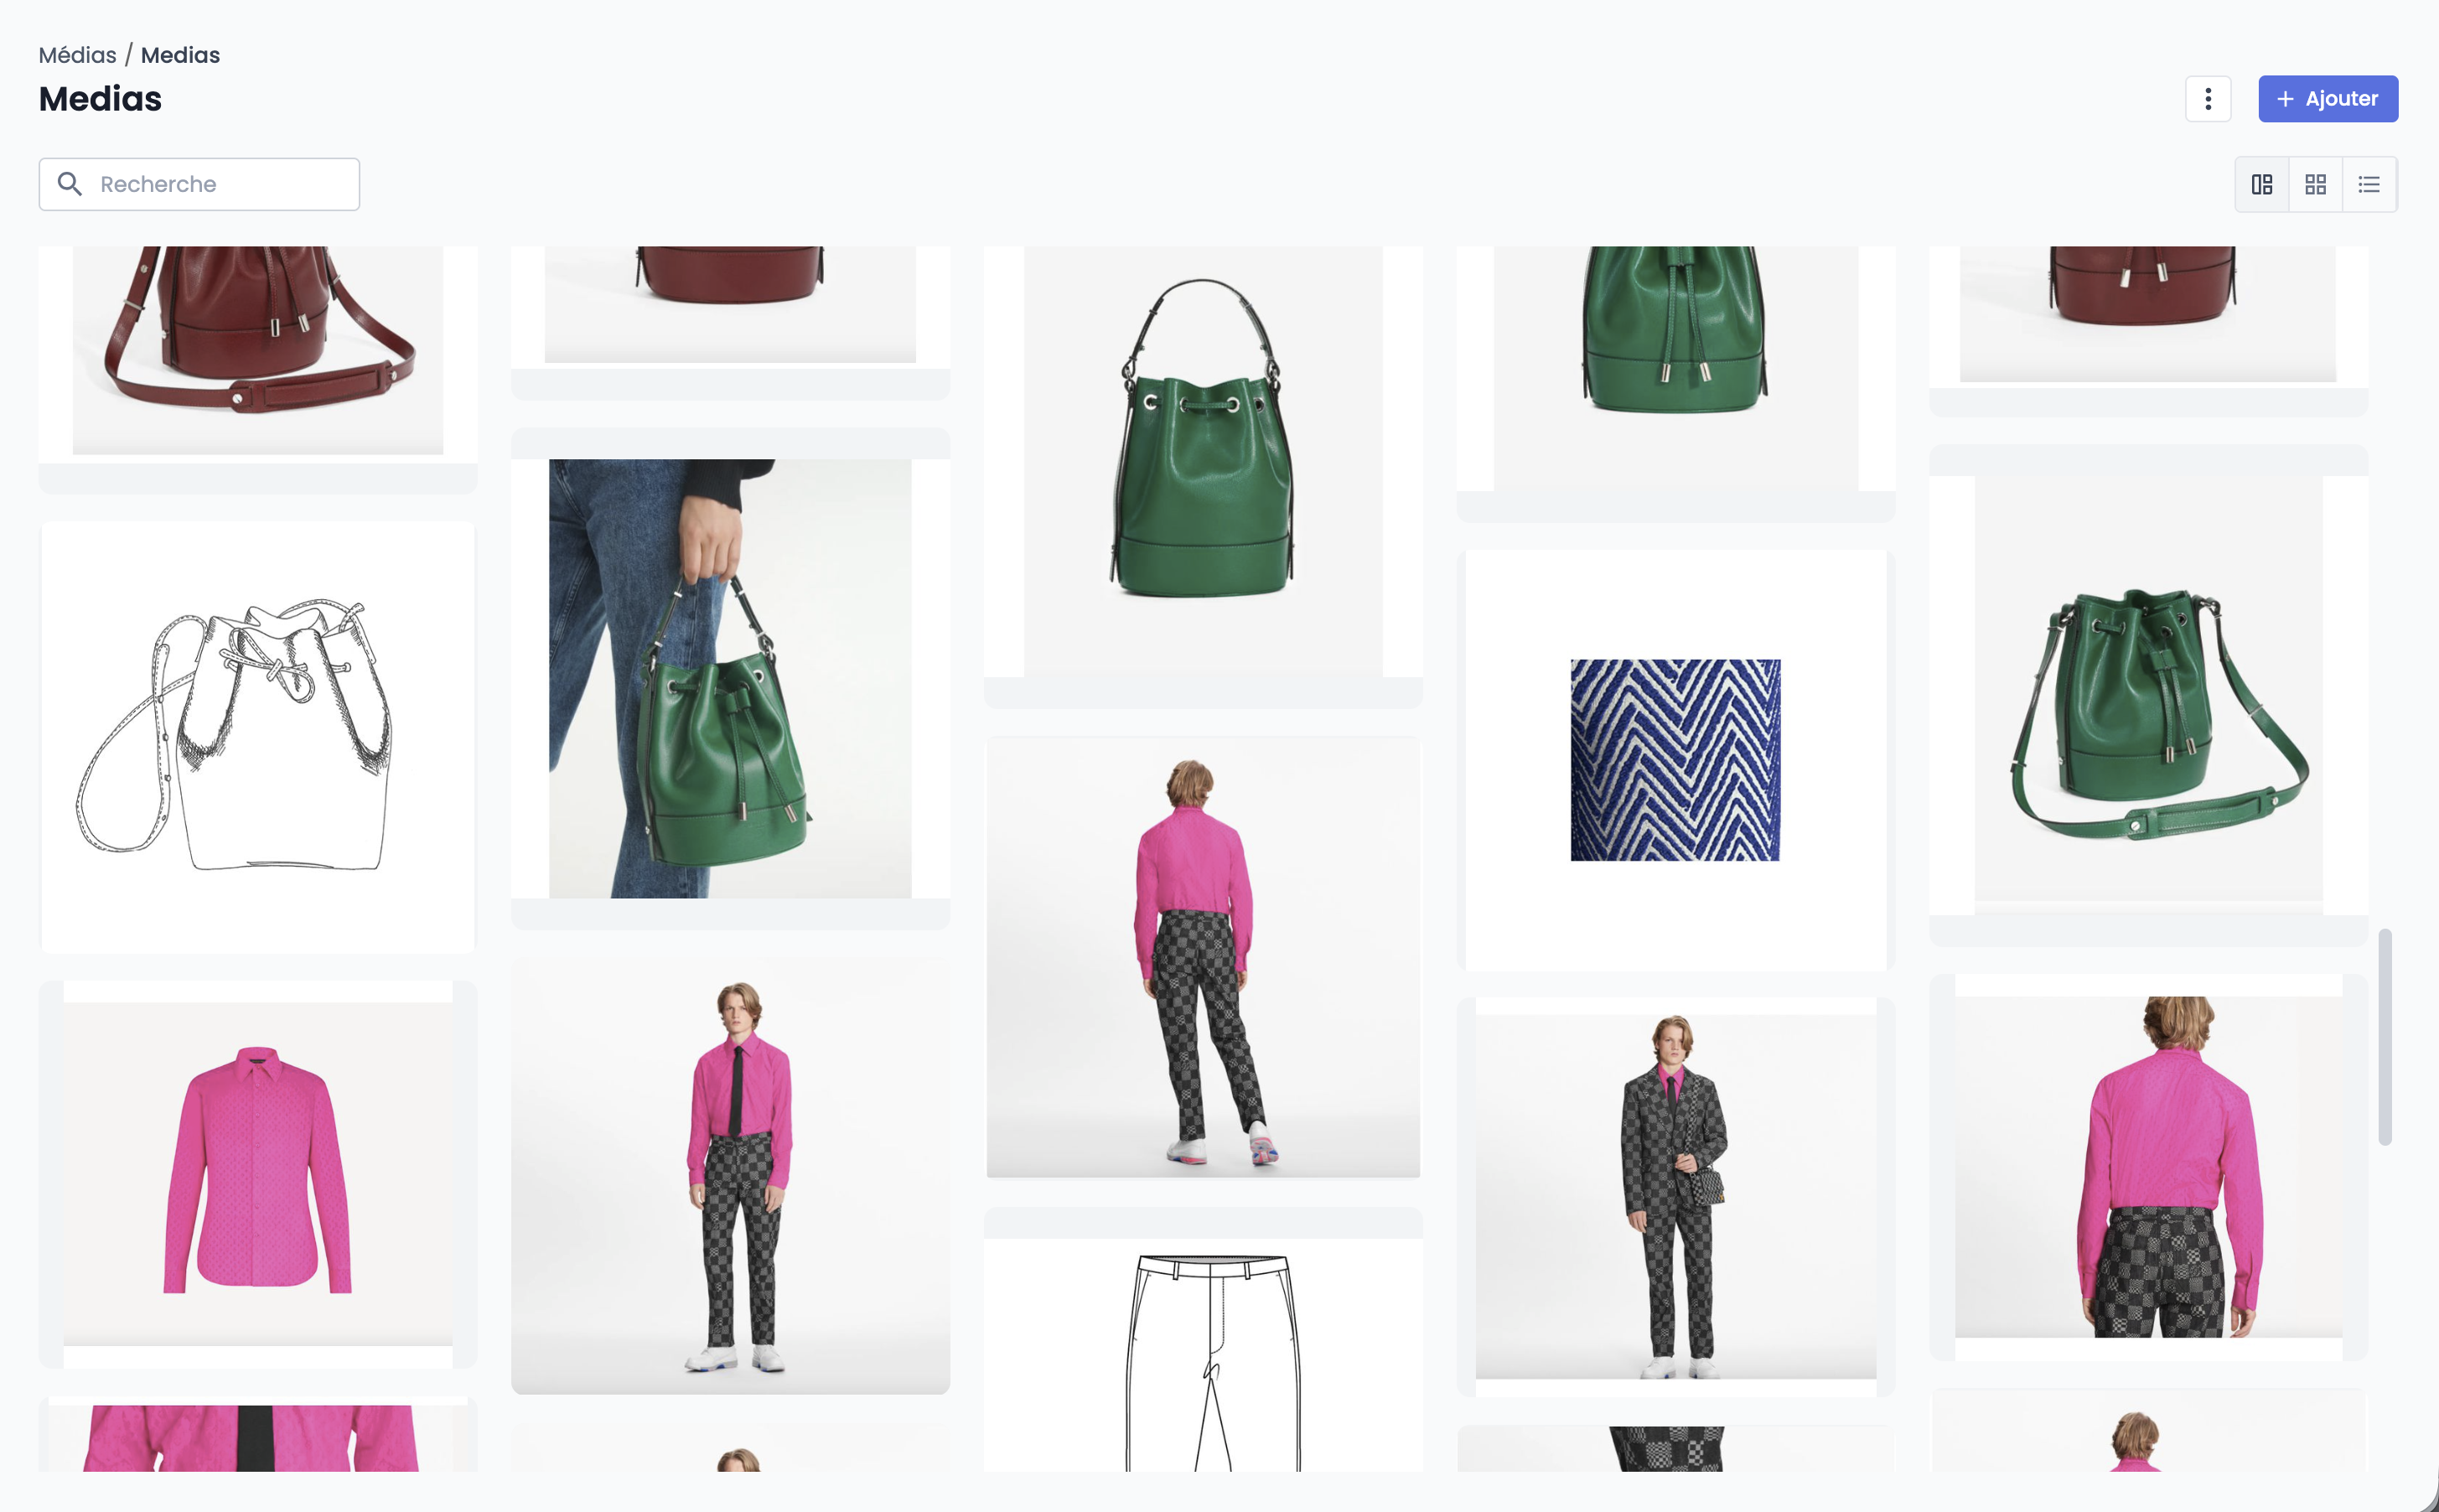
Mosaic view – (default view) Assets are displayed in their original format, without cropping, like an image wall. Assets load as you scroll. Each card displays the thumbnail, name and file type (JPEG, PNG…). This view is ideal for visually browsing a collection, for example during a presentation or when selecting visuals.
-
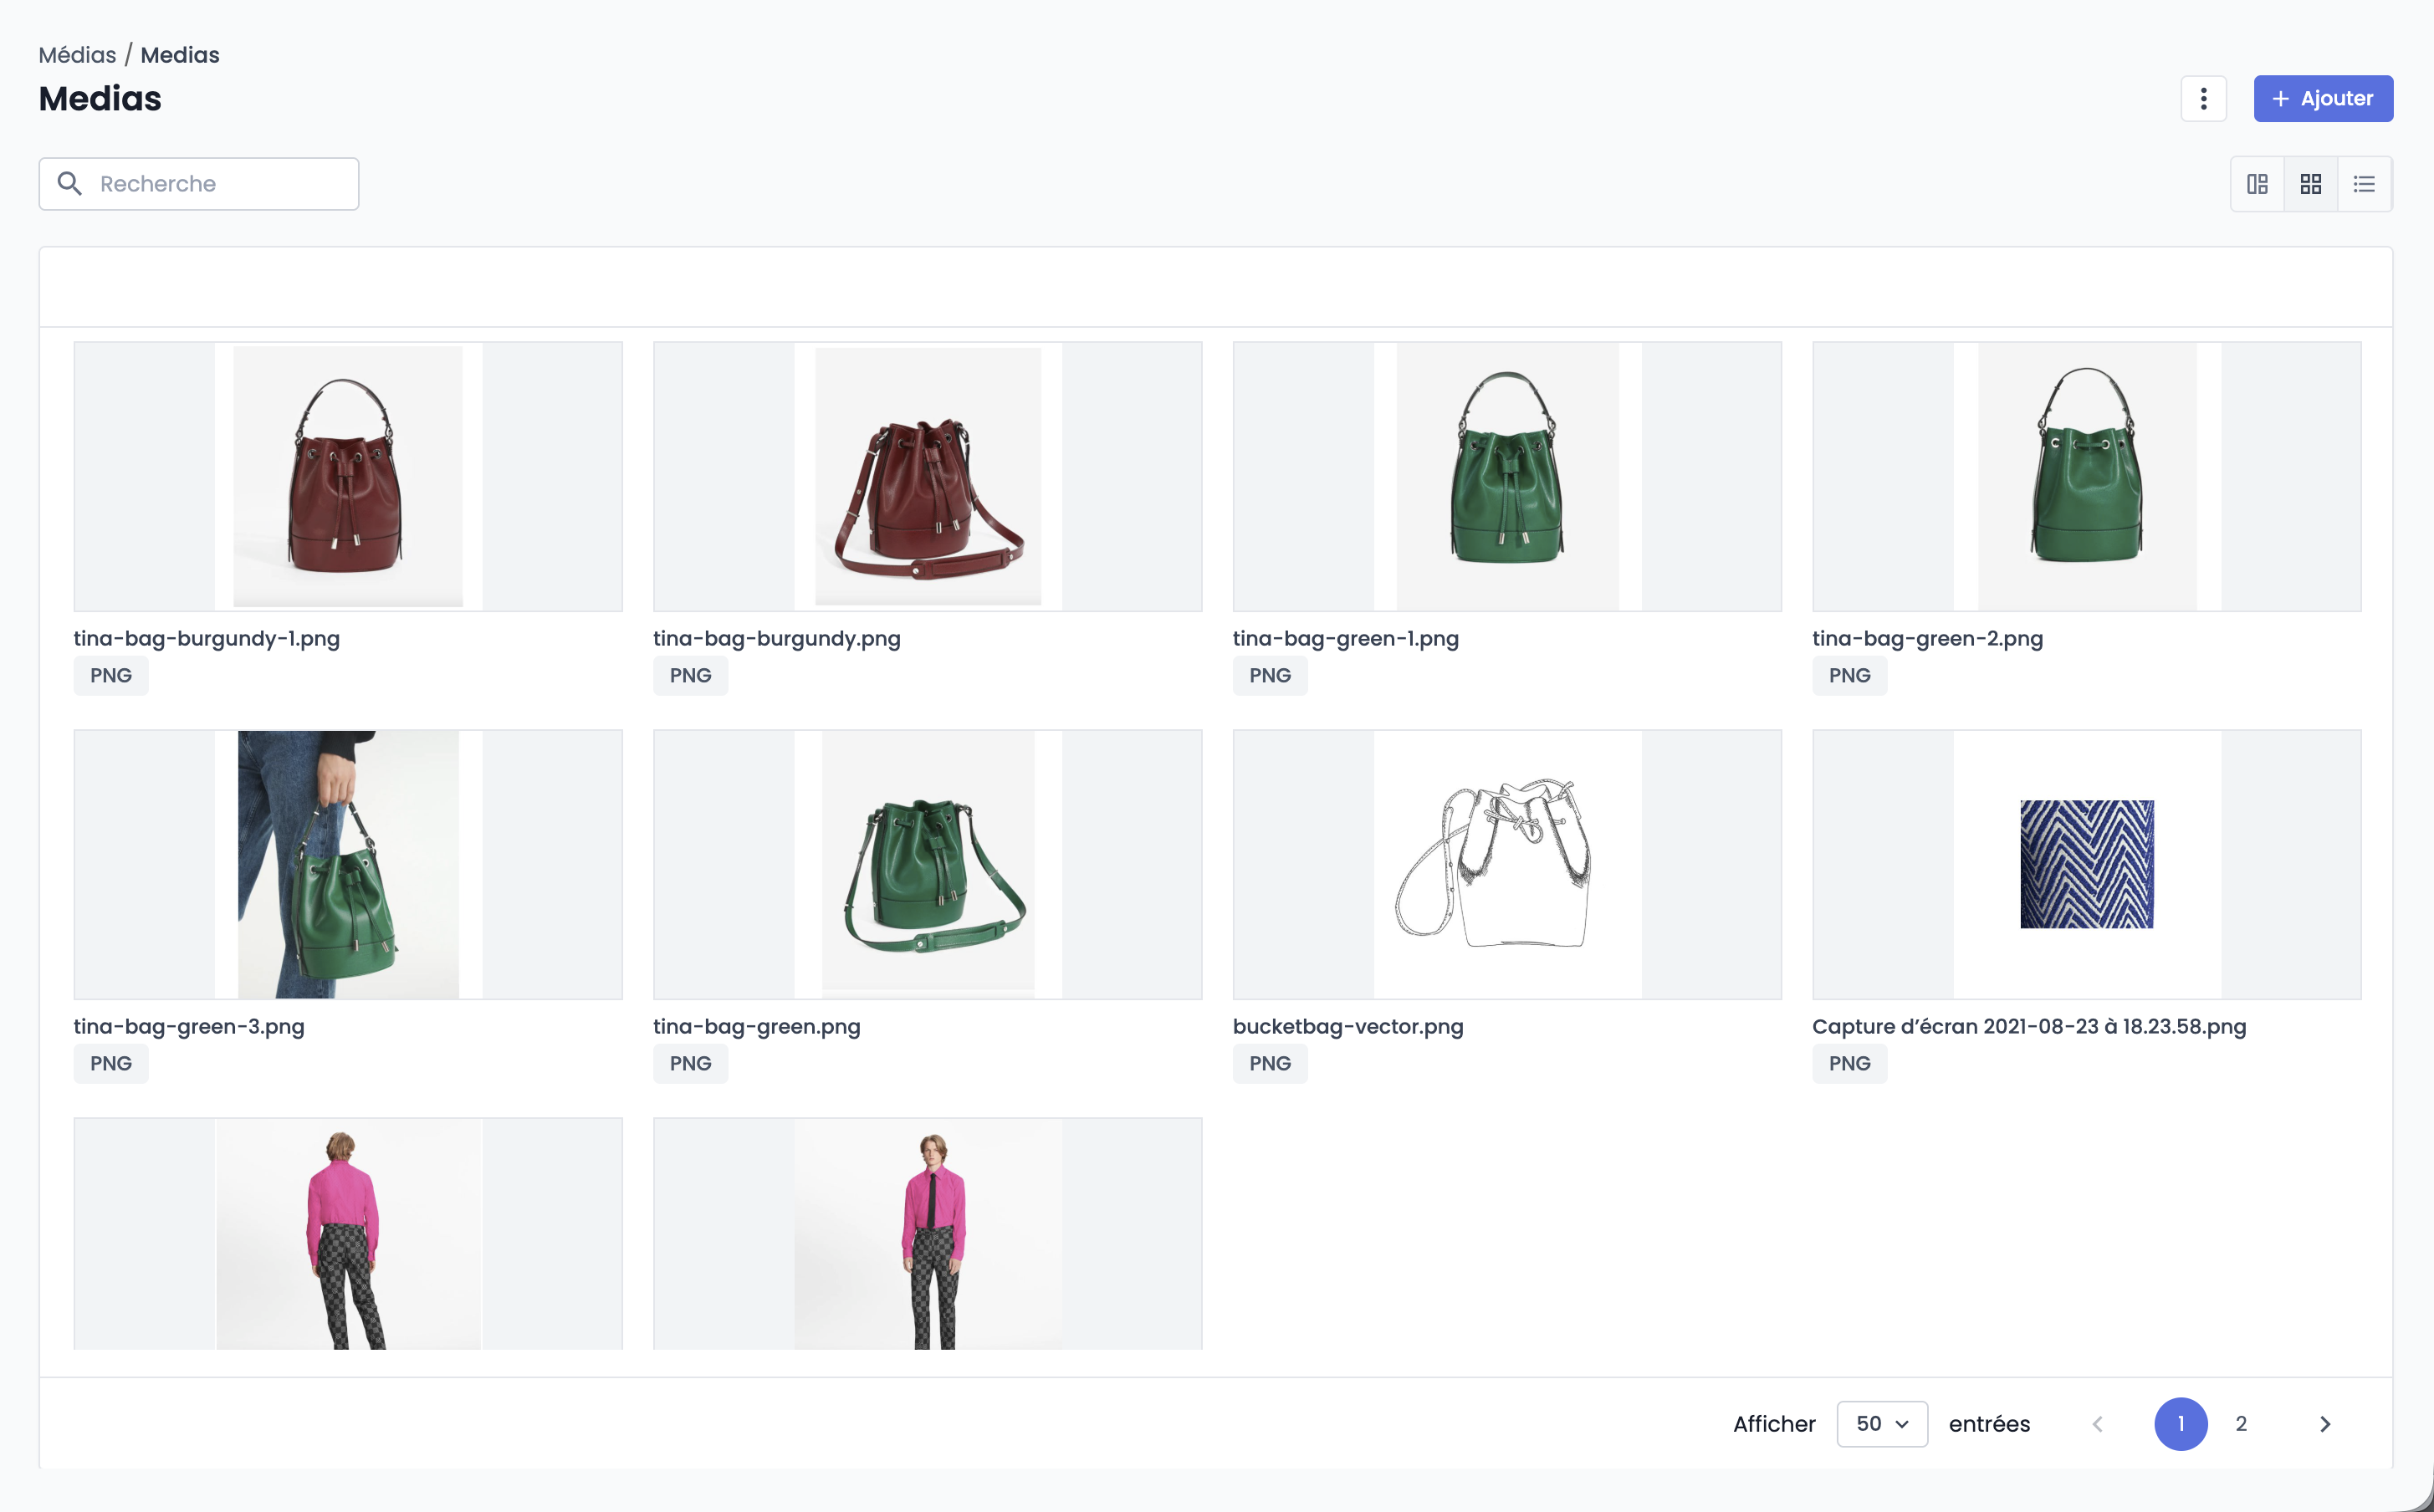
Gallery view – Assets are displayed in a grid of identically sized cards. Pagination is available at the bottom of the page.
-
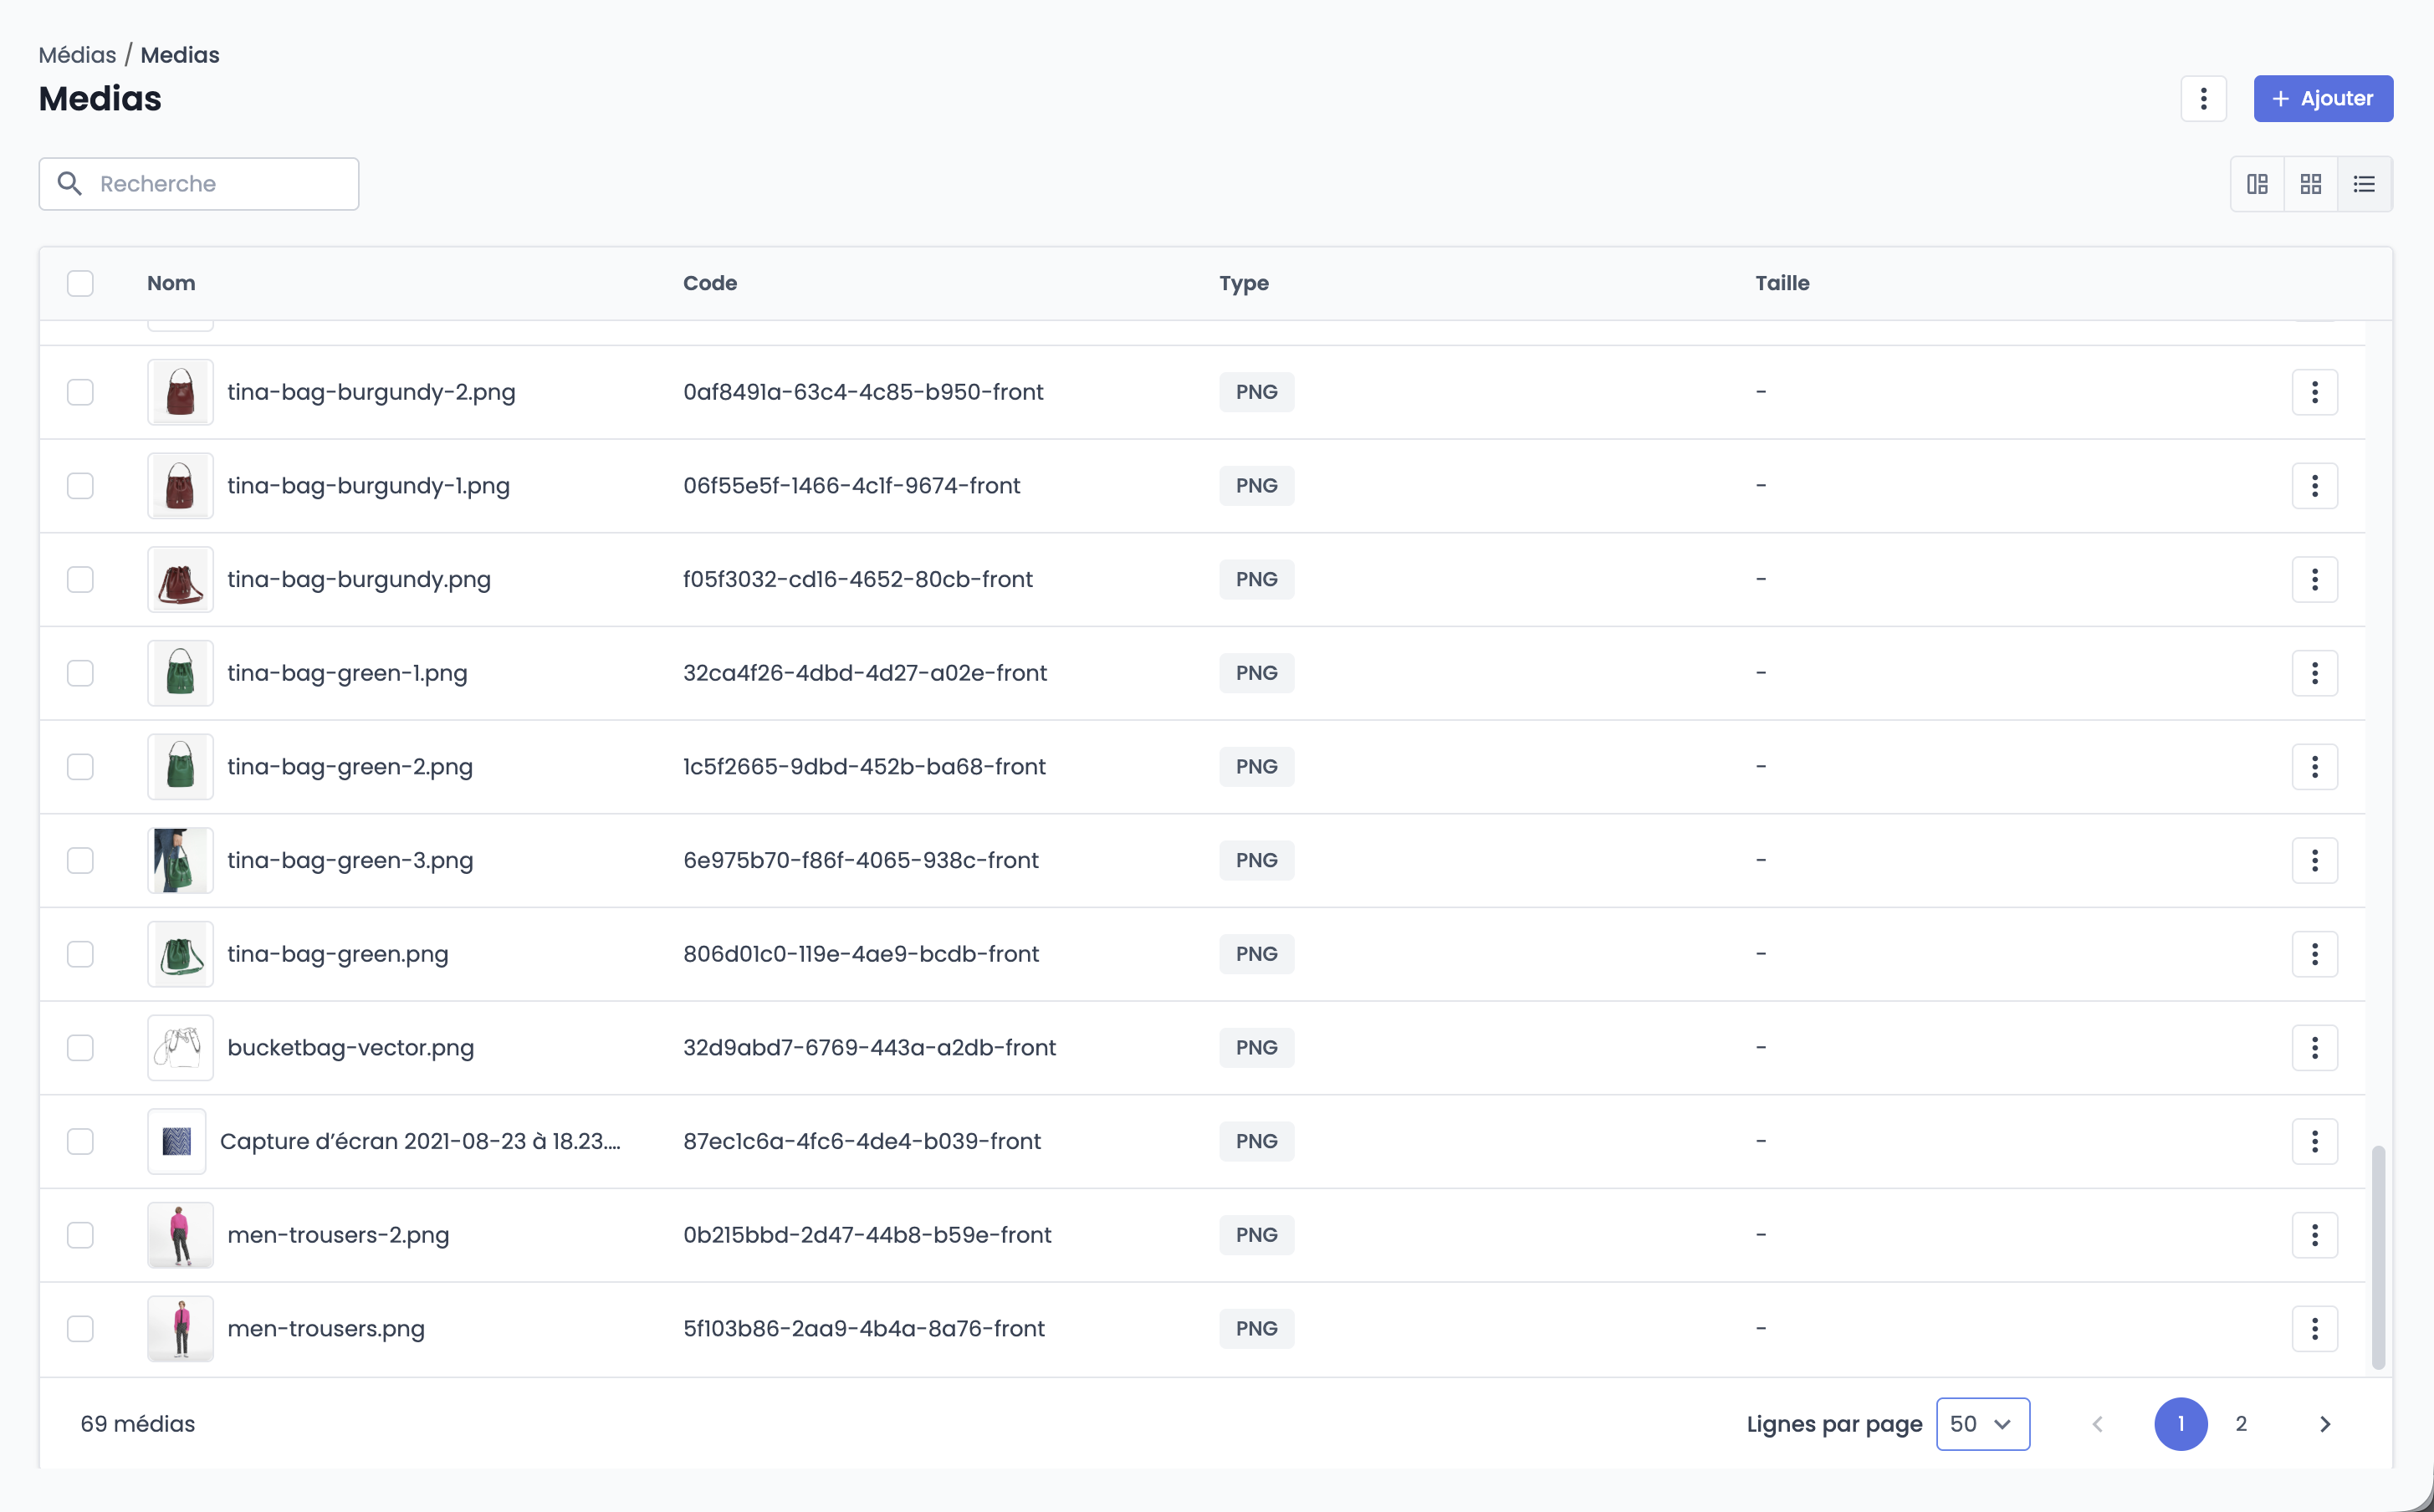
List view – Assets are displayed in table rows, with the following columns: checkbox, name and thumbnail, code, type and size. You can display 10, 25 or 50 rows per page.
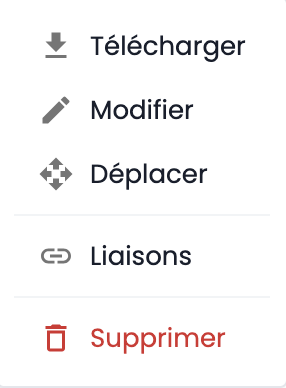
In all views, each asset has a ⋮ menu: at the top right of the thumbnail on hover (Mosaic and Gallery views) or at the end of the row (List view). This menu offers the following actions:
- Download,
- Edit,
- Move,
- Links,
- Delete (confirmation is required).
Good to knowActions that your role does not allow you to perform do not appear in the menu. The Link action requires the link creation permission.
Your display preferences are saved
- The selected view (Mosaic, Gallery or List) is kept throughout your navigation in the DAM. It is stored in your browser and restored the next time you log in.
- The number of rows per page is kept when you switch classifications.
- The last classification you opened is restored as long as your browser tab remains open.
Search within a classification
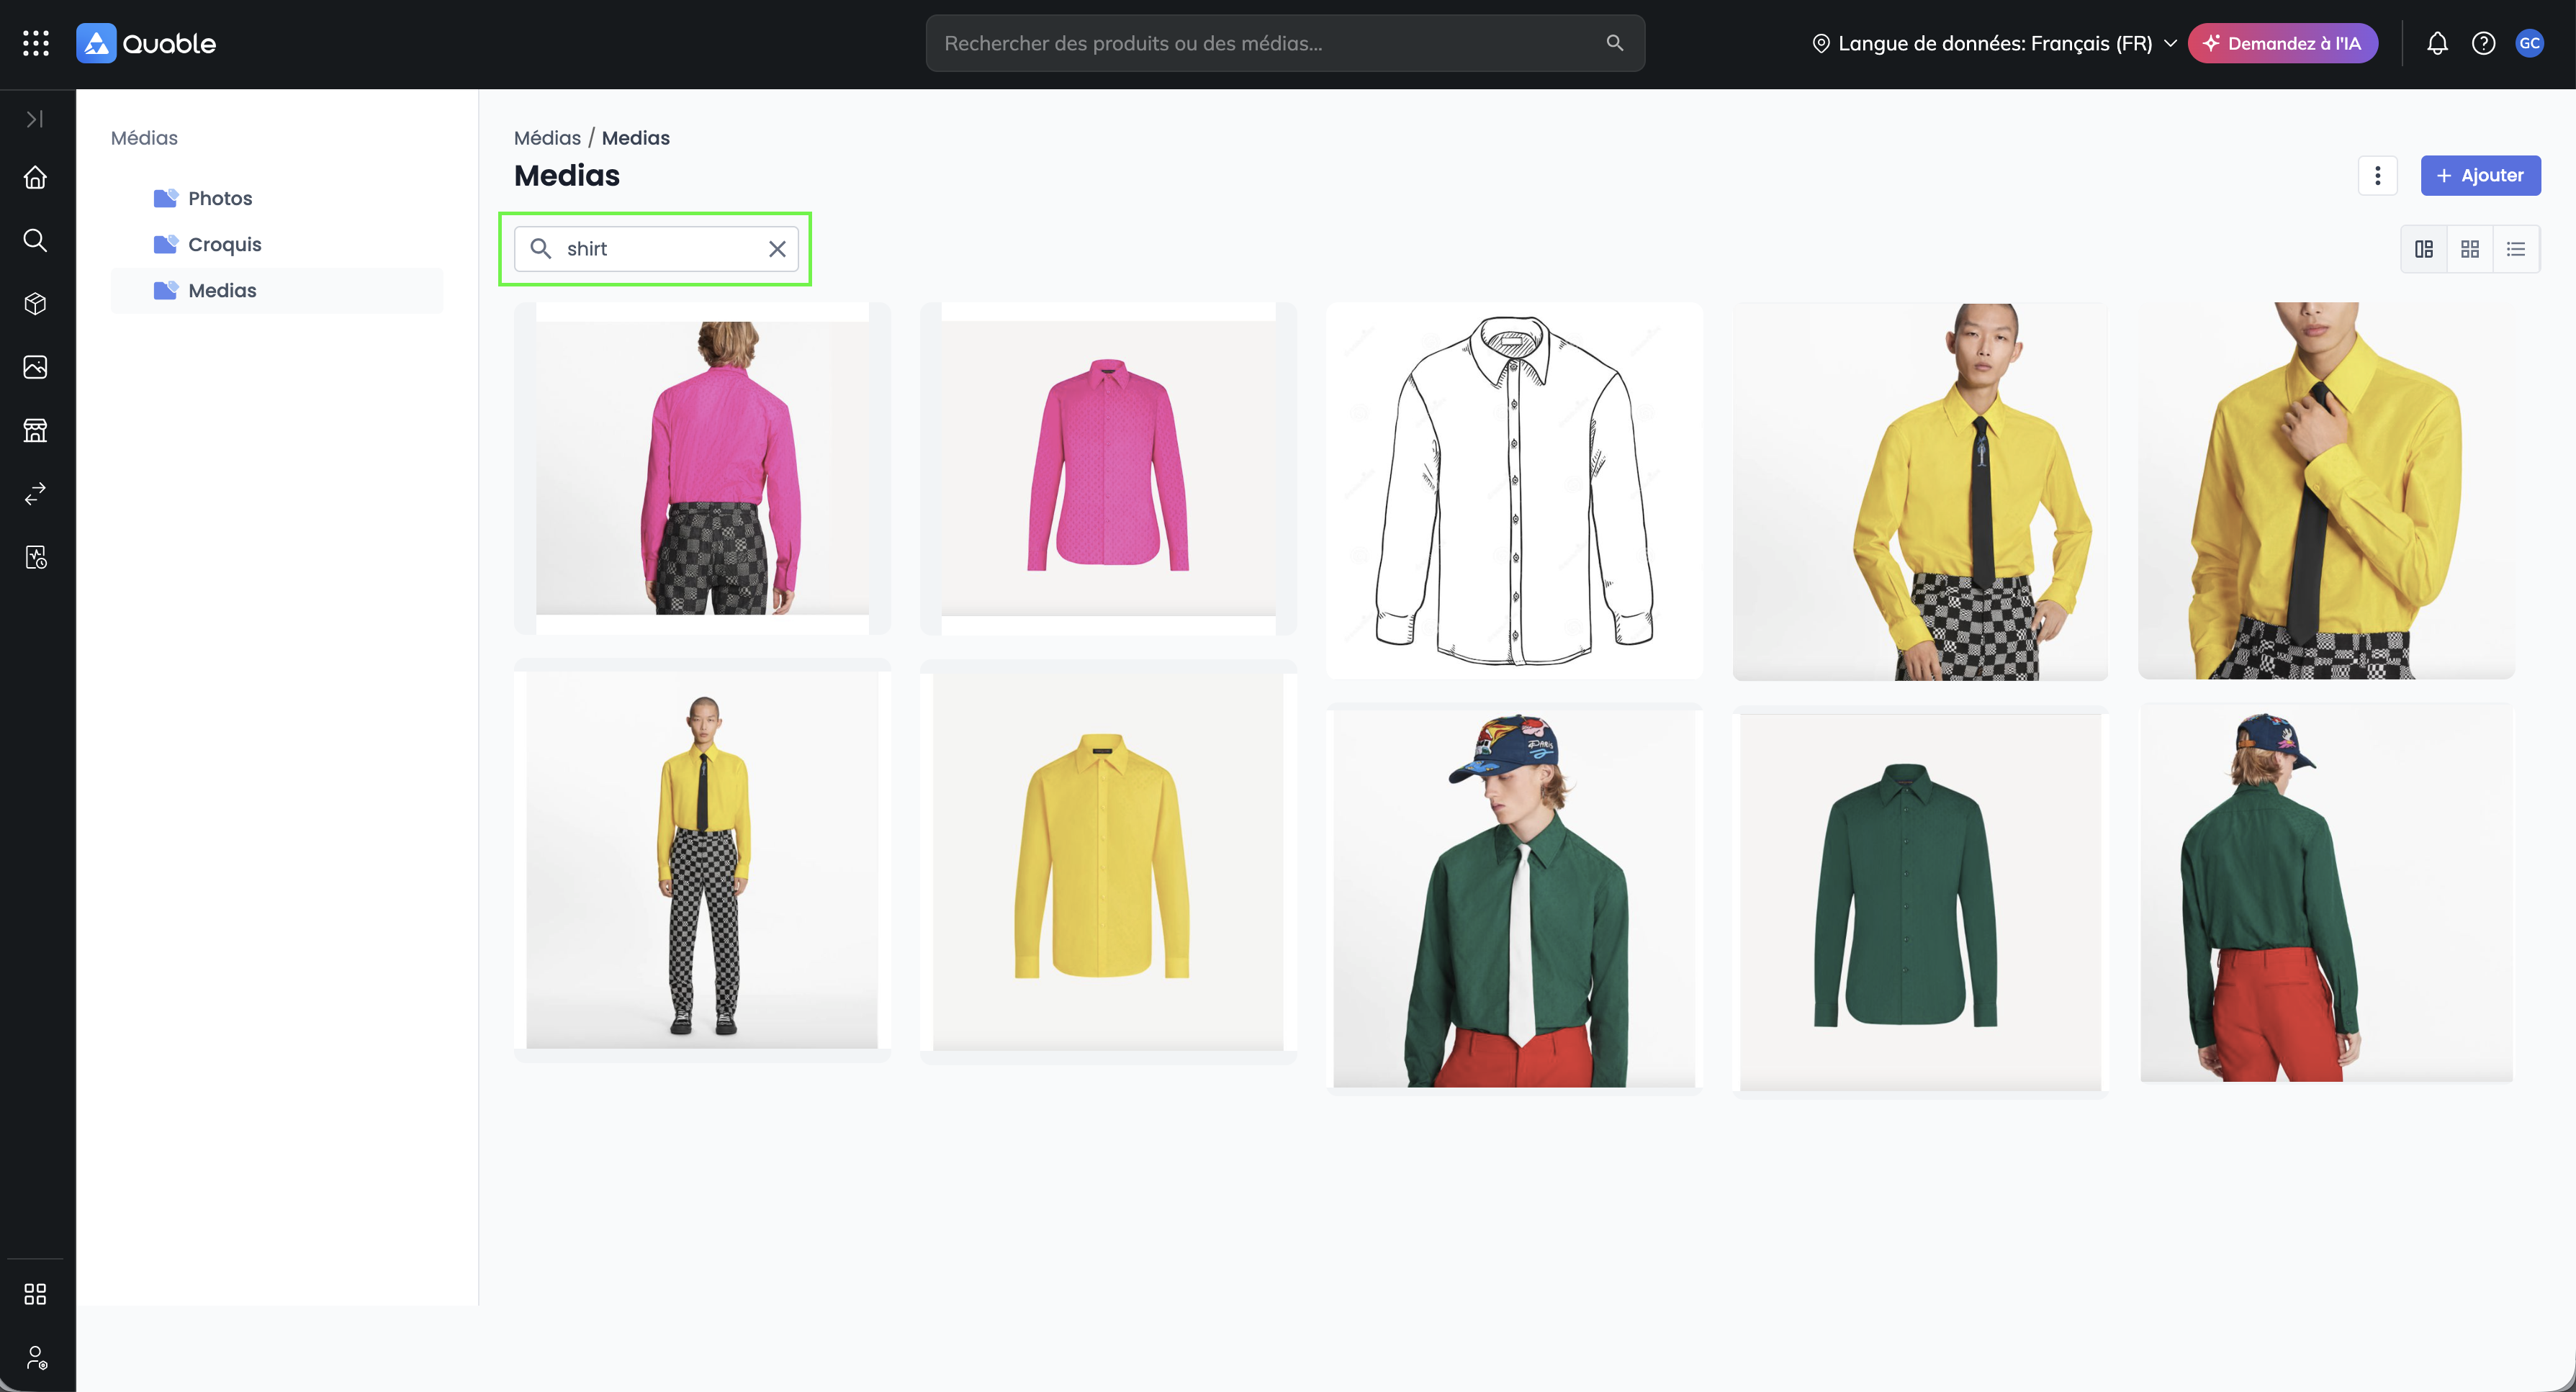
A search bar is available at the top of the Right panel. It filters the assets of the open classification.
- The search applies to the file name and code.
- It only filters the assets of the open classification, not those of its sub-classifications.
Good to knowTo search the entire DAM, or with more specific criteria, use advanced search.
Open and select an asset
| Action | Result |
|---|---|
| Single-click an asset | Selects the asset. Clicking it again deselects it. |
| Double-click an asset | Opens the Asset Sheet in the same tab. |
| Right-click > Open link in new tab (or Ctrl / Cmd + click) | Opens the Asset Sheet in a new tab. |
Bulk actions
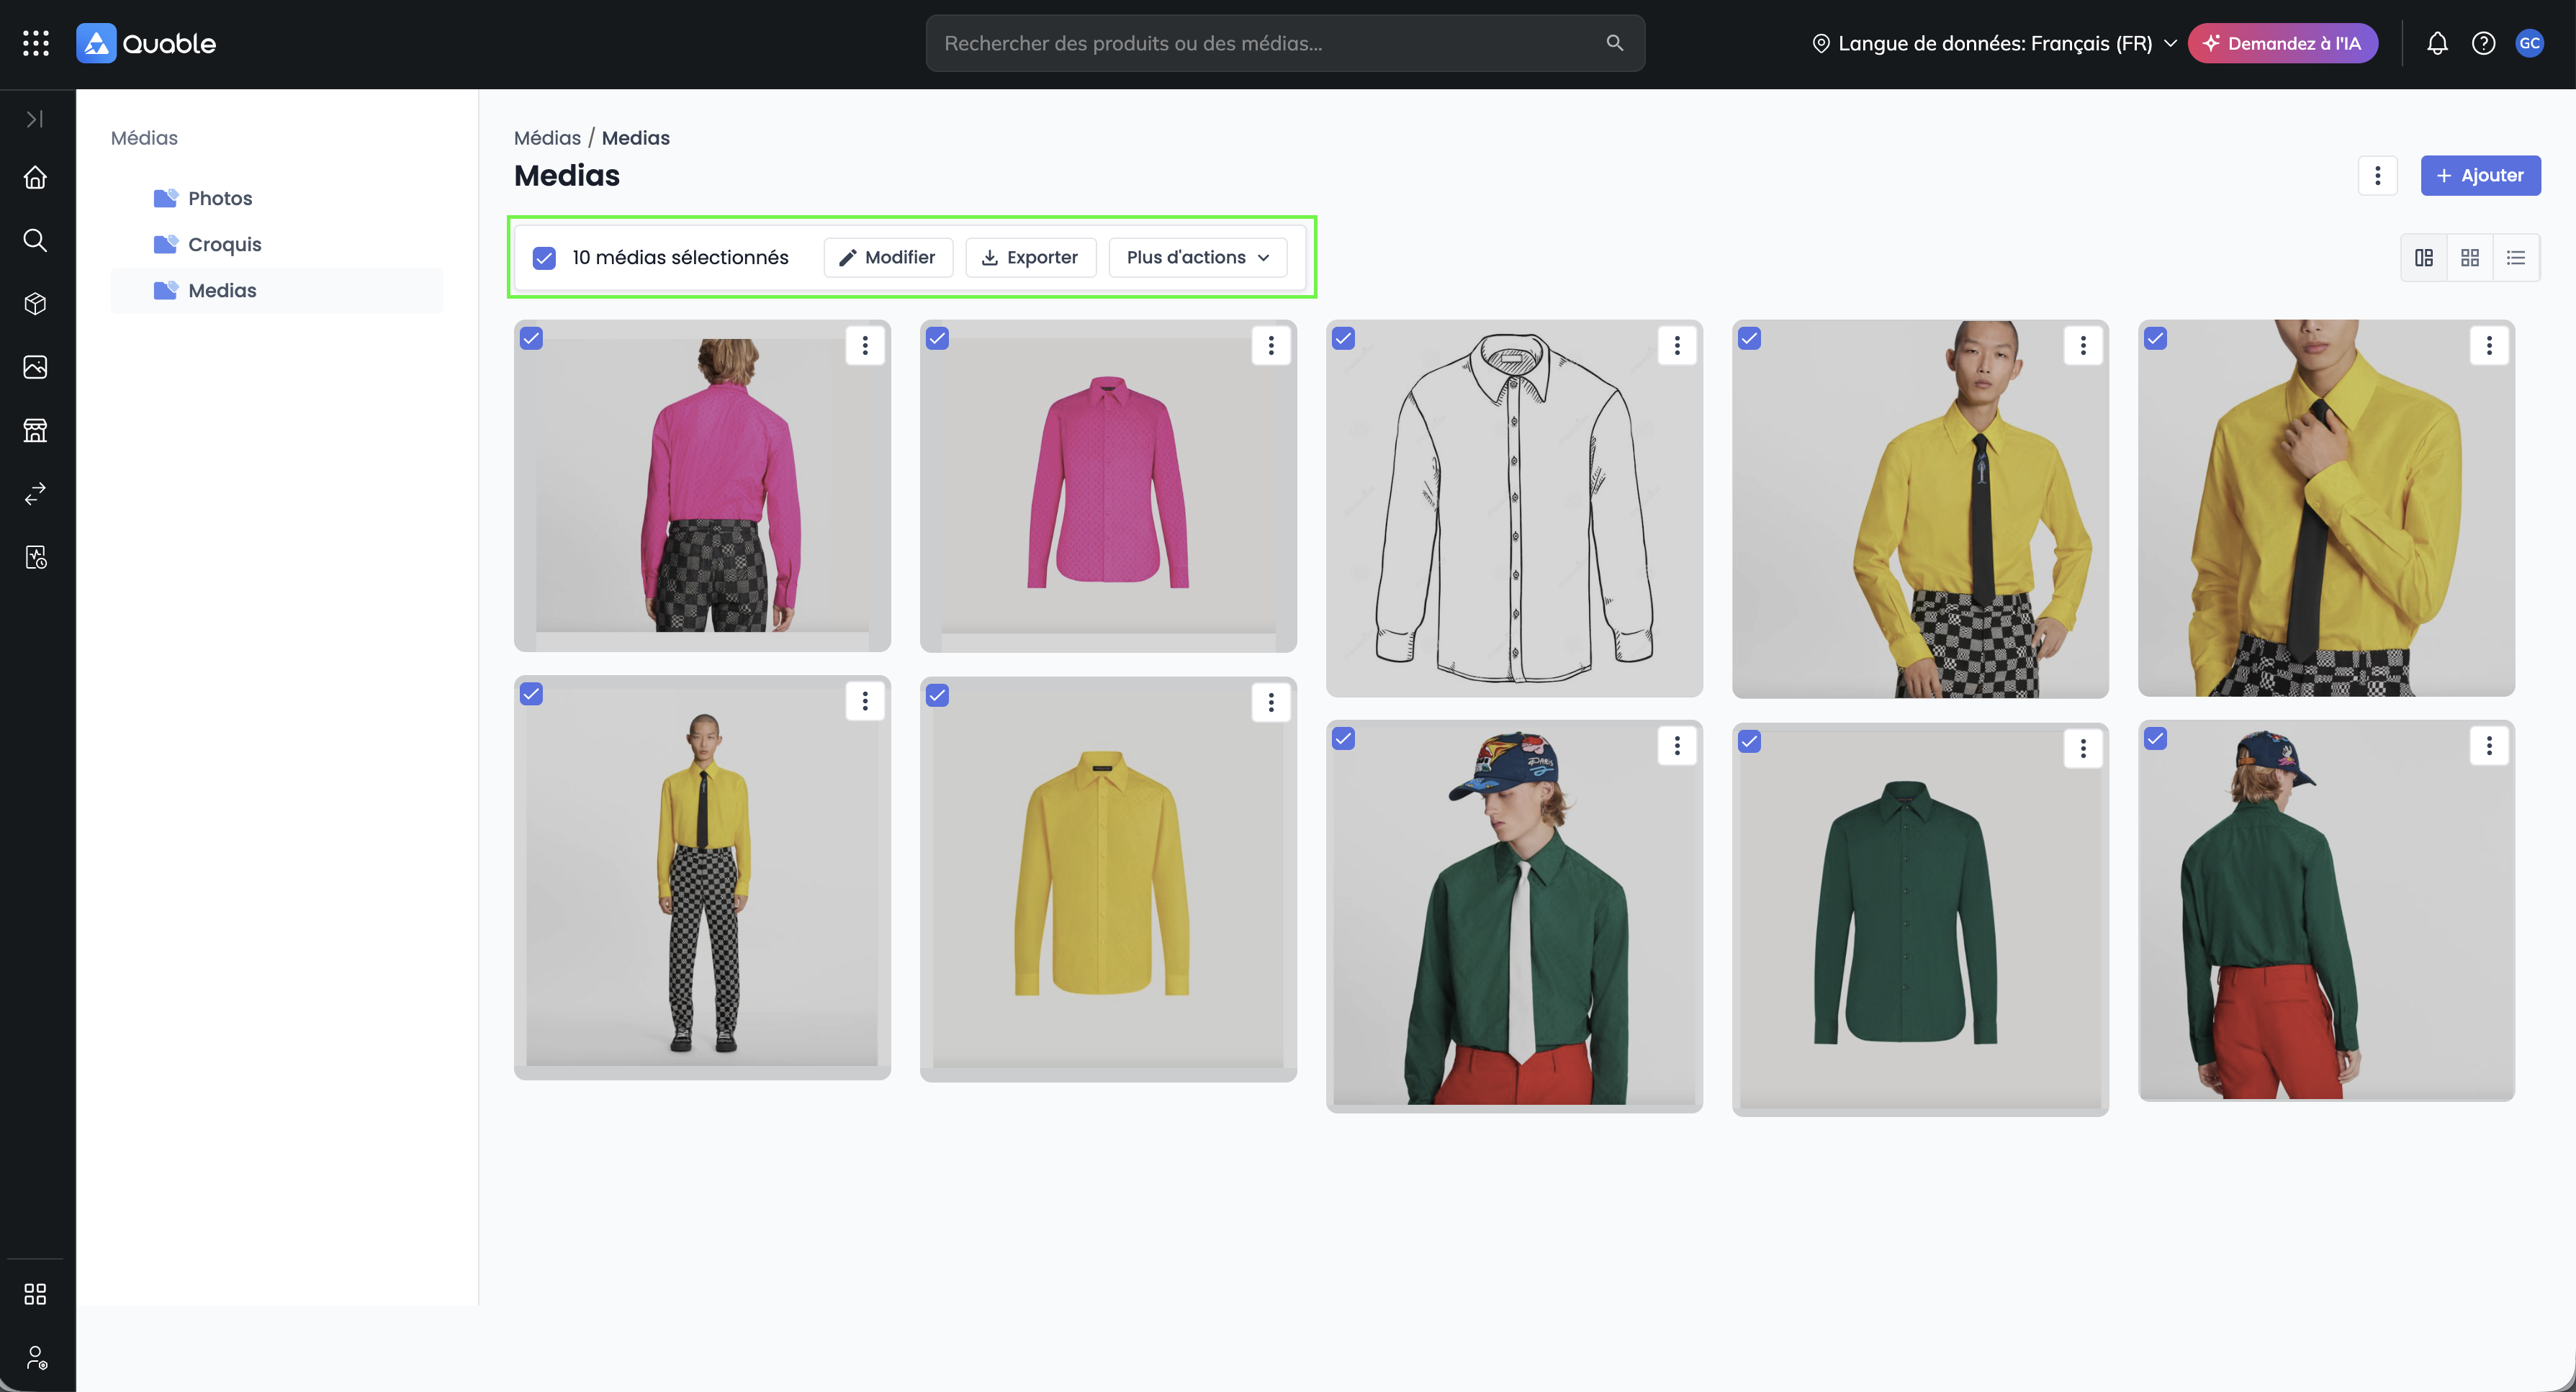
As soon as an asset is selected, an action bar is displayed. It shows the number of selected assets and provides a checkbox to select all.
The available actions are:
- Edit: bulk edit the attributes of the selected assets;
- Export results: export the selected assets;
- Move: move the assets to another classification;
- Links: link the assets to products;
- Delete: delete the selected assets.
The Edit and Export results actions work the same way as in advanced search.
Share a view
The page address (URL) changes as you navigate. It contains the open classification, the selected view, the page, the number of items per page and the search entered.
This means you can:
- copy the URL and send it to a colleague: they will see the same folder with the same view;
- use your browser's Back button to return to the previous state.
Good to knowA third party who opens the link sees the content filtered according to their own permissions. They may therefore see more or fewer assets than you.
Access rights to asset classifications
The administrator can restrict access to certain DAM classifications, as with product classifications. For a user assigned a DAM profile:
- only authorized classifications are displayed in the tree;
- quick search and advanced search only return assets from authorized classifications;
- unclassified assets are hidden;
- in the Assets tab of a Product Sheet or variant, unauthorized assets are hidden. The user can only link an existing DAM asset from among those they are authorized to access.
Limitations
- Data exports (CSV, XLSX) do not take the DAM profile into account: all data is exported, regardless of permissions.
- Administrators are not affected by DAM profiles: they see all assets.
- API call: A read / write token is not subject to this filter: it gives access to all assets.
A user without a DAM profile sees all assets. To create a DAM profile and assign it to users, see Classification access profiles.
New classifications
To create a new classification, select the DAM classification level (the highest level) and click the New classification button. A dialog box opens where you can define the new classification:
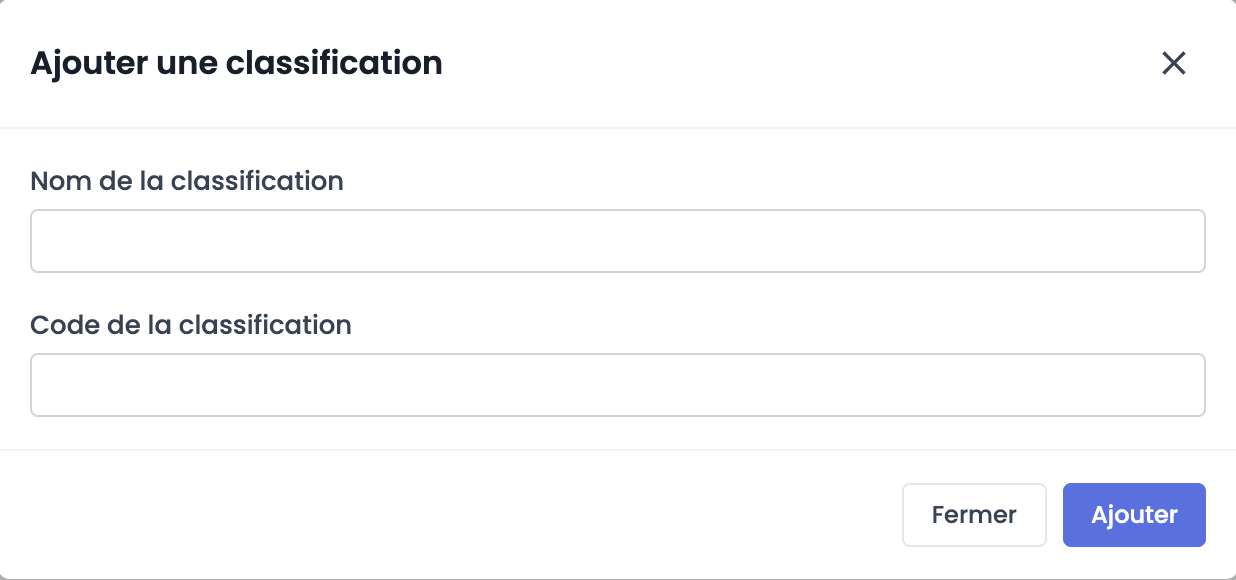
Enter the following information:
| Information | Description | Required |
|---|---|---|
| Name | The name of the classification. | Yes |
| Code | It is automatically generated by Quable PIM when you click in the Code field. It can only be edited when the classification is created. Once the classification is created, it can no longer be edited. | Yes |
Once you have entered all the information for the new classification, click the Add button to save your changes, or the Close button to return to the Assets page without saving the new classification.
New sub-classifications
To create a new sub-classification, select a "parent" classification. A list of its "children" (sub-classifications) is displayed. Continue navigating through the classifications until you are in the desired parent classification. The breadcrumb shows your location. Once you have found the level for the new sub-classification, repeat the process for New classifications.
LimitationsAssets can only be added at the lowest classification level.
If a classification:
- already contains assets, sub-classifications cannot be added.
- does not contain assets, sub-classifications can be added.
You cannot create sub-classifications in the dam_sort classification, because it is used to automatically associate new assets that do not yet have a classification (for example, when adding a new asset to a document).
Edit or Delete classifications
To edit or delete a classification, navigate through the classifications until you are in the desired classification. Then click the ⋮ menu next to the classification title, and click Edit or Delete. You can also use the ⋮ menu on the sub-classification card, from the parent classification.
-
Edit : The classification page is displayed. When you have finished editing the classification, click the Validate button to save your changes, or the Back button to go back and discard your changes.
-
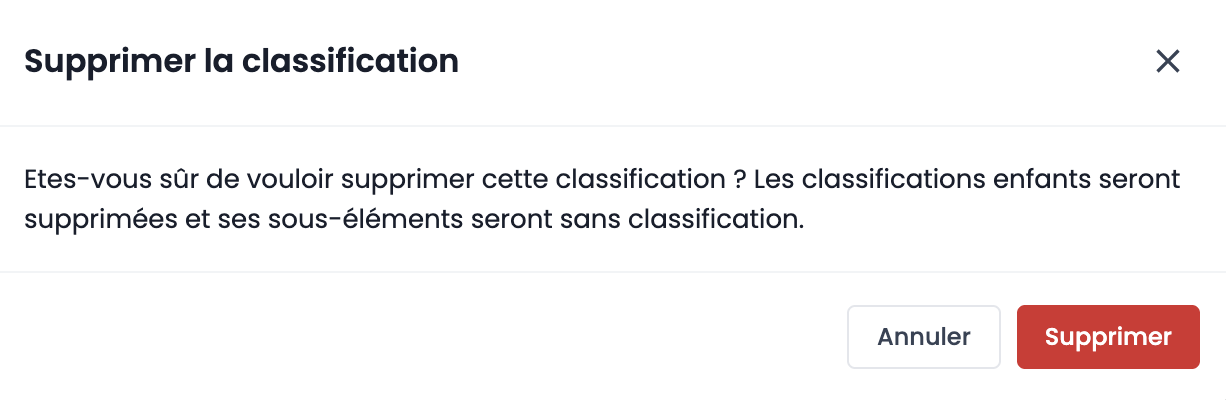
Delete: a confirmation window opens to confirm the deletion.
Change the order of classifications
In the CLASSIFICATION tree of the Left panel, you can drag and drop a classification to:
- change the order of two classifications at the same level;
- move a classification into another classification.
Add new assets
You can add new assets to your classifications from the Assets page, or you can add an asset to a Product Sheet via its Assets tab. These options are described in the following sections.
PermissionsSince assets are associated with Product Sheets through links, you must have the following link permissions to manage them: Create - Update - Delete.
From the Assets page (DAM)
The Assets page offers two ways to add assets:
-
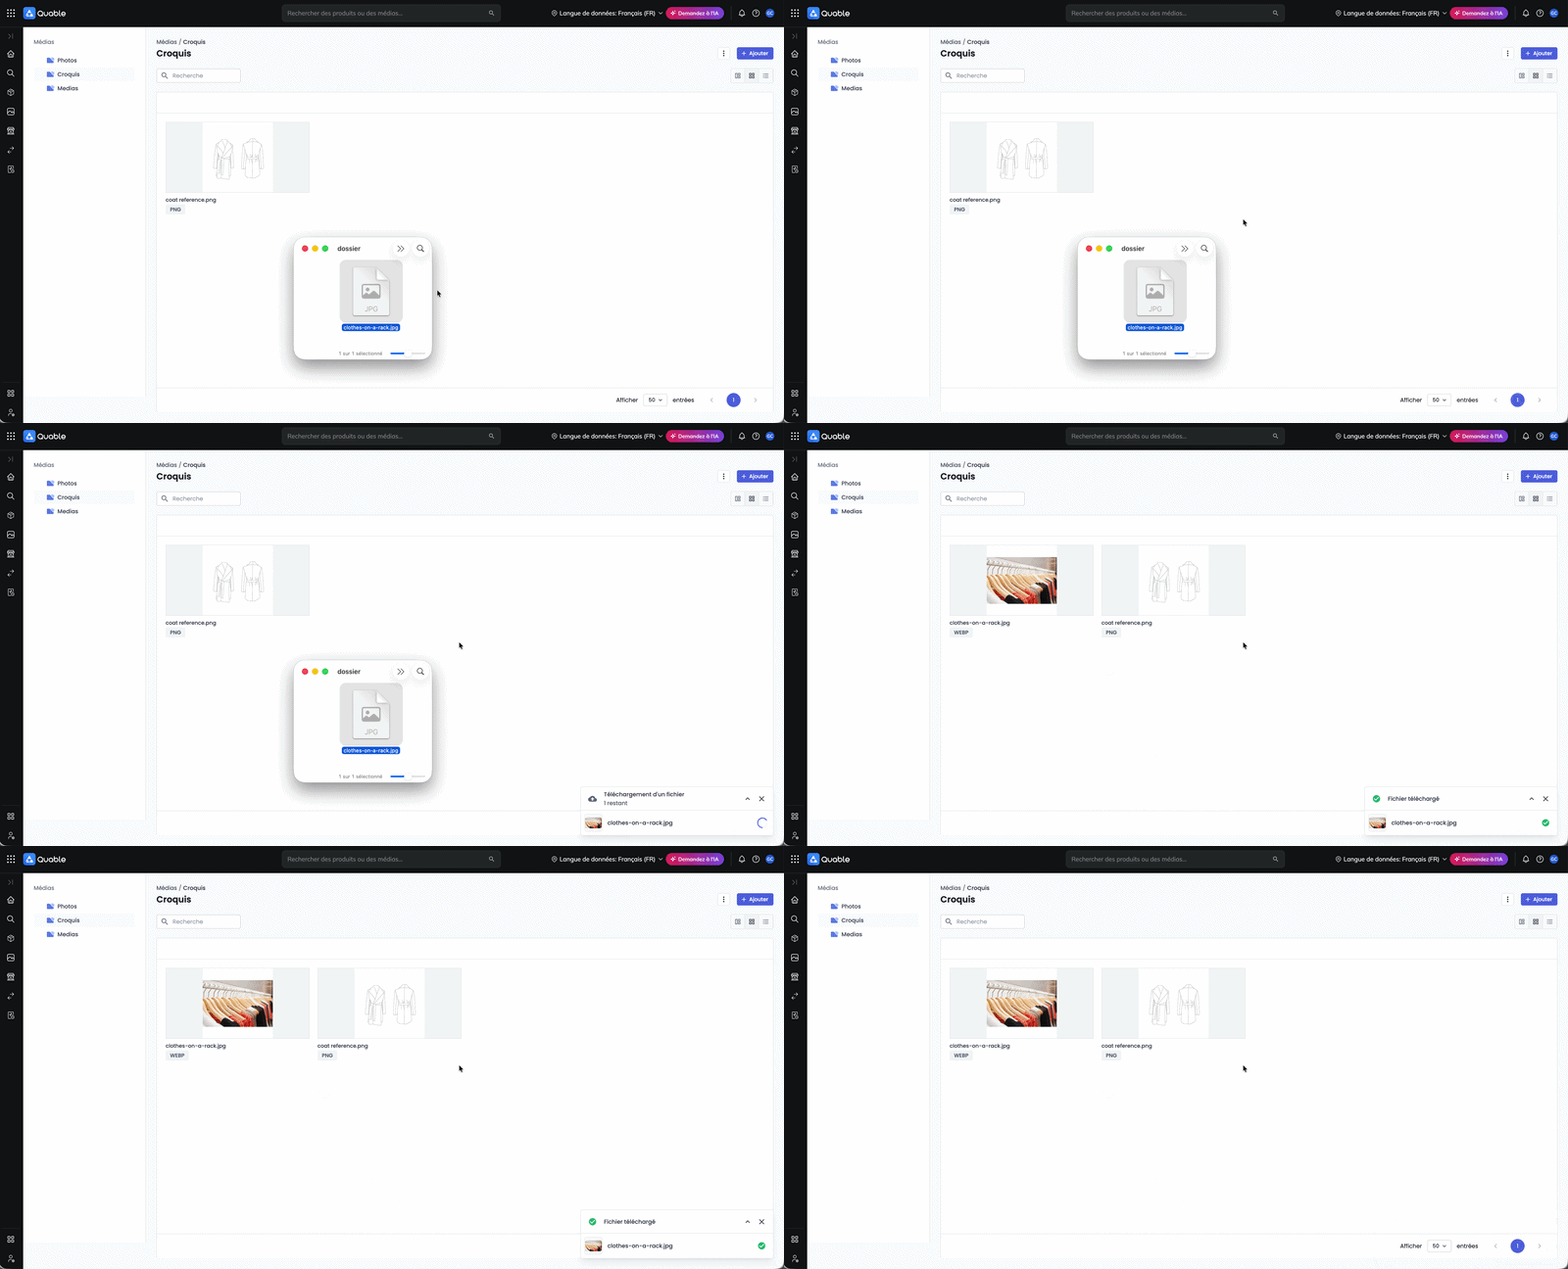
Drag and drop- Select a classification, then drag one or more assets into the Right Panel.
-
Add button - Select a classification, then click the Add button and choose Upload asset. A window opens where you can select assets from your computer / network.
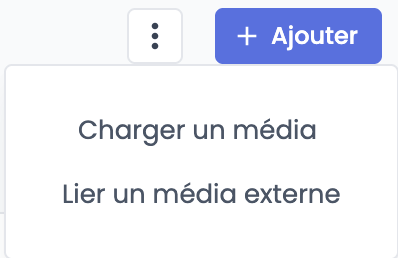
In both cases, the files are immediately added to the selected classification and a status indicator is displayed. Clicking the status indicator opens a window showing the status of each uploaded asset.
If the asset upload status is:
- In progress:
- Minimize closes the window and displays the status indicator again.
- Cancel all stops adding the assets, then closes the window and the status indicator.
- Success or Failed:
- Minimize closes the window and displays the status indicator again.
- Cancel all closes the window and the status indicator.
From a Product Sheet
To add an asset from a Product Sheet, open its Assets tab. Each asset link of the document type is displayed in its own section, with the number of assets already linked.
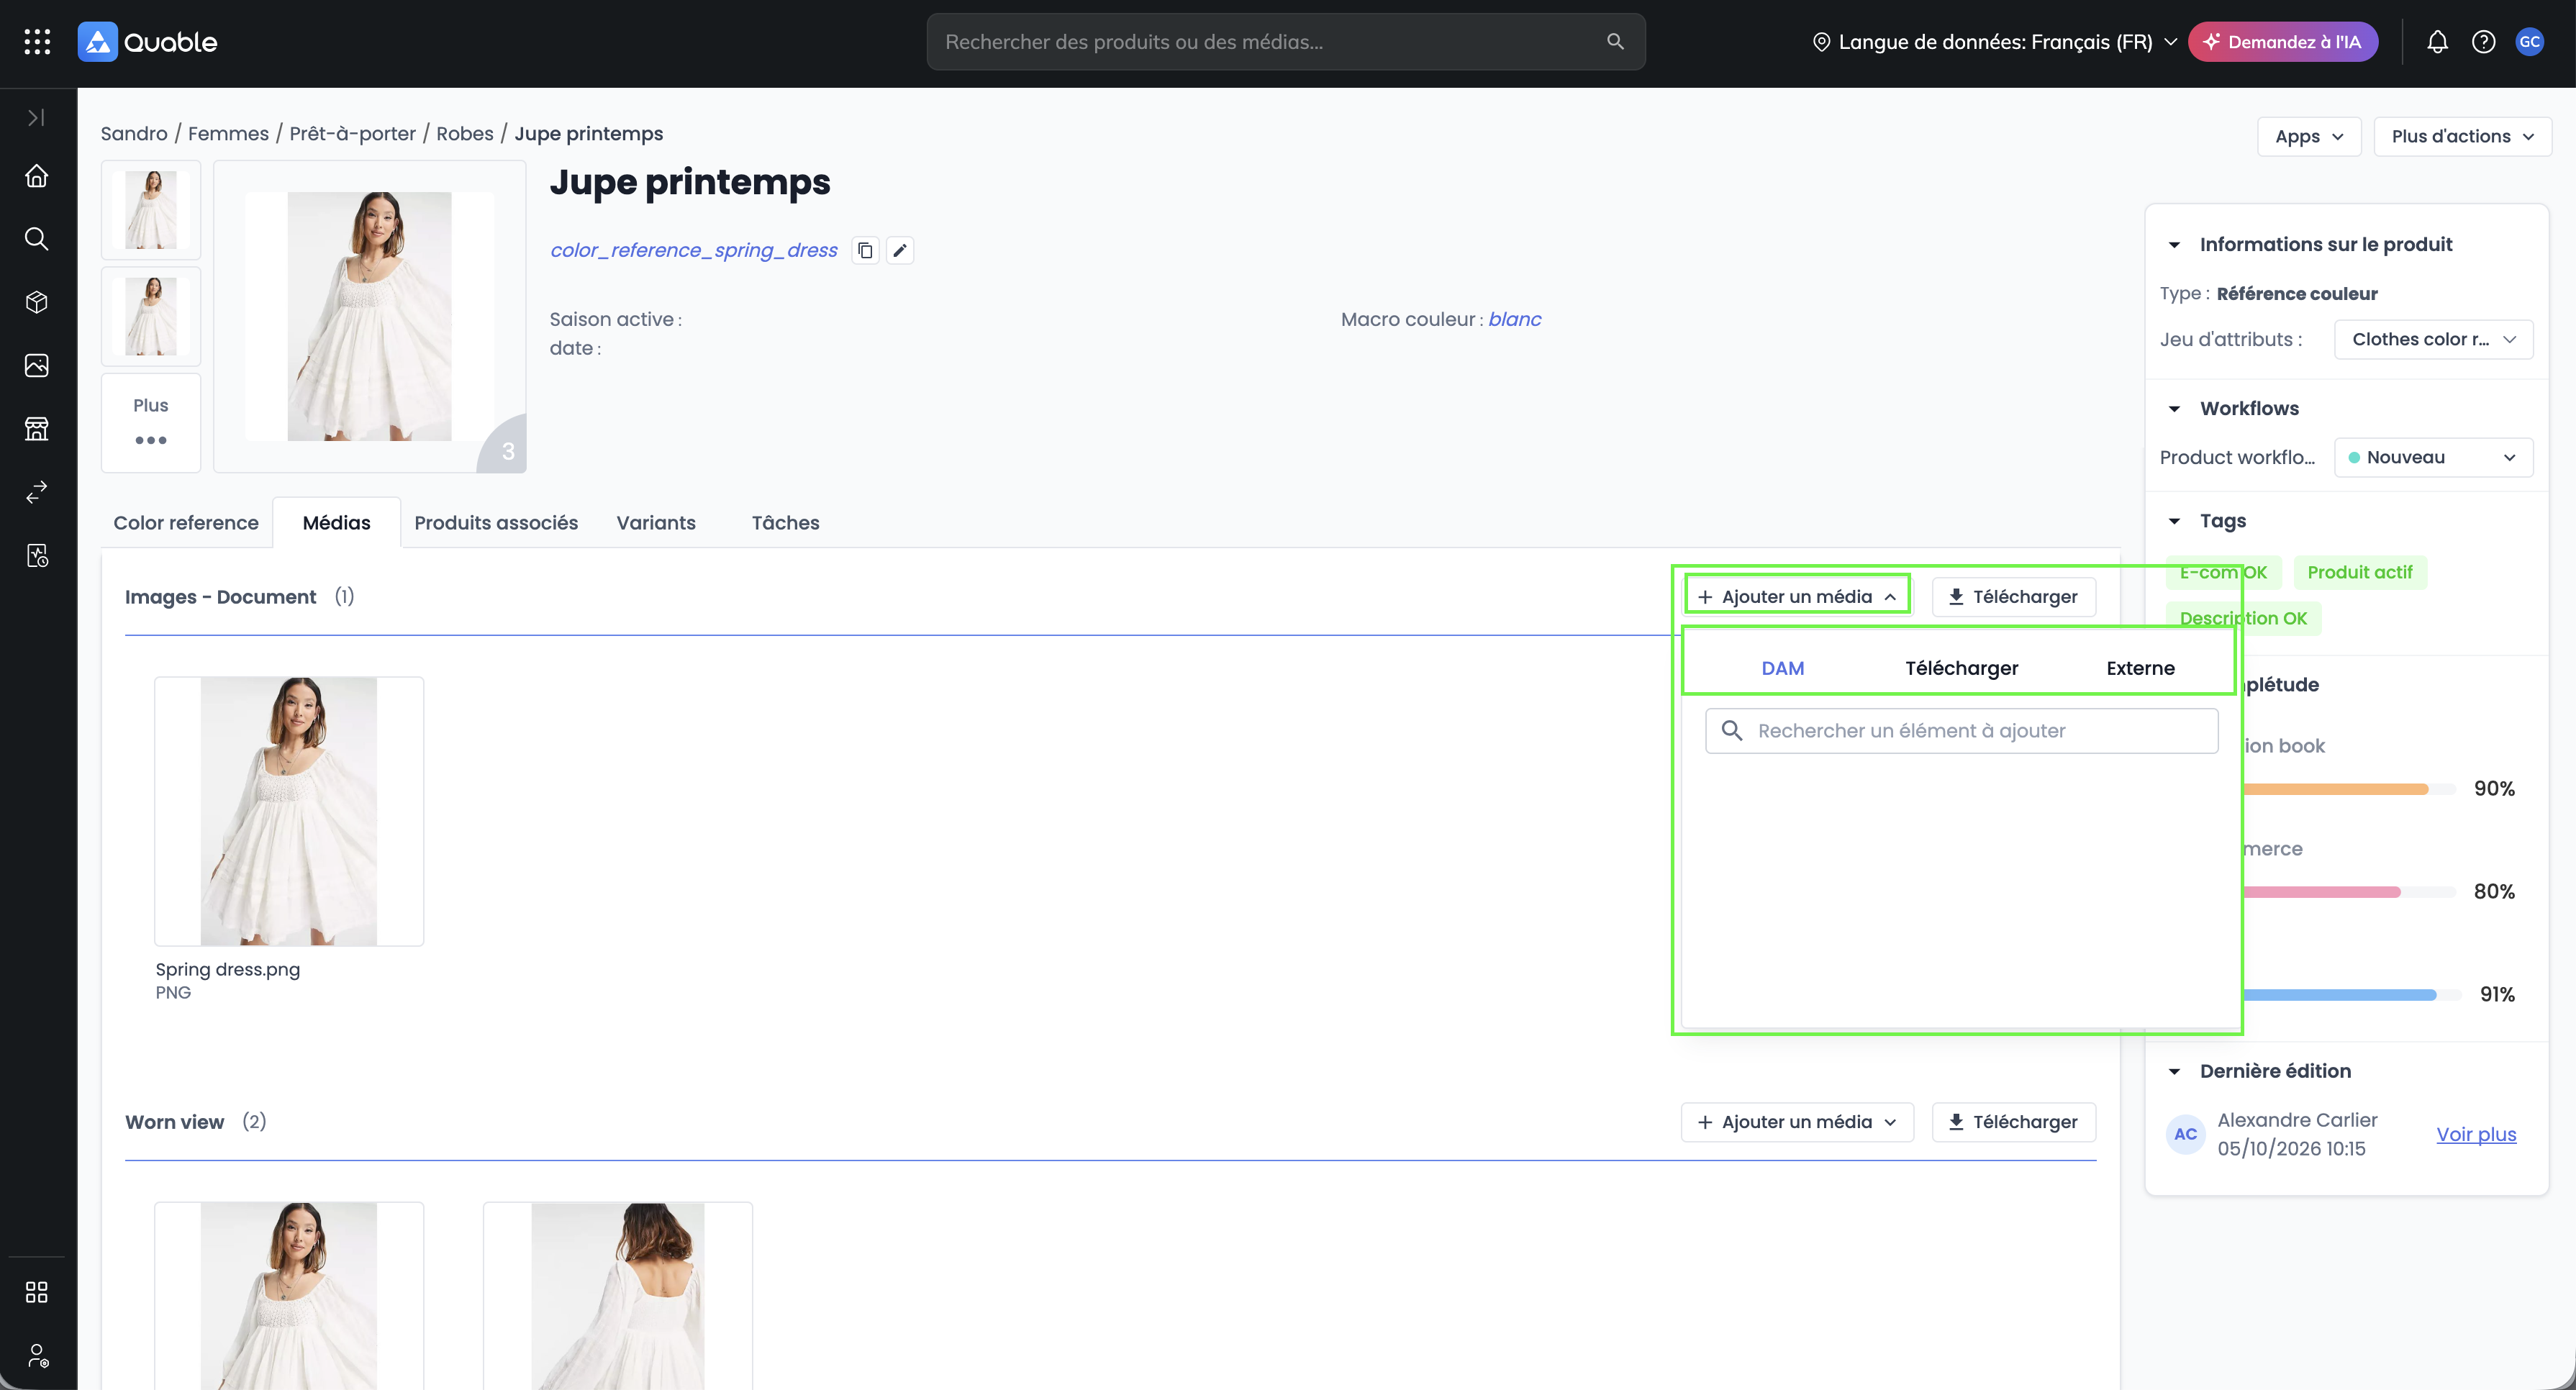
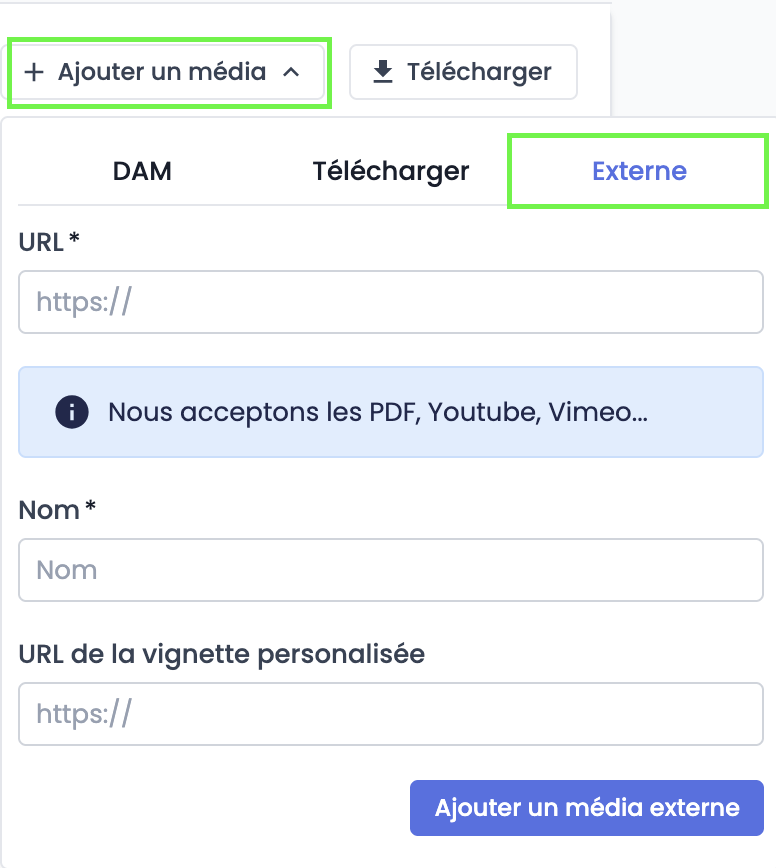
In the section for the desired link, click the Add asset button. A menu opens with three tabs:
- DAM: enter at least three characters of the Name or Code of an existing asset. Check an asset in the list to link it to the Product Sheet, or uncheck it to unlink it. Assets that are already linked appear checked.
- Upload: drop one or more files in the dedicated area, or browse your computer / network to select them. The import starts automatically.
- External: enter the file URL and its name, then confirm to create an external asset. A thumbnail URL can optionally be added.
You can also drag and drop files directly into a section: into the drop zone if the section is empty, or onto the list of assets already linked.
Good to knowIf an imported file has the same name as an existing DAM asset, a window is displayed. Choose whether to keep the existing asset or replace it, then click Add asset. By default, the existing asset is not overwritten.
User with a DAM profileIf your access to asset classifications is restricted by a DAM profile, only the DAM tab is available: you can link an existing asset from among those you are authorized to access. The Upload and External tabs are not available.
In all cases, the asset(s) are automatically associated with the Product Sheet, in the section's link.
Limitations
- The maximum length of an asset file name cannot exceed 100 characters. Any excess characters are automatically truncated from the asset file name.
- A link can be limited to a maximum number of assets. Once this number is reached, adding is disabled. If you import more files than there are remaining slots, the import is rejected.
- The search in the DAM tab displays a maximum of 50 results. Refine your entry if the asset you are looking for does not appear.
From a link: External assets
External assets let you add images, videos or any other type of asset hosted online to the PIM, via a secure public link (HTTPS). External assets can be used to illustrate:
- Product Sheets or variants,
- classifications,
ImportantThe link to the external asset must be:
- HTTPS only,
- public (no login and password, no VPN),
- directly accessible.
When creating an external asset, fill in the following fields:
- Asset URL (required – must be HTTPS),
- Asset name (required),
- Custom thumbnail URL (optional but recommended – must be HTTPS).
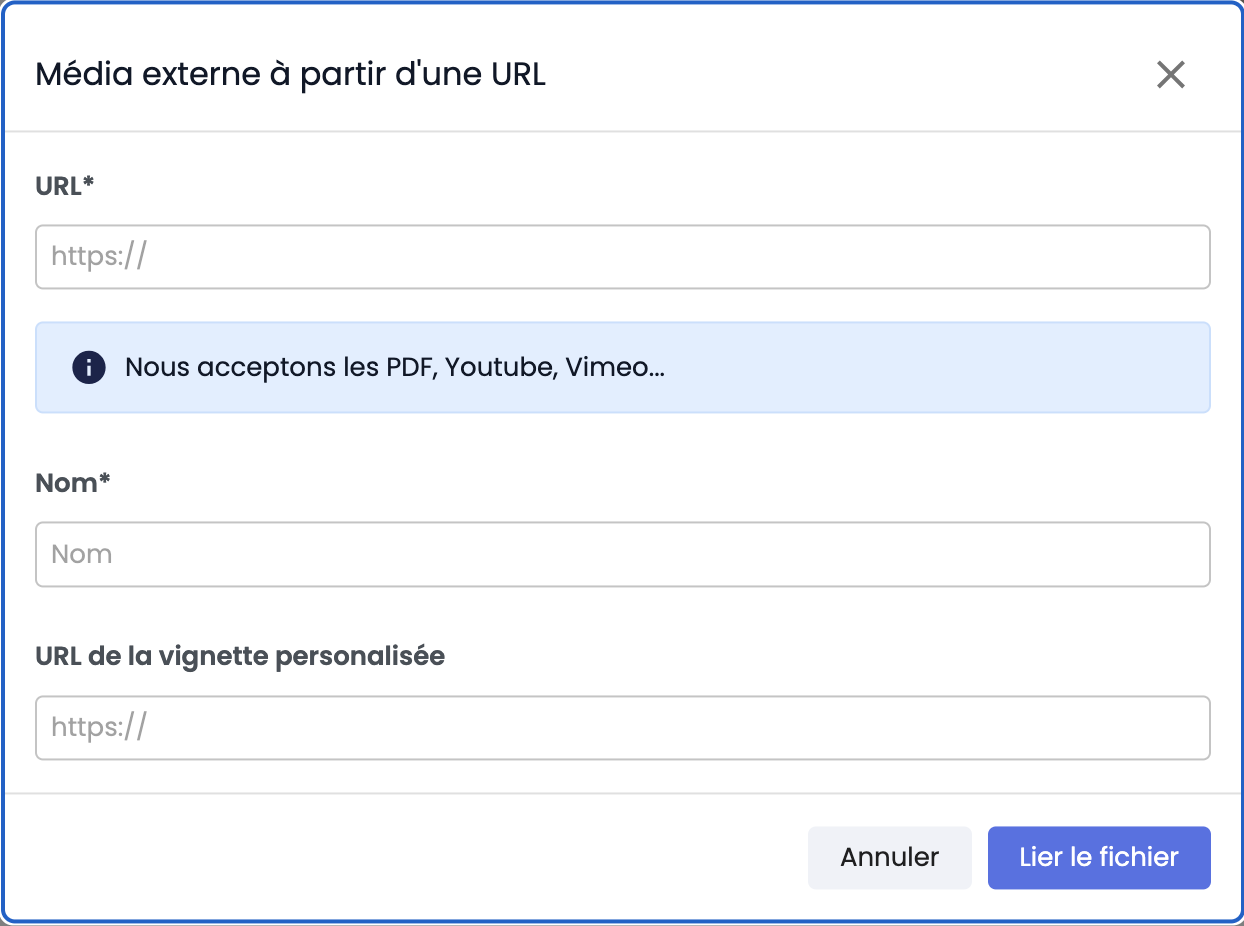
- Click Link file.
⚠️ A notification is displayed to confirm that the asset has been created.

Good to know
- Custom thumbnails:
- They help speed up display, especially for videos or large files, particularly in advanced search results.
- Custom thumbnails take priority over the original visual.
- For videos, the custom thumbnail is displayed directly.
Limitations
- User permissions on external assets are the same as those for assets imported directly into the DAM.
- External assets cannot be bulk downloaded because they are not stored in the DAM.
Import an external asset
From a Product Sheet or variant
Go to the Assets tab, then click the arrow next to the Add asset button. Select the External tab.
From the DAM
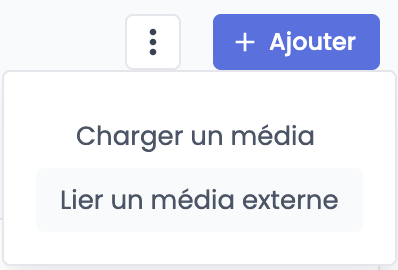
Go to the DAM classification where you want to add the external asset. Click Add and choose Link external asset.
Bulk import of external assets
From data flows:
You can bulk import external assets using an import file from data flows, by importing a file containing the URLs (HTTPS only).
From the API:
Good to knowWhen an external asset is created, the system checks that the file is accessible via an HTTP GET request with the header
User-Agent: "Quable PIM". A200 OKresponse is required. If the server returns an error (e.g., 403 due to an SSL certificate issue), the asset will be considered invalid.
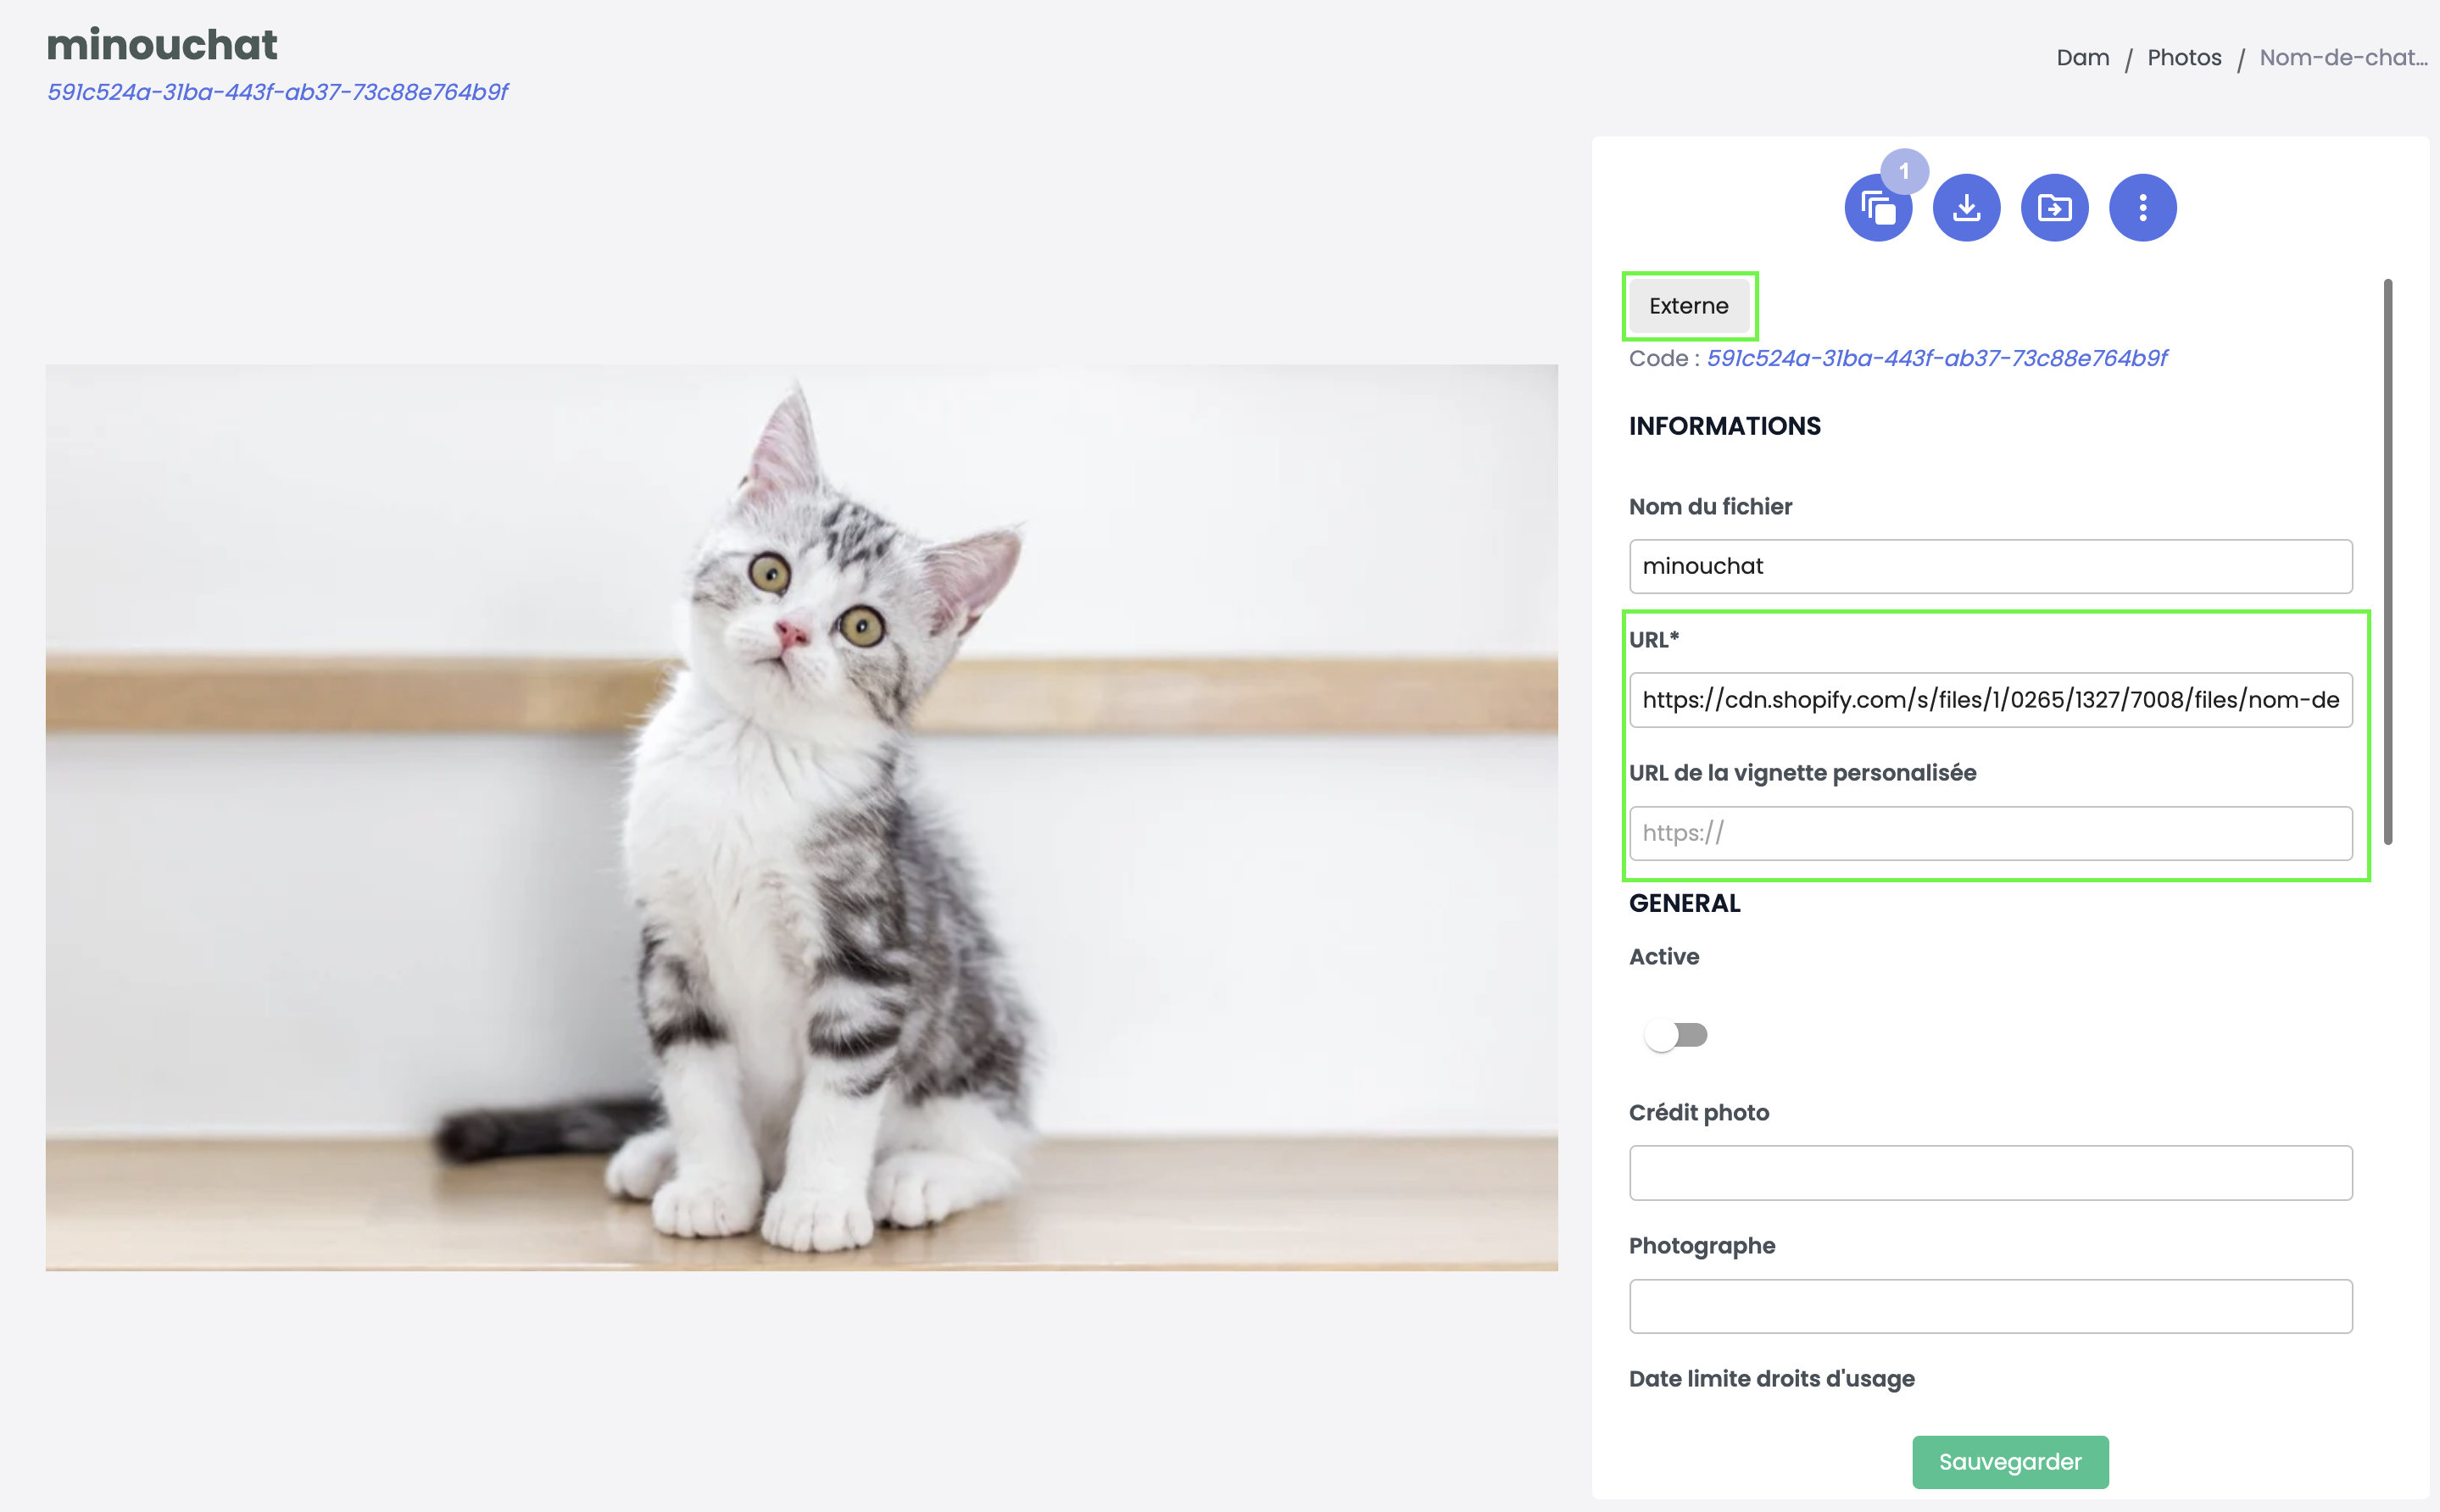
External Asset Sheet
- An "External" label is displayed at the top left of the attribute list,
- The following information is visible:
- URL,
- Custom thumbnail URL,
- All other Asset Sheet attributes are available
⚠️ Warning! Technical metadata (XMP, color space, size…) is not available.
Updated about 15 hours ago