Managing Data and Content Distributed in a Channel
Configure the data associated with products and/or assets within a distribution channel.
Learning objectivesCustomize data distribution: Configure the information, assets, and associated products distributed through your channels to meet your specific needs.
Now that you know how to:
- configure distribution channels,
- configure their classifications,
- configure their content using manual selections or saved dynamic selections,
let’s look at how to customize which content is distributed, meaning the attributes of Product Sheets, as well as the assets and other associated products. Quable PIM gives you full control over the information you choose to share. You can customize distributed data, meaning:
- Associated attributes,
- Links with assets and associated products,
Good to know
- Data distribution customization is consistent across the entire channel.
These settings ensure a tailored distribution adapted to your needs across each of your channels.
How to proceed? Follow the steps below.
Distributed Data
LimitationsThe link and attribute distribution settings described here apply only to API channels. Channels distributed via flat file data feeds are not included.
Data distribution settings apply uniformly to the entire distribution channel across the full classification hierarchy. These settings allow you to configure the distribution of:
- Attributes related to Product Sheets (and their variants), assets, classifications, and other linked products. To define the attributes you want to distribute, click the Attributes tab, accessible from the channel edit page.

- Links to assets and other associated products. To define the asset links and product links you want to distribute, click the Link Types tab, accessible from the channel edit page.

Good to know
- Configuring distributed data is mandatory. If no settings are configured, no Product Sheet or asset will be distributed.
- The principle is simple: only checked data is distributed. Unchecked data is not included.
Select Link Types to Distribute
Follow these steps to configure distributed link types:
- Go to Data > Channels and click the edit button of the desired distribution channel.
- Click the Link Types tab.
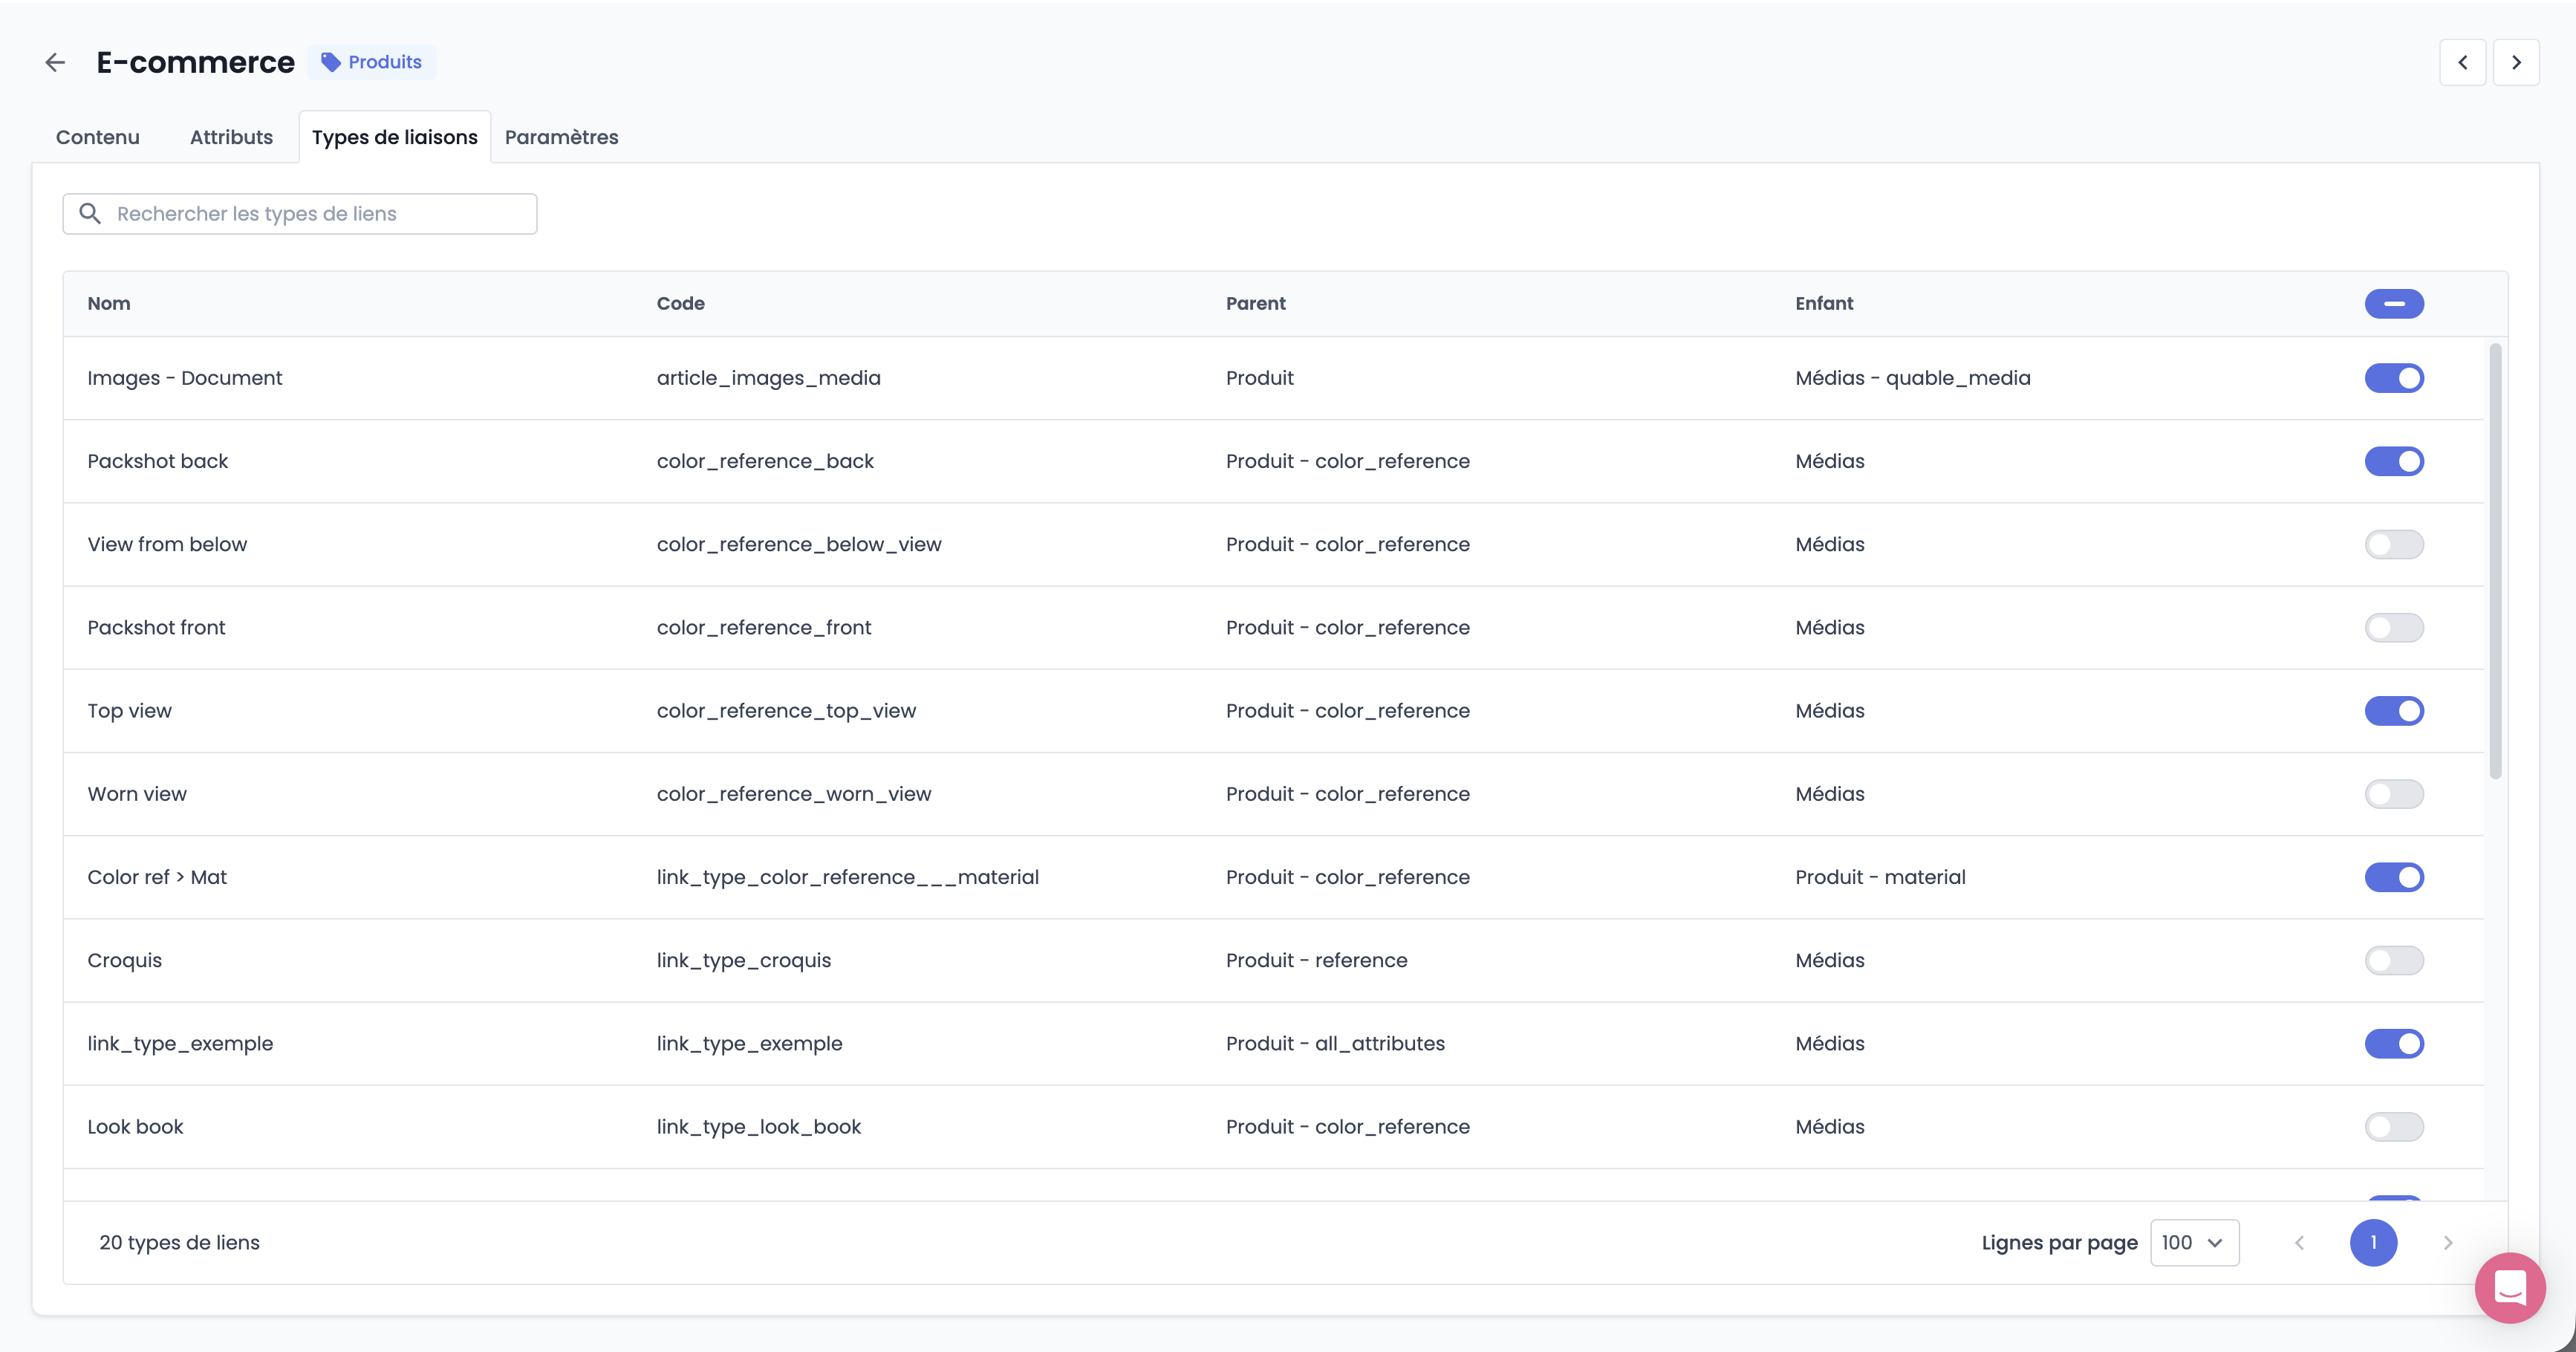
- In the window, select the links to distribute by checking the toggles corresponding to the assets and other associated products you want to include.

Good to know
- If many link types are available, multiple pages may be displayed. Use the search bar to browse link types.
- Click Save to confirm.
Select Attributes to Distribute
Follow these steps to configure distributed attributes:
- Go to Data > Channels and click the edit button of the desired distribution channel.
- Click the Attributes tab.
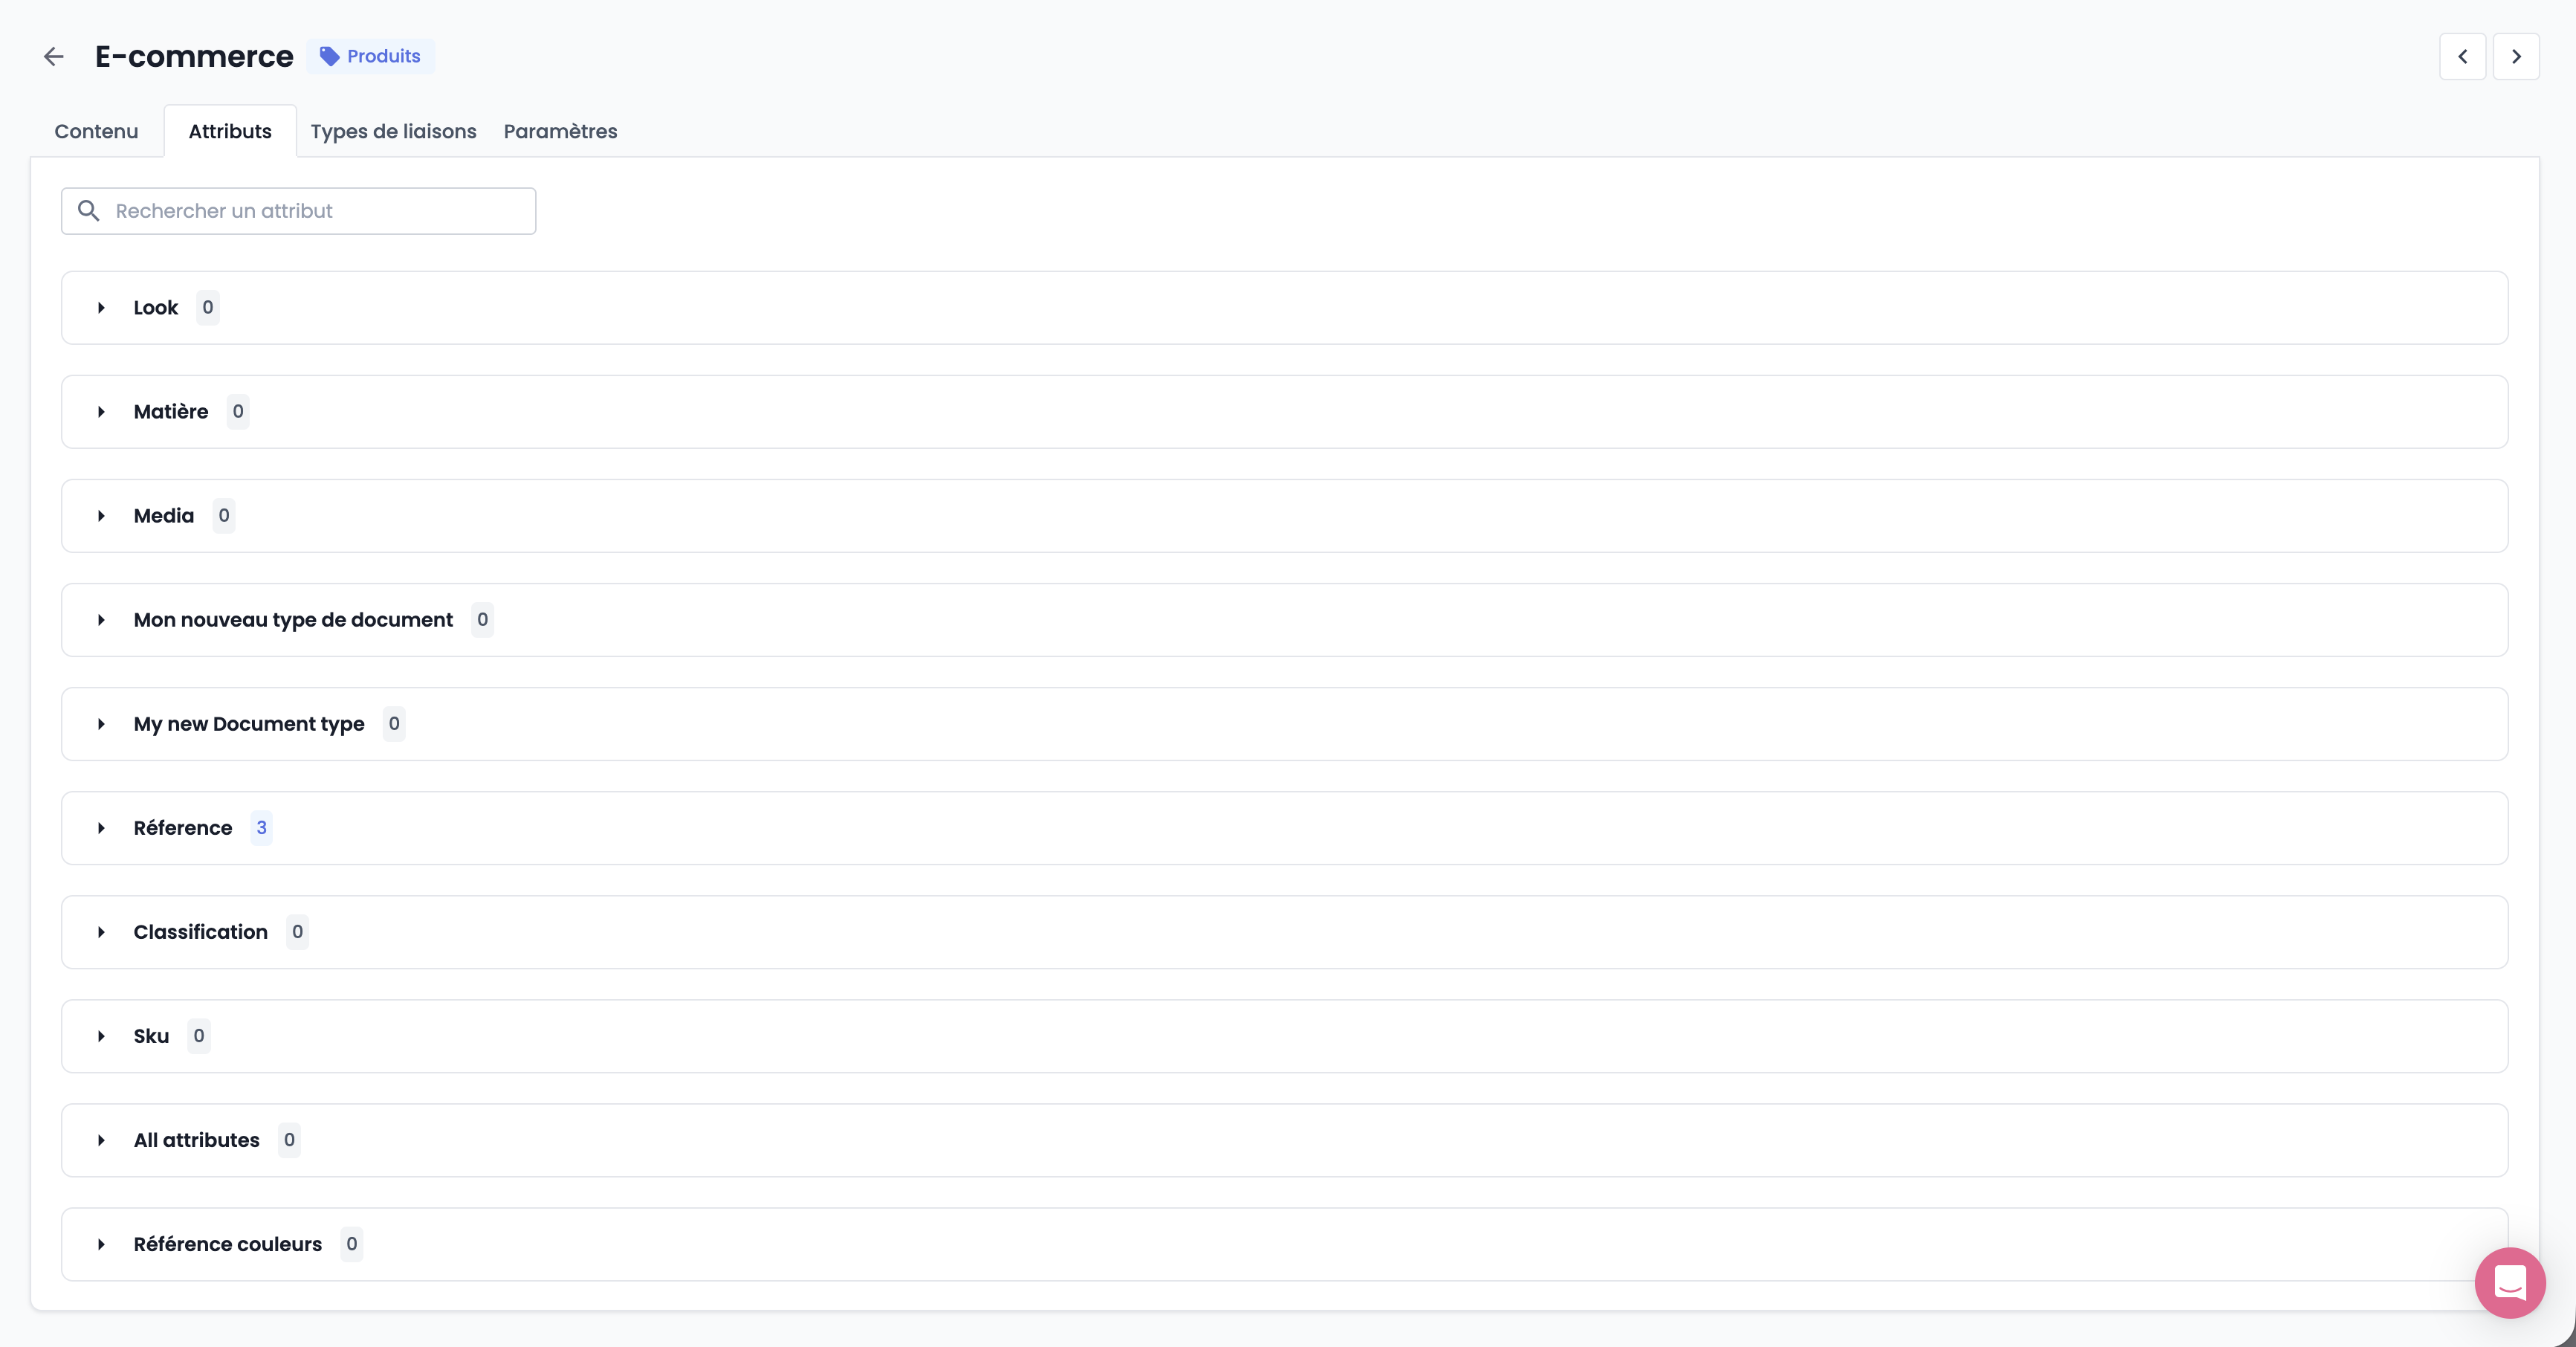
- In the window, select the attributes to distribute by toggling the switches corresponding to the attributes you want to include.

Good to know
- Expand each product type to configure attributes for all products.
- Click Save to confirm.
And that’s it! You now know how to precisely configure data distribution by defining links, associated content, and attributes for each type of shared object.
SummaryDistributed data management:
- Applies only to API-distributed data
- Data management is configured at the root node level,
- Configure links to assets and associated products,
- Select distributed attributes by product type, variants, classifications, and assets,
- Data distribution is consistent across the entire channel.
Next Chapter
Congratulations! You have completed the "Create Data Distribution Channels" module. Continue your learning by exploring the next module in the Contributor Training.
Updated 22 days ago