Roles
Roles allow you to designate a collection of actions that a specific set of users can perform.
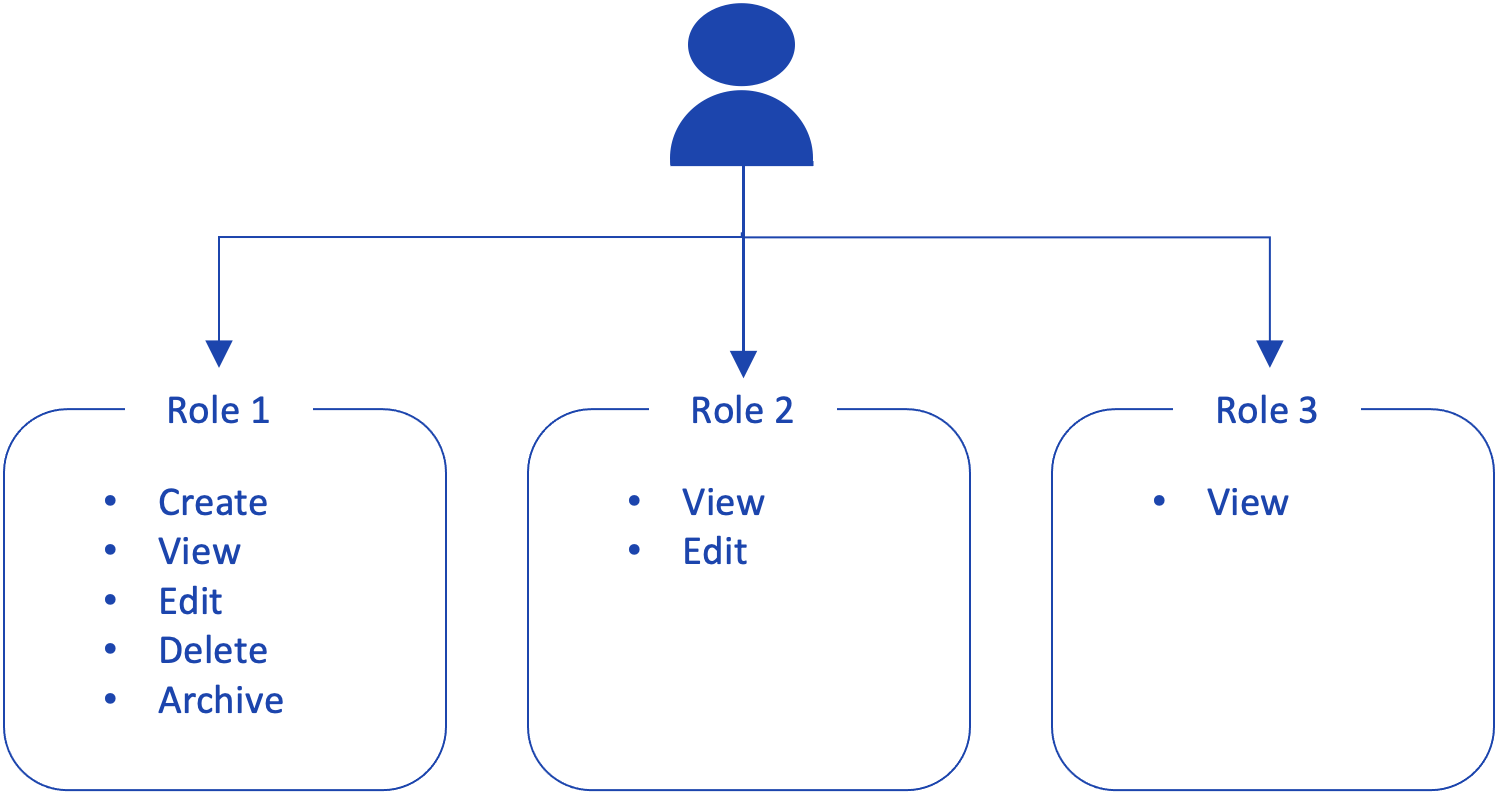
Roles ensure that:
- only associated users are able to perform authorized actions,
- the appropriate buttons or icons are displayed in the PIM interface. If a role does not have permission to perform an action, the button or icon for that action is not displayed.
Users can be associated to several roles.
Administrator users have all permissions, no matter their associated role(s). See Users.
When you click on Roles from the sidebar, the Roles page is displayed. The page includes a brief description of the feature, a link to this documentation, and a list of current roles, if any.
If no roles have been created yet, a Create A Role button is displayed in both the Current roles section and the top right corner of the page.
If roles have already been created, a list of their names with colored icons of the initials of the users associated with the role are displayed and the Create A Role button is only displayed in the top right corner of the page.
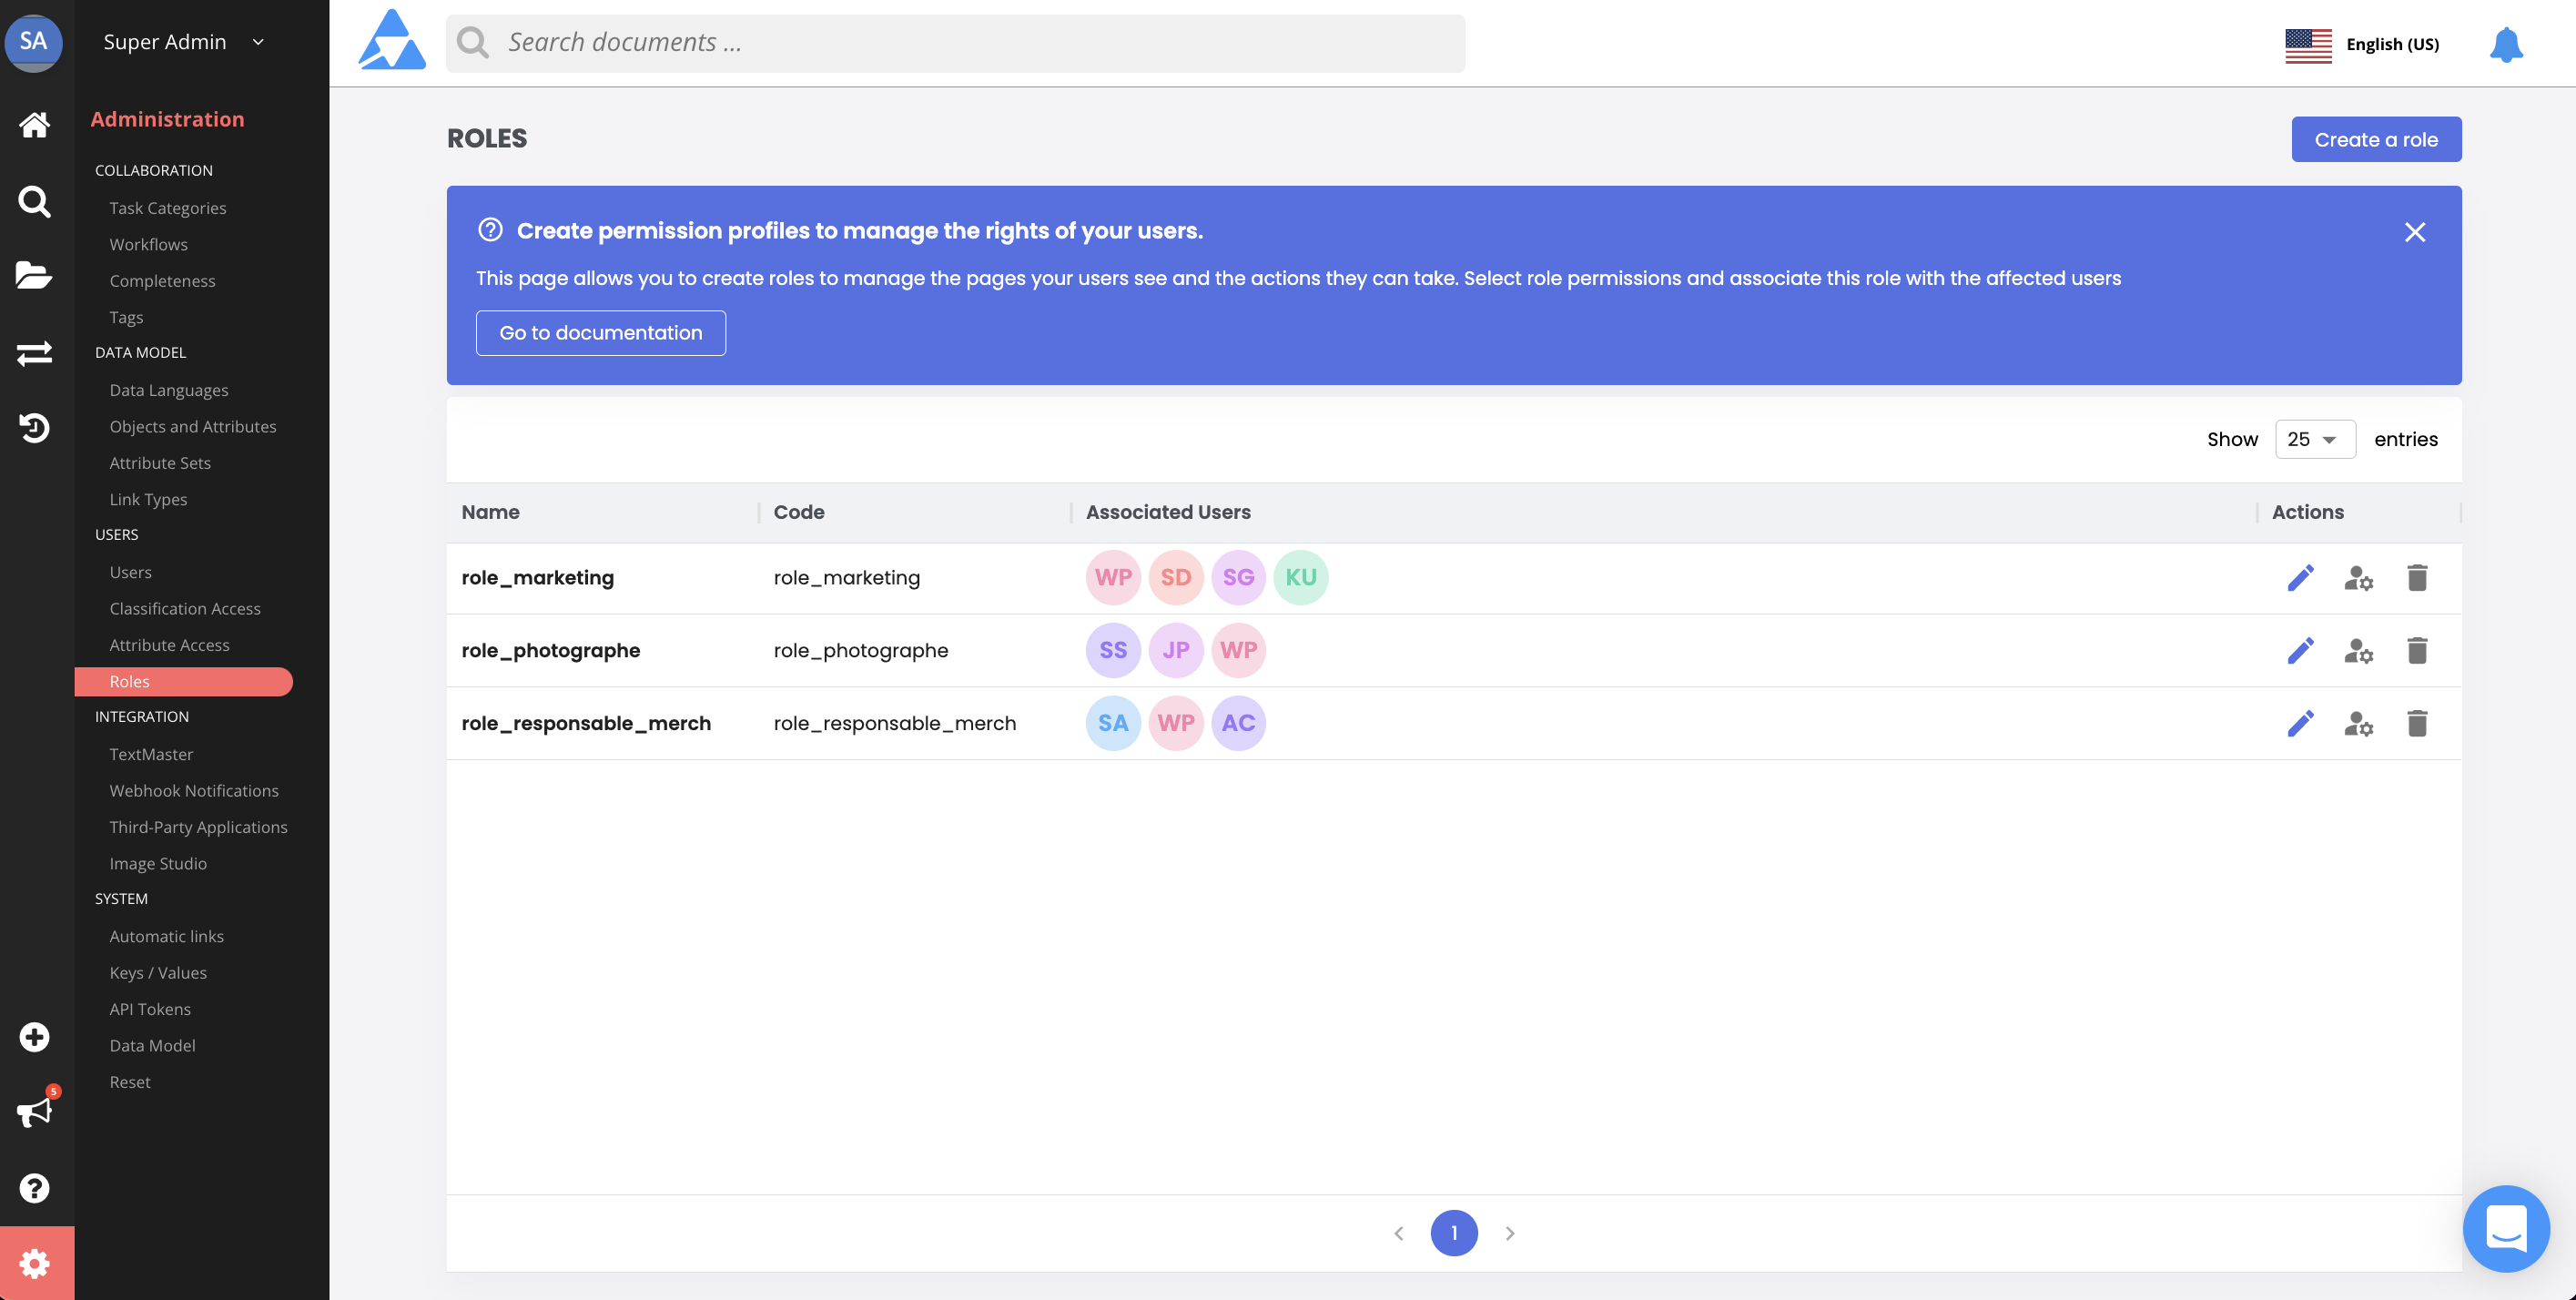
On the actions button, you can find a "manage users" icon.
When you click the Manage users icon, the pop-in for assigning users to the selected role is displayed. We will explain it on the Associate / Remove user(s) section.
Creating a role
To create a role, click on the Create A Role button. The New role form is displayed.
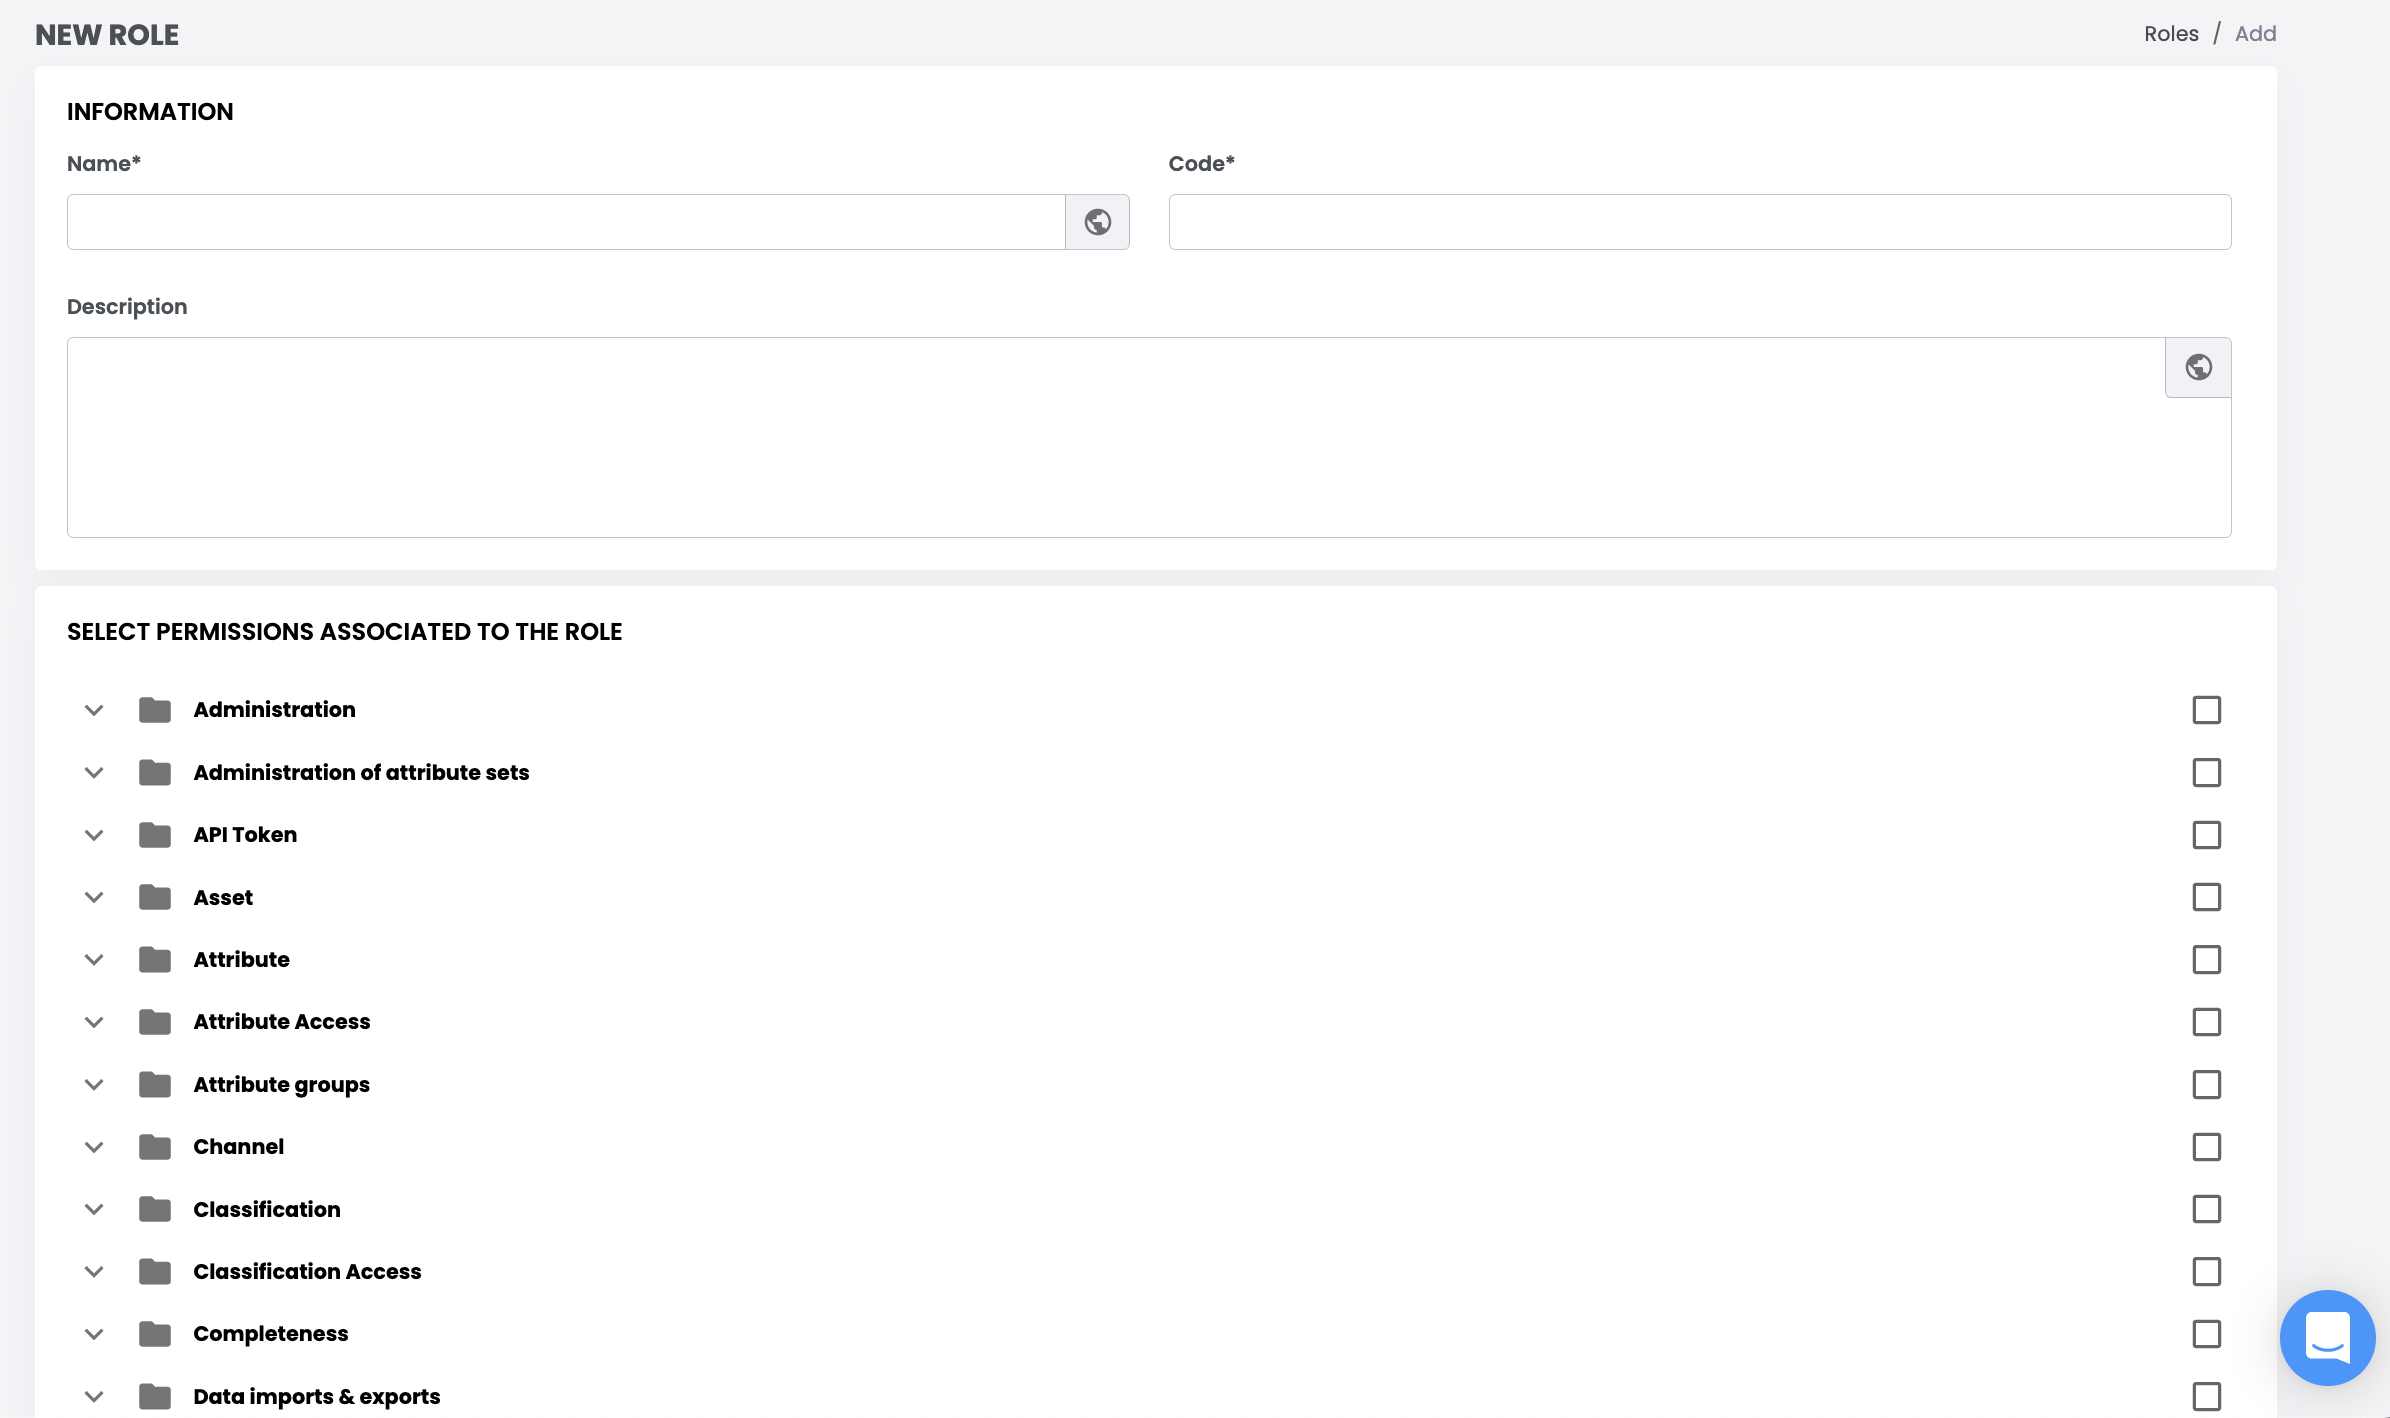
The page is divided into two sections: Role Identity and Role Permissions. These are described in detail below. When you've completed both sections, click on the Create button to save the profile.
Role Identity
This section is used to distinguish each Role and its permitted actions.

Enter the Name, Code and Description for the role. The asterisks (*) next to the Name and Code titles indicate that this information is mandatory, Description is optional (but highly recommended). Quable PIM automatically generates a Code for you. Note that the auto-generated Code can be modified only during profile creation.
The globe icon in the Name and Description fields indicates that they are localized. Clicking on the globe opens a form where you can enter translations for the selected field in all of the languages available in the application interface.
Role Permissions
The role permissions section displays all of the actions in the PIM. This section allows you to define the actions that an associated user can perform.
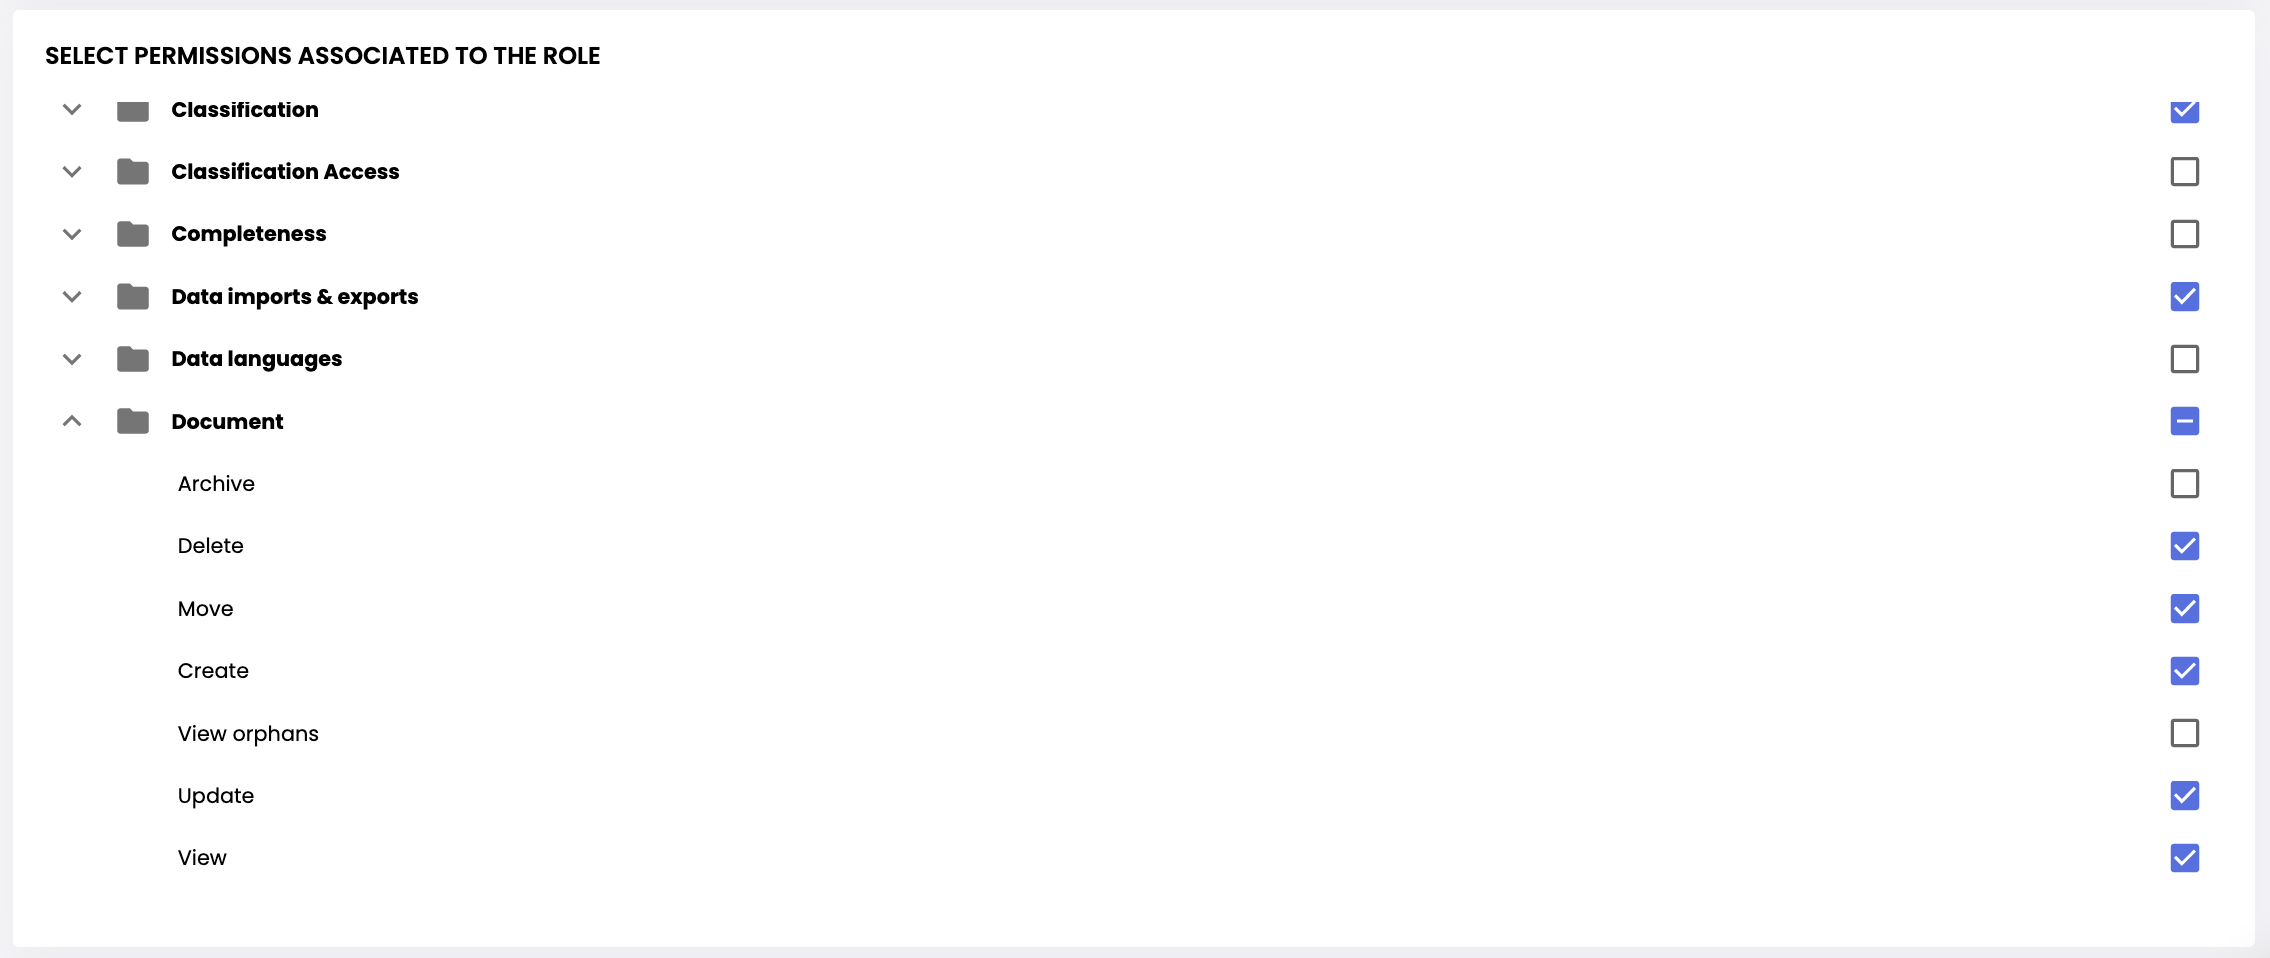
To authorize an action, click on the:
- action type folder,
- action name, or
- checkbox.
The checkboxes change to indicate the selected action(s).
Editing a role
To edit a role, click on the Edit icon on the Roles page. The Edit Role form for the selected role is displayed. You can edit the role name, description, and authorized actions.
Deleting a role
To delete a role, click on the Delete icon on the Roles page. A dialog is displayed to cancel or confirm the deletion.
Associate / remove user(s)
After you've created your role(s), you can associate a user to them or remove them from it.
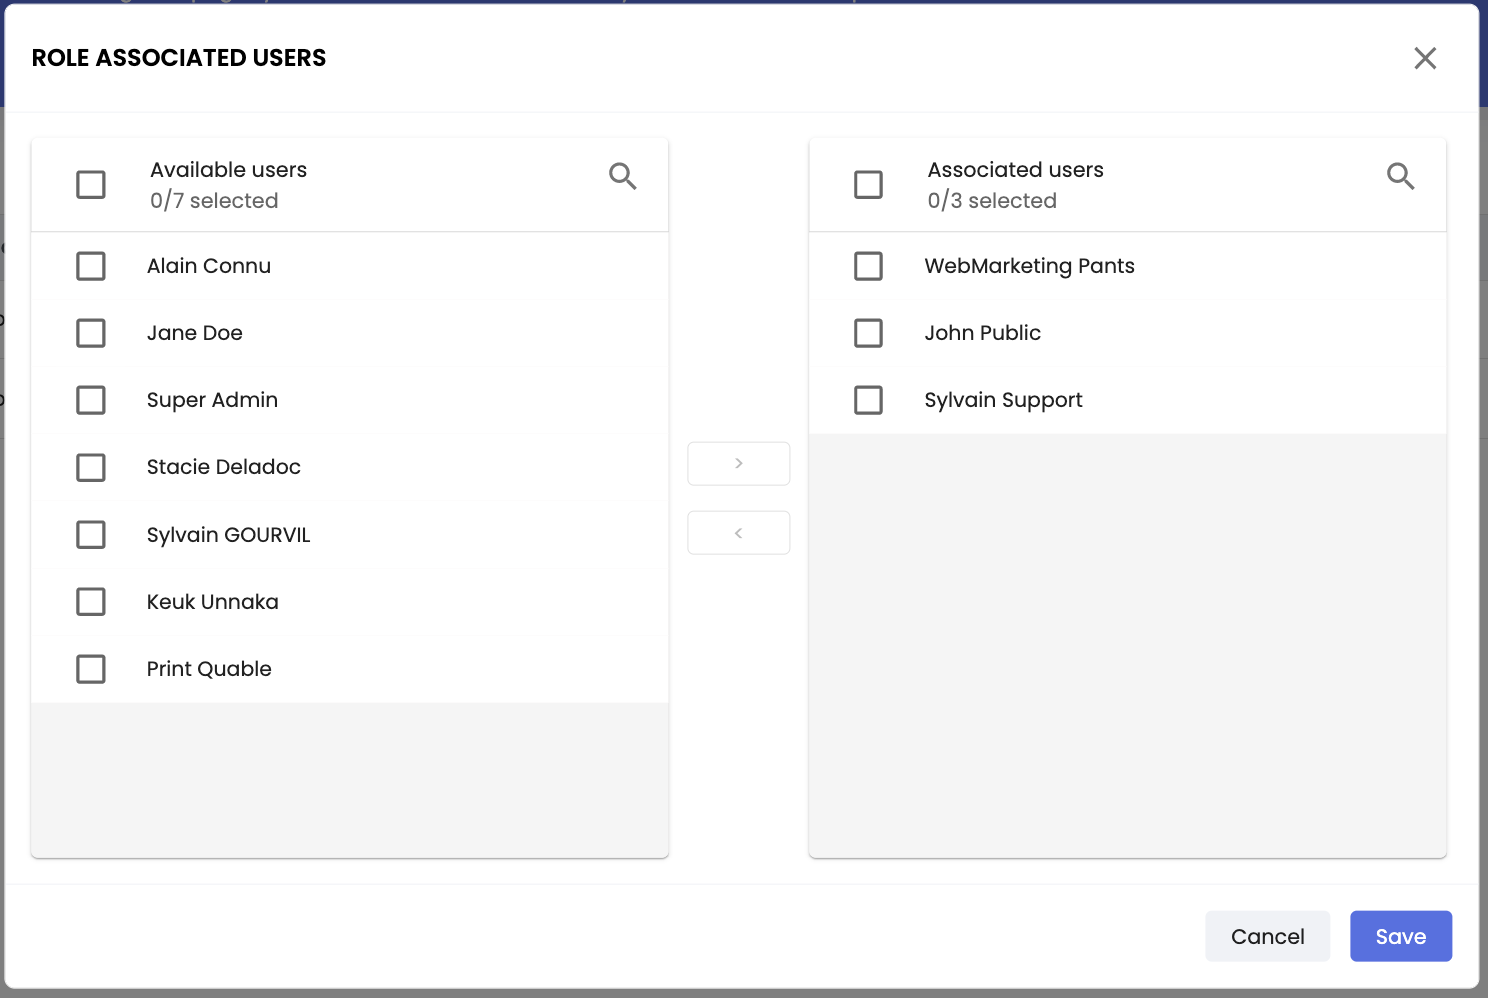
Associating users with a role gives the user permission to perform the actions defined for that role. You can associate a user to role by clicking on the Manage users icon. It will display a pop-in with the available Users on the left side and the Associated Users on the right side.
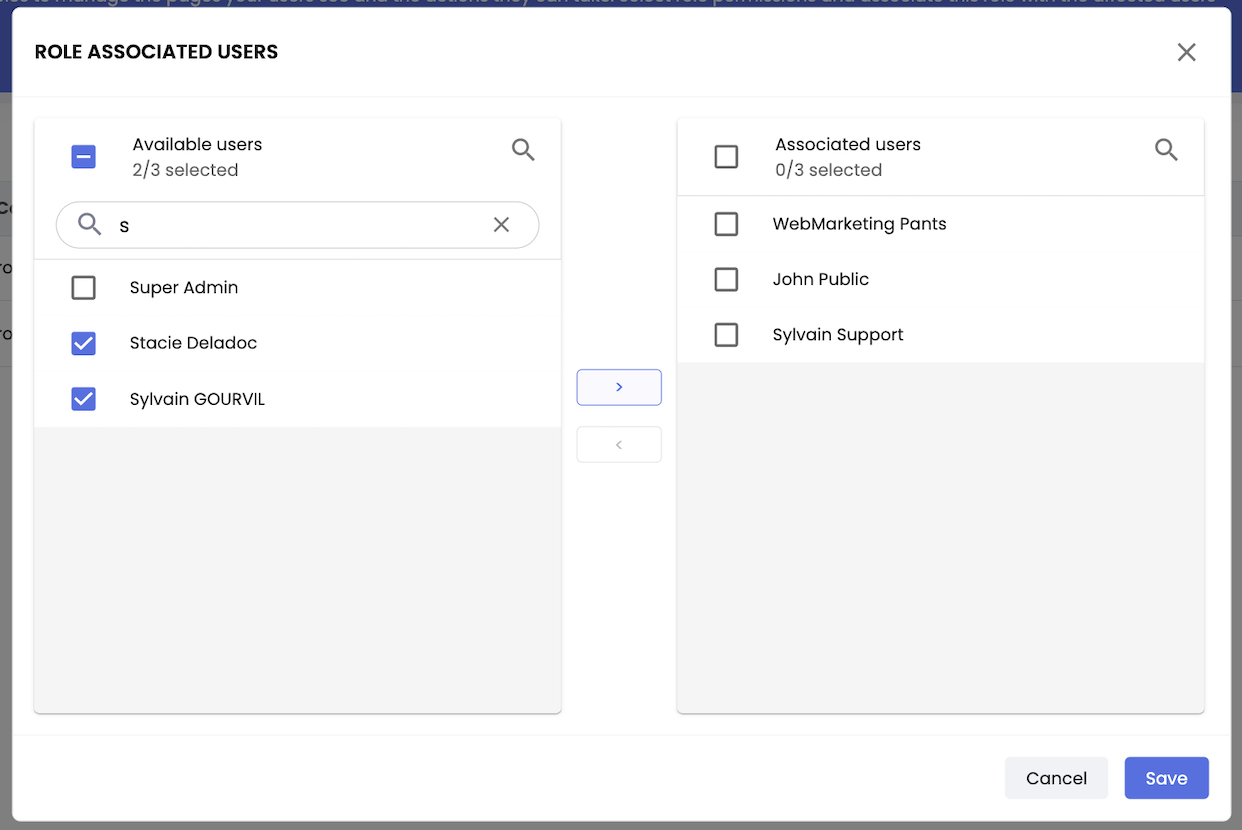
To associate a user, select it from the left side, and click on the top arrow.
To remove a user, select it from the right side, and click on the bottom arrow.
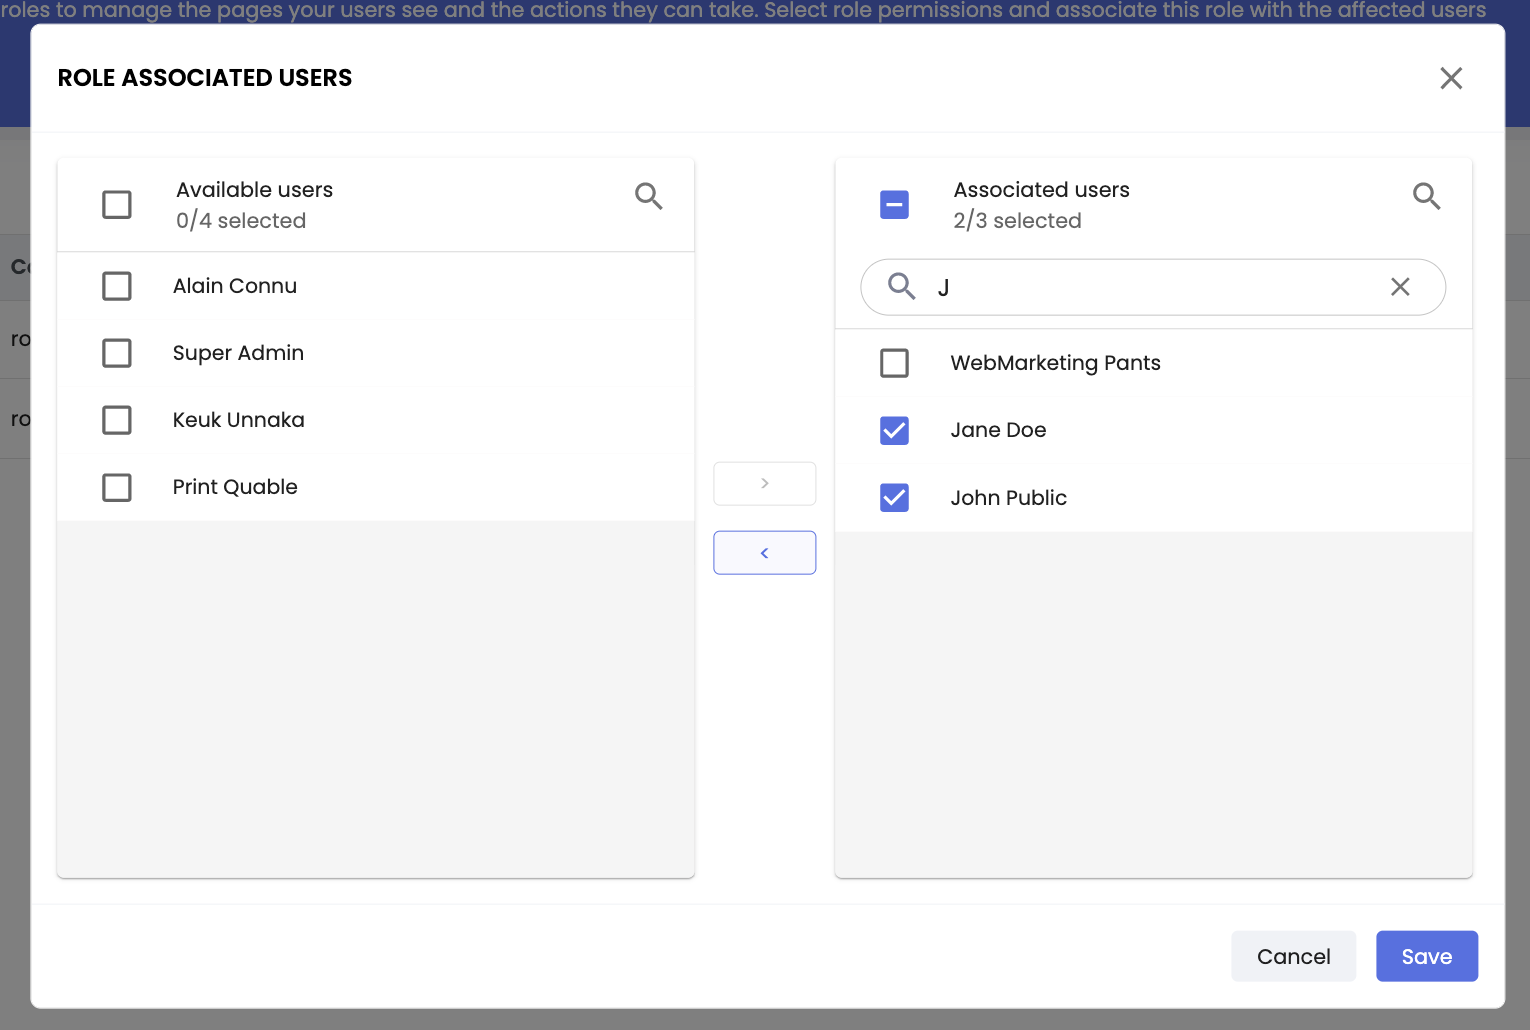
On both sides, you can find a search-bar, allowing you to find the user you are looking for.
AttentionWhen you disassociate a user from a role, the user reverts to their previous action permissions by default.
Updated 5 months ago
