Users
The Users page allows you to create and manage the settings of your Quable Portal users as well as to assign rights and permissions to them.
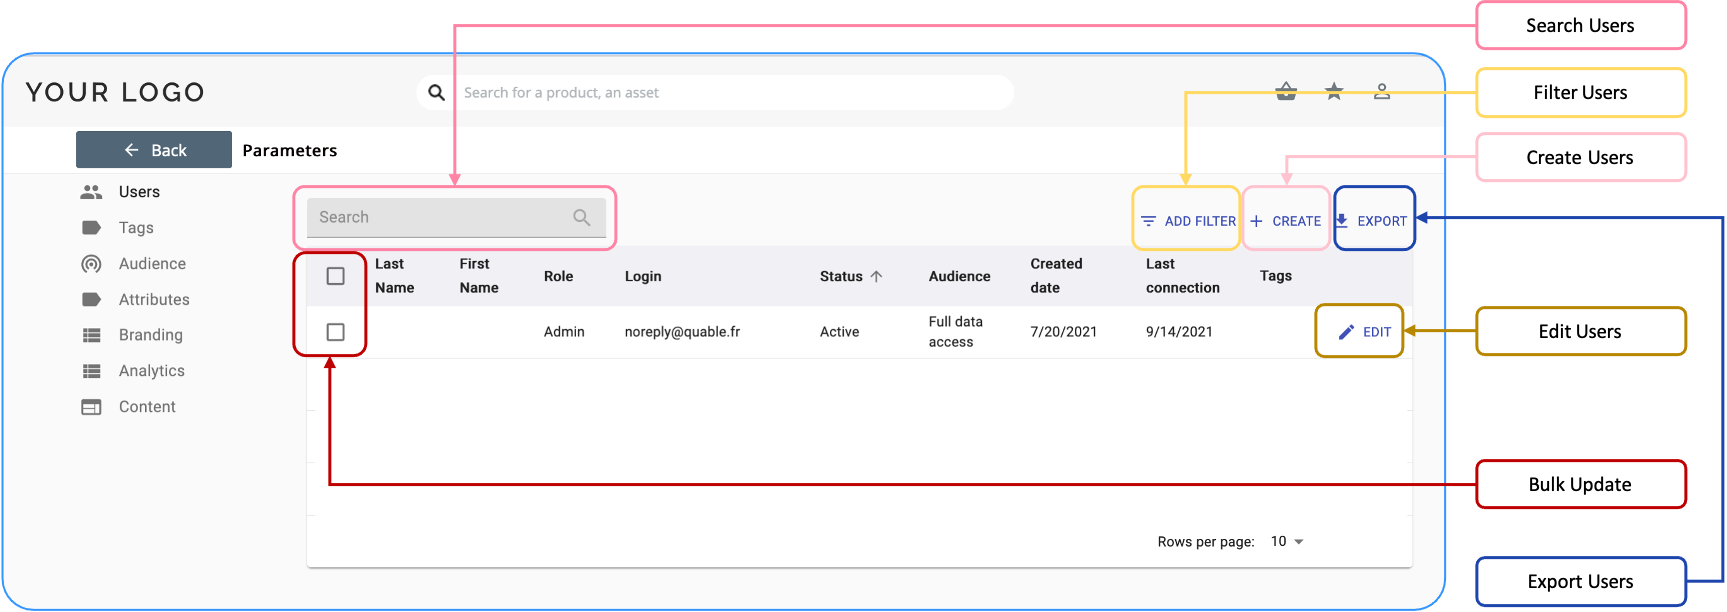
You can change how the columns are sorted by clicking on the column title. An arrow is displayed to indicate the sort order.
Search Users
To search for a specific user, type at least three characters in the search bar and press the Enter key. A scrollable list of users is automatically displayed.

The search isn't case-sensitive, so you can search easier ... without worrying about capitalization!
Filter Users
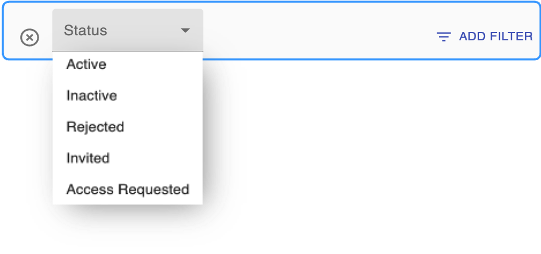
You can filter the list of users by clicking on the Add Filter link. This opens a list to select the type of filter.

Once you've selected the type of filter, a dropdown list appears from which you can select a specific filter to use.
Create Users
To create a user, click the Create link.

A form is displayed to define the user's account information as well as their Audience, Role, and Tags.
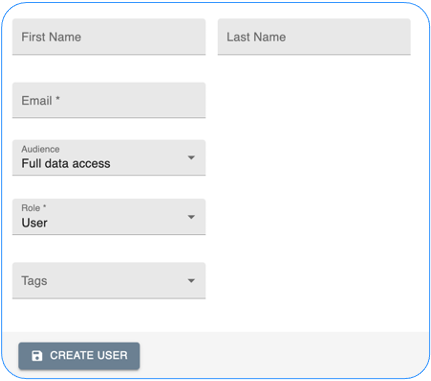
Enter the following information:
Information | Description | Mandatory |
|---|---|---|
First Name | The user's first name. | No |
Last Name | The user's last name. | No |
The email address to use for all communications sent by Quable Portal, including notifications.
| Yes | |
Select an audience to define which products, assets, and variants are available to the user. Note
| No | |
Role | The Role assigned to the user designates a collection of actions that a specific set of users can perform.
| Yes |
Enter a label to easily identify a specific group of users. | No |
By default, all portal users have an Active status when their account creation request is approved and they connect to the portal. You can change this via Edit.
Once you have entered all the information for a new user, click the Create User button to save your changes or the Back button (in the top navigation) to return to the Users page without saving the new user.
Edit Users
You can modify a user's account information by selecting a user and clicking the Edit icon.

The user's account information form is displayed.
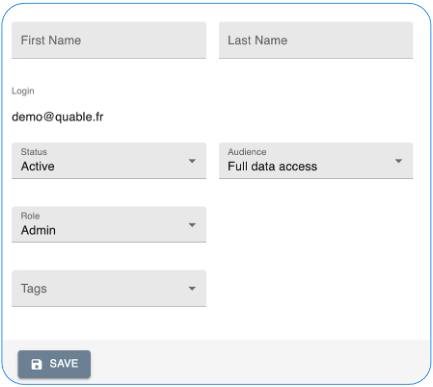
You can modify the following information:
Information | Description |
|---|---|
First Name | The user's first name. |
Last Name | The user's last name. |
Status | The following statuses can be modified:
The following statuses are displayed but cannot be modified:
|
Select an audience to define which products, assets, and variants are available to the user. Note
| |
Role | The Role assigned to the user designates a collection of actions that a specific set of users can perform.
|
Enter a label to easily identify a specific group of users. |
When you've finished making modifications, click the Save button to save your changes or the Back button (in the top navigation) to cancel the operation and return to the Users page without saving the changes. A message is displayed to indicate the user has been updated.

Deactivate Users
To deactivate a user, click on the Edit button and set the account Status to Inactive. When a user account is Inactive, it immediately becomes inoperable. An inactive user's information is kept, but the user is no longer able to access the portal.
You can reactivate a deactivated user by clicking on the Edit button to setting their status to Active. When an account is Active, it immediately becomes operable.
Delete Users
To delete a user, click on the Edit button for the user, then click on Delete. The user account is immediately removed from the portal.
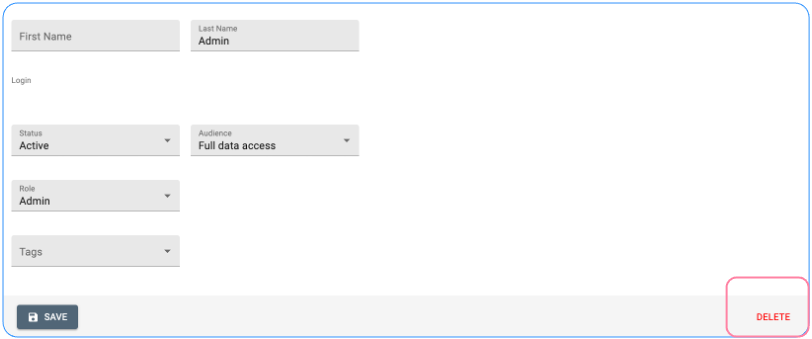
Attention!This action is irreversible. Once a user account has been deleted, it can't be recovered.
Bulk Update
You can change the Tags, Status and/or Audience for multiple users at the same time by selecting the checkbox for the individual account(s) or select all users at once by selecting the checkbox in the title bar.

A bar is displayed above the list of users which includes:
- the number of users selected,
- a dropdown list and button that you can use to select and apply Tags,
- a dropdown list that you can use to select a new Status,
- and a dropdown list that you can use to select a new Audience.
When you've finished making modifications, A message is displayed to indicate the update has been made.

Export Users
You can export a list of users in a CSV file by clicking on the Export link.

The file will automatically download to your computer once it has finished generating.
Updated 5 months ago
