Users
The Users page allows you to create and manage the settings of your users as well as to assign rights and permissions to them.

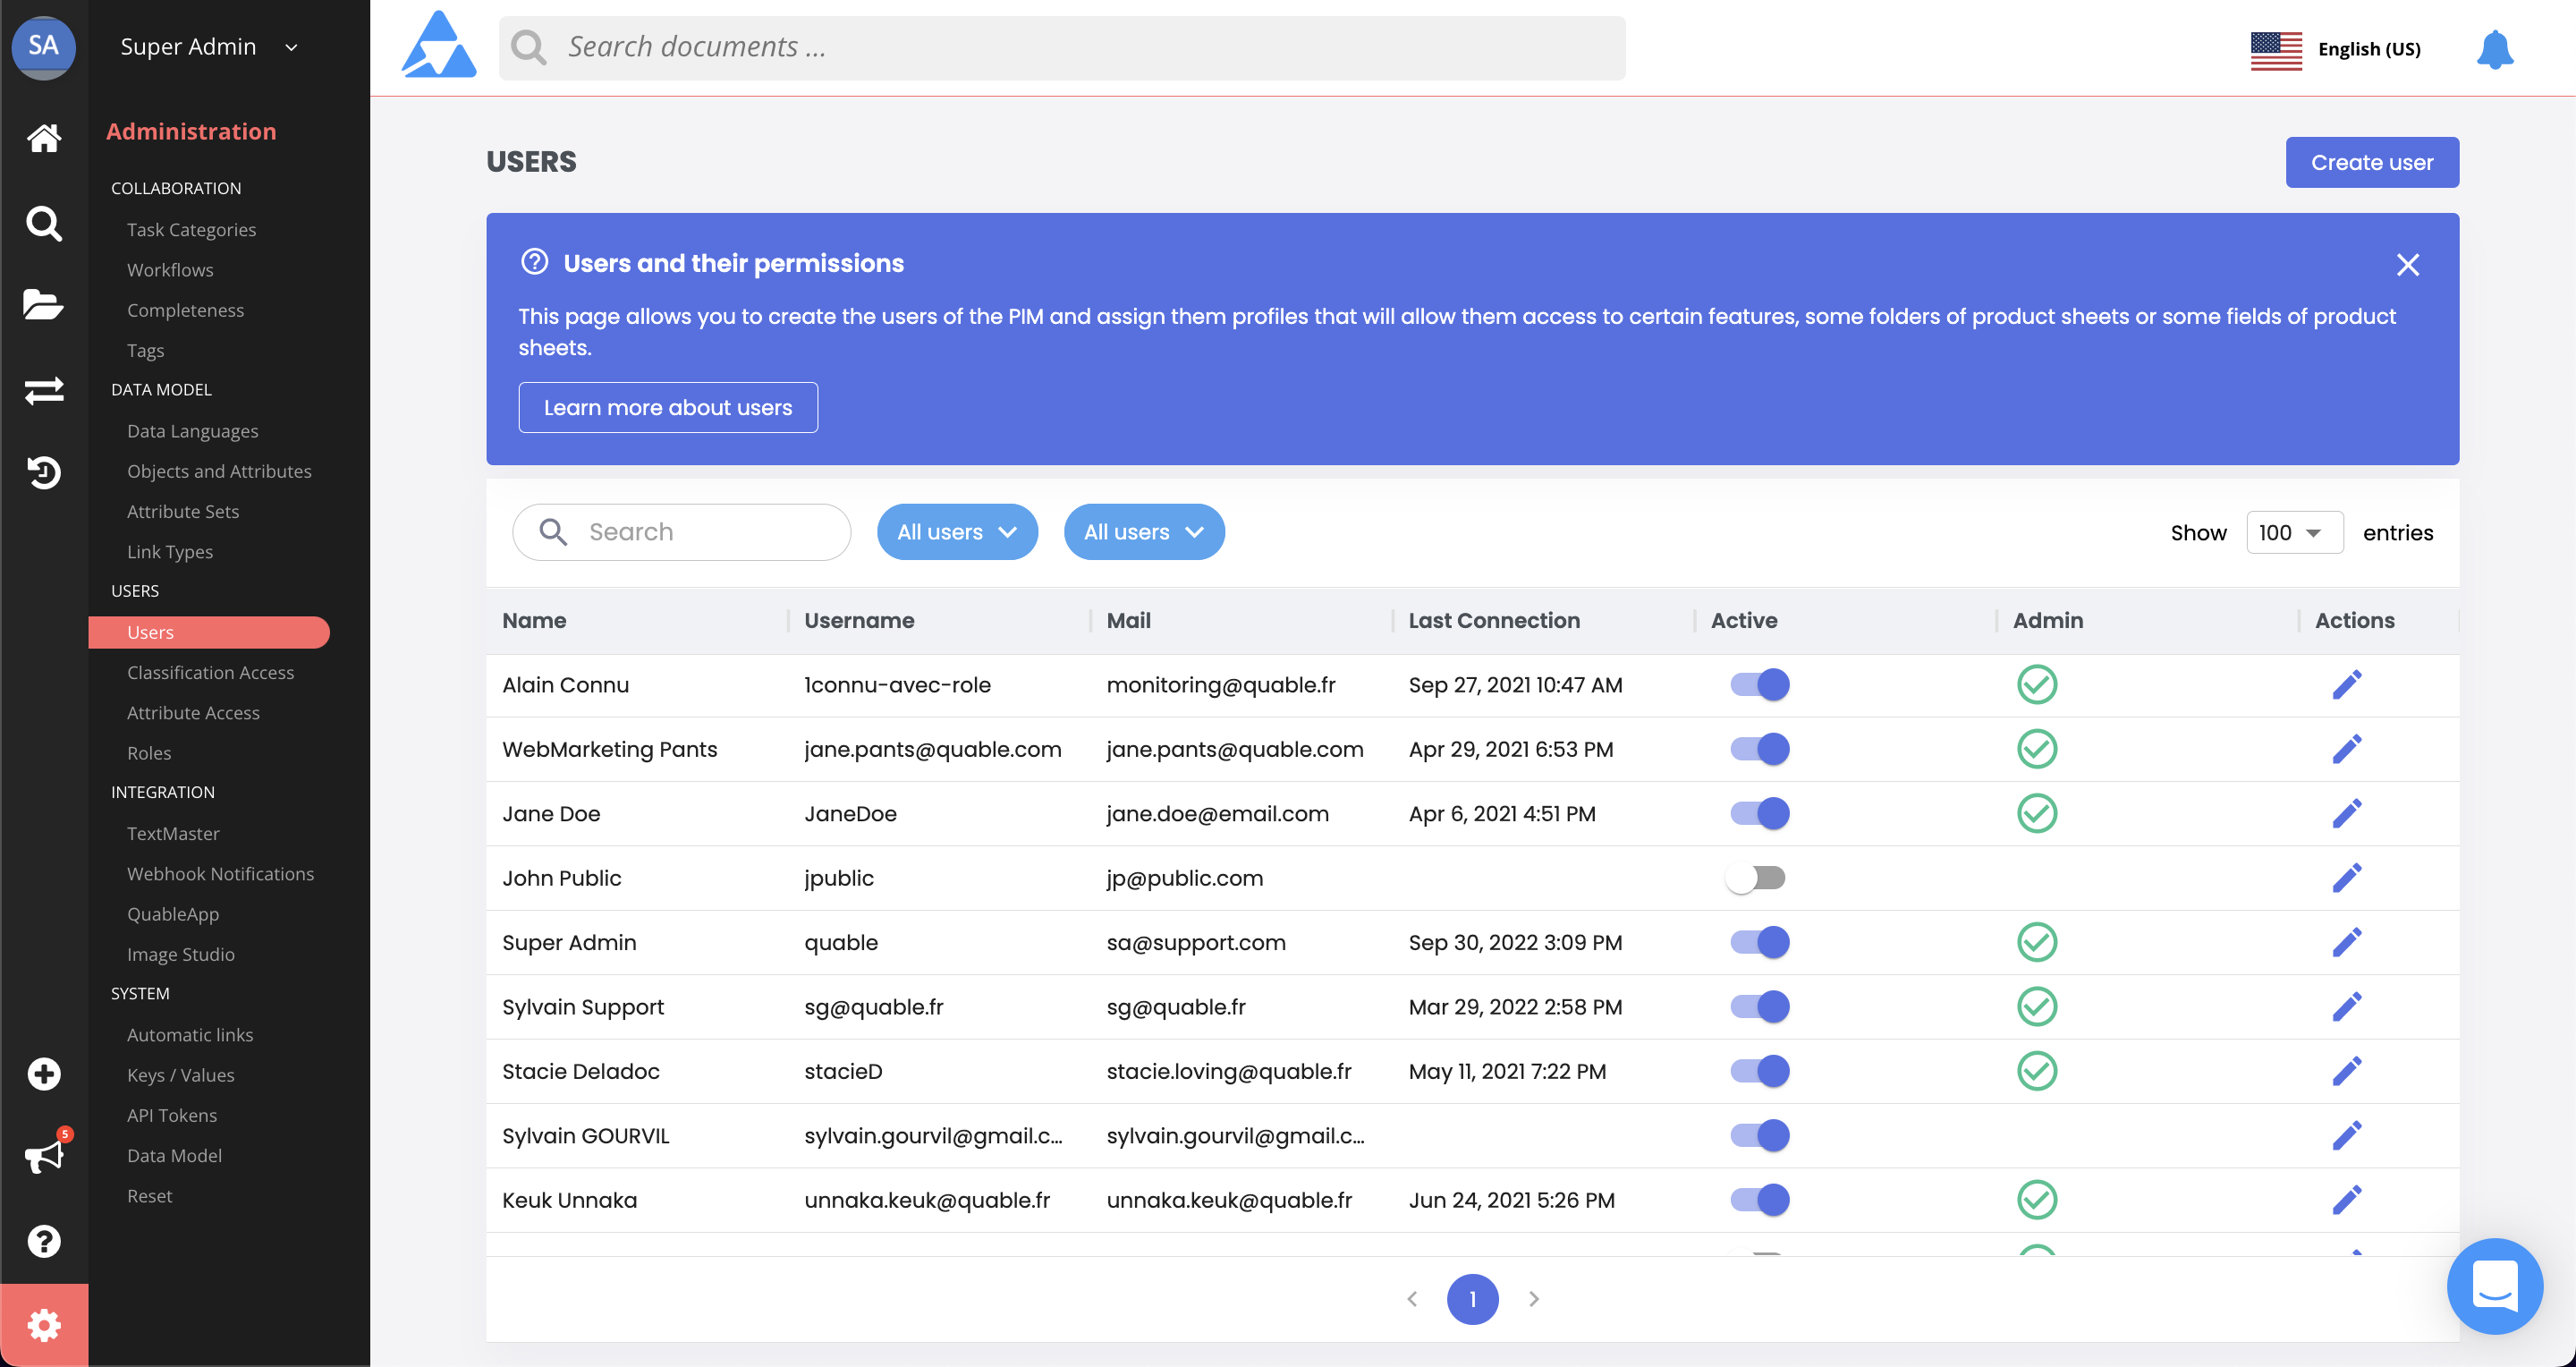
The initial page displays the following information (from left to right):
- Login - User login
- Name - Name of the user
- Mail - User email address
- Last Connection - Date/time of last connection
- Active - Indicates the user account status
- Admin - Indicates if user is an administrator
You can search current users in the Search bar.
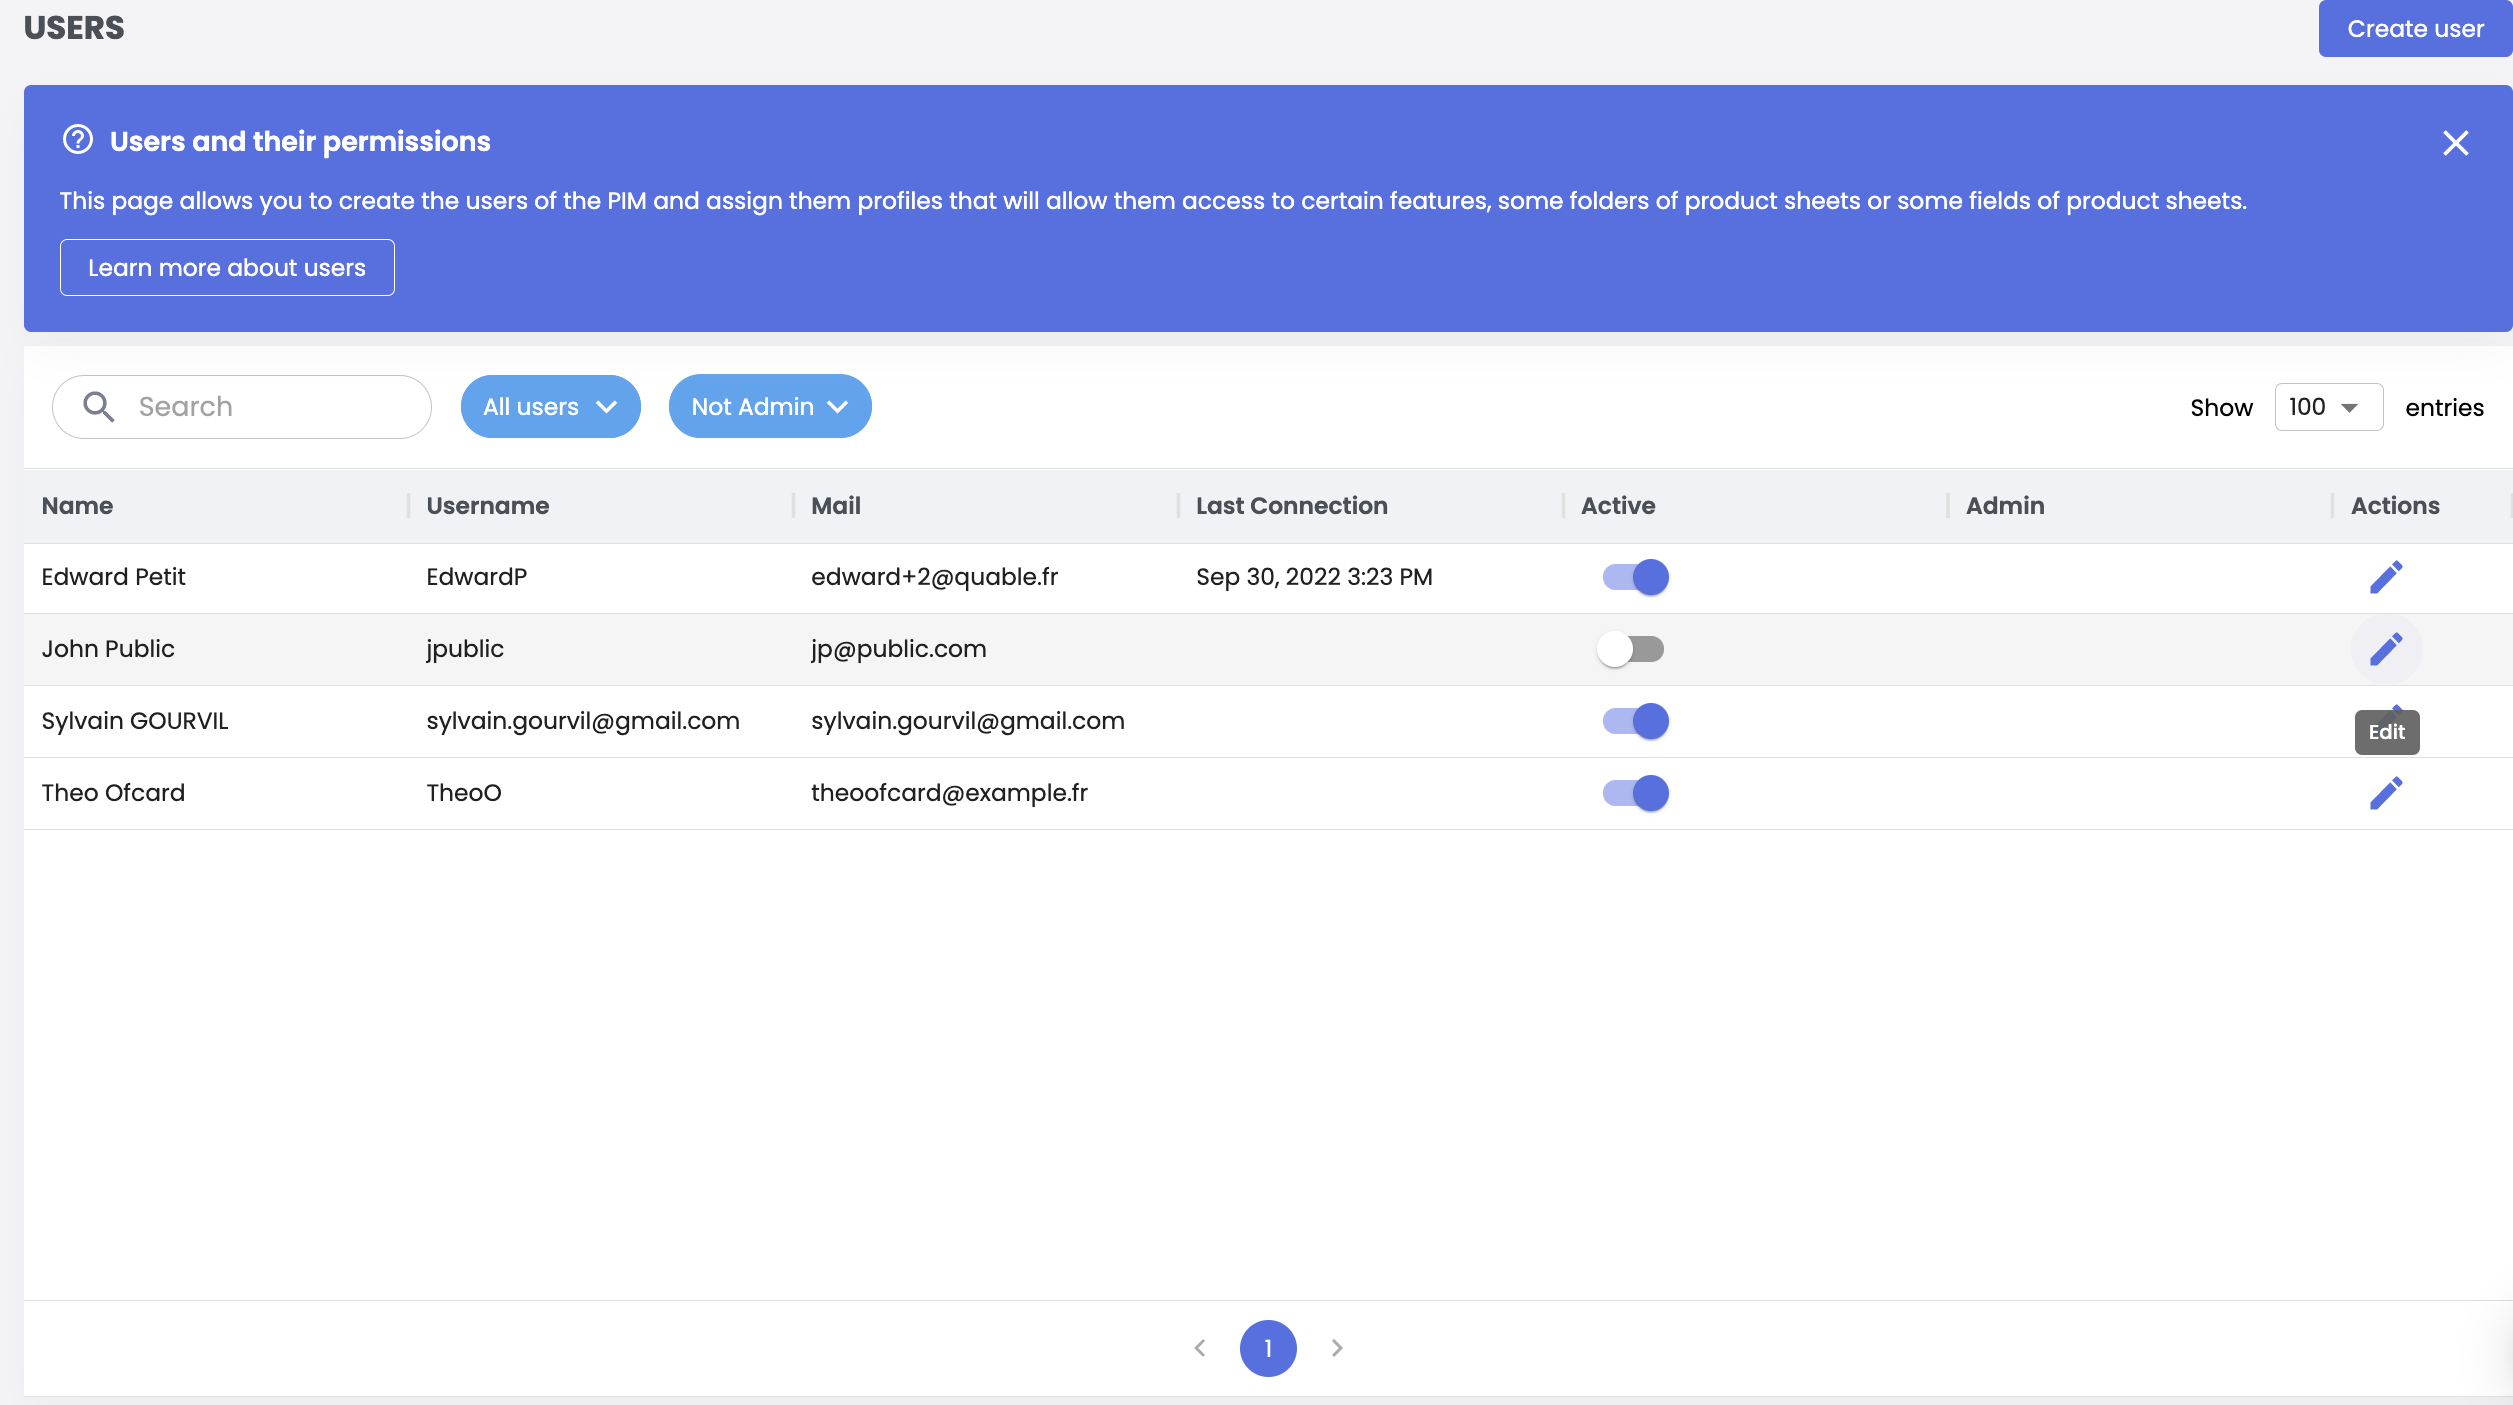
Filters are available to search by account status:
- All users, Active or Inactive
- All users, Admin, or not Admin
Create New User
To create a user, click the Create User button.

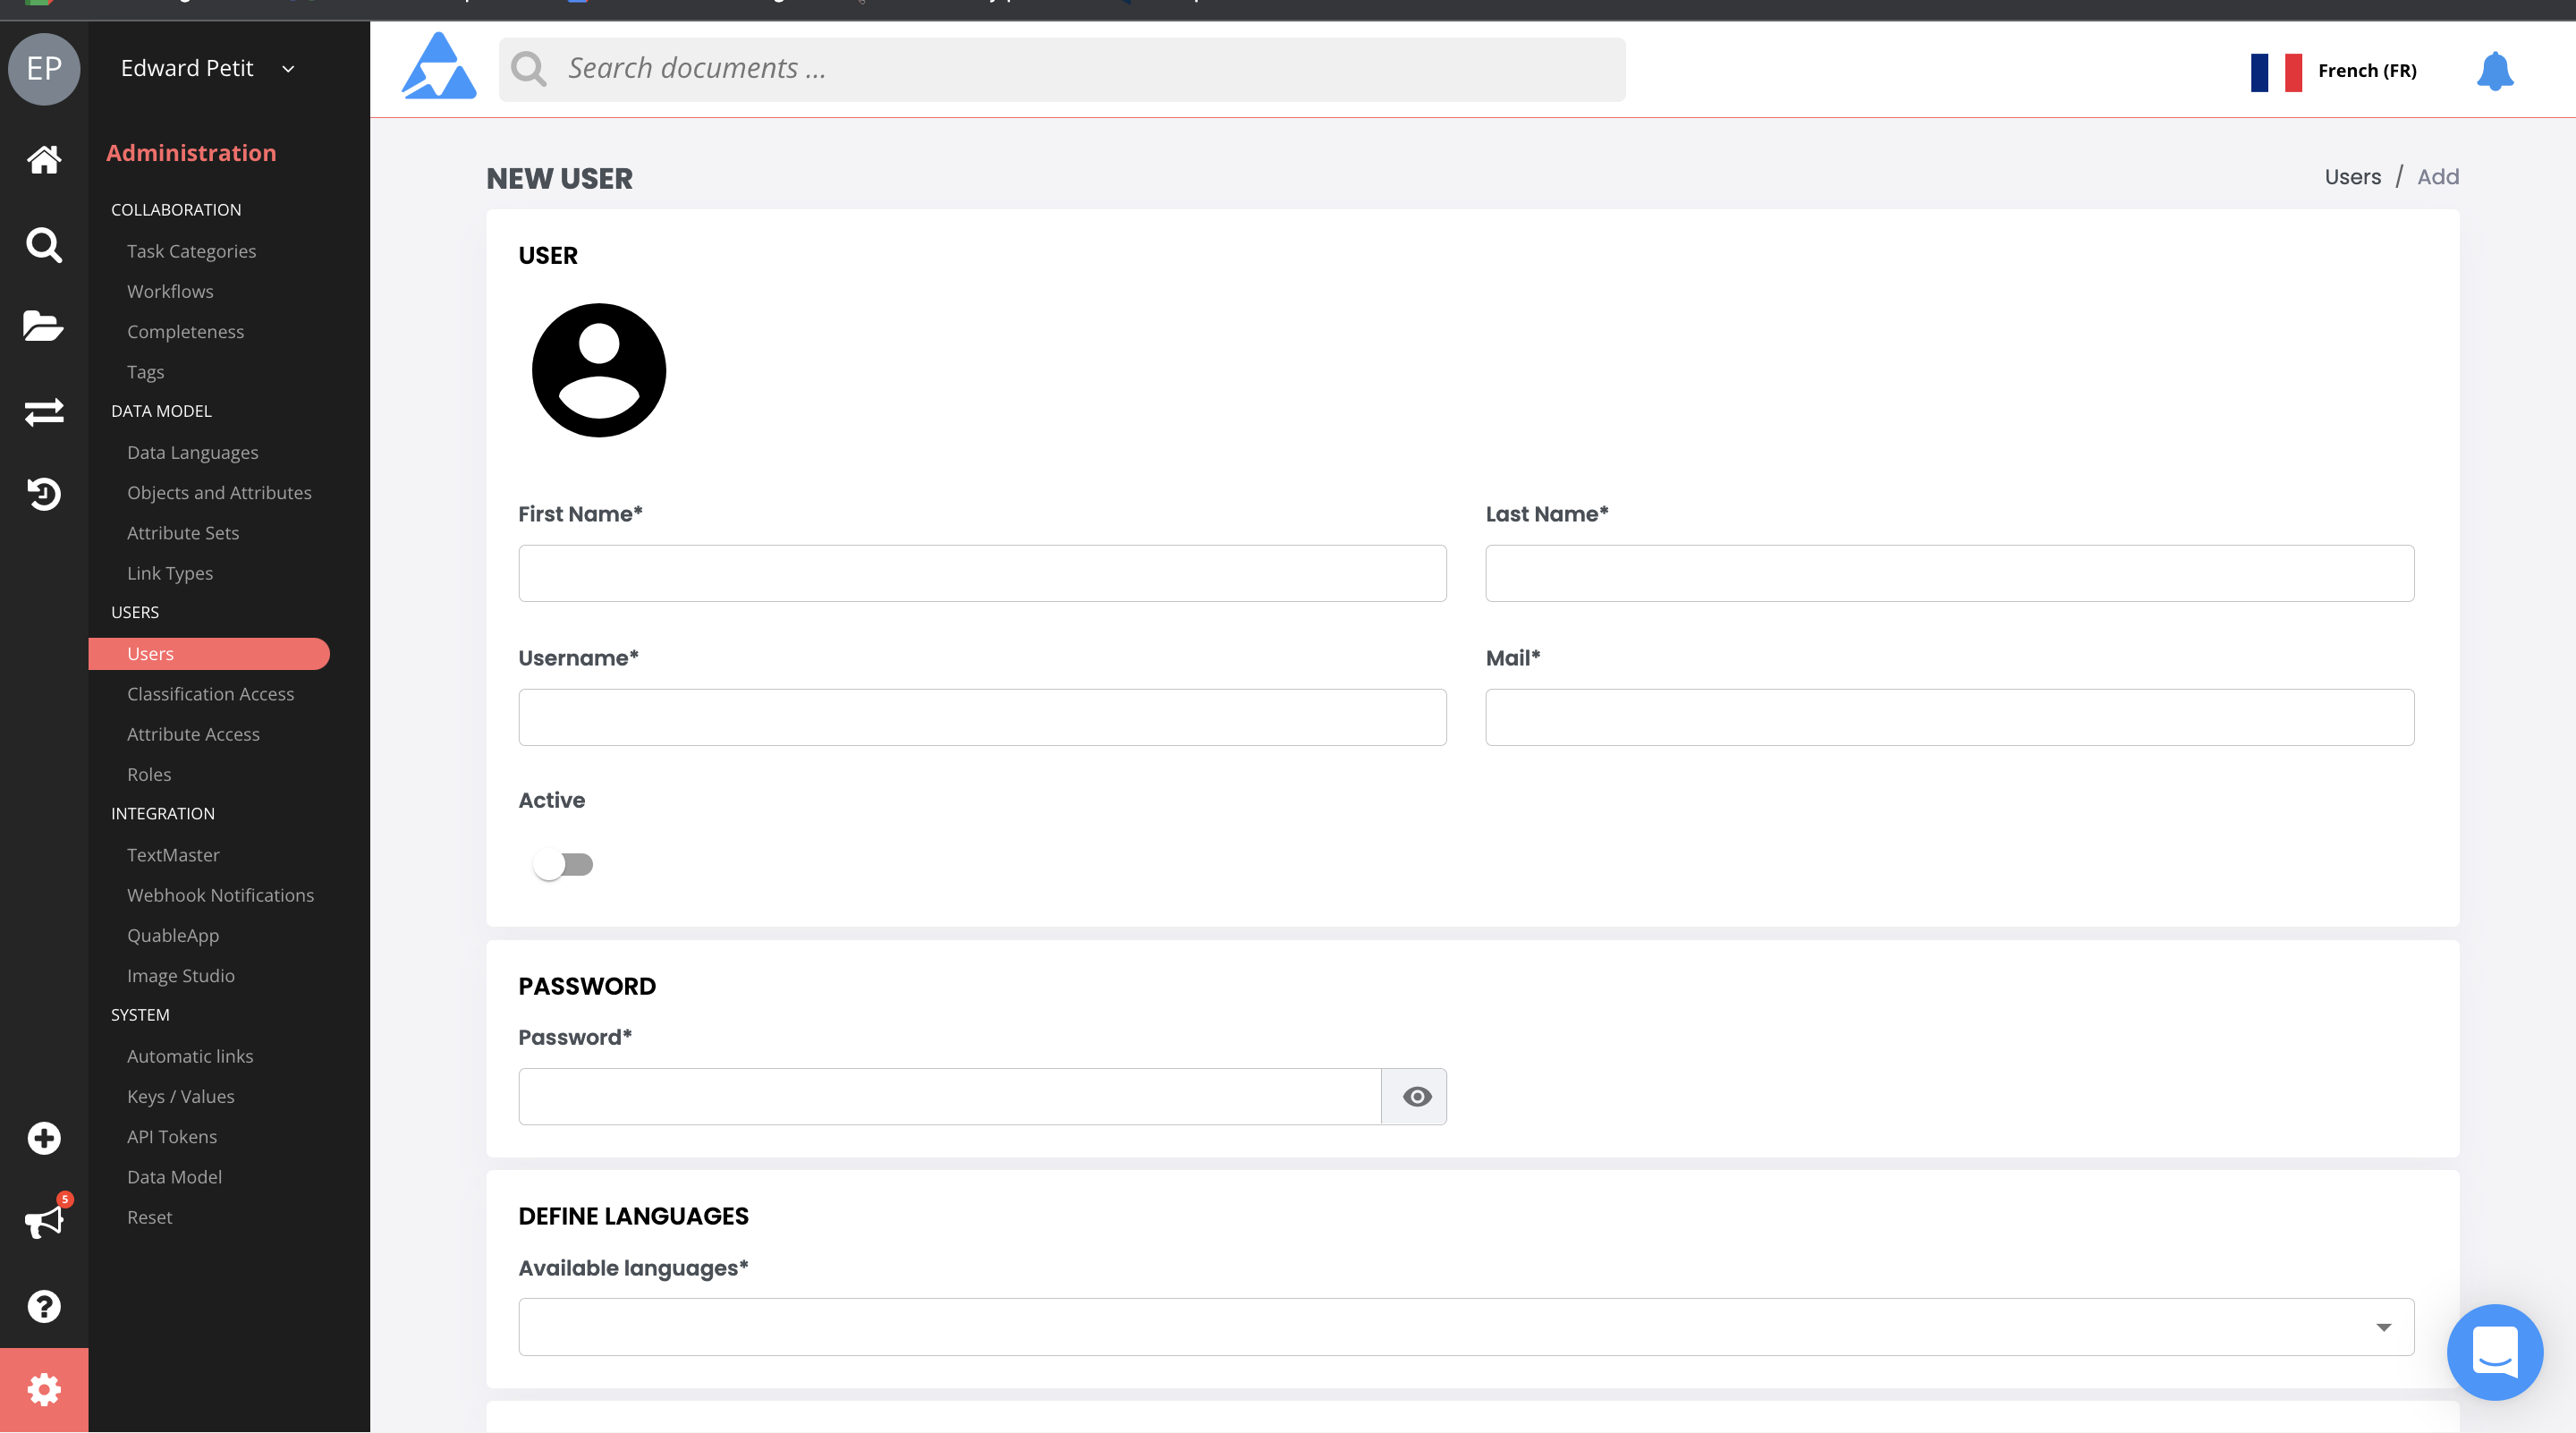
A form is displayed to define the user's account information and role(s).

User Identity
This section allows you to define the user's identity, as well as their account status and whether or not the user is an administrator.

Enter the following information to identify the user:
Information | Description | Mandatory |
|---|---|---|
First Name | The user's first name. | Yes |
Last Name | The user's last name. | Yes |
Username | The user's login name.
| Yes |
The user's email address. This address is used for all emails sent by Quable PIM, including notifications. | Yes | |
Active / Inactive | New accounts are inactive by default. Click the slide button to activate the user account. If not enabled, the user account is inactive. | |
Admin | Select this checkbox to create an account with all permissions (e.g., modify the data model, import, export, manage users, roles and rights profiles).
|
Account Password
In this section, you can define a password for the user to access the PIM.

You have the option to leave the password empty. Once the form is completed and validated, the user will receive an email containing an automatically generated password that they can change later.
Languages
This is where you can designate specific languages in which the user is able to view and contribute to documents.
Select one or more languages from the Available Languages dropdown list. Once you've selected the languages available to the user, options appear to specify the default languages in which the user will view product information and translate product information.

The following table summarizes the language options:
Language | Description | Mandatory |
|---|---|---|
Your Quable PIM active data languages. At least one language must be selected. | Yes | |
The default language that the user will see when viewing product information in a document. | ||
The data language the user will use by default when using translation mode in a document. |
Permissions
Next, you can define the user's role, as well as the classifications and attributes they can access.

The following table summarizes the permission options:
Permission | Description | Mandatory |
|---|---|---|
Predefined profiles with specific permissions that can be assigned to a single user or a group of users so that they can access authorized content and/or features. | Yes (unless user is an Administrator) | |
Predefined profile for viewing and modifying product classifications.
| ||
Predefined profile for viewing and modifying the attributes in documents.
|
Additional Information
The final section allows you to enter additional information about the user.

The following table summarizes the options:
Field | Description |
|---|---|
Job | The user's job title. |
Manager | The user's direct supervisor. |
Time Zone | The user's timezone. Date fields are formatting according to the selected timezone. Default timezone is UTC. |
Deactivation Date | The date when the user account is deactivated. This allows you to define a date when the account will become inactive and the user will no longer be able to access the PIM. This can be useful for short-term contracts. You can remove the Deactivation Date by clicking on the Delete icon (trash can). |
Once you have entered all the information for a new user, click the Create button to save your changes or the Return link (at the top of the form) to return to the Users page without saving the new user.

Edit User
You can modify a user's account information by selecting a user and clicking the Edit icon.

The user's account information page is displayed. When you've finished making modifications, click the Save button to save your changes or the Return link (at the top of the form) to return to the Users page without saving the changes.

Reset Password
You can reset a user's password it by selecting a user and clicking the Edit icon. The user's account information page is displayed where you can enter a new password in the Password section.

When you've finished, click the Save button to save your changes or the Return link (at the top of the form) to return to the Users page without saving the changes.
Activate / Deactivate User
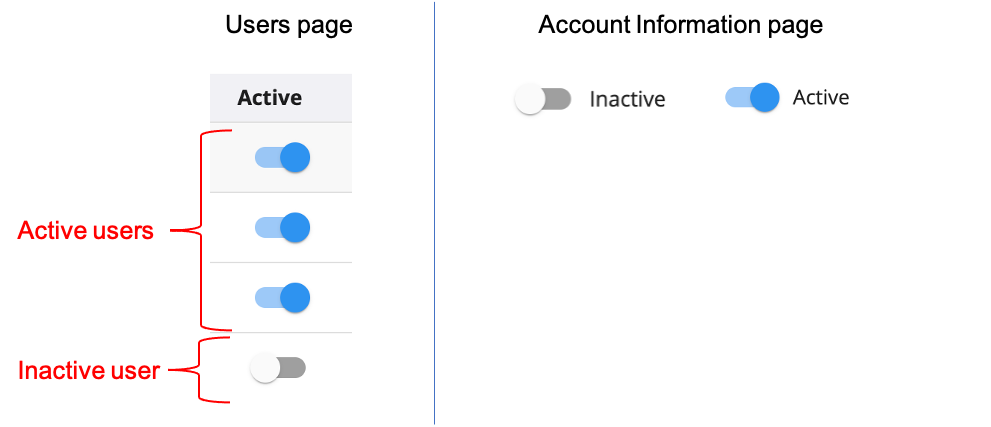
There are two ways to active or deactivate user accounts, via the slide button in the Active column (on the Users page) or on by editing the user's account information (in the Identity section).

To deactivate a user, click on the slide button to set the account to Inactive. When a user account is Inactive, it immediately becomes inoperable. An inactive user's information is kept, but the user is no longer able to access the PIM.
Use with cautionDeactivating a user can be done easily, but be careful! Be sure that the user being deactivated isn't currently using the PIM. If a user is performing a task, deactivating their account prevents them from being able to finish it.
You can reactivate a deactivated user by clicking on the slide button to set the account to Active. When a user account is Active, it immediately becomes operable.
Updated 5 months ago
