Workflows
Workflows are a set of logical steps linked by transitions to ensure that your documents follow a specific process from start to finish (e.g., contribution -> validation -> distribution). These logical steps are automated sequences of operations and validation steps for specific tasks between various parties. You can even designate Roles with the authority to validate your document's progression from one state to another.
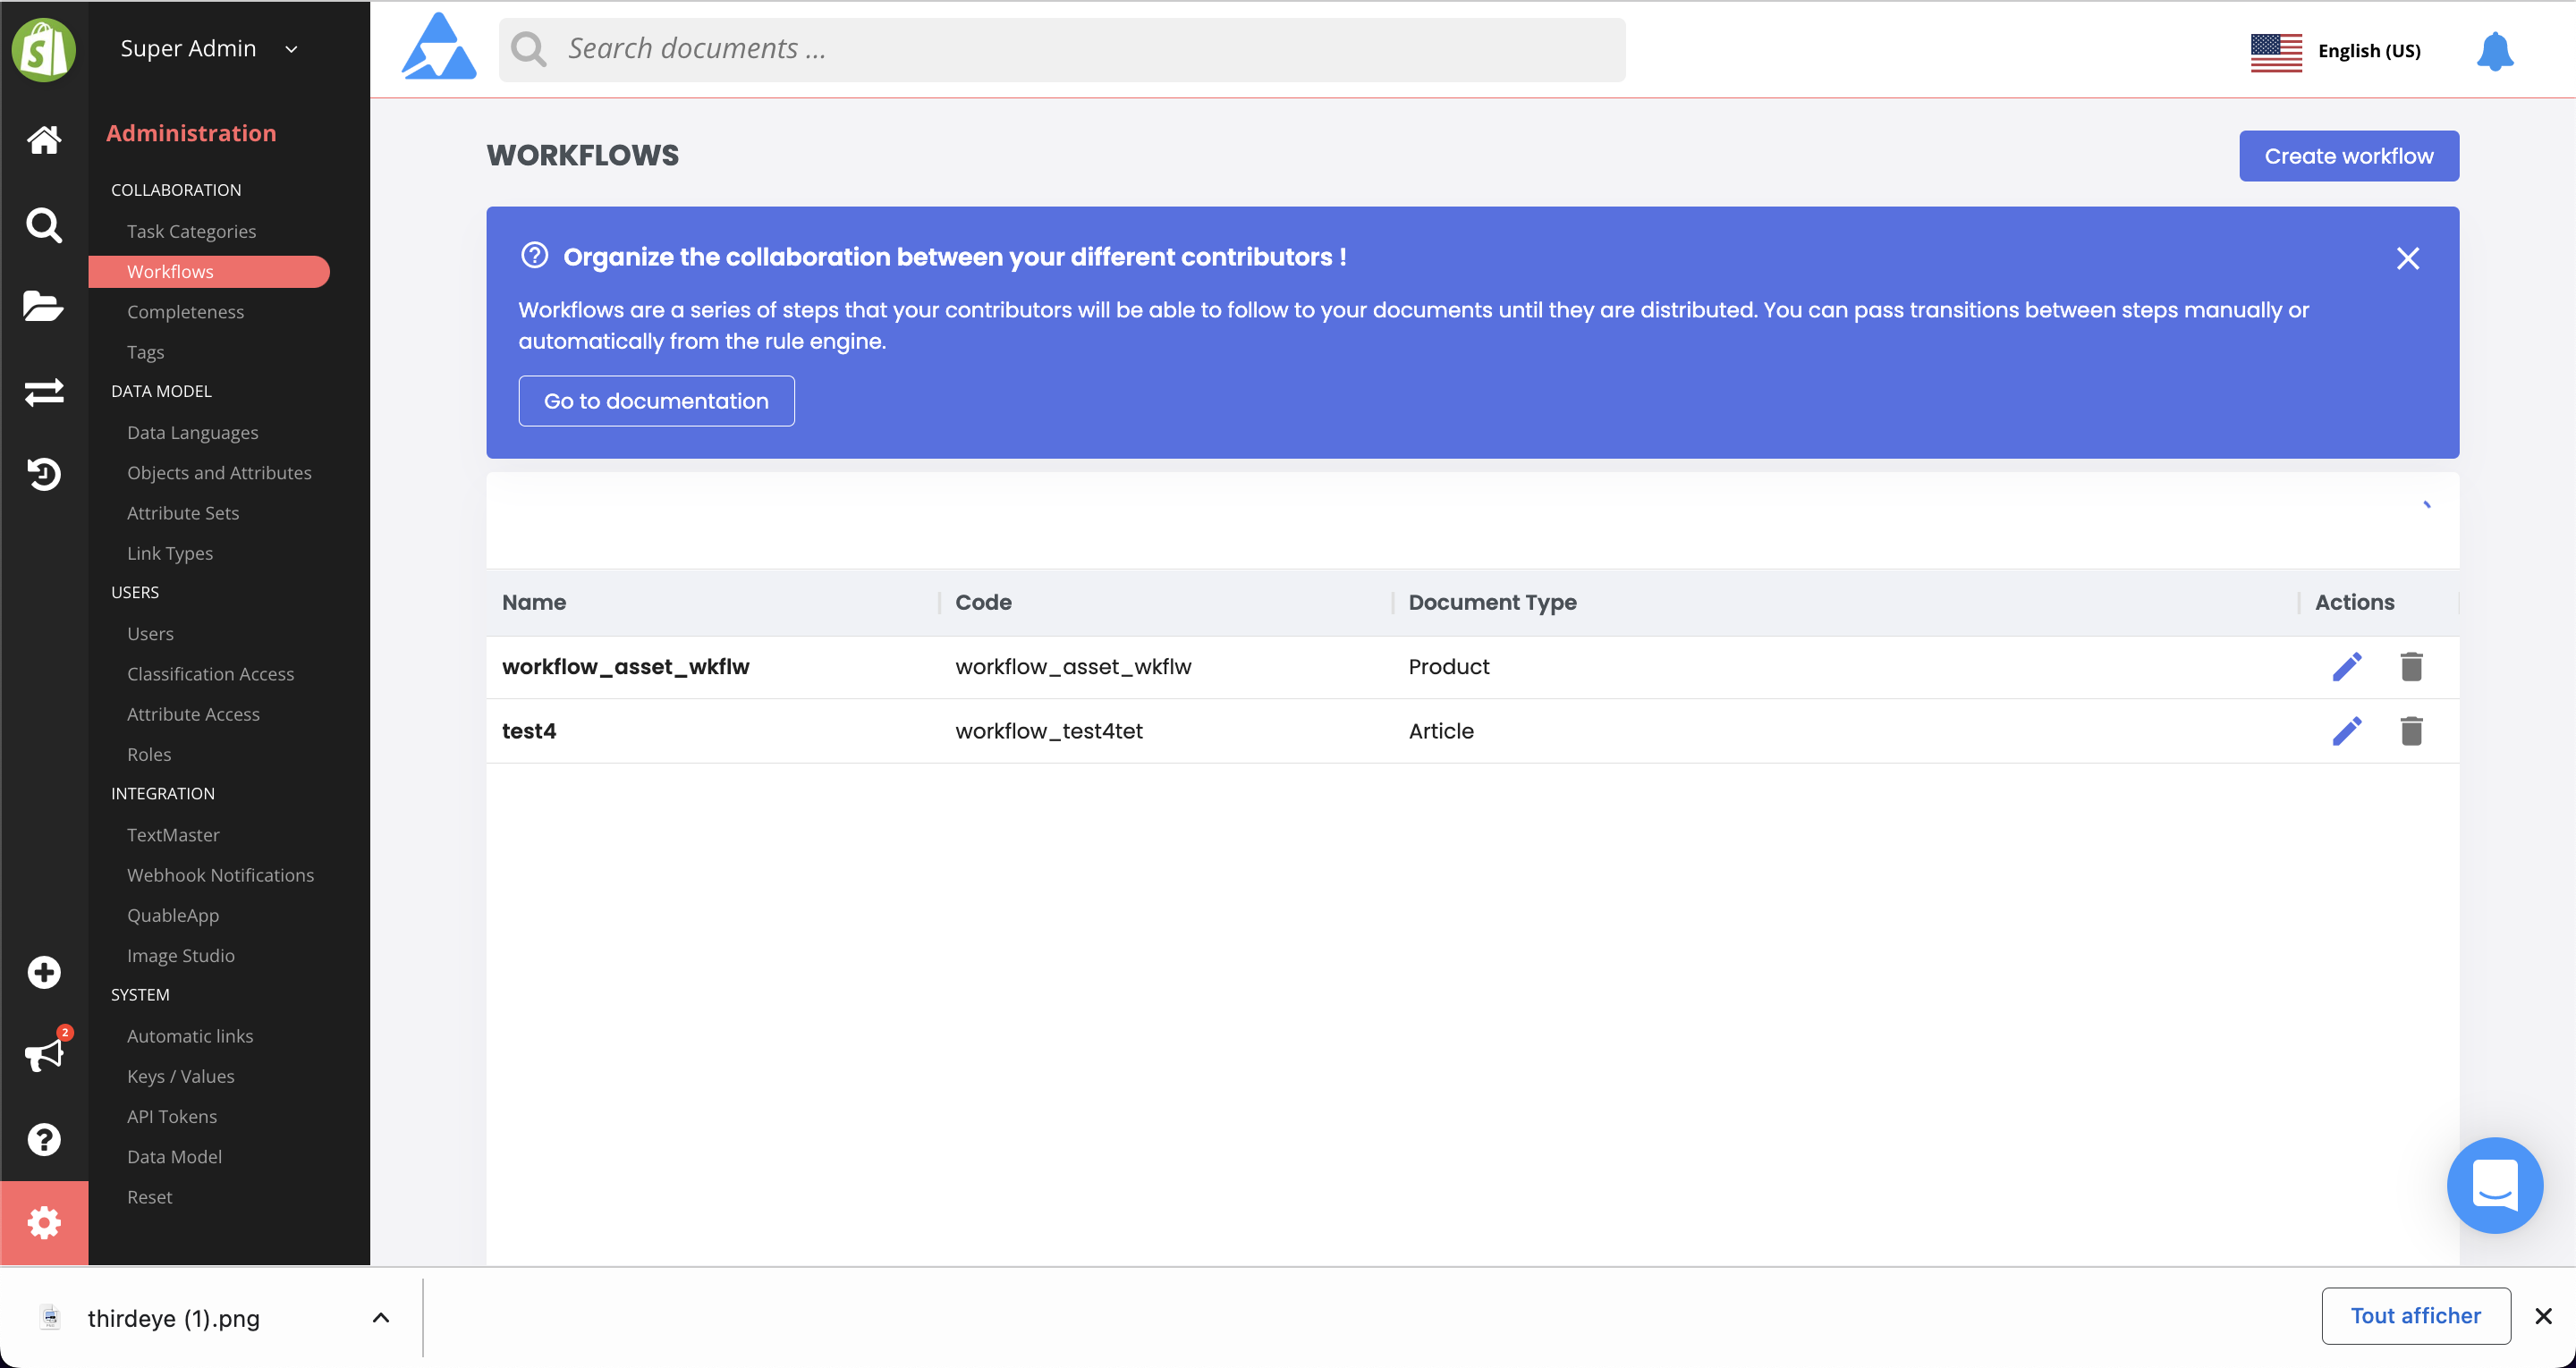
The Workflows page includes a brief description of the feature, a link to this documentation page, and a list of existing workflows (if any), their codes, and the type of document they're applied to.
-
If no workflows have been created yet, a Create Workflow button is displayed in both the Current workflows list and the top right corner of the page.
-
If workflows have already been created, a list of workflows is displayed in the Current workflows list and the Create Workflow button is only displayed in the top right corner of the page.
Create Workflow
To create a workflow, click on the Create Workflow button. The New Workflow form is displayed.
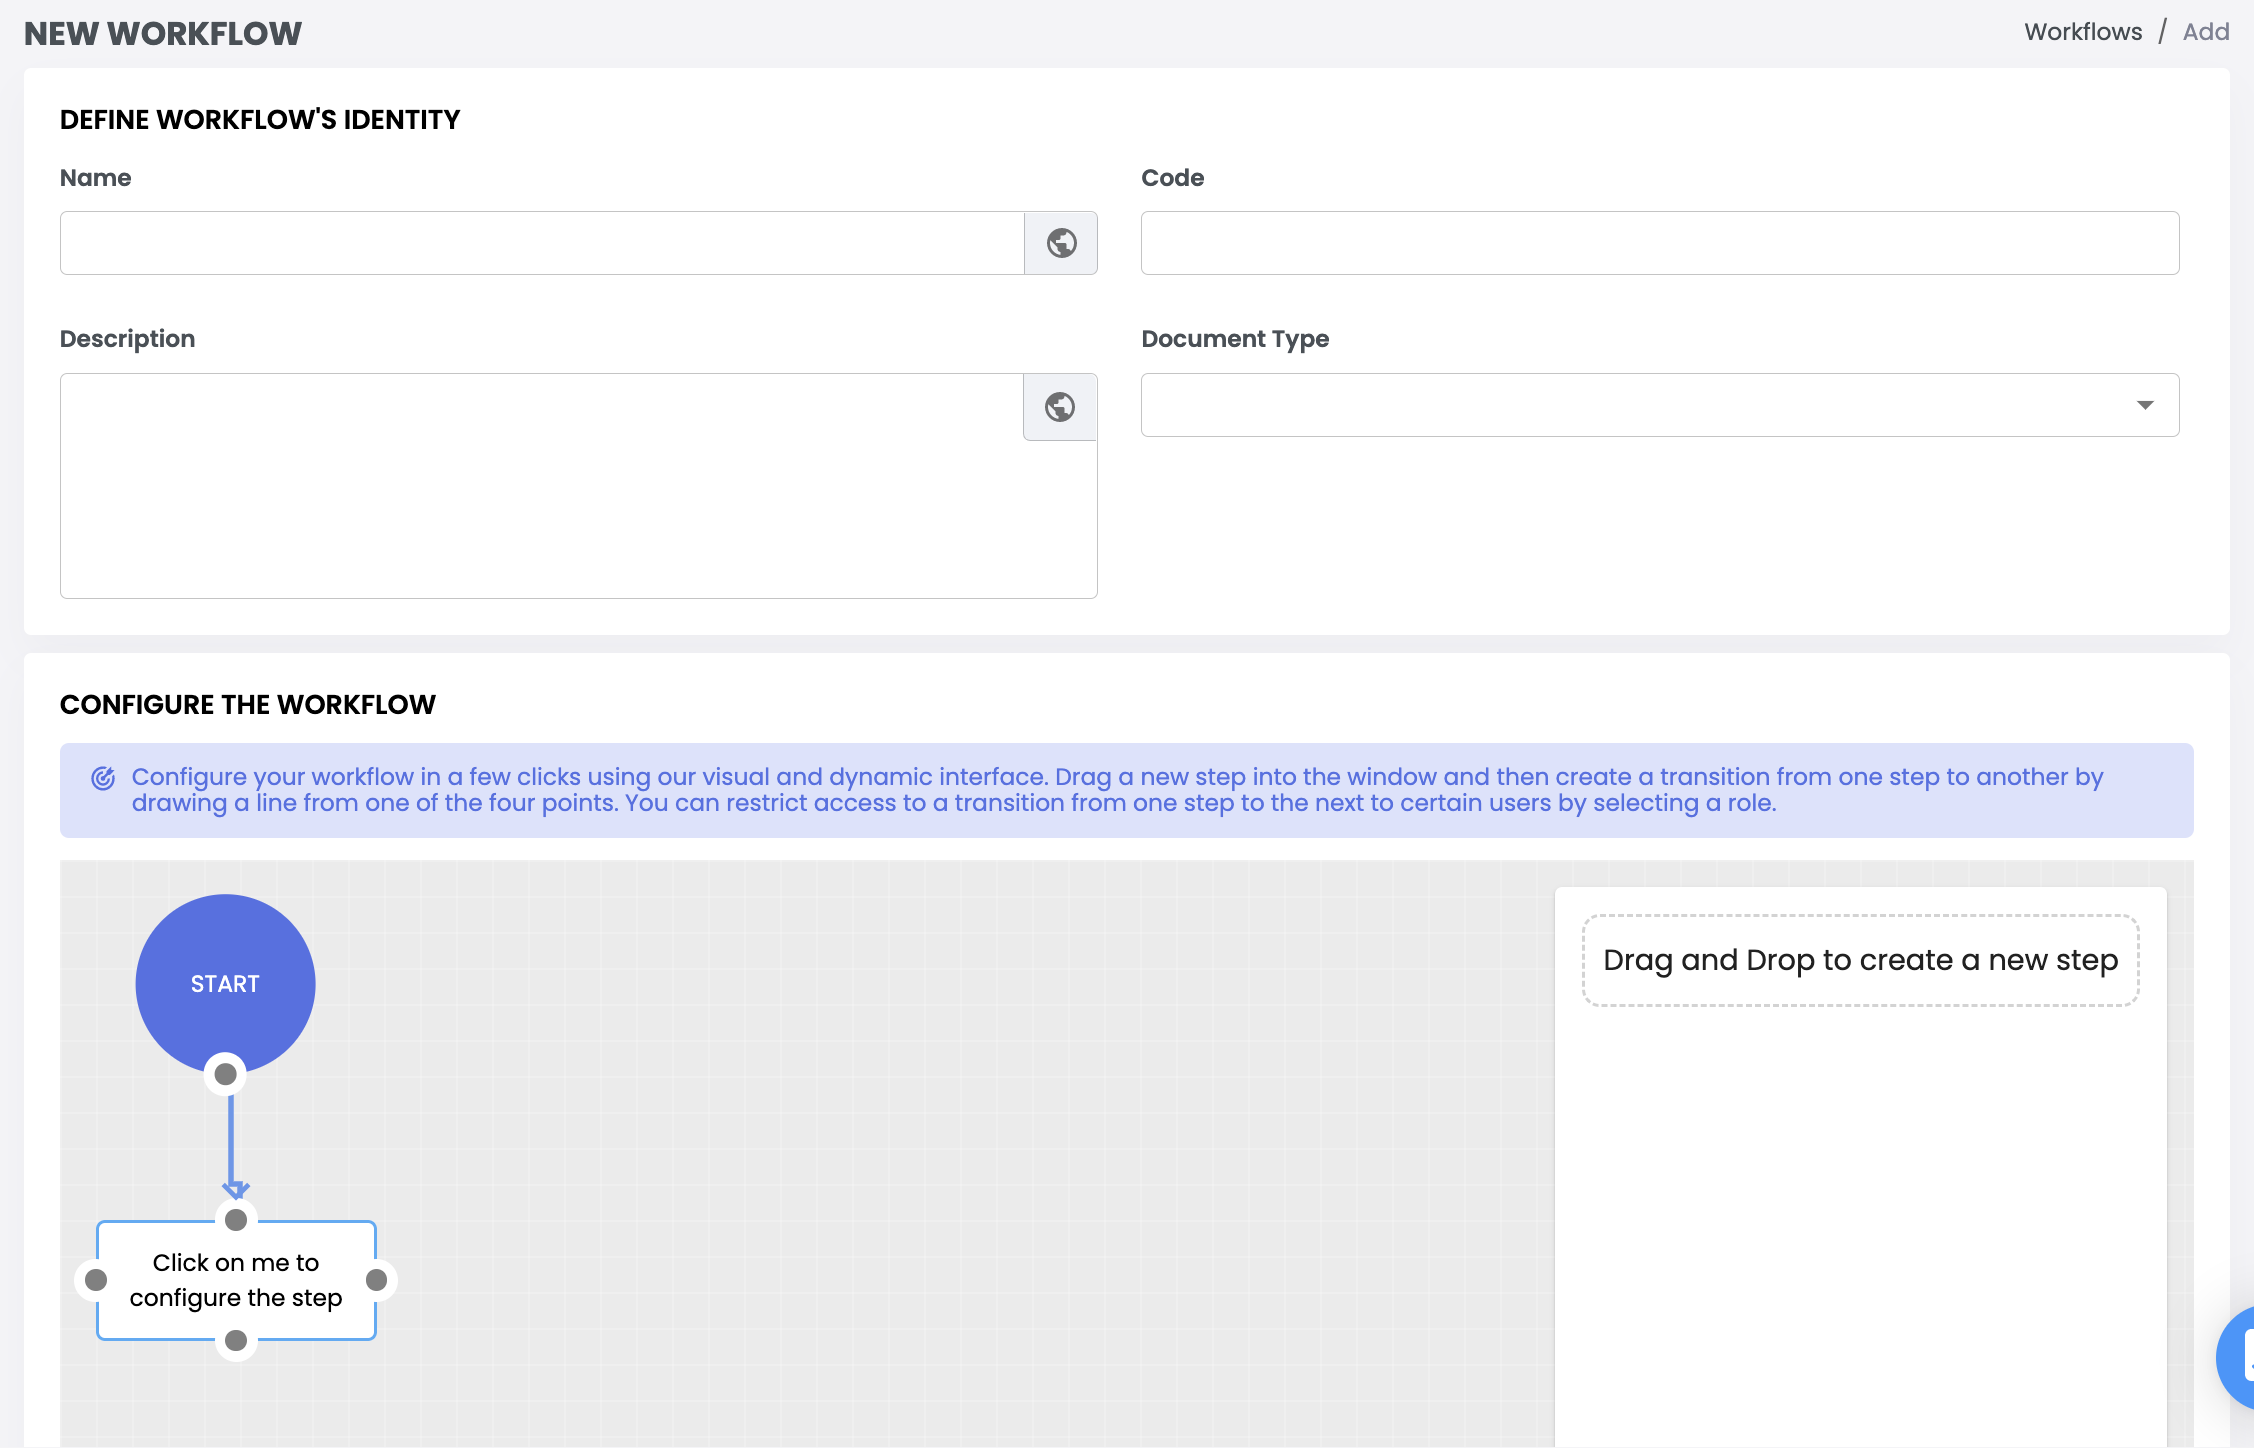
The form is divided into two sections: Workflow Identity, and Configuration. These are described in detail below.
When you've completed the sections, click the Create button to save the workflow or the Return link to cancel the creation of the new workflow.
Workflow Identity
This section is used to distinguish each workflow and its settings.

Enter the following information:
Information | Description | Mandatory |
|---|---|---|
Name | The name of the workflow. | Yes |
Code | This is automatically generated by Quable PIM when you click in the Code entry area.
| Yes |
Description | Text to describe the workflow. | No |
Document Type | The type of document that will use the workflow. | Yes |
The globe icon in the Name and Description fields indicates that they are localized. Clicking on the globe opens a form where you can enter translations for the selected field in all of the languages available in the Quable PIM interface.
Configuration
This section is used to define the steps and transitions of your workflow.
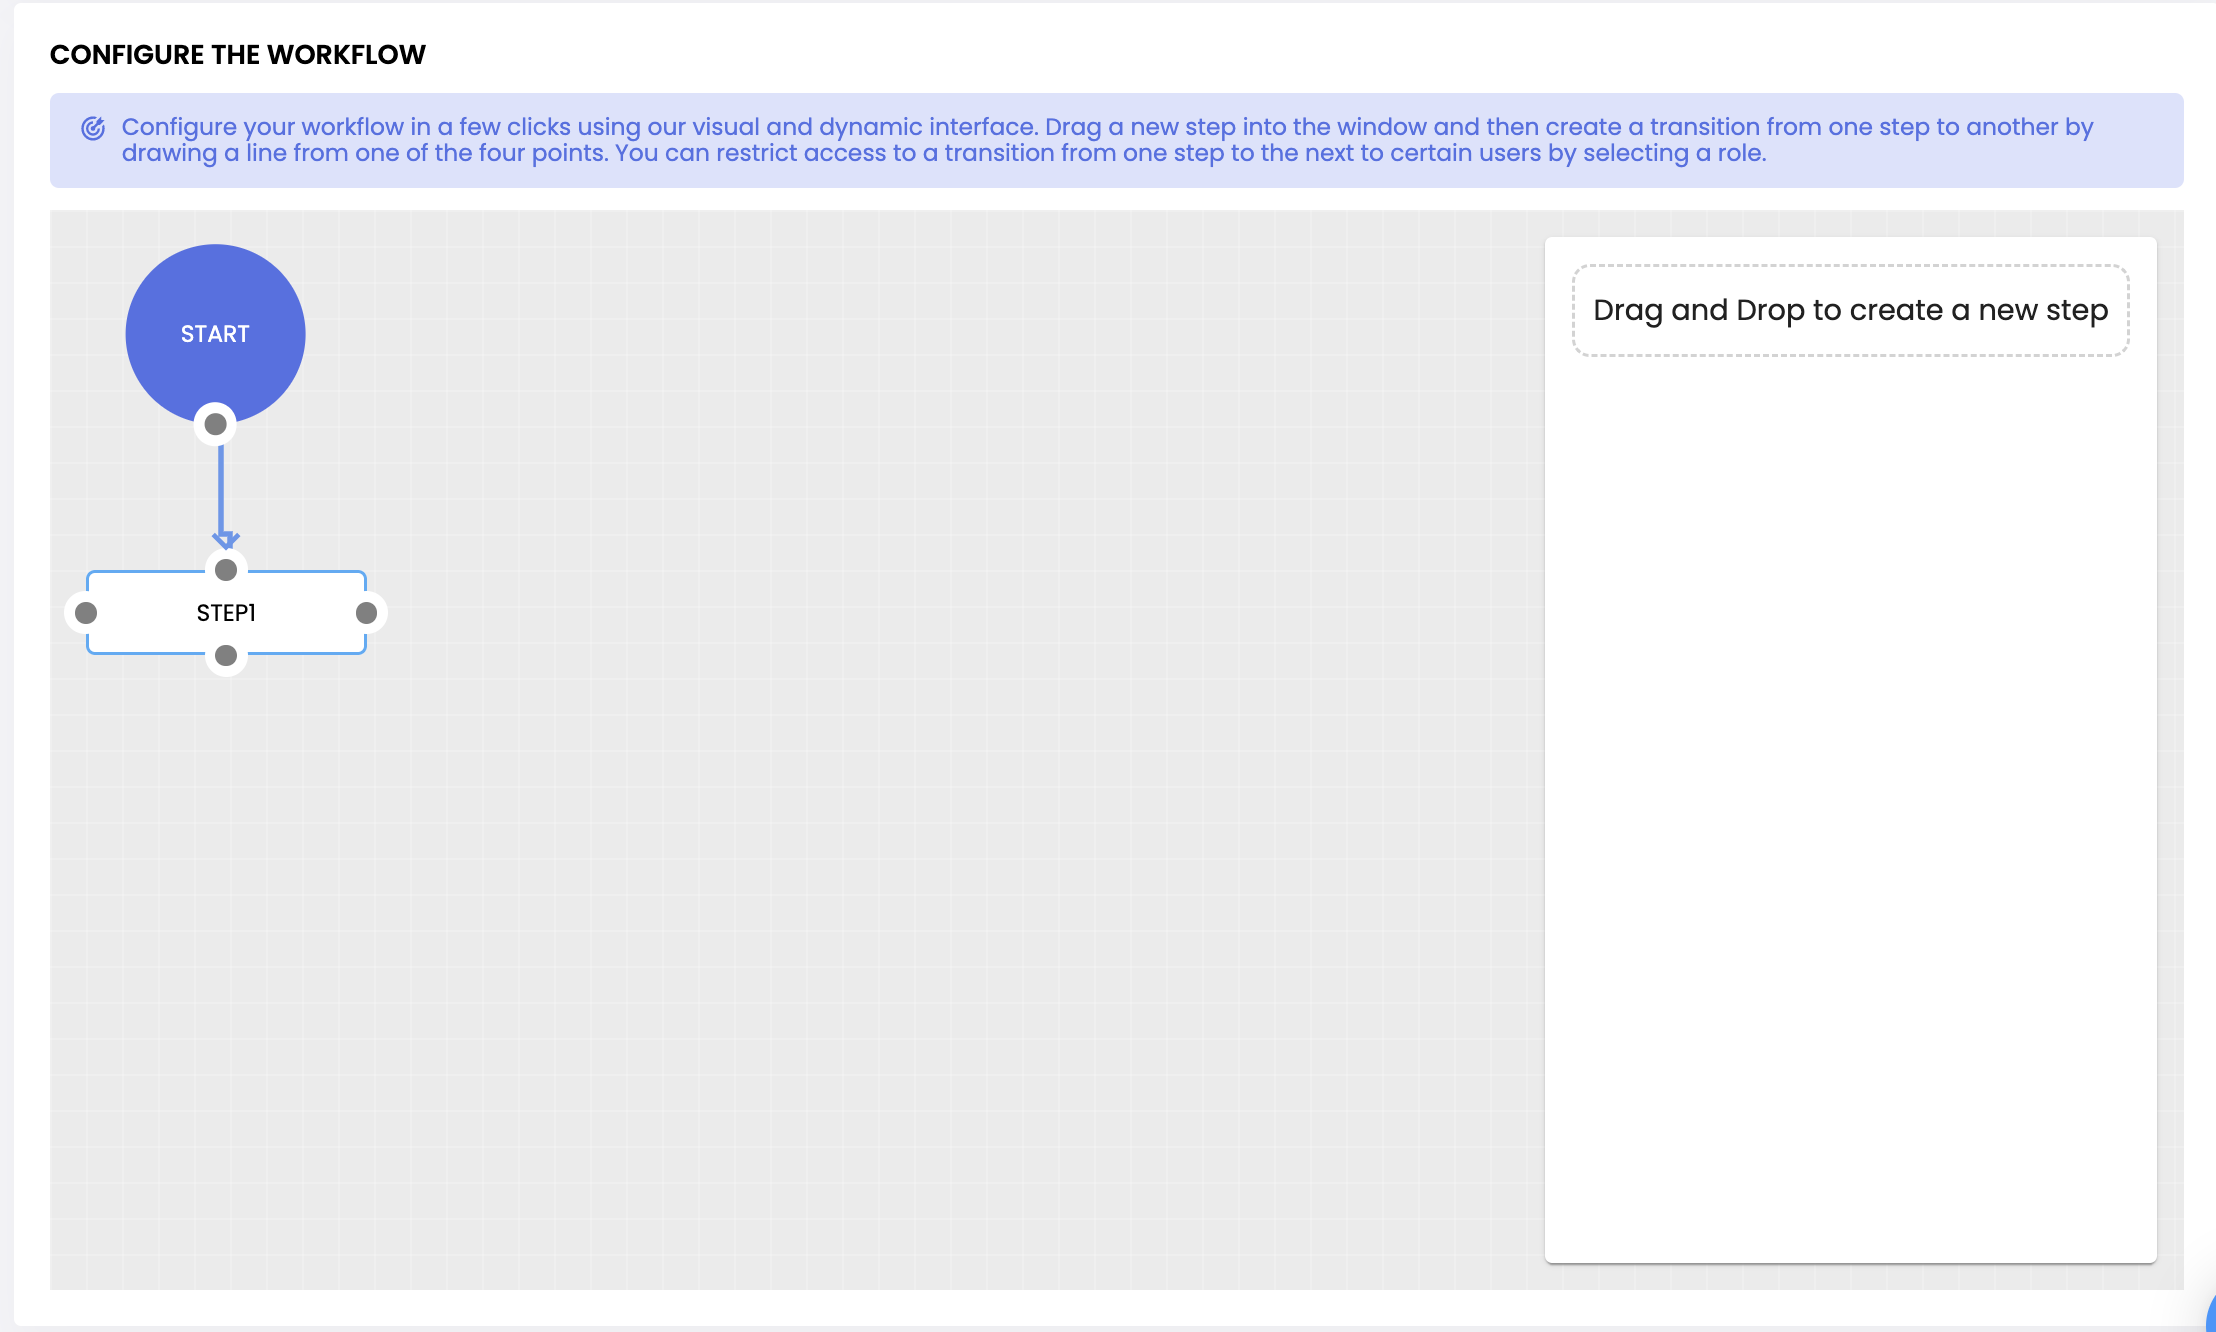
First Step
To add the first step of the workflow, click on the step below the Start circle. This opens the step's properties in the right sidebar.
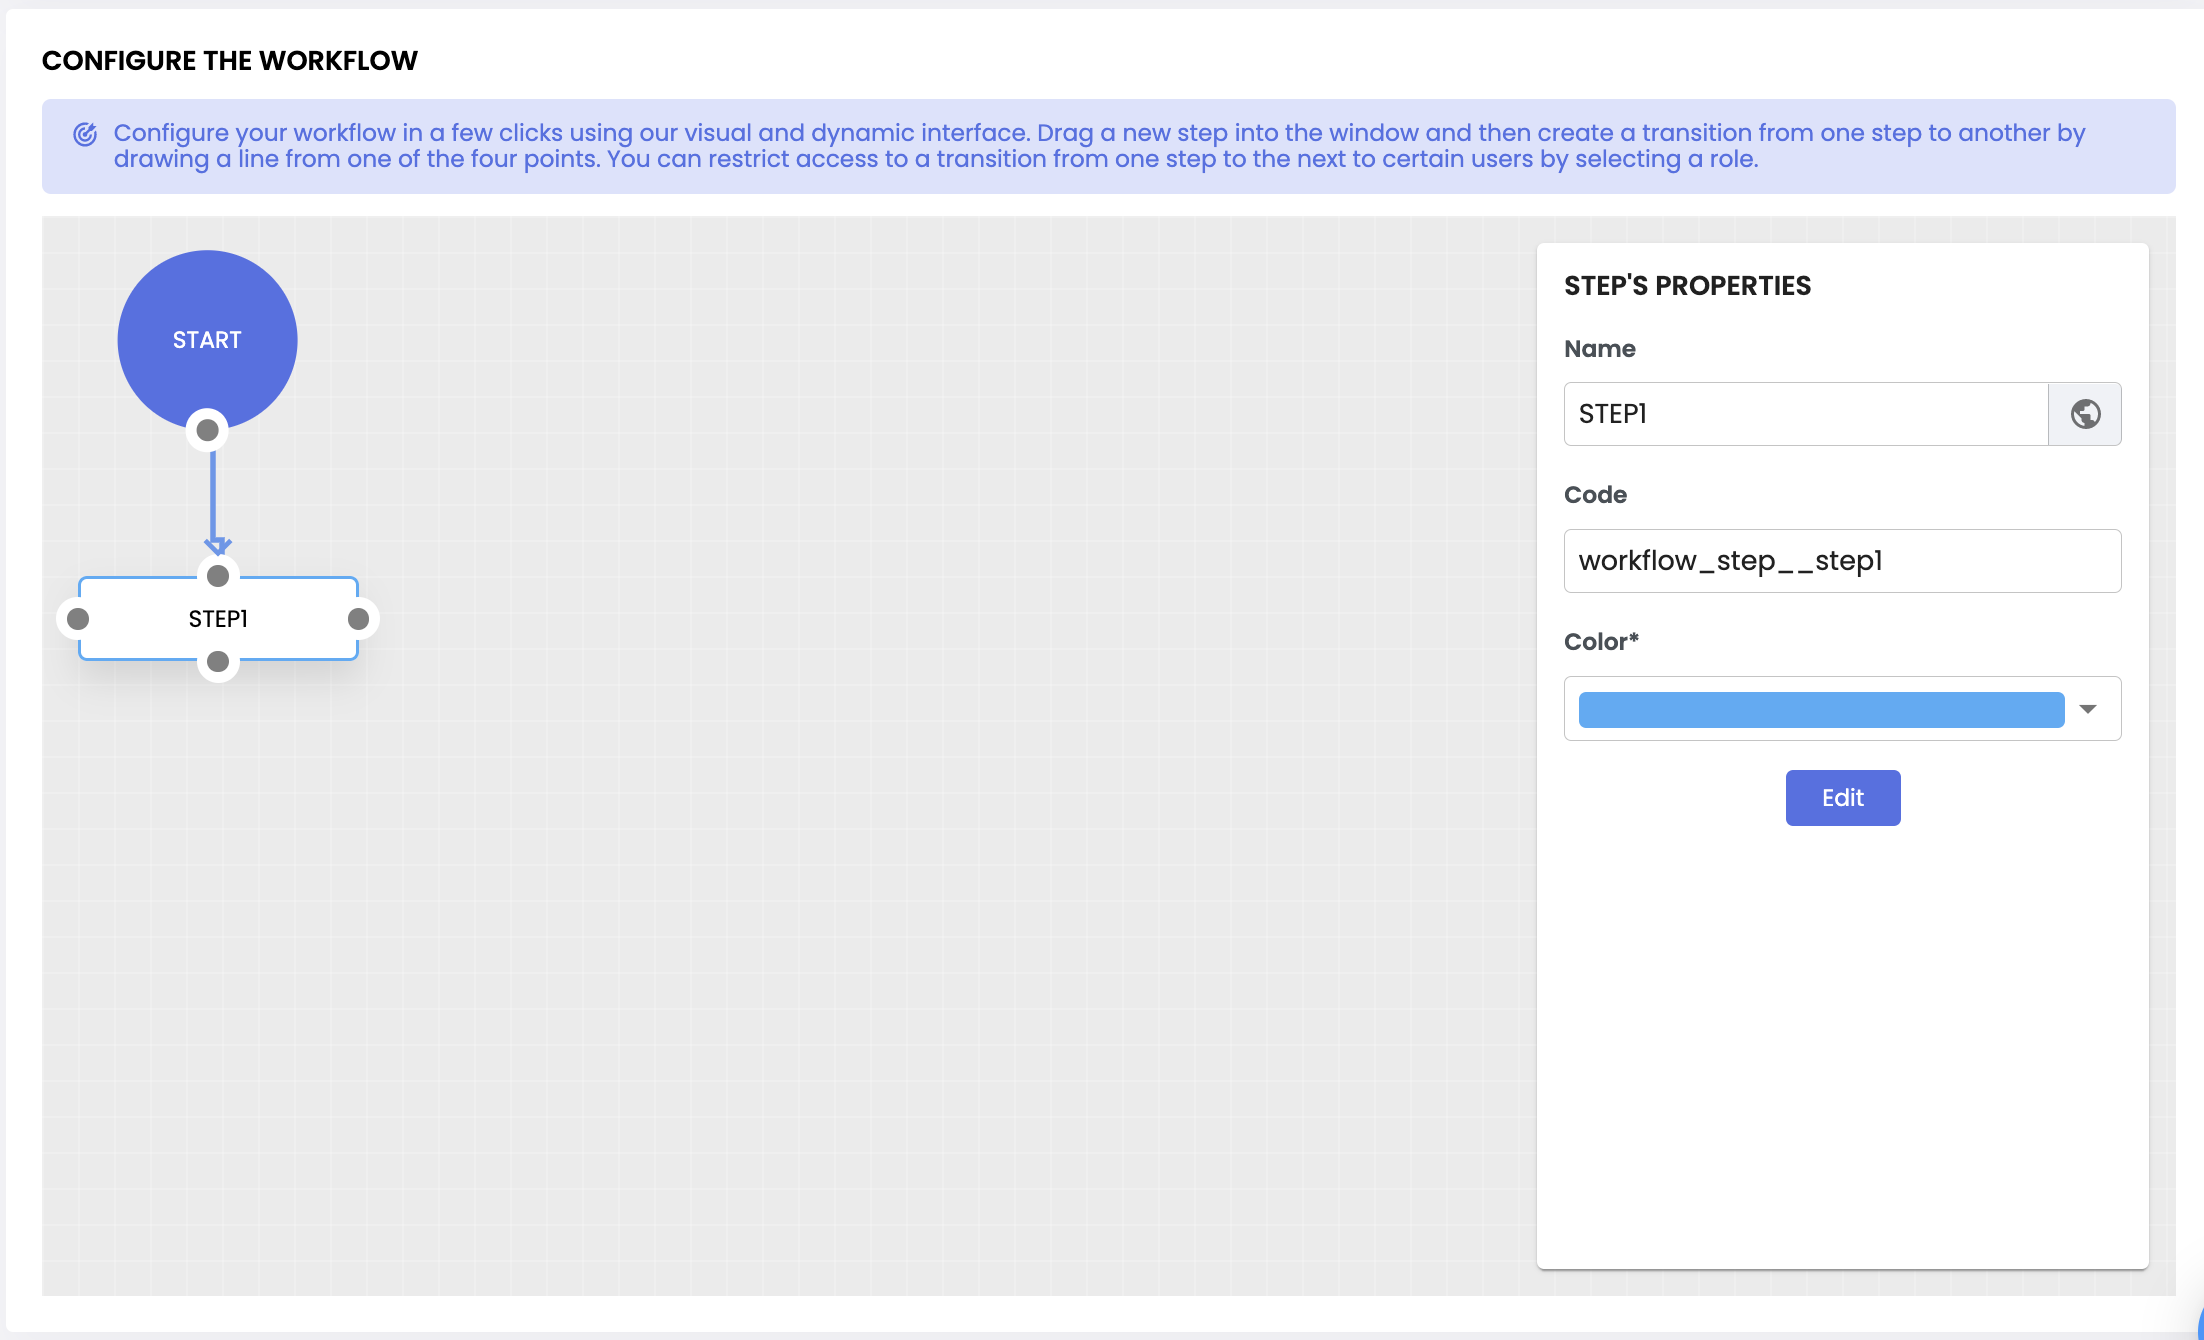
Enter the following information:
Information | Description | Mandatory |
|---|---|---|
Name | The name of the workflow step. | Yes |
Code | This is automatically generated by Quable PIM when you click in the Code entry area.
| Yes |
Color | Select a color to identify the workflow step. You can select a system color or enter a hexadecimal color code. | Yes |
The globe icon in the Name field indicates that it is localized. Clicking on the globe opens a form where you can enter translations for the selected field in all of the languages available in the Quable PIM interface.
When you've completed defining the step, click the Edit button.
Additional Steps
To add additional workflow steps, drag a box from the right sidebar onto the gray panel. Click on the step and enter the information for the step as described for the first step.
Add Transitions
To add transistions between your workflow steps, click on one of a step's four points and draw a line to one of the four points on the next step. Click on the line to open the transition's properties in the right sidebar.
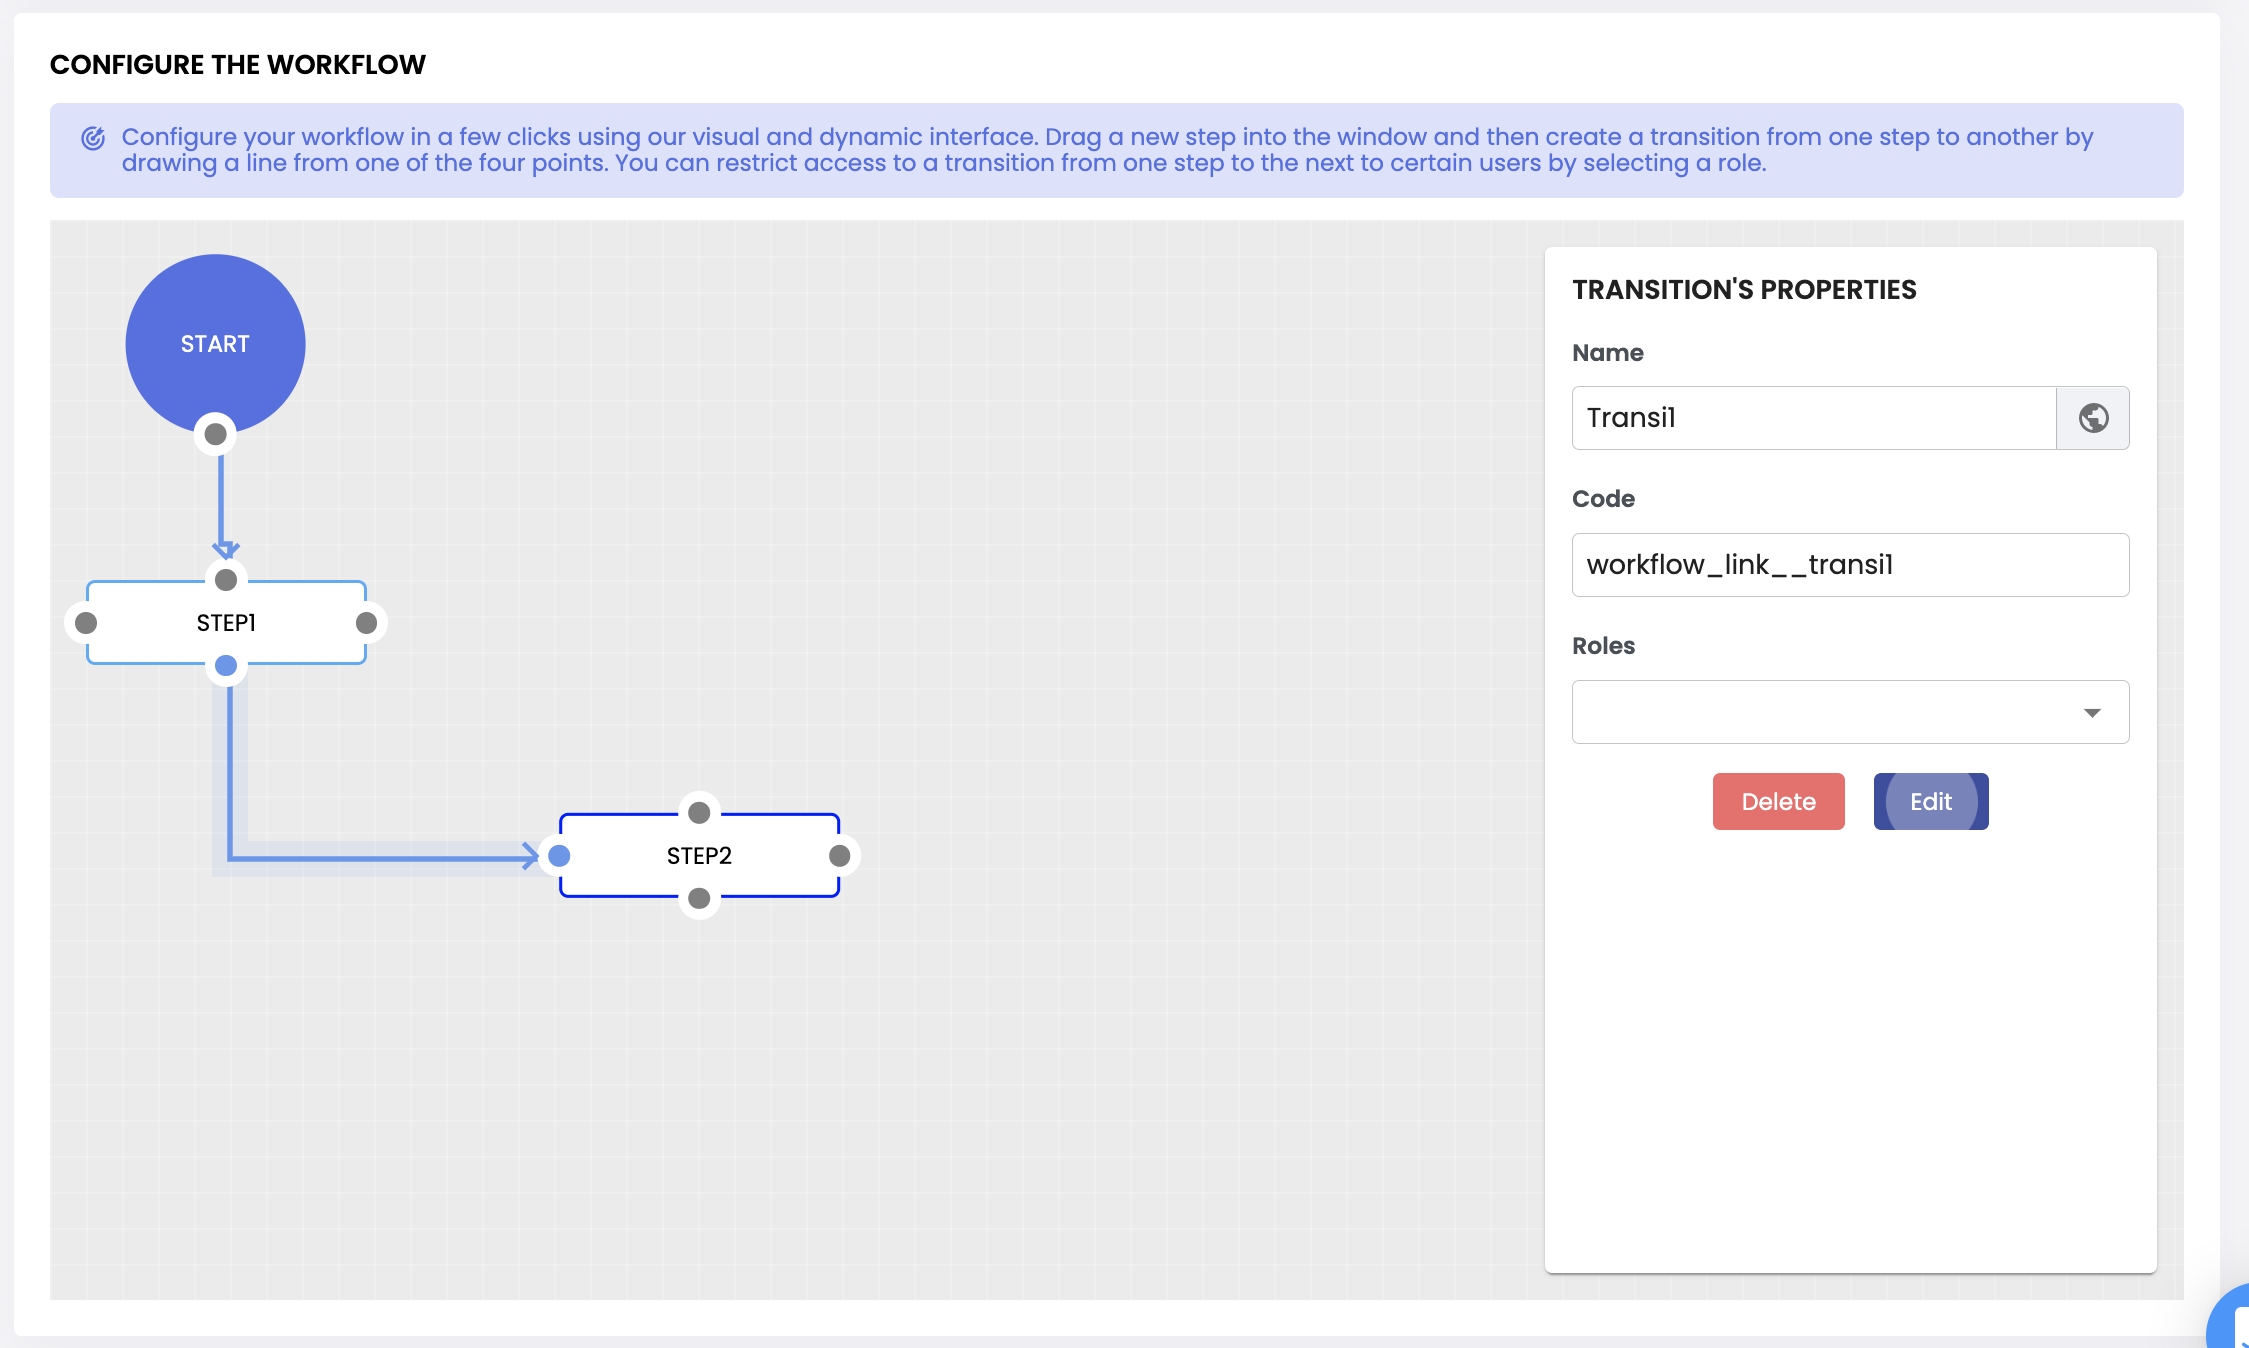
Enter the following information:
Information | Description | Mandatory |
|---|---|---|
Name | The name of the workflow transition. | Yes |
Code | This is automatically generated by Quable PIM when you click in the Code entry area. Note: The auto-generated code can be modified only during workflow creation. | Yes |
Roles | You can select Role(s) authorized to validate the transition. If no selection is made, any user can validate the transition. | No |
The globe icon in the Name field indicates that it is localized. Clicking on the globe opens a form where you can enter translations for the selected field in all of the languages available in the Quable PIM interface.
When you've completed defining the transition, click the Edit button.
Edit Workflow
To edit a workflow, select a workflow in the Current workflows list on the Workflows page and click on its Edit icon . The Edit Workflow form for the selected workflow is displayed.
When you've completed your modifications, click the Save button to save your changes or the Return link to exit the form without saving any changes.
Delete Workflow
There are two ways to delete a workflow. Select a workflow in the Current workflows list on the Workflows page and:
- click on its Delete icon or
- click the Edit icon to open the Edit Workflow form and click the Delete button.
A dialog is displayed to cancel or confirm the deletion.
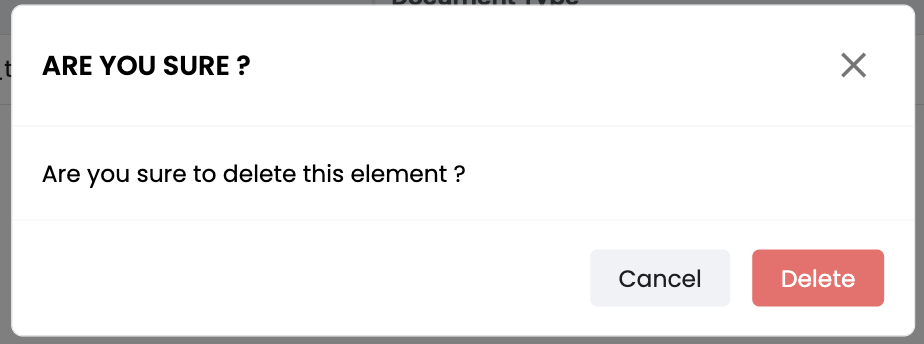
IRREVERSIBLE ACTIONDeleting a workflow permanently removes the workflow from Quable PIM and will no longer be able shown in your documents.
Updated 5 months ago
