Moving, replacing, and deleting assets
Learning objectives
- Learn how to move an asset to a different classification without losing its links.
- Understand how to replace a file without recreating the asset sheet.
- Learn how to delete an asset, knowingly and responsibly.
Overview
This course explains how to manage assets already present in the DAM by moving them to a different classification, replacing them, or permanently deleting them.
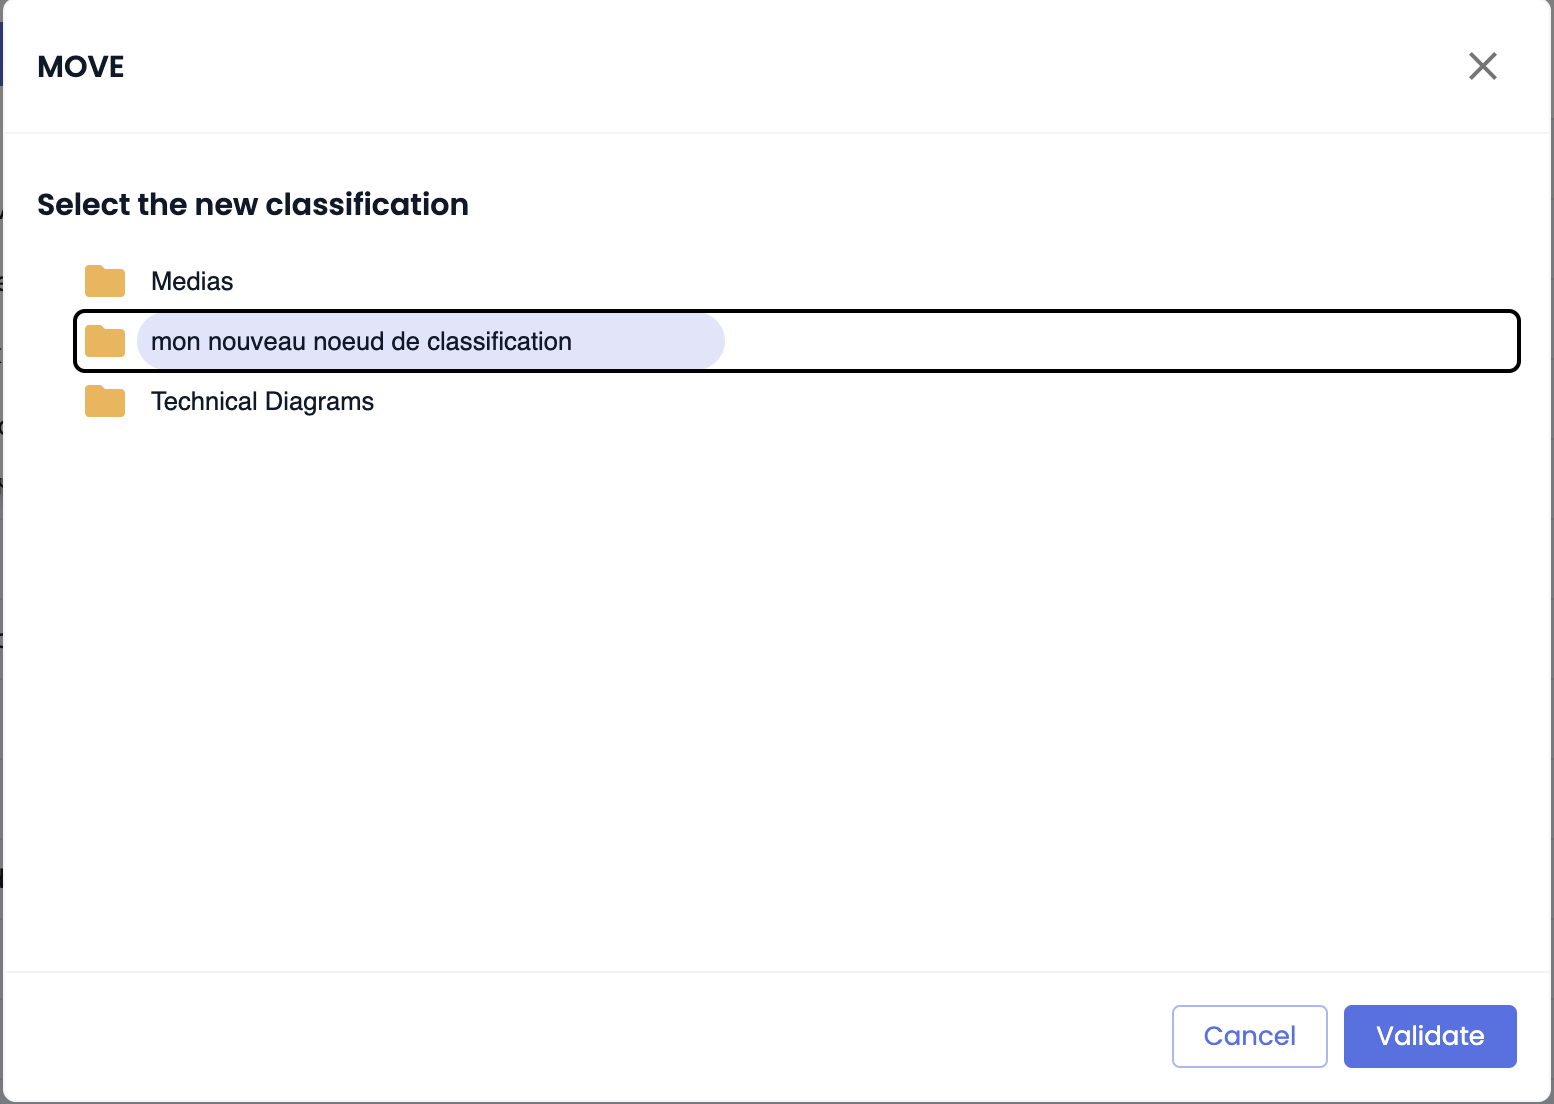
Moving an asset
An asset can be moved to another classification directly from its asset sheet.
- Open the relevant asset sheet,
- Click the Move button,
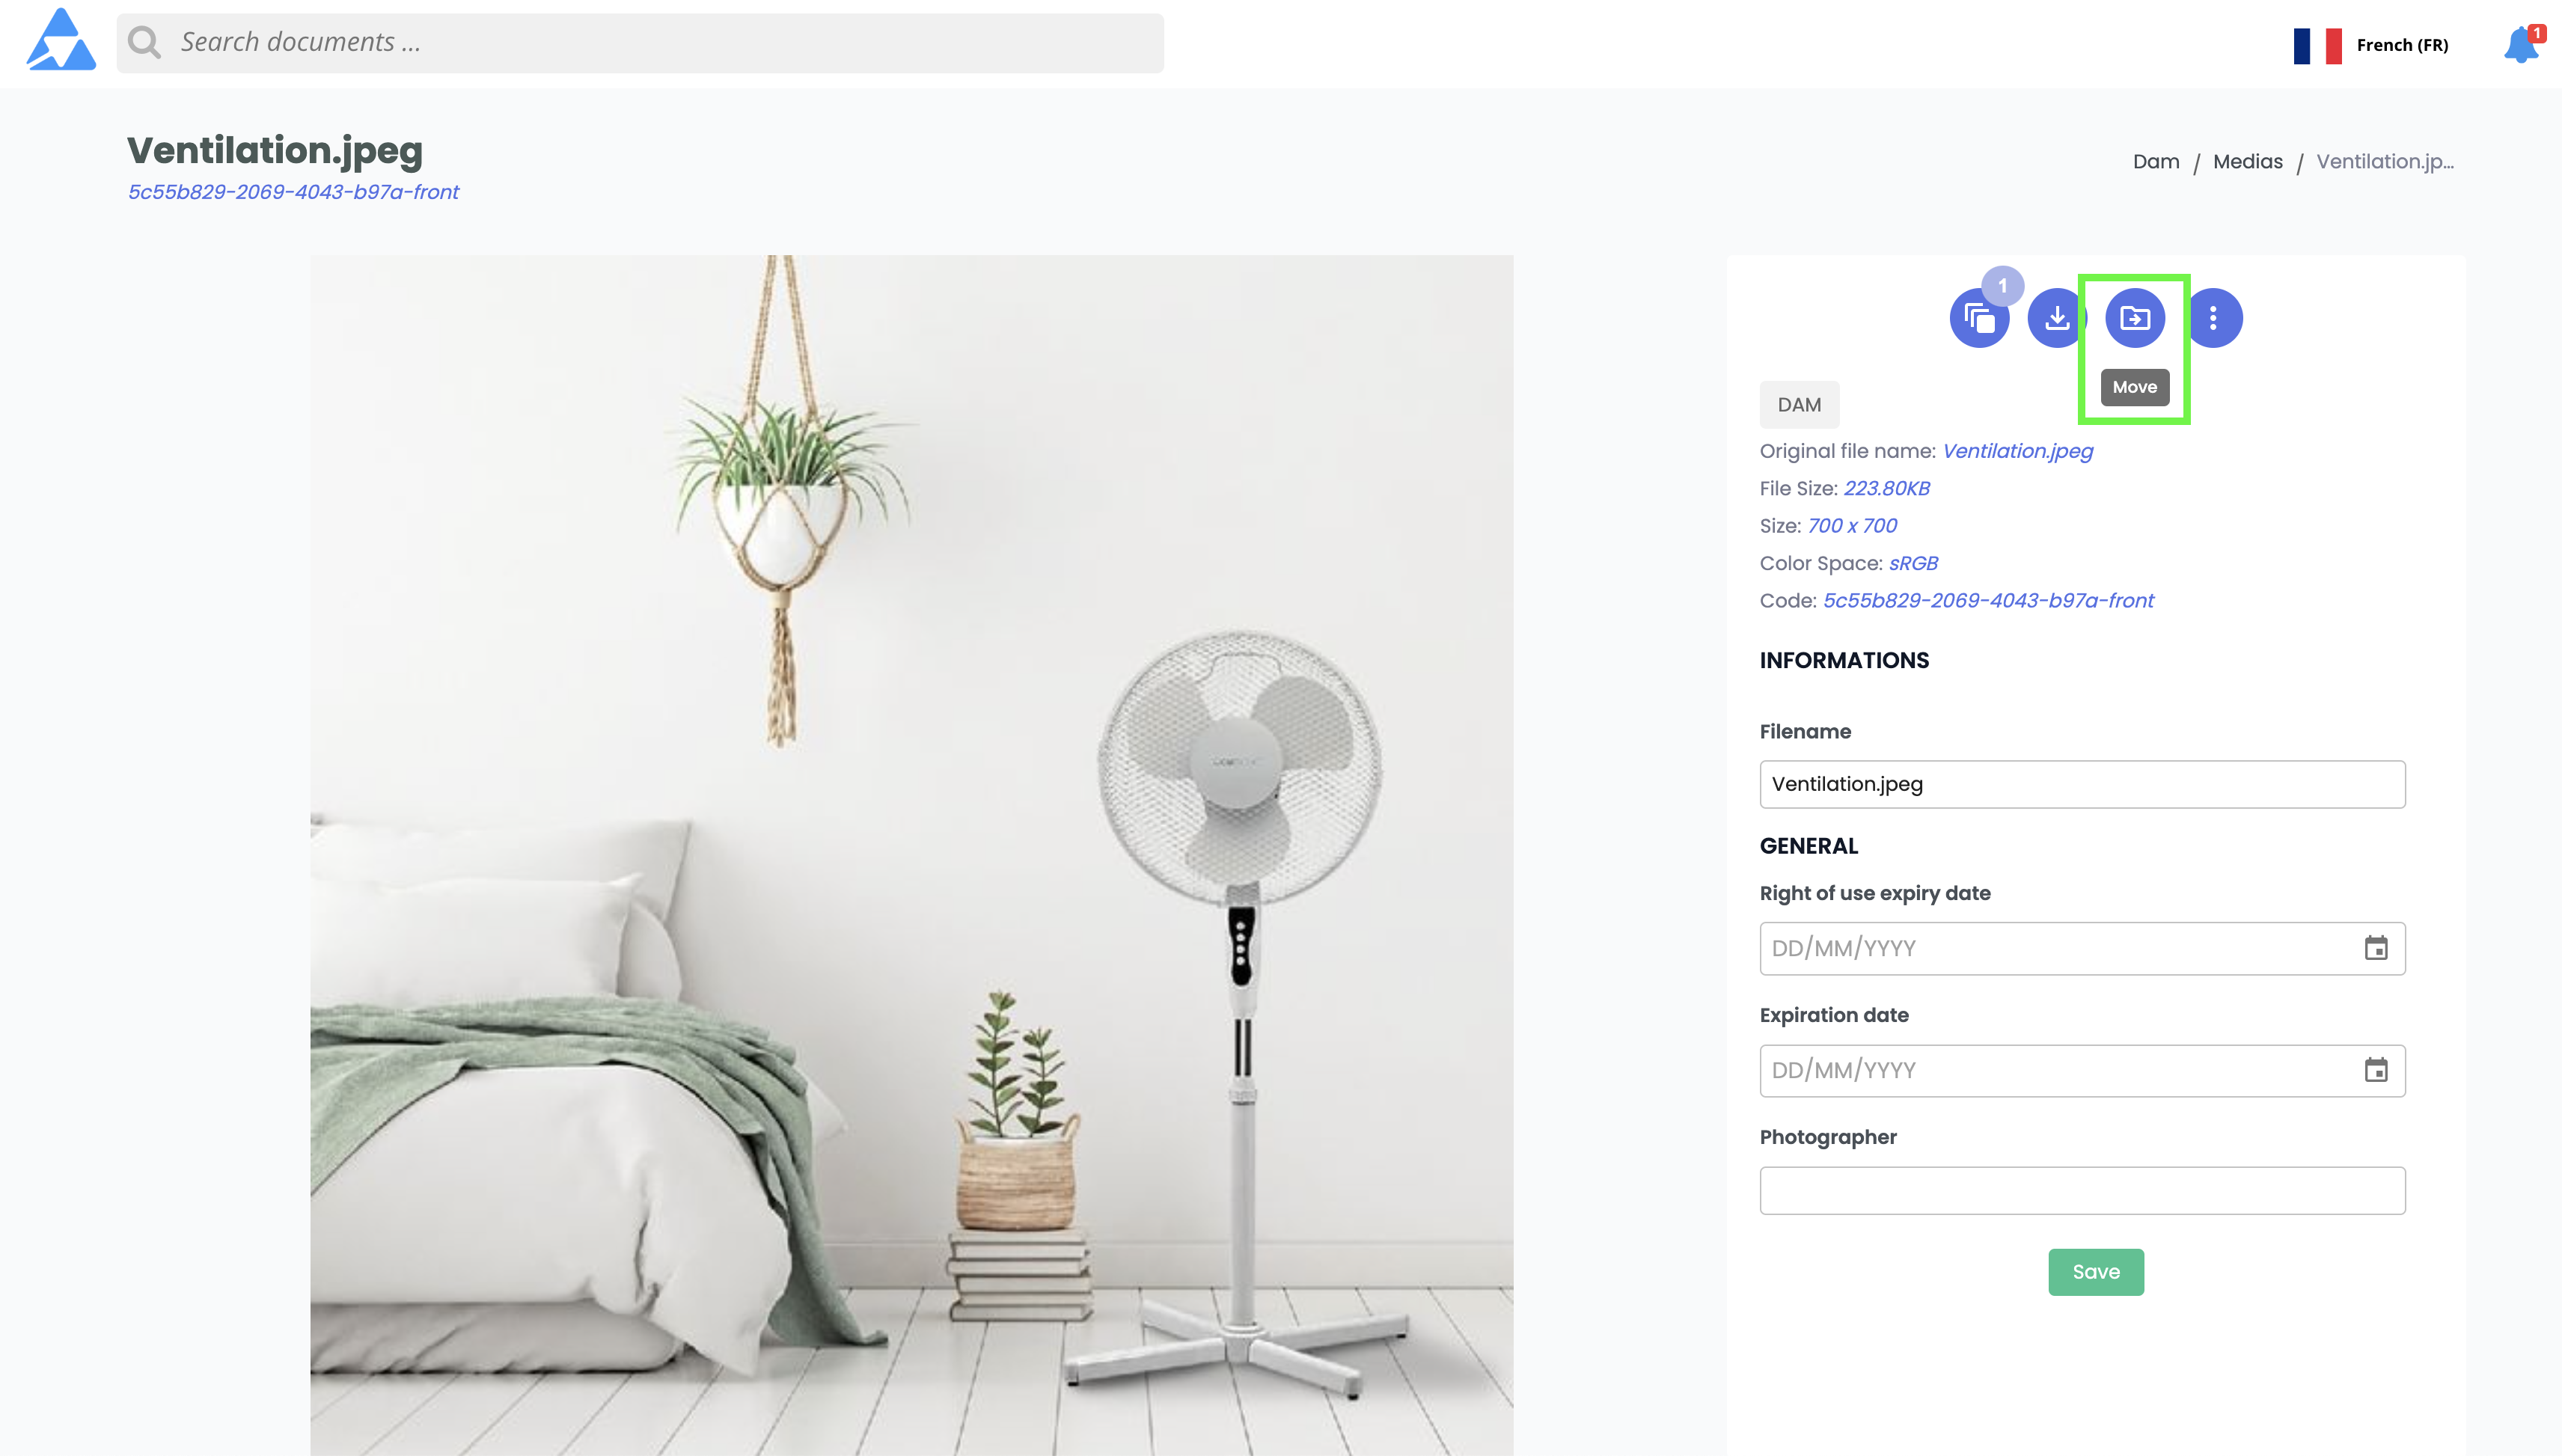
- Select a new classification from the dropdown list,
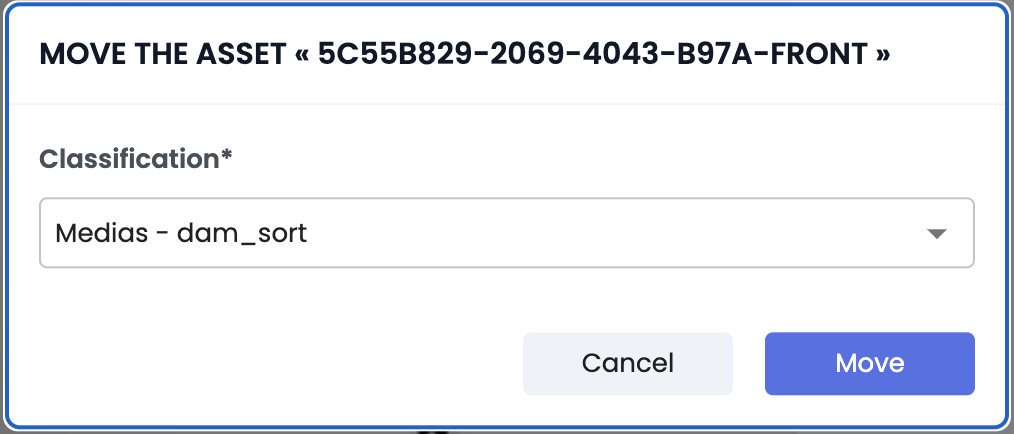
- Click Move to confirm or Cancel to abort.
Good to knowMoving an asset does not affect its links to product sheets. Only its position within the DAM classifications is updated.
Replacing an asset
For assets already in the DAM
Replacing an asset lets you keep the same asset sheet (and any existing links) while updating the associated file.
- Open the relevant asset sheet,
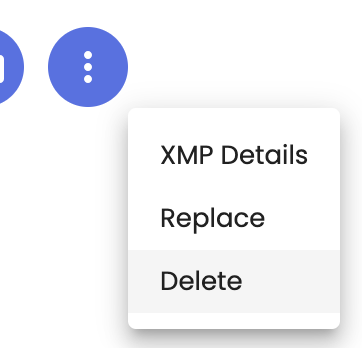
- Click on the ⁝ icon, then select Replace,
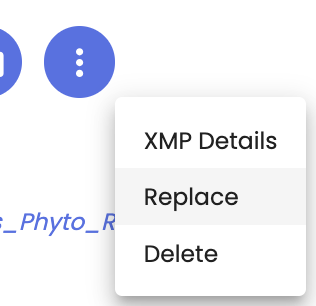
- Select a new file from your computer,
The new file immediately replaces the old one, without modifying the asset sheet's attributes or links.
Good to knowThis is especially useful for updating a product visual without having to create a new asset sheet.
For external assets
Clicking Replace on an external asset sheet converts it to a standard sheet. The new file is stored in the DAM and permanently replaces the old asset.
To keep the asset as an external sheet, simply update the asset URL in the relevant attribute field instead of using the Replace button.
Good to know
- The external asset URL must be a public HTTPS link.
- It is not possible to convert a standard asset sheet into an external one.
Deleting an asset
When an asset is deleted, its corresponding asset sheet is also removed. This results in the permanent loss of all its attributes and links. Deletion can be done from:
- the DAM,
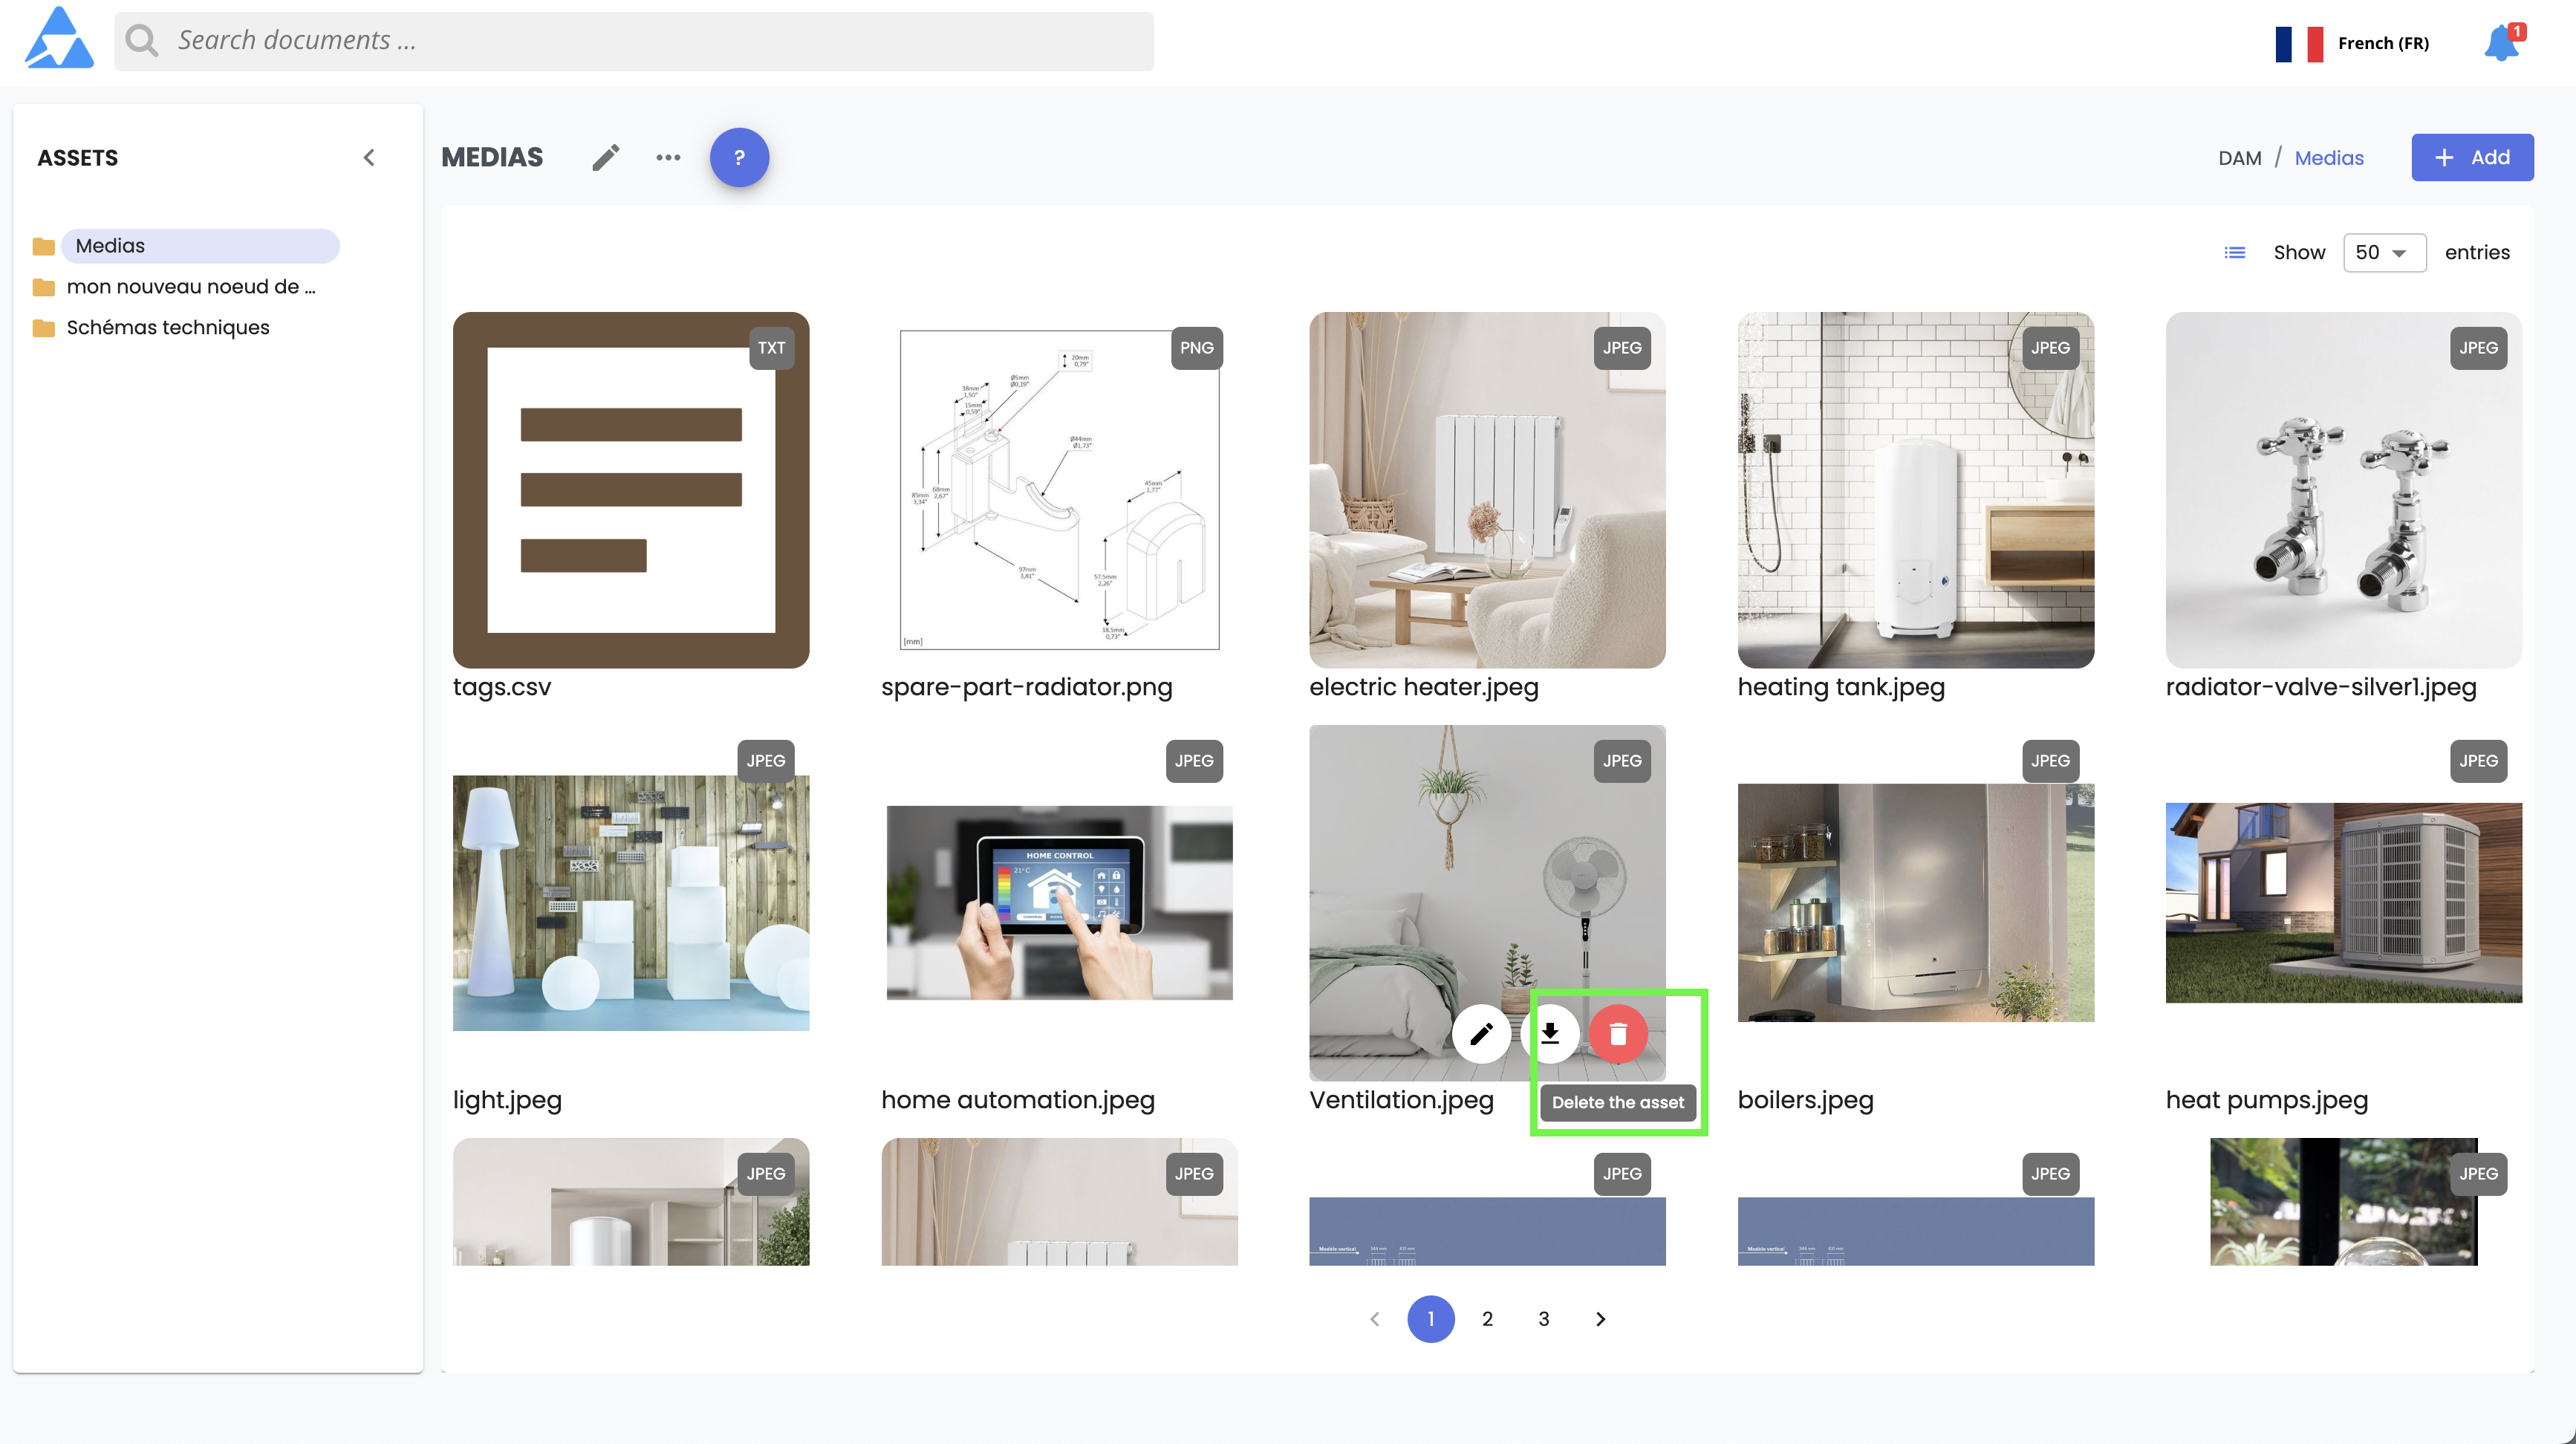
- the asset sheet,
- the product sheet,
How to delete?
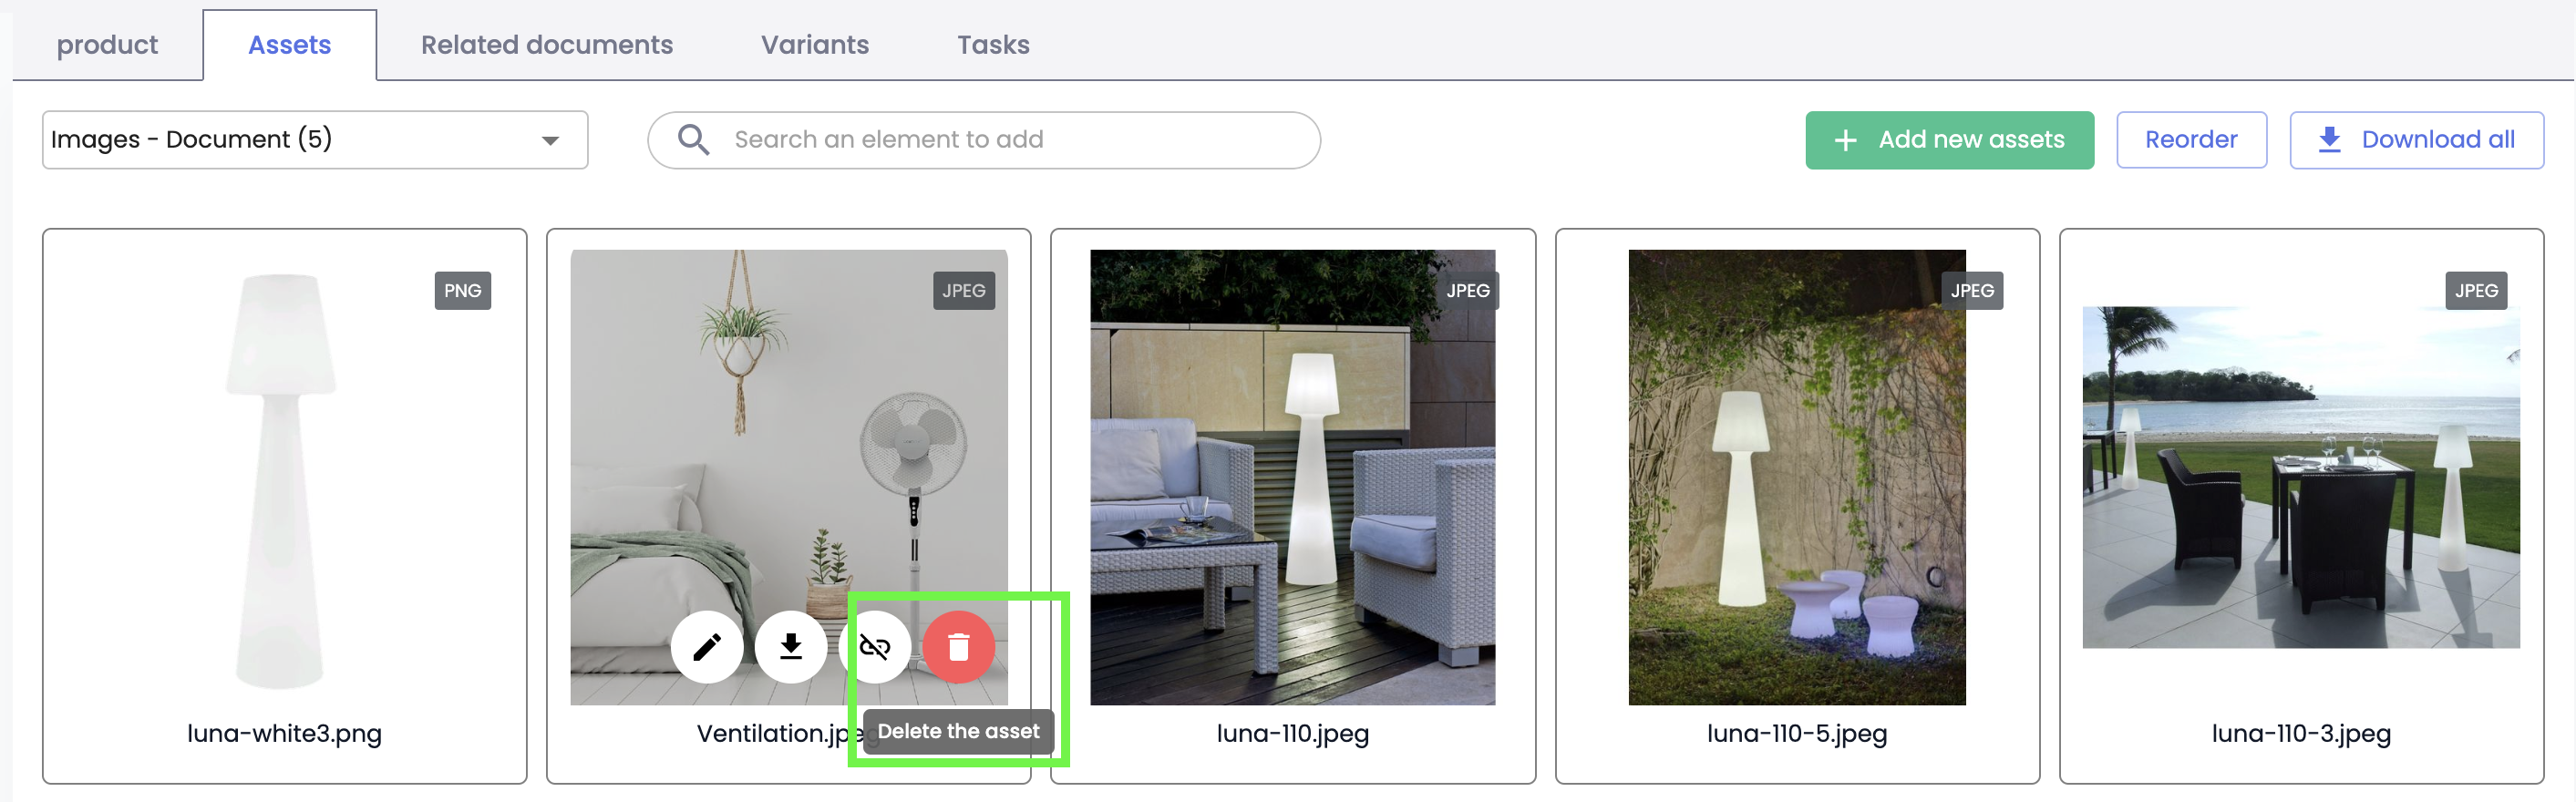
- Click the Delete button,
- A warning window will appear. Confirm the action.
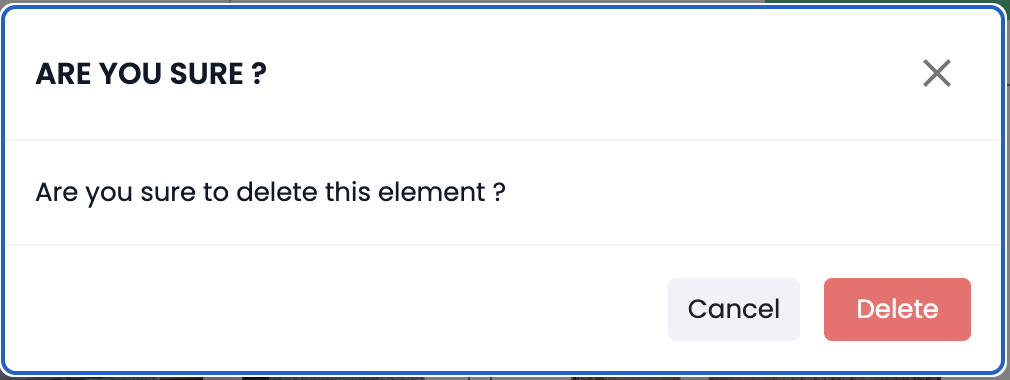
WarningDeletion is irreversible. Once deleted, the asset cannot be restored.
Bulk actions on assets
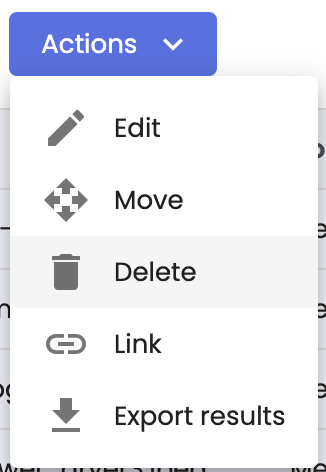
It is possible to perform bulk move and delete operations on assets. Go to the advanced search page and follow these steps:
Bulk move of items
Bulk move allows you to change the classification of a selected group of assets at once, moving them all to a new classification.
-
Perform a search for a selection of items on the Advanced Search page,
-
Select the assets you want to move by ticking their checkboxes, or click “select all results”,
-
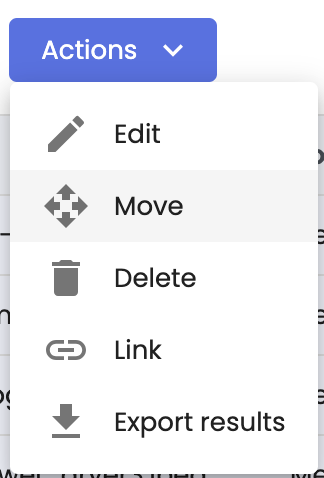
Then click the Actions button and choose Move from the dropdown menu.
-
A dialog box will ask you to choose the classification to which you want to move the items. Expand the tree, select the desired classification node, and click Confirm.
Irreversible actionThis action is irreversible. Once the bulk move is performed, the change cannot be undone.
Bulk delete
Bulk delete allows you to delete a selection of items at once across product sheet, assets, or variants.
-
Perform a search for a selection of assets on the Advanced Search page,
-
Select the assets you want to delete by ticking their checkboxes, or click “select all results”,
-
Then click the Actions button and choose Delete from the dropdown menu.
-
A dialog box will ask you to confirm the deletion of the assets. Follow the prompts to confirm.
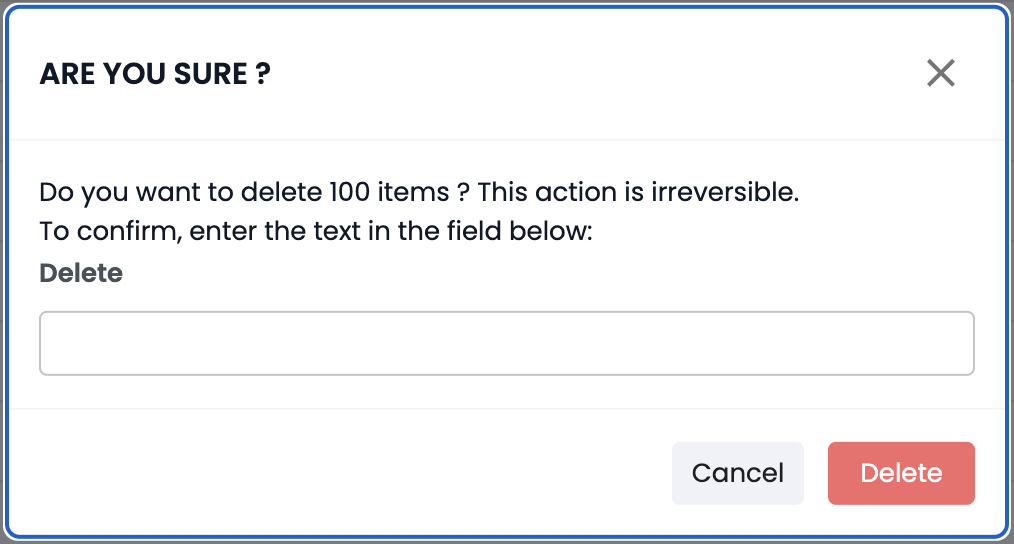
Irreversible actionThis action is irreversible. Once the bulk deletion is completed, the assets cannot be recovered.
Best practices
- Move assets to the appropriate classifications to maintain a clear hierarchy,
- Use the replace function to avoid duplicates or the loss of information linked to an asset sheet.
- Delete an asset only when you are sure it is no longer needed.
Summary
Move: change of classification from the asset sheet, with no impact on links.
Replace:
- keeps the asset sheet, its attributes, and its links,
- converts an external sheet into a standard one if used on an external asset.
Delete:
- warning: irreversible action!
- deletes the asset sheet, its attributes, and its links.
Best practices:
- organize classifications,
- avoid duplicates by using replace,
- only delete when the asset is obsolete.
Next chapter
Now that you know how to move, deplace and delete assets., let’s discover how to enrich data in an asset sheet.
Updated 10 months ago