Documents (Legacy version)
The stars of the show!
Product Page: Legacy VersionThis page presents the old version of the product page, which has become obsolete following the visual rewwork of our platform.
You can access the new version of the product page by clicking on "Access the new document page" located at the top right of the screen:

Documents are amazing. Their versatility allows them to be used in many different ways. Not only do they display all of the information that describe your products, they do so much more!
They can present a wide range of information such as:

The only limit is your imagination!
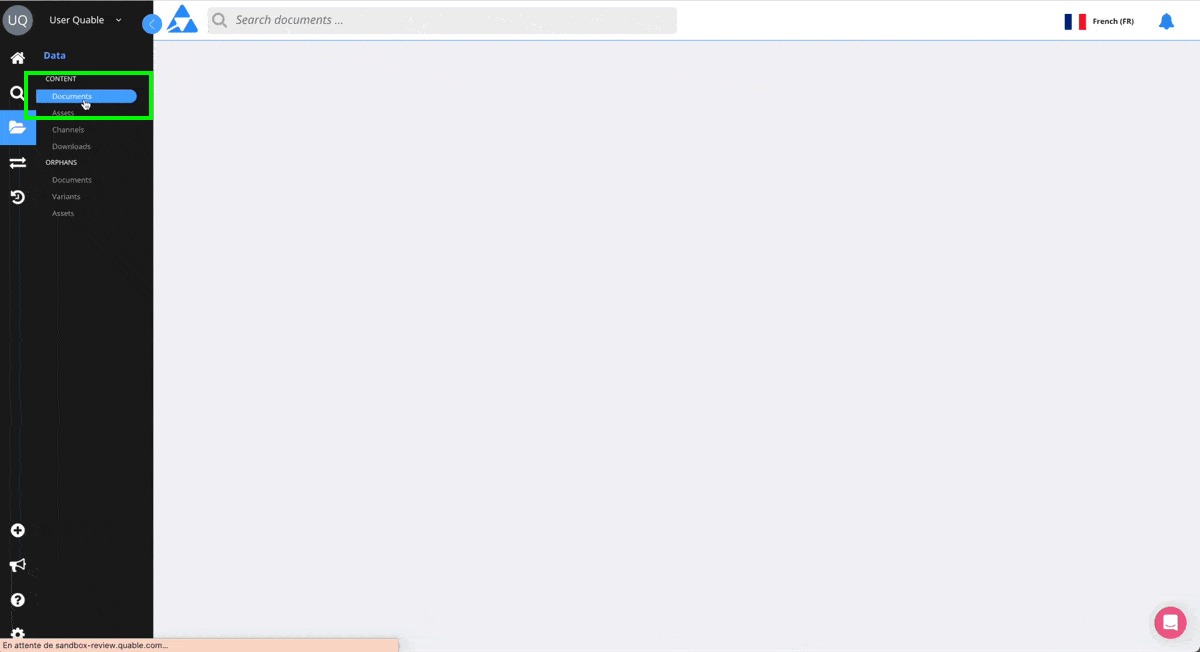
Accessing Documents
There are several ways to access your Quable PIM documents, the most common are:
- Quick Search ,
- Advanced Search, and the
- Documents page (via the Data menu).
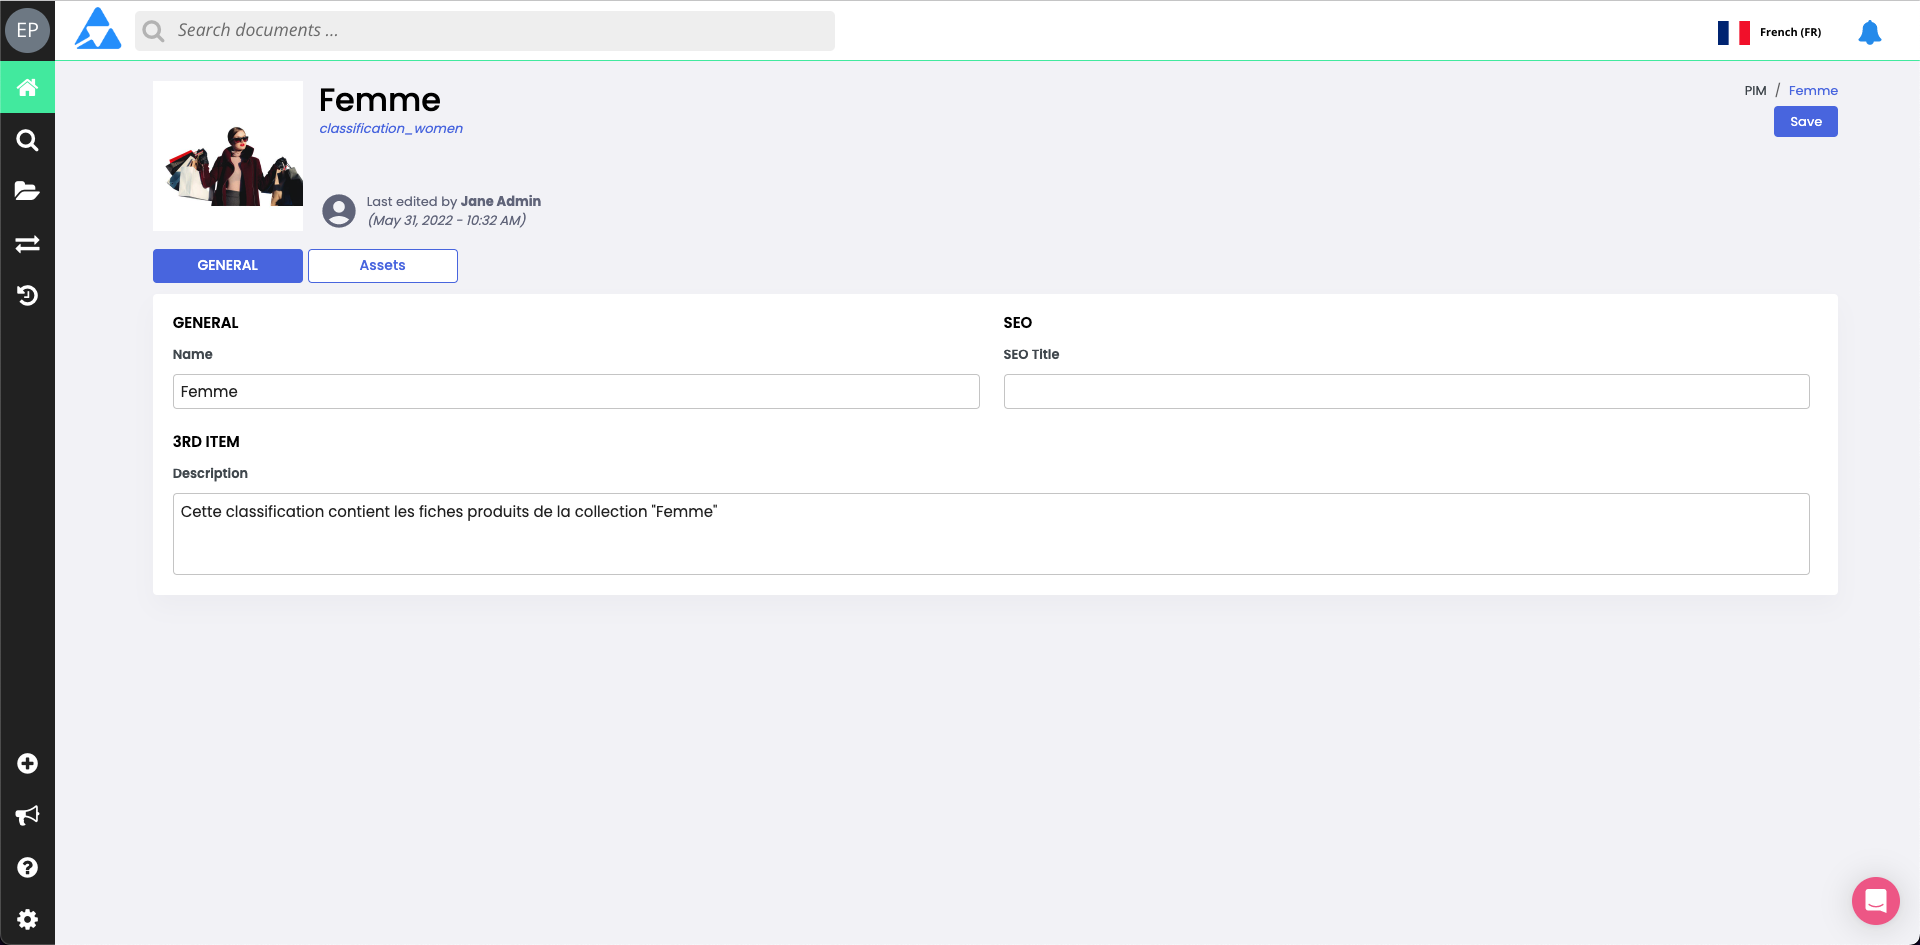
Structure
Documents contain everything necessary to present an item: editorial content, assets, variants, links with other documents, etc.
While there is no "standard" document structure, every document includes the following segments:

| Segment | Description |
|---|---|
| Classification breadcrumbs | Enables viewing and navigating your classification hierarchy via the breadcrumb links at the top of each document. |
| Name and Asset Preview | Provides an overview of the document:
|
| Content Tabs | Documents typically have the following tabs:
|
| Attribute links and information | Provides a direct link or information about an attribute:
|
| Document Status and Workflow | Indicators for the status of a document or workflow step (e.g., publication status, completeness rate, etc.). There are two types of status:
|
| Document Tools | Enables or disables modes for working with documents:
|
| Action Buttons | Enables performing specific actions on a document: |
| Activity Feed | Enables viewing the previous actions performed on a document. Displays the date, the author, and the language. |
| Completeness Widget | Indicators for the level of document completeness, according to settings defined by the Quable PIM administrator. Clicking on a completeness indicator displays a colored dot next to its required attributes. |
Documents Page
The Documents page is where you can create and manage your Quable PIM documents and classifications. The initial page includes:
- your classification hierarchy,
- a button to add classifications or documents,
- options to edit or delete classifications, and
- options to control the document display.

The page is divided into two panels:
| Left Panel | Right Panel |
|---|---|
The Left panel displays your classification hierarchy in a list that can be expanded and collasped via the arrows ( > ) next to them. The list can be expanded until the lowest classification level is displayed. Expanding a classification level displays the contents of that classification level in the Right panel. When you click on the lowest level, the classification's documents are displayed in the Right panel. You can collapse the Left panel by clicking on the left arrow ( < ) in the upper right corner. The right arrow ( > ) is displayed to allow you to expand the panel again. | Once a classification has been selected in the Left panel, the contents of the selected classification are displayed in the Right panel. You can navigate to lower classification levels by clicking on the classification in either the Left or Right panel. Once the lowest classification level has been selected, the classification's documents are displayed. |
Document Display
Once you've reached the lowest level of a classification, there are two ways to view your documents:
- Gallery view - Documents are represented in columns by their main asets and titles. You can activate gallery view by clicking the Gallery icon next to the Add button.

- Table view - (default view) Documents are displayed in table rows. You can activate table view by clicking the crossed out Gallery icon next to the Add button.

| When table view is used, the Columns button allows you to specify which columns to display. By default, all columns are enabled. You can enable or disable individual columns by clicking the slide switch next to them. To enable or disable all columns, click the Show All or Hide All options. You can search for a specific column by entering its title in the search bar. The list will display fewer and fewer results as you continue to enter text in the search bar until nothing matches. | |||
 | |||
Table view also allows you to click directly on a column header to change the list sort order and display an arrow to indicate which column and direction the list is sorted on. | |||
New Classifications
To create a new classification, click the + Add or + Classification button and select Classification.
A dialog is displayed to create the new classification:

Enter the following information:
| Information | Description | Mandatory |
|---|---|---|
| Name | The name of the classification. | Yes |
| Code | This is automatically generated by Quable PIM when you click in the Code entry area. This is only editable during creation of the classification Once the classification has been created, it can no longer be modified. | Yes |
Classification codeOnly the special characters "_" and "-" are allowed in the classification code. All other special characters, spaces, and accents are prohibited.
New Sub-Classifications
To create a new sub-classification, select a "parent" classification. A list is displayed of its "children" (sub-classifcations). Continue navigating through the classifications until you're within the desired parent classification. Once you've located the level for the new sub-classification, repeat the process for New Classifications.
NoteThe breadcrumbs at the top of the page display your location in the classification hierarchy.
Edit Classifications
To modify a classification, navigate through the classifications until you're within the desired parent classification. Once you've located the desired level click the Edit icon (next to the classification title, above the Right panel).
The classification's page is displayed. When you've finished editing the classification, click the Save button to save your changes or use the breadcrumb to return to abort the modification.
Delete Classifications
Attention: This action is irreversible.
To delete a classification, navigate through the classifications until you're within the desired parent classification. Once you've located the desired level click the More actions (...) option next to the Add button and select Delete.
New documents
You can create new documents from within a classification. To create a new document, navigate through the classifications until you're within the desired parent classification then click the Add button and select Document.
A dialog is displayed to define the new document:

TipsThe Classification and Document type are automatically selected based on your current location, however you can change them by selecting from the dropdown lists.
Enter the following information:
| Information | Description | Mandatory |
|---|---|---|
| Document type | The type of document to create. | Yes |
| Name | The name of the document. | Yes |
| Code | This is automatically generated by Quable PIM when you click in the Code entry area, however you can modify it.
| Yes |
| Attribute set | The attribute set (if any) to apply to the document.
| No |
Once you've entered all of the information for the new document, click the ADD button to save your changes or the CLOSE button to cancel the creation of the new document.
Content Tabs
The following sections describe the specific actions that can be performed on each document tab.
Look outIf you make any modifications on a tab, you must save before switching to another tab, otherwise your modifications will be discarded.
General
This tab is the where you enter and edit most of the text descriptions for a document. It generally has multiple sections with distinct groups of attributes to complete. The exact layout of the document type is configured by your Quable PIM administrator.

NoteThe General tab is a generic editing tab. The Quable PIM administrator may rename it or create additional tabs of this nature.
Assets
This tab is for managing the digital media files (assets) associated with a document.

The assets are displayed within sections for the link used to associate them with the document. Just before the title of the section (the name of the link), the number of assets is displayed. This can be useful to quickly identify the number of assets used for specific purposes (e.g., collections, print, web, etc.).
PermissionsBecause assets are associated with documents via links, you must have the following cross-reference permissions to manage them: Create - Update - Delete
| Action | Description |
|---|---|
| Add Assets | There are two ways to add assets to a document: search and import. Both methods are performed just below the title of the section:
|
| Order Assets | You can change the order of the assets within a section by clicking on the Order button for that section. A dialog is displayed where you can drag and drop the assets into the desired order. The main asset is the first asset in the first section. To select an asset from another section as the main asset, an administrator must change the priority of the selected section's link type. |
| Compressed Download | You can download a compressed file of all assets by clicking on the Download button. |
Additional Actions
When you hover over an asset, additional buttons are available to perform actions on the selected asset:

Download
Clicking on the Download button opens a dialog to specify the size to download:

-
Original file - The file is downloaded in it's original size. Note, depending on the format, this could be quite large.
-
Resized - You can specify the width and height of the asset to download. This is primarily used for image files.
Make your selections and click the Download button to download the asset or Cancel to abort the download.
More Details
Clicking on the More Details button opens the asset's page:

This page includes all of the attributes that define the asset, as well as buttons that allow you to perform actions on the asset:
| Button | Description |
|---|---|
| Apply | Saves any modifications made to the asset's attributes. |
| Move | Enables changing the asset's classification. A dialog is displayed to select from a list of existing classifications.
|
| Update | Enables replacing the asset. A window is opened to allow uploading a replacement. |
| Remove | Deletes the asset.
|
| Download | Opens the download dialog. |
| Back | Returns to the Asset tab. |
NoteThere's also an XMP Detail button to view the asset's metadata.
Dissociate
Clicking on the Dissociate button removes the link between the document and the asset.
NoteDisassociating an asset from a document does not delete it. If the asset is:
- associated with one or more other documents - the asset is simply detached from the document.
- not associated with another document - it becomes an orphan.
Delete the Asset
Clicking the Delete the Asset button permanently removes the asset from both the document and Quable PIM. A dialog is displayed to confirm the deletion.
Related Documents
This tab is for managing the other documents (if any) associated with a document.

The related documents are displayed within sections for the link used to associate them with the document. Sections (if any) are displayed in the gray sidebar on the left. In the main area of the tab, the number of related documents is displayed just before the title of the section (the name of the link). This can be useful to quickly identify the number of related documents used for specific purposes (e.g., cross-sell, upsell, etc.).
PermissionsBecause related documents are associated with documents via links, you must have the following cross-reference permissions to manage them: Create - Update - Delete
| Action | Description |
|---|---|
| Add Documents | You can add related documents by performing a quick search. Enter at least three characters of an existing document's Name or Code in the search bar. A scrollable list of documents is automatically displayed. |
| Manage Attributes | You can modify the attributes for the link between the documents by selecting one from the list and clicking the Manage the Attributes of the Link button. A dialog to modify the link's attributes is displayed. When you've finished modifying the attributes, click the Apply button.
|
| Remove Link | You can remove a related document by selecting one from the list and clicking on the Remove Linkbutton. |
| Open New Window | You can open a related document in a new window by selecting one from the list and clicking on the New Window icon. |
Parent Documents
This tab is for managing the parent documents (if any) associated with a document.

The parent documents are displayed within sections for the link used to associate them with the document. Sections (if any) are displayed in the gray sidebar on the left. In the main area of the tab, the number of related documents is displayed just before the title of the section (the name of the link). This can be useful to quickly identify the number of parent documents used for specific purposes (e.g., cross-sell, upsell, etc.).
PermissionsBecause parent documents are associated with documents via links, you must have the following cross-reference permissions to manage them: Create - Update - Delete
| Action | Description |
|---|---|
| Add Documents | You can add parent documents by performing a quick search. Enter at least three characters of an existing document's Name or Code in the search bar. A scrollable list of documents is automatically displayed. |
| Remove Link | You can remove a parent document by selecting one from the list and clicking on the Remove Link button. |
| Open New Window | You can open a parent document in a new window by selecting one from the list and clicking on the New Window icon. |
Variants
This tab is for managing the variants (if any) associated with a document.

NoteYou can add assets for variants by selecting a variant from the list and following the steps in the assets section.
Add variants
NoteVariants can only belong to a single document.
Clicking on the Add a Variant button opens a dialog to define the attributes of the variant:

Enter information for the variant's attributes. By default, the following attributes are available:
| Information | Description | Mandatory |
|---|---|---|
| Code | The unique code of the variant. | Yes |
| Active | Specifies if the variant is visible. | No |
| Name | The name of the variant. | No |
Once you have entered all of the information for the new variant, click the Create the Variant button to save the variant or the Cancel button to abort the creation.
NoteThe attributes available for variants are defined by the Quable PIM administrator.
Bulk additions
PrerequisiteThe Quable PIM administrator must create variant attributes with pre-defined values before this feature can be used.
Clicking on the Bulk Add button opens a dialog to create multiple variants at the same time:

The dialog provides two options to select attributes and values for the new variants:
| Option | Description |
|---|---|
| Line | Creates new variants with a single attribute. Expand the dropdown list, select an attribute to apply to the new variants, and click the Create the Variantbutton to create the new variants. A new dialog opens to display the available values for the selected attribute. Select the checkboxes for the desired values and click the Validate the Creation of New Variants button.
|
| Column | Creates new variants with the selected attributes in columns. Expand the dropdown list, select an attribute to apply to the new variants as a column header. Next select a different attribute from the Line option to fill the column, and click the Create the Variantbutton to create the new variants. A new dialog opens to display the available values for the selected attribute. Select the checkboxes for the desired values and click the Validate the Creation of New Variants button.
|
Quick info
At a glance, this area displays the status and position (priority) of the variant. Clicking on "..." in the Actions column displays options to Edit or Detach the variant:

| Action | Description |
|---|---|
| Edit | Opens a dialog to edit the variant's attributes. When you've finished modifying the attributes, click the Save button. You can also double-click on a variant to edit it.
|
| Detach | Removes the link between the variant and the document.
|
Tasks
This tab is for managing the tasks related to the document.

At the top of tab, the number of tasks is displayed. This can be useful to quickly identify the number of tasks needing attention (resolved tasks are not included in the count).
Next to the number of tasks is a Filter button. Clicking on this button opens a panel with options you can select to limit the tasks displayed. You can filter the tasks to display by status, category, who created the task, and/or whom the task is assigned to.
The tasks are displayed in the center of the tab, color-coded according to their completion level. Clicking on a task opens the task dialog where you can add a comment for the creator of the task.
You can create new tasks by clicking on the Create a Task button. This opens the New Task dialog where you can enter information for the task and assign it to the appropriate person/role.
For more in-depth information about managing tasks, see the Tasks page.
Action Buttons
On the Actions tab (right of the document), is a group of buttons to perform actions on the document. These buttons are available from every tab in the document.

Save Documents
At any time, you can save modifications to a document by clicking the Save button.
When you move between tabs, be sure to save the current tab if you've made any modifications. Any changes made will be lost if you do not save before changing tabs. A dialog is displayed to remind you to save your work.
Move Documents
You can move a document to a different classification by clicking the Move button. A dialog is displayed where you can select a new classification from a dropdown list. Once you've made your selection, click the Move button to move the document or click the To Close button to abort the move.

Archive Documents
You can exclude a document from appearing in your Quable PIM by clicking the Archive button. A dialog is displayed to confirm the archive.
Archive RetrievalYou have 2 ways to retrieve archived product pages:
- Or via the following API: https://{your-company}.quable.com/api/documents?active=0
Remove Documents
You can permanently delete a document by clicking the Remove button. A dialog is displayed to confirm the deletion.
Look outThis action is irreversible. Once a document has been deleted, it can't be recovered.
Duplicate Documents
NoteThis button is only available when the default data language is in use.
You can make a copy of a document by clicking the Duplicate button. A dialog is displayed to confirm the duplication. A "-copy" suffix is added to the document's Code. You can change it or leave it as is. Click the Duplicate button to duplicate the document or click the Cancel button to abort the duplication.

NoteOnly the document, its attributes, its links, and its assets (if any) are copied. Variants are not copied because they can only belong to a single document.
Print Documents
PrerequisiteThe Quable PIM administrator must define a print channel before this feature can be used.
You can create a PDF Product Sheet by clicking the Print button. A new browser window is opened to display the PDF:

PDF Product Sheets are read-only copies of your Quable PIM documents. They contain the following information :
| Information | Description |
|---|---|
| Classification Hierarchy | The classification hierarchy from which the document originates. |
| PDF creation date | The date the PDF was created. |
| Document Name | The name of the document. (included automatically) |
| Data Model Information | The document's settings in the data model:
|
| Main Asset | The document's main asset (images only). |
| Attributes | The attributes selected for the print channel. |
| Variants | The document's variants (Code and Label only). |
To keep things as simple as possible, PDF Product sheets are only available for documents and their attributes and variants. Other linked objects are not available for PDF printing.
QuableApp
Look outThis button is only enabled if a QuableApp has been configured and the designated document type is selected.
To use a QuableApp with a document, select an app from the QuableApp Buttons dropdown list:

The app opens a window so you can interact with it. Follow any instructions or procedures within the window and click the Generate button. When done, you can close the window by clicking on the X in the upper right corner.
NoteThe window opened by the app and any contents within it are entirely managed by the external applications, not Quable PIM.
Activity Feed
On the Activity tab (right of the document), you can view the most recent actions performed on the document. The feed displays the name of the person who performed an action, when the action was performed, what action was performed, and if available, the data language used for the action. The activity feed is available from every tab in the document.

You can view all of the document's modification history by clicking the Change History button at the bottom of the activity feed.
A page is displayed where you can view the entire history of changes:

Each individual change is listed in a table that displays:
- Date - when the change was made
- Author - who made the change (profile image also displayed)
- Actions - the type of change made
- Language - the data language used for the change
Clicking on More Information for a change displays a dialog with additional information about the change:

The details are color-coded to indicate the type of change made:
- GREEN = information was added
- ORANGE = information modified
- RED = information was deleted
To exit the history page and go back to the document, click the Return link.
Updated 10 months ago