Creating and Managing the Structure of Product Sheets
Learning Objectives
- Understand the role of attributes in structuring product sheets.
- Learn to create, organize, and manage hierarchical levels in product sheets.
- Gain expertise in adding and configuring attributes according to business needs and best practices.
Overview
In the PIM, product sheet attributes carry all essential information: each attribute corresponds to a specific piece of data associated with the product. This can include technical specifications (weight, dimensions, material), marketing content (descriptions, images, videos), or sales channel-specific information (SKU, delivery times).
Organizing attributes into logical structures (tabs, sections, categories) is crucial for optimizing user navigation and productivity within the PIM. A well-structured product sheet enables teams to quickly find information, minimize errors, and maintain consistent data quality.
Attributes form the foundation of the product sheet: they define product characteristics and serve as a framework for storing its information. Their creation and organization ensure data centralization and the efficiency of your Quable PIM. Now, we will go through the following steps:
- Creating a new document type for product sheets,
- Organizing its hierarchical levels (tabs, sections, categories),
- Creating and managing attributes within the product sheet.
Follow these instructions to effectively structure your product sheet data.
Good to KnowIn this course, the terms "document" and "product sheet" refer to the same entity. A product sheet is a document with a specific document type, defined by the administrator.
Creating a New Document Type
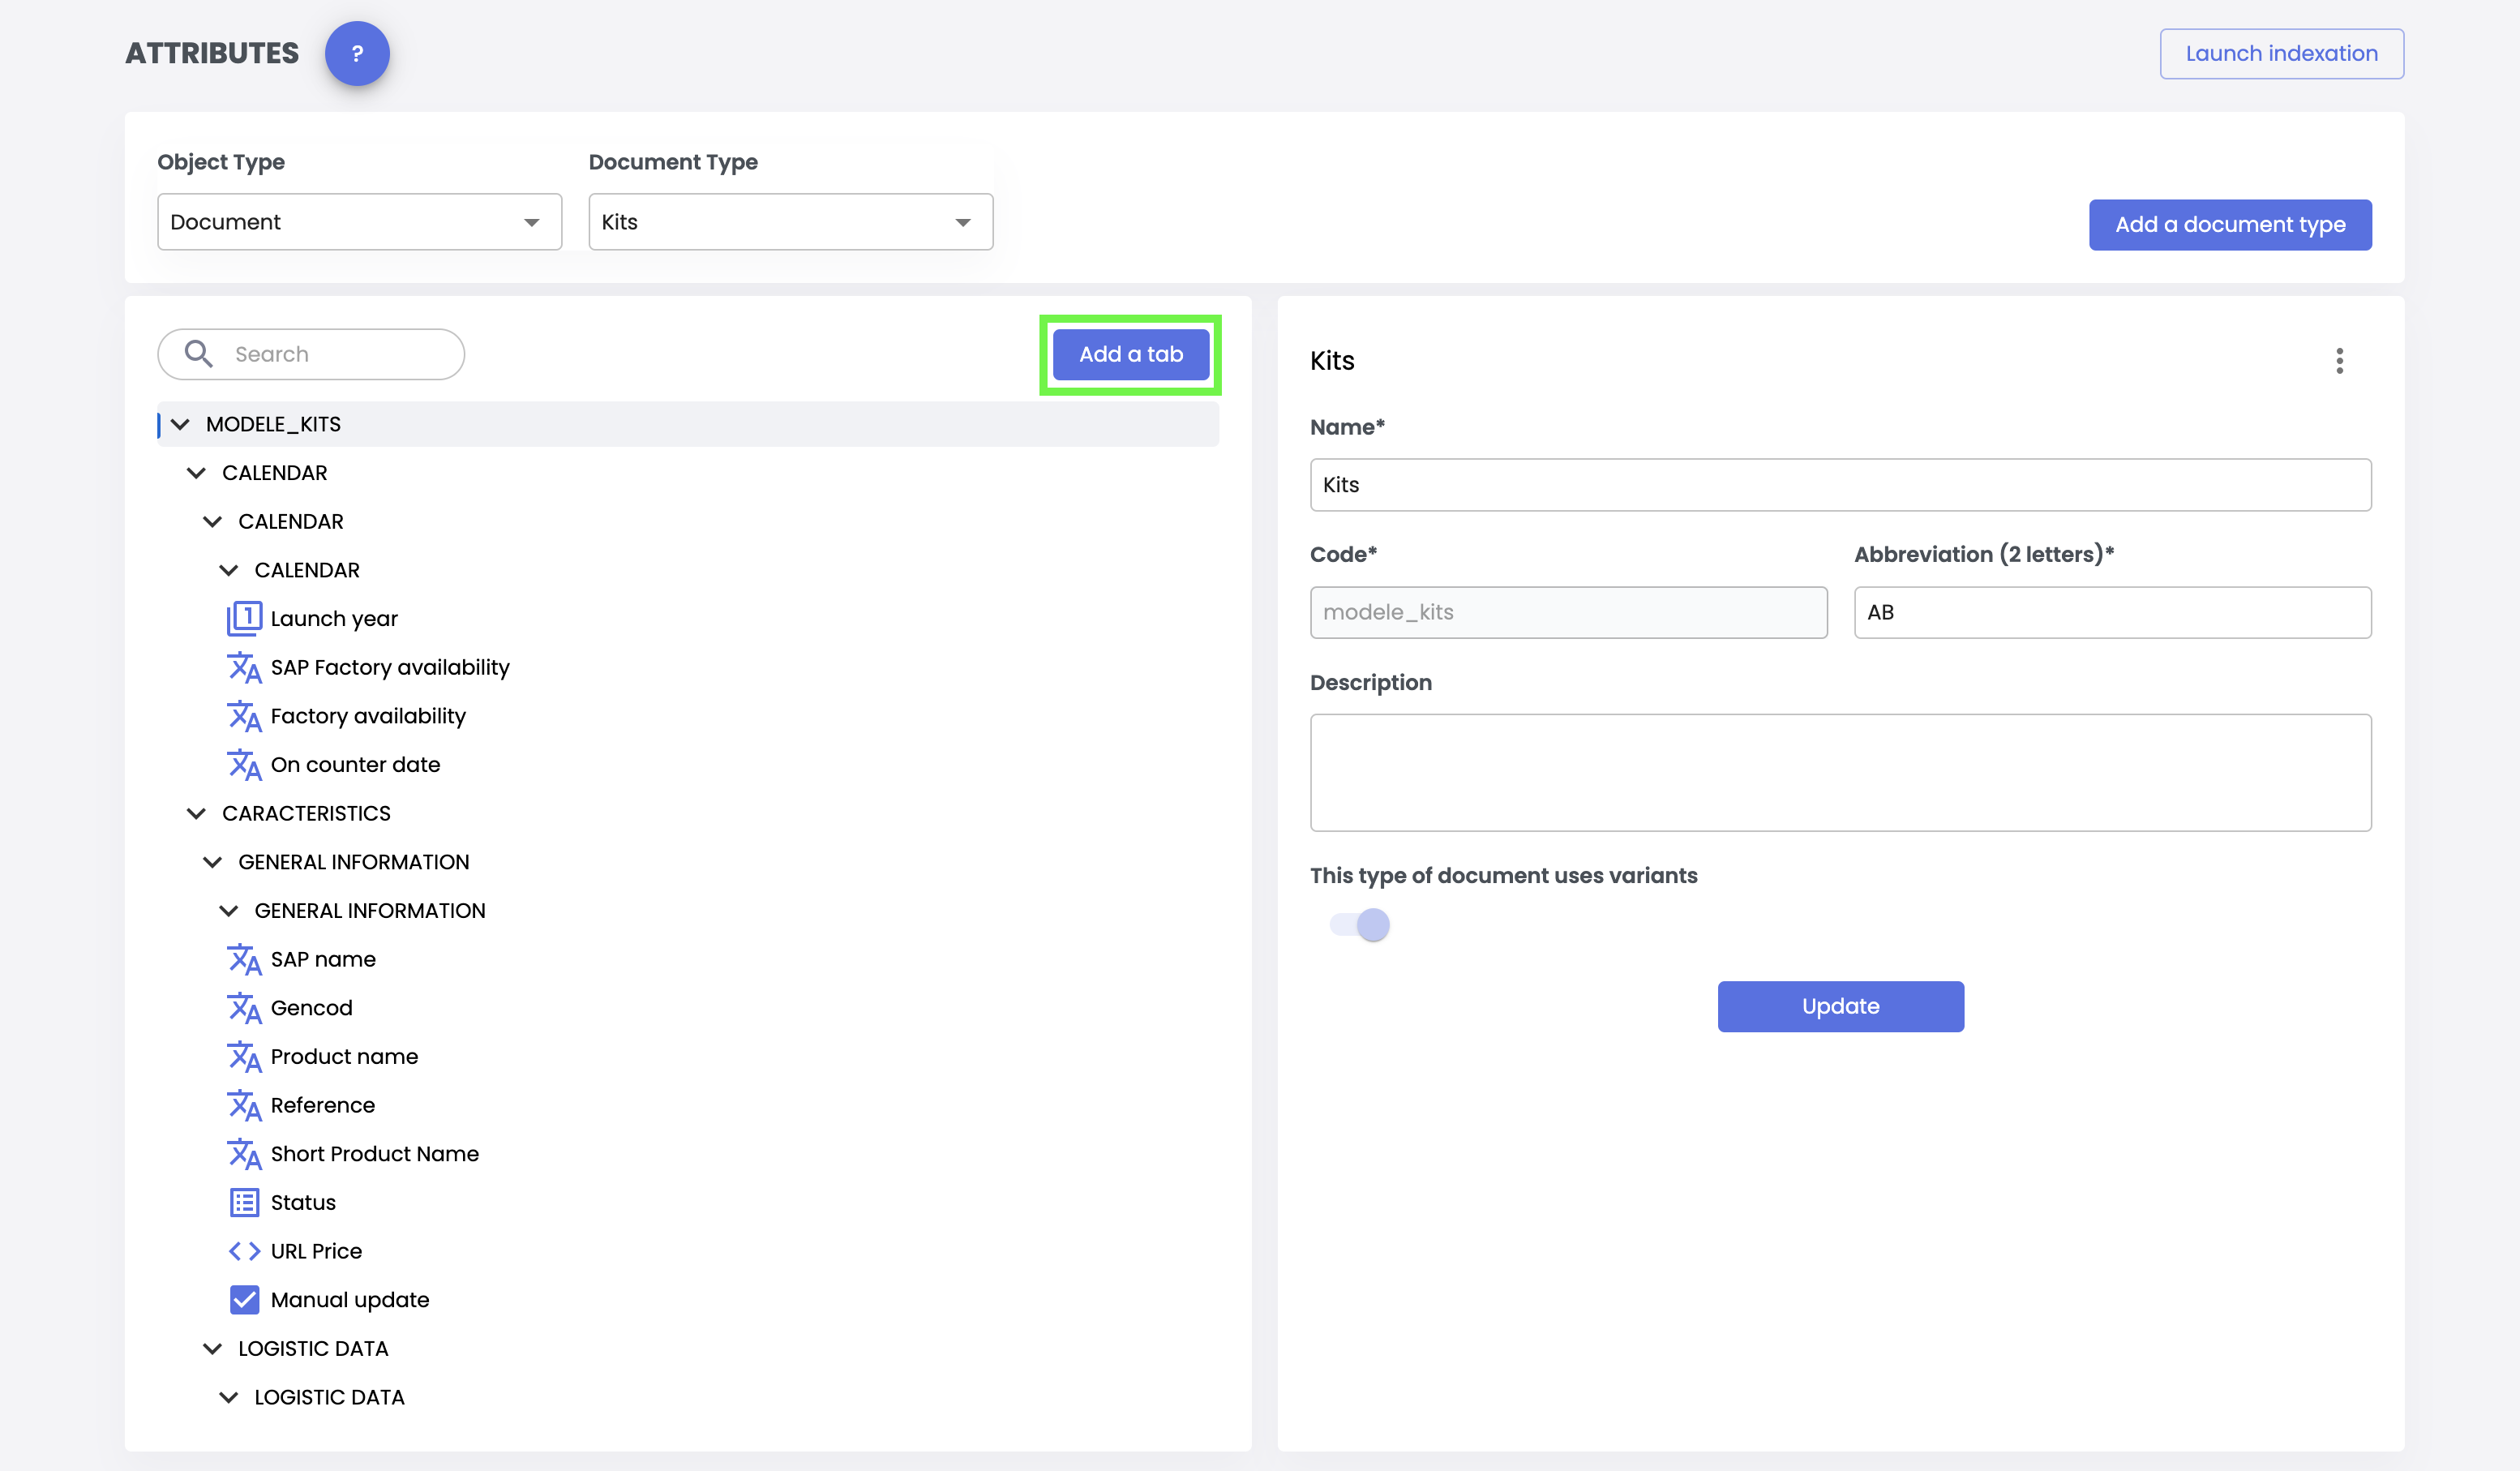
Accessing the Attributes Page
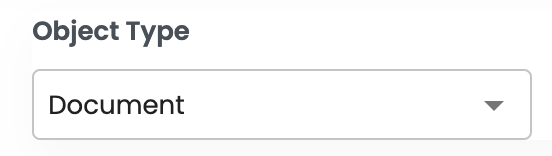
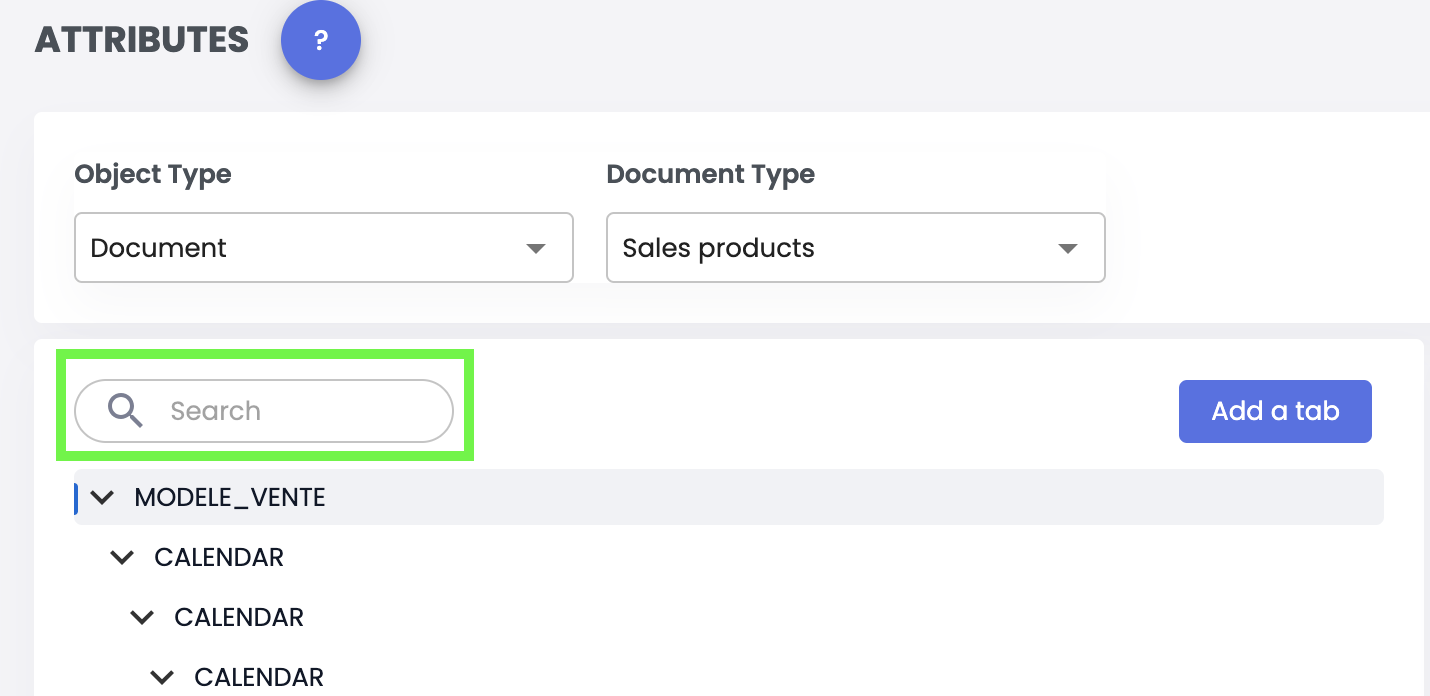
- Navigate to the administration menu and go to Data Model > Attributes.

- Ensure that you select the document object type.
Creating a New Document Type
- Click Add a Document Type at the top right panel.

- Fill out the form:
- Name (required): Enter a clear name to identify this document type.
- Code (required): Automatically generated or manually adjusted according to naming rules.
- Abbreviation (required): Choose a two-letter abbreviation.
- Description (optional): Add a description of the document type.
- Variants (required): Specify whether this document type will support variants.
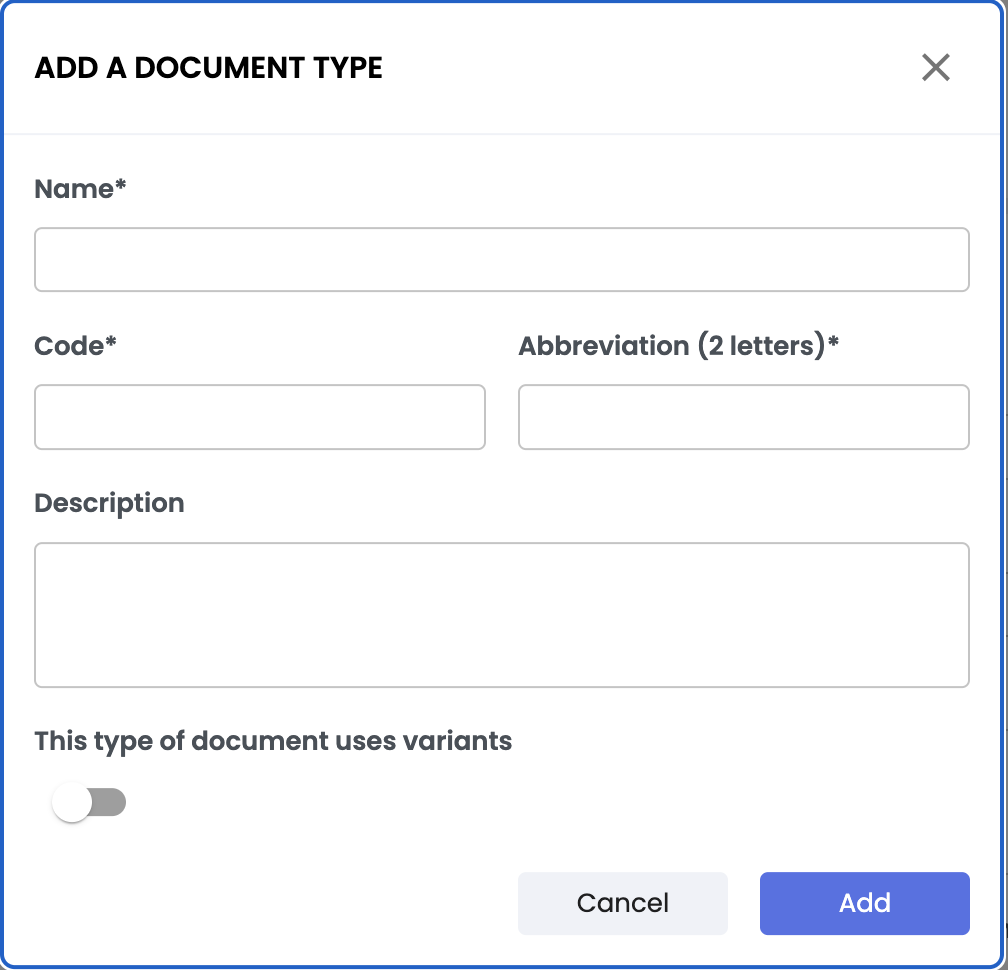
- Save: Click Add to register the new document type.
Good to Know
- Keep document type names simple: use clear and explicit names.
- Plan ahead: review and validate the structure before deploying it in production.
Creating and Configuring Hierarchical Levels
Hierarchical levels help structure documents into tabs, categories, and sections.
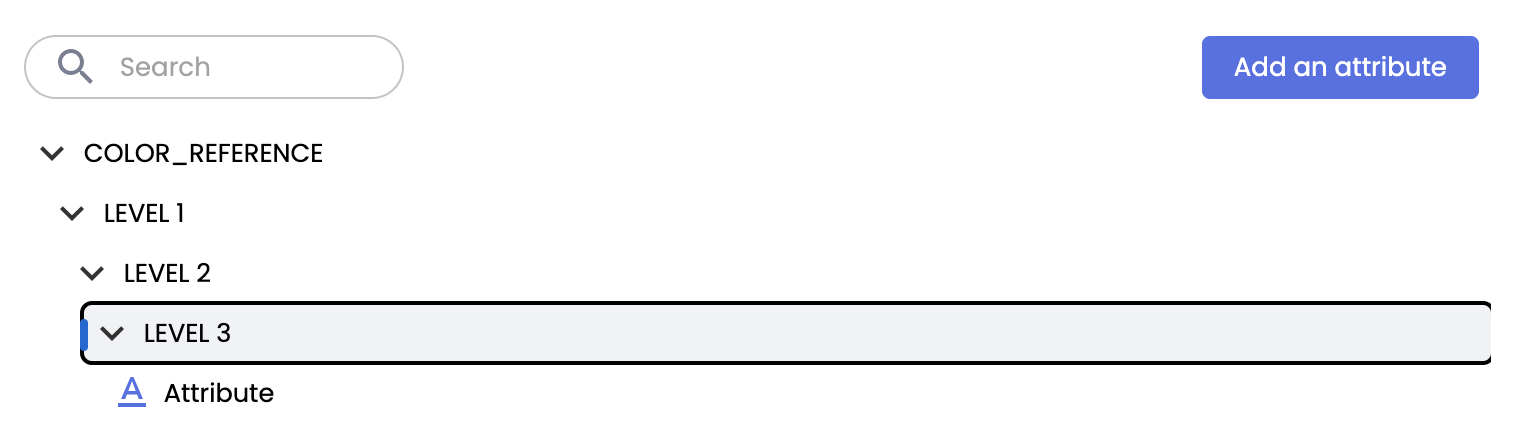
These levels are displayed as follows in the product sheet:
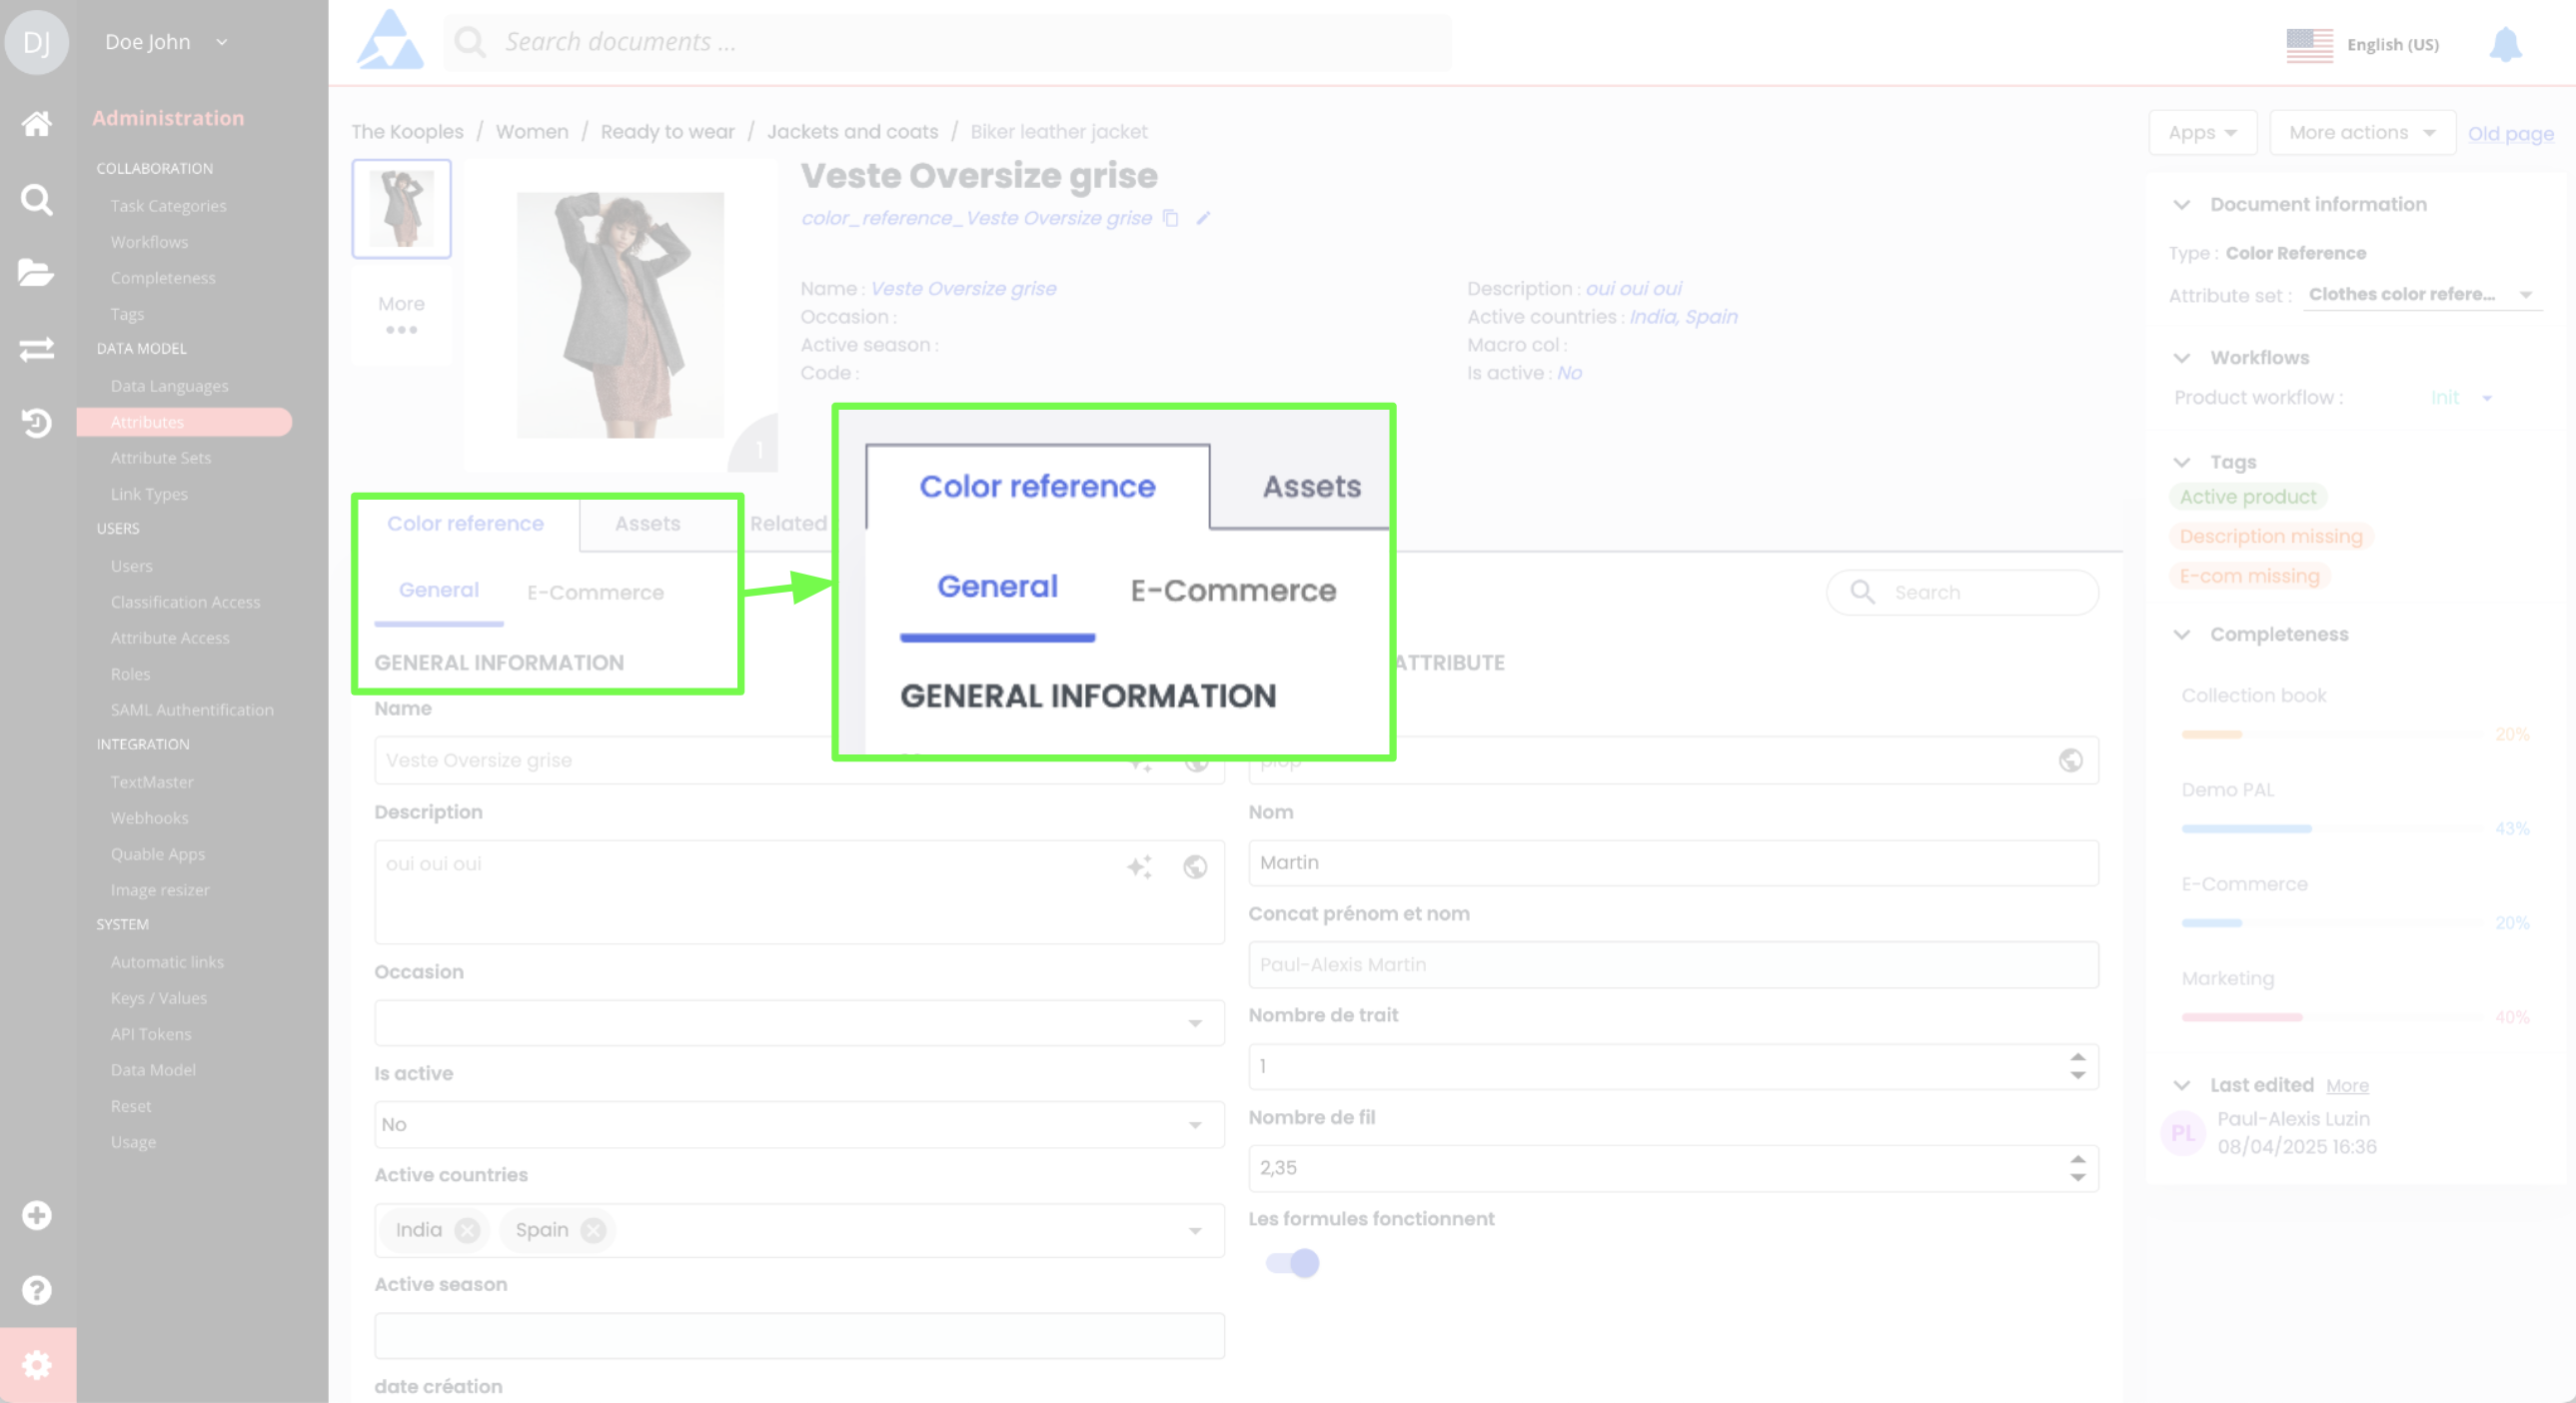
- In this illustration:
-
COLOR REFERENCE = Tab el 1]
-
GENERAL = Category el 2]
-
GENERAL INFORMATION = Section el 3]
-
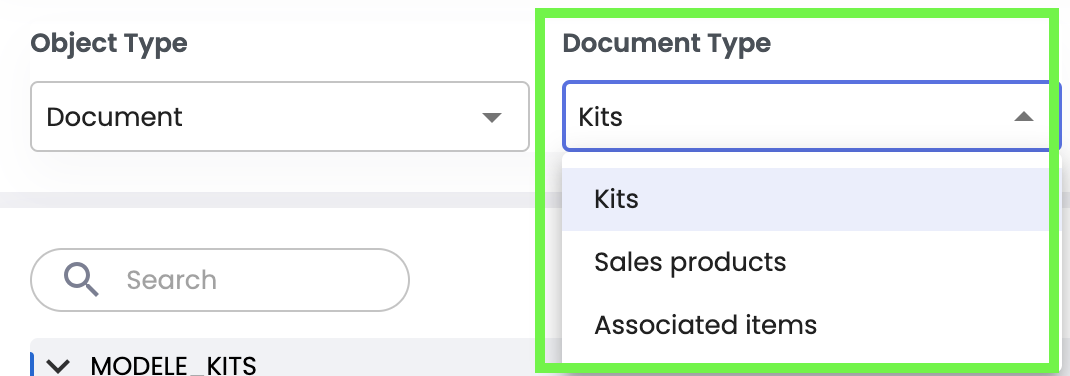
Accessing the Document Type Hierarchy
- Select the created document type from the dropdown list.
Adding Levels
- Click the Add / Category / Section / Attribute] b** button at the desired location in the hierarchy:
Depending on the selected level, the Add button offers different options:

- Level 0: Defines the document type. Selecting it allows adding a Level 1 tab.
- Level 1: Defines a main tab. Selecting it allows adding a Level 2 category.
- Level 2: Defines a category within the tab. Selecting it allows adding a Level 3 section.
- Level 3: Defines a section within the category. Selecting it allows adding attributes.
- Level 4: Defines attributes.

Configuring Each Level’s Properties
- Name: Define a clear name.
- Code: Ensure it follows naming rules (only letters, numbers, underscores, and dashes are allowed).
- Reorganizing Levels: Drag and drop a level to adjust its position.
Good to Know
- The five hierarchical levels are mandatory, and attributes are always placed at the lowest level.
- Organize levels according to business needs.
- Avoid overcrowding sections with too many attributes—create subsections to improve readability.
- Use consistent hierarchical codes with a clear naming convention.
Creating and Managing Attributes
Attributes define the specific data contained in your documents.
Adding an Attribute
- Select a Level: In the hierarchy, click on the last level (i.e., a level 3 section) where you want to add an attribute.
- Add an Attribute: Click Add an attribute in the right panel.
-
Configure the Attribute:
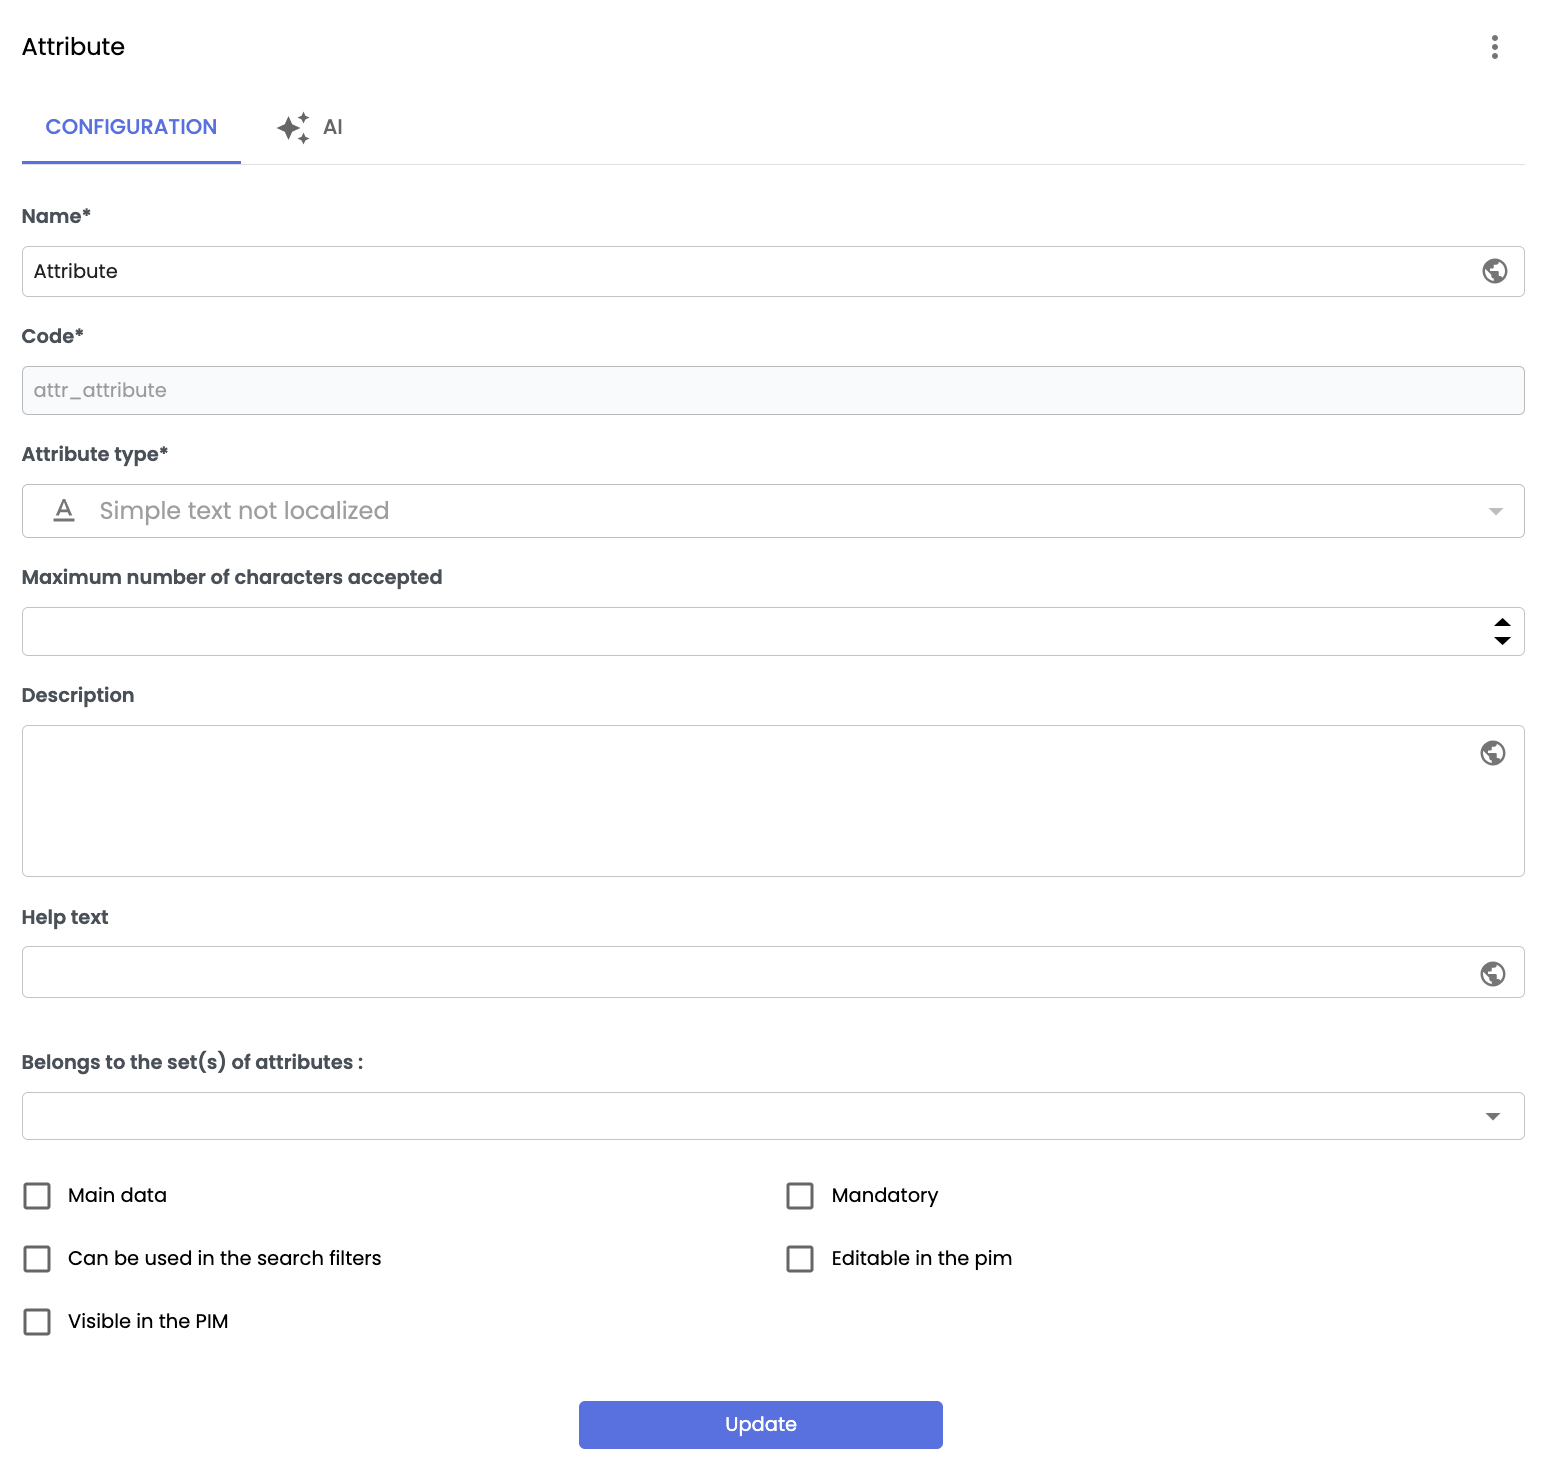
- Name (mandatory): A clear and explicit name for the attribute.
- Code (mandatory): Automatically generated or manually edited. The code must be unique (duplicates are not allowed).
- Attribute Type (mandatory): Choose from the available types (text, date, checkbox, etc.).
- Description (optional): Add a description of the attribute.
-
Optional Properties:
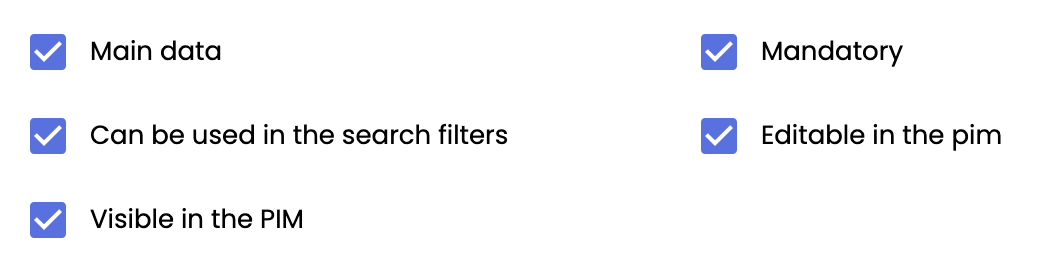
- Main Data: Makes the attribute visible in the product sheet header.

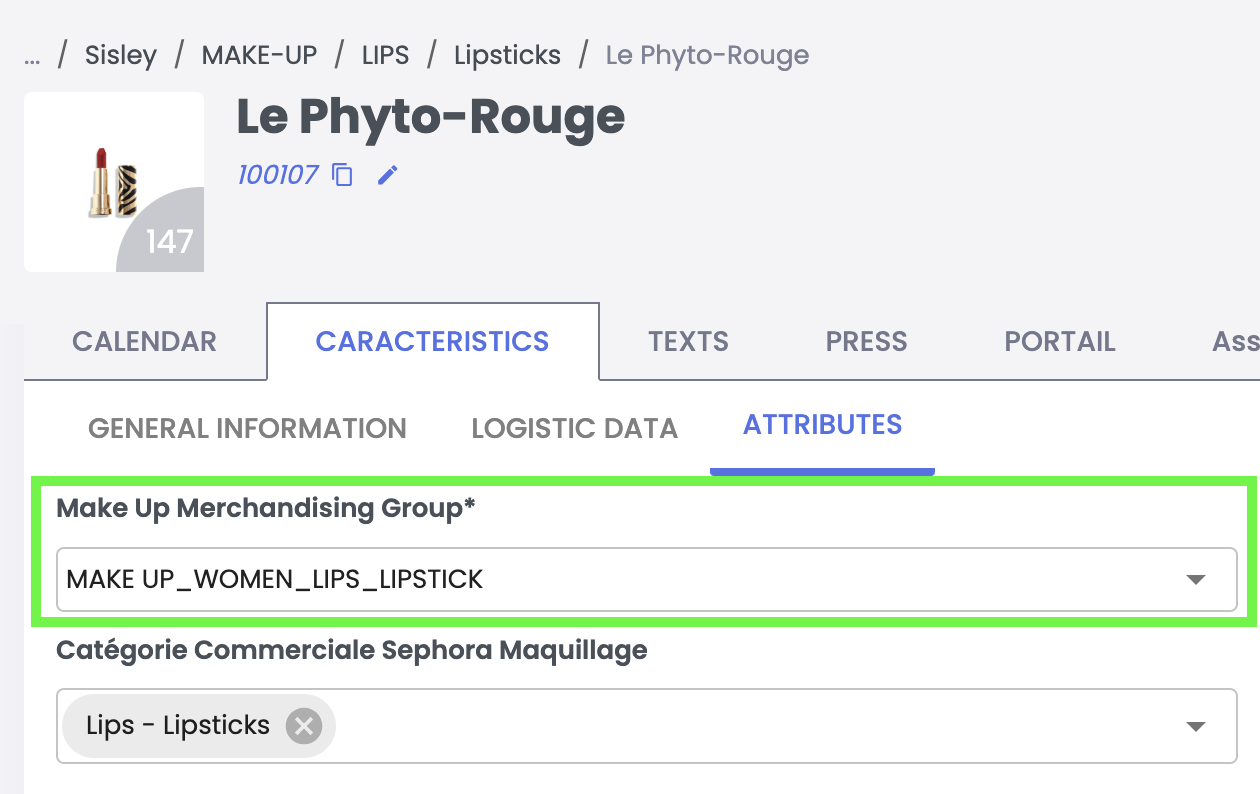
- Mandatory: Makes the attribute required for saving. The attribute is marked with an asterisk (*) on the product sheet.
- Can be used in the Search Filters: Enables the attribute’s data to be used in advanced search filters and widgets.
- Editable in the PIM: Allows the attribute to be modified in the product sheet. If unchecked, the field is grayed out.

- Visible in the PIM: The attribute is displayed on the product sheet.
-
Save: Click Add to confirm.
Good to KnowLocalization: Translate the attribute label into multiple languages if needed using the localization function.

Good to Know
- Choose appropriate attribute types that match the expected format (e.g., use Integer for a quantity, Localized Text for translated text).
- Avoid unnecessary attributes to keep data management simple. Ensure each attribute serves a specific need and is used in your business processes.
- Add help text for complex or specific attributes to help users understand their role without referring to the documentation.
- Check attribute access rights: Some sensitive attributes (e.g., prices, confidential codes) may require restricted visibility. Attributes may be visible or hidden based on user-specific permissions. For more information, see Managing User Access Rights.
Editing or Deleting an Attribute
- To edit an attribute:
- Select the attribute in the hierarchy.
- Modify its properties in the right panel.
- Click Edit to save the changes.
Good to Know
- The code and attribute type are final and cannot be changed after creation.
- The attributes
<document_type_code>_nameand<document_type_code>_descriptionshould not be deleted, but they can be hidden by disabling the "visible in the PIM" option.
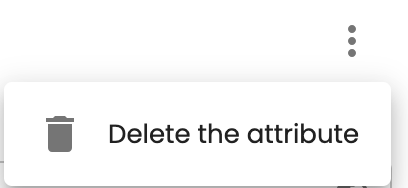
- To delete an attribute:
- Select the attribute in the hierarchy.
- Click the ⁝ button (three dots) in the top right of the right panel.
- Click Delete the Attribute to remove it.
❗️ Irreversible Action: Deleting an attribute permanently removes it from the document type, along with any values it holds in product sheets.
Best Practices
- Organization: Use explicit names to make data navigation and identification easier on a product sheet.
- Code Creation Rules: Avoid prohibited special characters (only letters, numbers, underscores, and dashes are allowed) to prevent conflicts.
- Limits: Adhere to system constraints:
- Maximum of 10,000 attributes per PIM.
- Maximum of 2,000 attributes per document type.
- Documentation: Successful PIM deployment requires mastering data management processes. Check the functional documentation for detailed information about attributes: Quable Documentation.
- Use the attributes page’s search bar to quickly find an attribute in your data structure.
In SummaryCreate a new document type
- Go to Data Model > Attributes to create a new document type.
- Fill in the form (name, code, description, etc.) and save.
Organize hierarchical levels
- Structure the sheets into tabs (level 1), sections (level 2), and subsections (level 3).
- Configure and reorganize these levels by dragging and dropping.
- Follow clear naming conventions and avoid overloading sections.
Create and manage attributes
- Add attributes to a section (level 3) of a product sheet.
- Configure each attribute (name, type, visibility, localization, etc.).
- Avoid unnecessary attributes and follow the limits (2,000 attributes max per document type).
Modify or delete attributes
- Modifications are possible afterward, except for the code and attribute type.
- Deleting an attribute is irreversible and removes associated data.
Best practices
- Simplify navigation by organizing data according to business needs and placing key information in the first tabs.
- Check access rights for sensitive attributes to avoid errors or data leakage.
Next Chapter
Now that you know how to create and manage product sheet structures, let’s move on to Creating and Managing Attribute Sets.
Updated 10 months ago