Adding assets
Learning objectives
- Understand the distinction between an asset and an asset sheet.
- Know how to add an asset from the DAM or a product sheet.
- Identify best practices and limitations related to asset addition.
Overview
This course explains how to add assets (images, videos, documents, etc.) to the DAM, especially to enrich product sheets.
Adding a new asset automatically creates an asset sheet. By common misuse, "asset" is sometimes used to refer to the sheet itself. However, the two must be distinguished: the asset is the file, while the asset sheet contains this file along with its attributes.
Assets are organized into classifications, which help structure and easily retrieve content in the DAM.
Good to know
- Adding a new asset always results in the creation of a new asset sheet.
- Only users with asset management rights can create and manage assets.
Finally, keep in mind that asset sheets are linked to product sheets through associations. We'll cover asset-to-product associations and association structure in the data model in upcoming chapters.
Supported files
All file types can be uploaded to the DAM. However, not all are handled in the same way:
| Asset type | Common formats | Visual preview in PIM / DAM |
|---|---|---|
| Images | .png, .jpg, .webp, .bmp, .gif, .pdf, etc. | Yes |
| Videos | .mp4, .avi | No (icon only) |
| Others | .docx, .xlsx, .zip, etc. | No (icon only) |
Good to know: video files
- The default icon for video files looks like this:
- Video files can be played directly in the Quable PIM viewer and playback speed can be adjusted via the options menu.
- Navigation (forward/backward) within videos is only possible once the file is fully buffered.

Limitations
- Maximum file size: 1 GB
- Max image preview resolution: 75 MPX
- Max file name length: 100 characters
Methods for adding new assets
There are two entry points to add an asset in Quable:
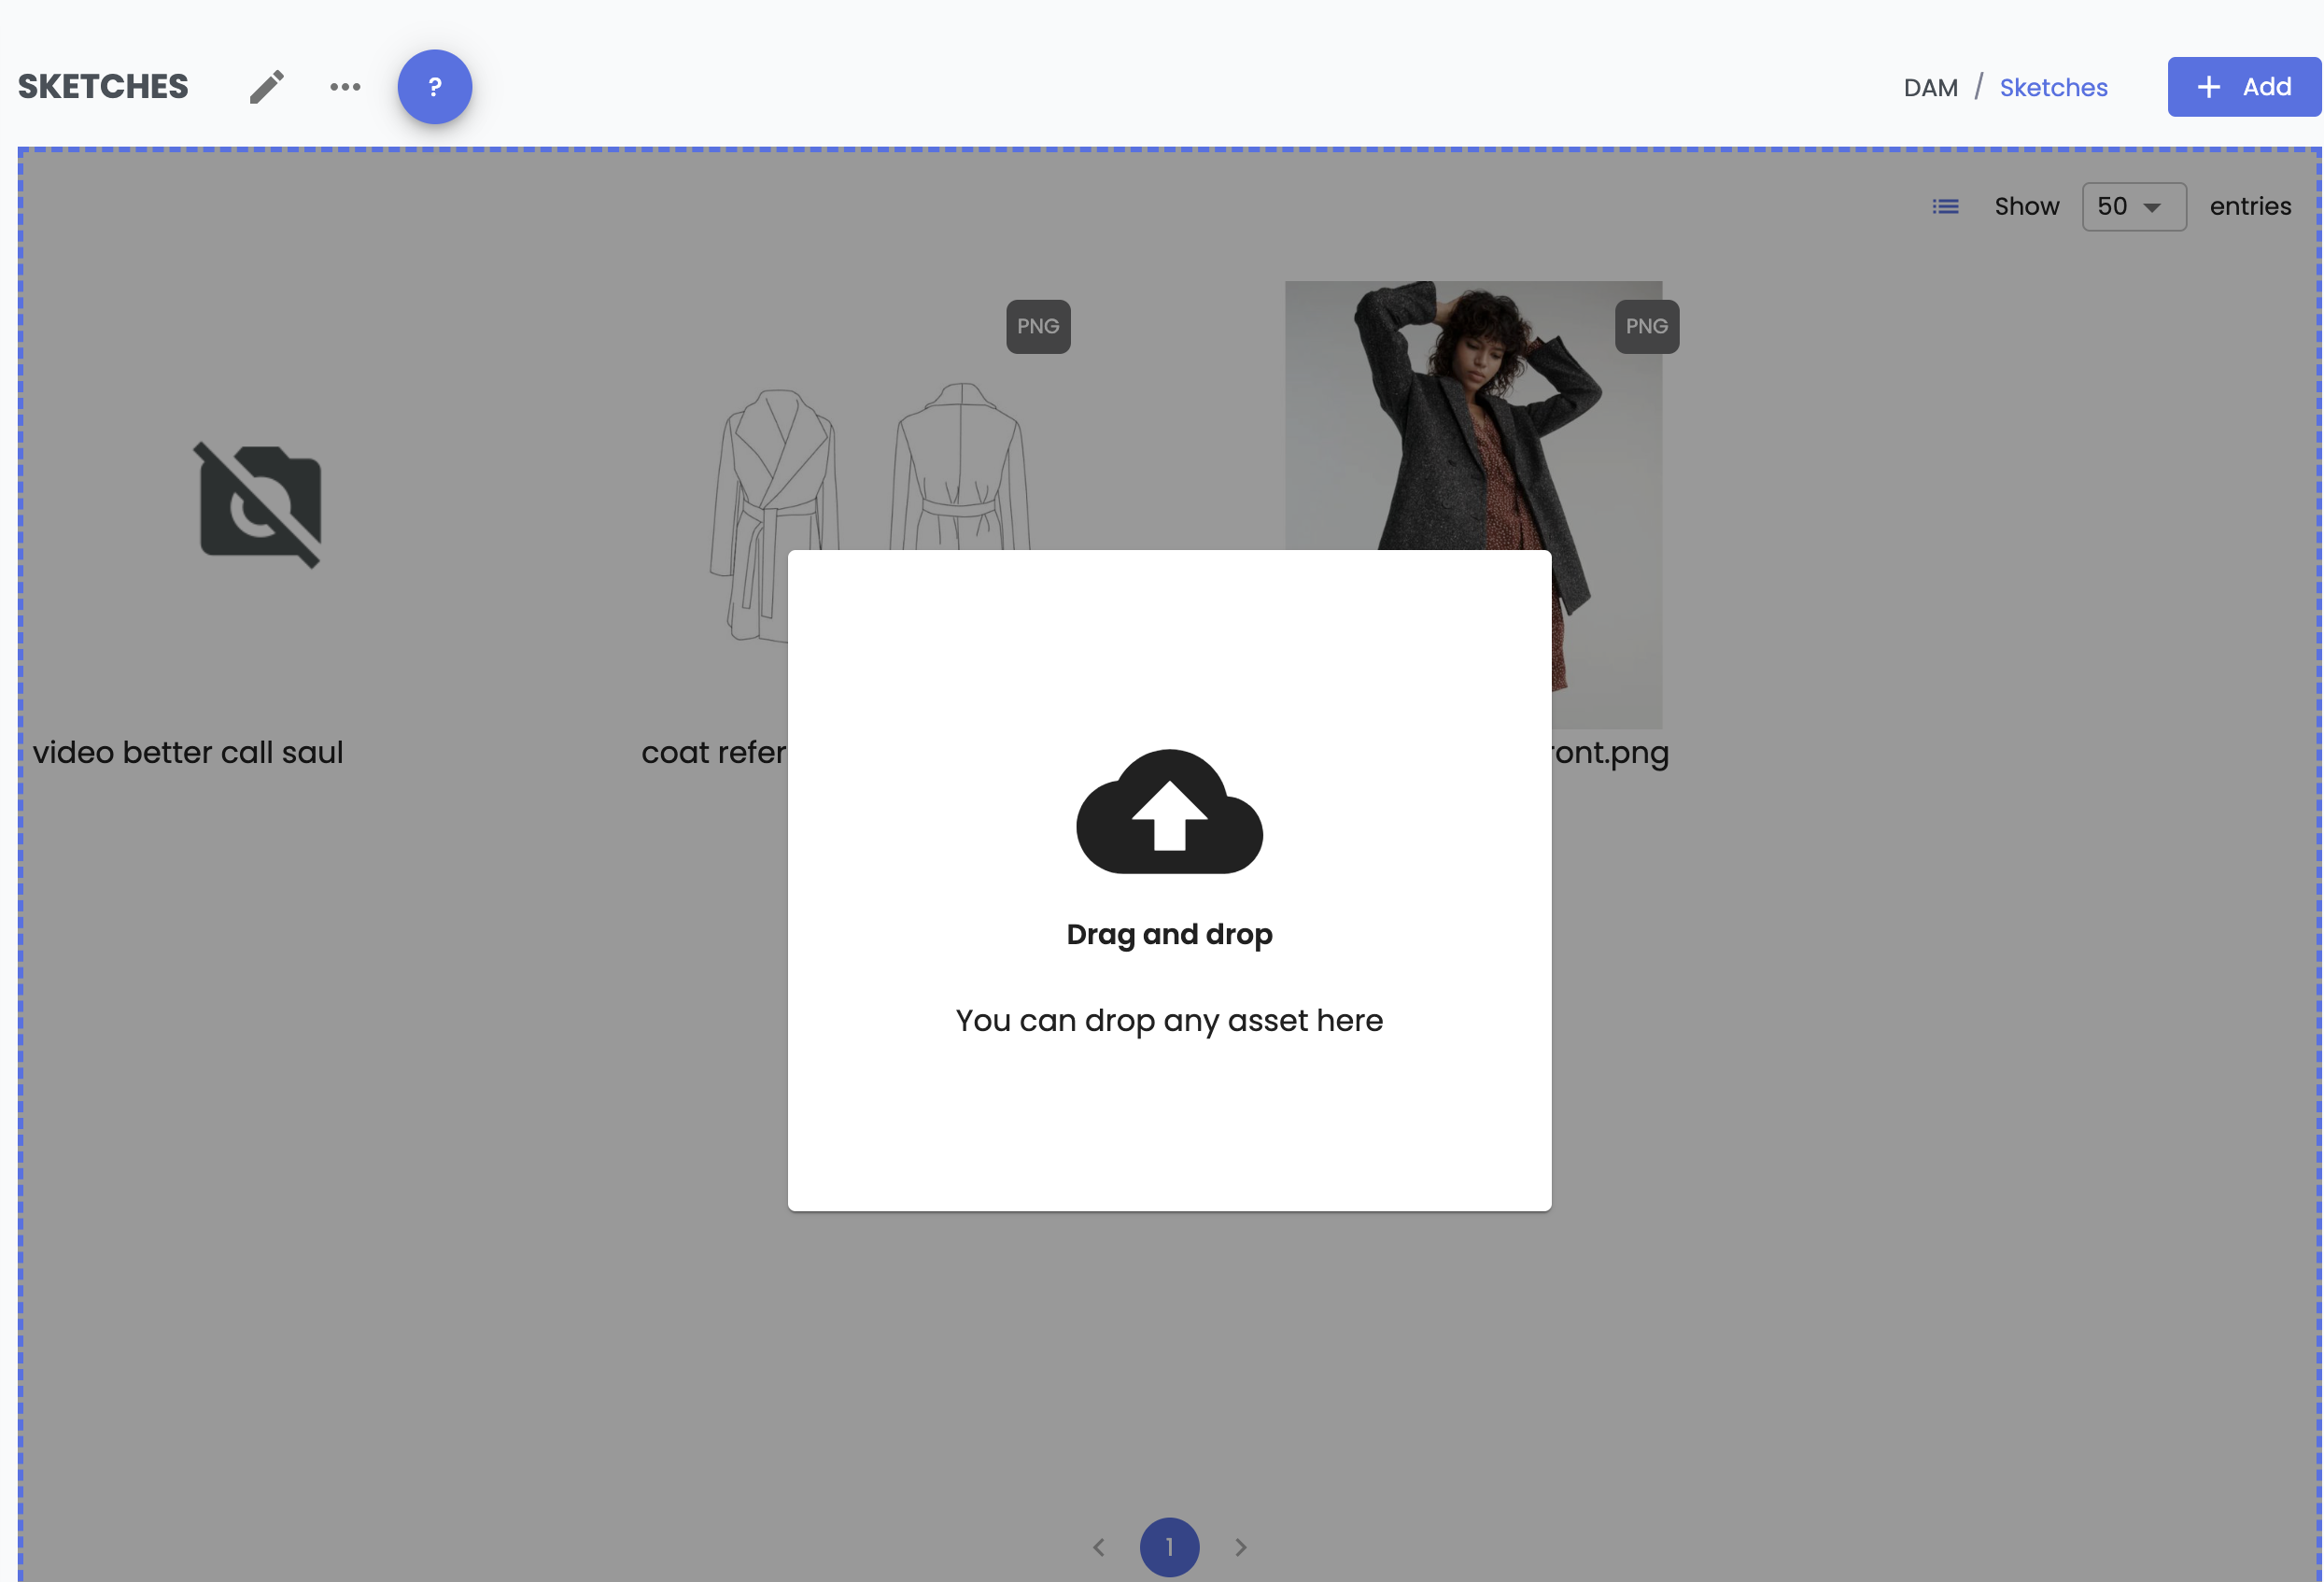
From the DAM
- Go to the Assets page,
-
Browse and select a classification,
-
Two options:
-
Either Drag & Drop one or more files into the drop zone,
-
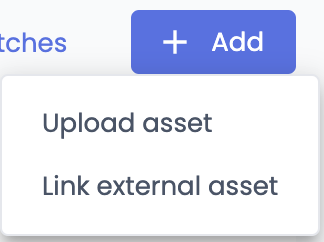
Or click + Add and choose between:
- Upload files from your computer, or
- Link external assets.
-
- An Upload window opens allowing you to select your files and confirm. Multiple assets can be uploaded at once.
- An asset sheet is then created in the selected classification, containing the asset.
- A notification informs you of success / error / progress.
➡️ The assets are uploaded into the DAM, within the selected classification, and can then be linked to product sheets! ⚠️ Warning! External assets are not uploaded and stored in the DAM.
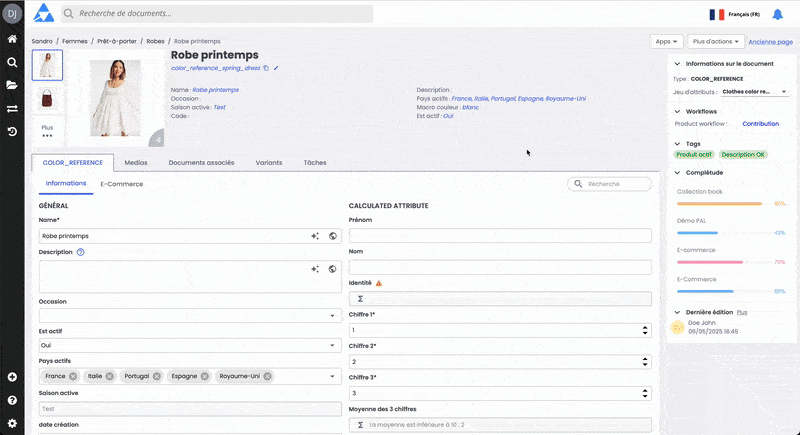
From a product sheet
-
Open the product sheet and go to the Assets tab.
-
In the dropdown list, select an association to link the asset.
-
Click on + Upload asset to add a new one,
- Either from your computer,
- Or from an external URL.
- An Upload window opens allowing you to select your files and confirm. Multiple assets can be uploaded at once.
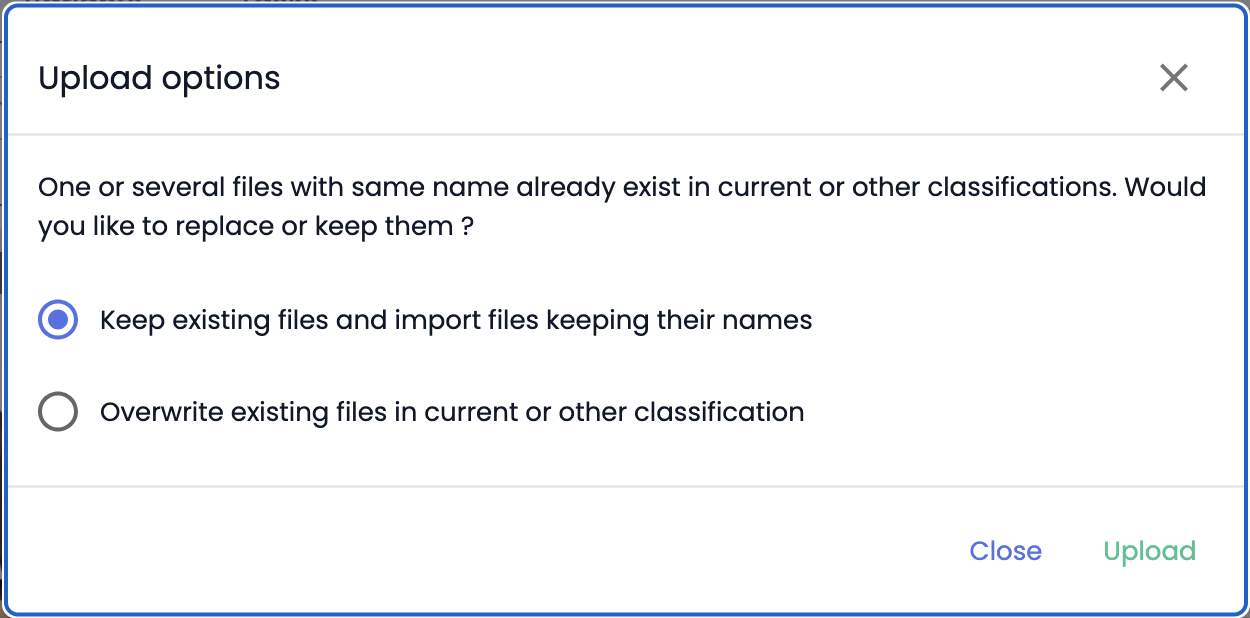
- If an asset with the same name already exists, a window opens to define the upload option: create a duplicate or replace it,
- A notification informs you of success / error / progress.

TipsUploaded assets will be placed in the default Assets classification node in your DAM. If you observe a specific classification structure in your DAM, you will need to move the uploaded asset into the appropriate classification node. However, the link between the product sheet and the asset will remain active.
➡️ An asset sheet is created, containing the uploaded asset, and the asset is automatically associated with the product sheet via the selected association.
Limitations
- When an asset is added directly from a product sheet, it is automatically placed in the DAM's default classification.
- If another organization is needed, the asset must be manually moved afterward to the appropriate classification, to maintain a consistent DAM structure.
Adding an external asset
-
When adding external assets, the system requires the following information:
- Asset URL (mandatory – must be public HTTPS),
- Asset name (mandatory),
- Custom thumbnail (optional but recommended).
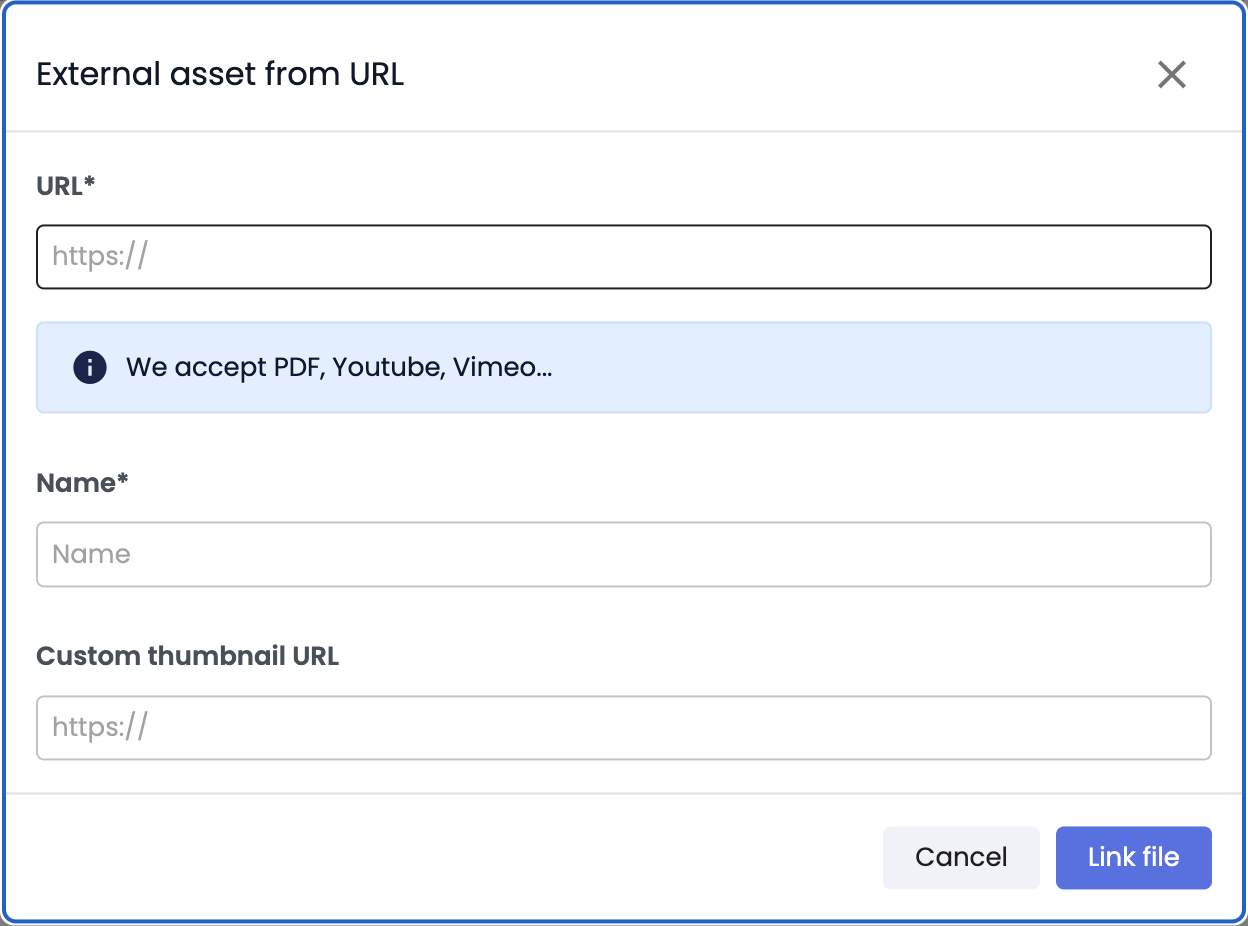
- The external asset sheet is created with the External label.
Limitations
- External assets cannot be bulk downloaded and are not stored in the DAM.
- The URL must be public HTTPS.
Best practices
- Organize assets into classifications to maintain clear and efficient access to them,
- Check associations on which assets are linked to product sheets.
- Name files clearly to make them easy to find,
- Add a custom thumbnail to external assets such as videos or large files to speed up display.
In summary
Adding an asset automatically creates an asset sheet (file + attributes).
File types supported: image, video, document, up to 1 GB per file.
Specific user permissions are required to manage assets.
There are two interface methods to add assets:
- from the DAM, or
- from a product sheet.
You can add external assets via a public HTTPS URL.
Best practices facilitate asset management:
- file naming,
- organization in classifications,
- custom thumbnails for external assets.
Next chapter
Now that you know how to add assets, let’s discover how to move, deplace and delete assets.
Updated 10 months ago