Creating a New User
Learning Objectives
- Learn how to create a new user in the PIM.
- Configure user settings, including identity information, permissions, and roles.
- Manage activation and deactivation as well as additional user information.
Introduction
User management in the PIM is essential to ensure controlled and secure access to features and data.
This lesson provides a step-by-step guide on how to create a new user, configure their settings, and define their permissions.
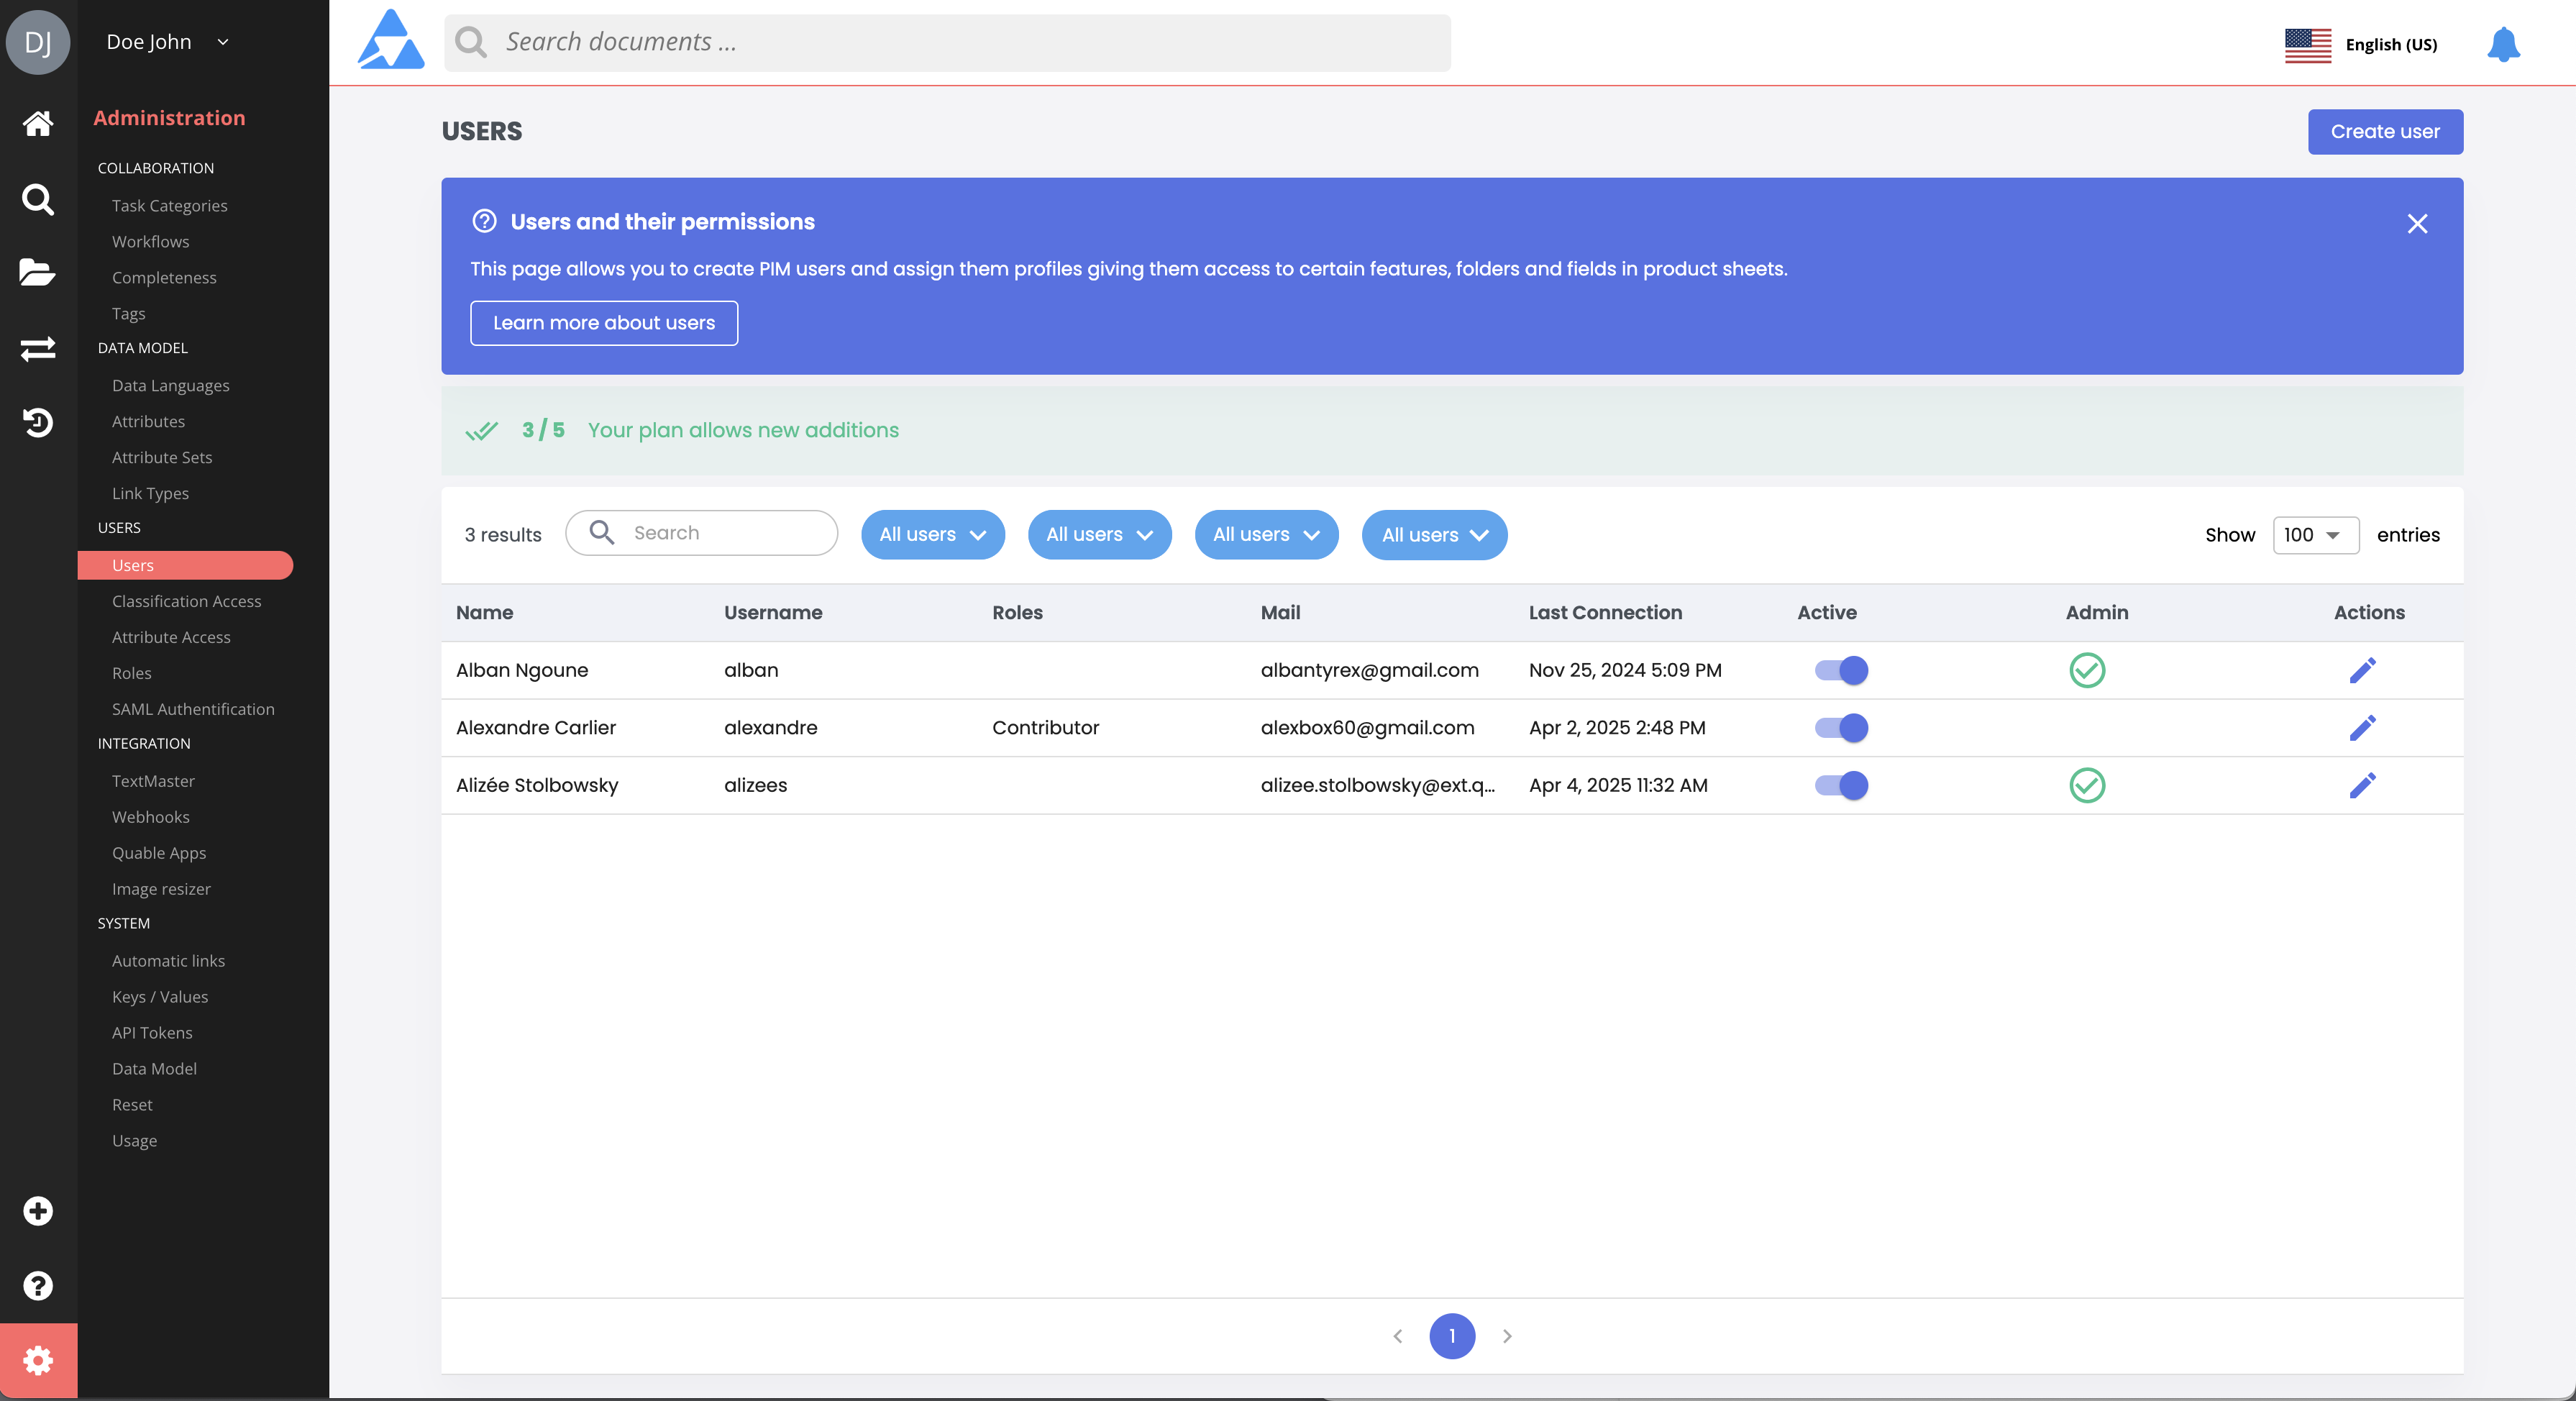
Access the Users Page
- From the administration menu, go to the Users page.
- The Users page displays a list of existing users with the following information:
- Username: Unique login name.
- Name: User’s full name.
- Email: Email address used for notifications.
- Last Connection: Date and time of the last activity.
- Admin: Indicates whether the user has administrator rights.
- Active: Account status (Active/Inactive).
Good to know:
- You can use the search field or filters to quickly find an existing user.
- It is not possible to delete a user, but you can deactivate a user account.
Limitations:You can create as many users as needed. However, the number of included users depends on your contract and the plan subscribed to with Quable. Additional fees may apply for any excess.
For more information, contact your CSM.
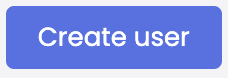
Create a New User
- Click the Create User button at the top right of the page.
- A form appears to enter the new user’s details.
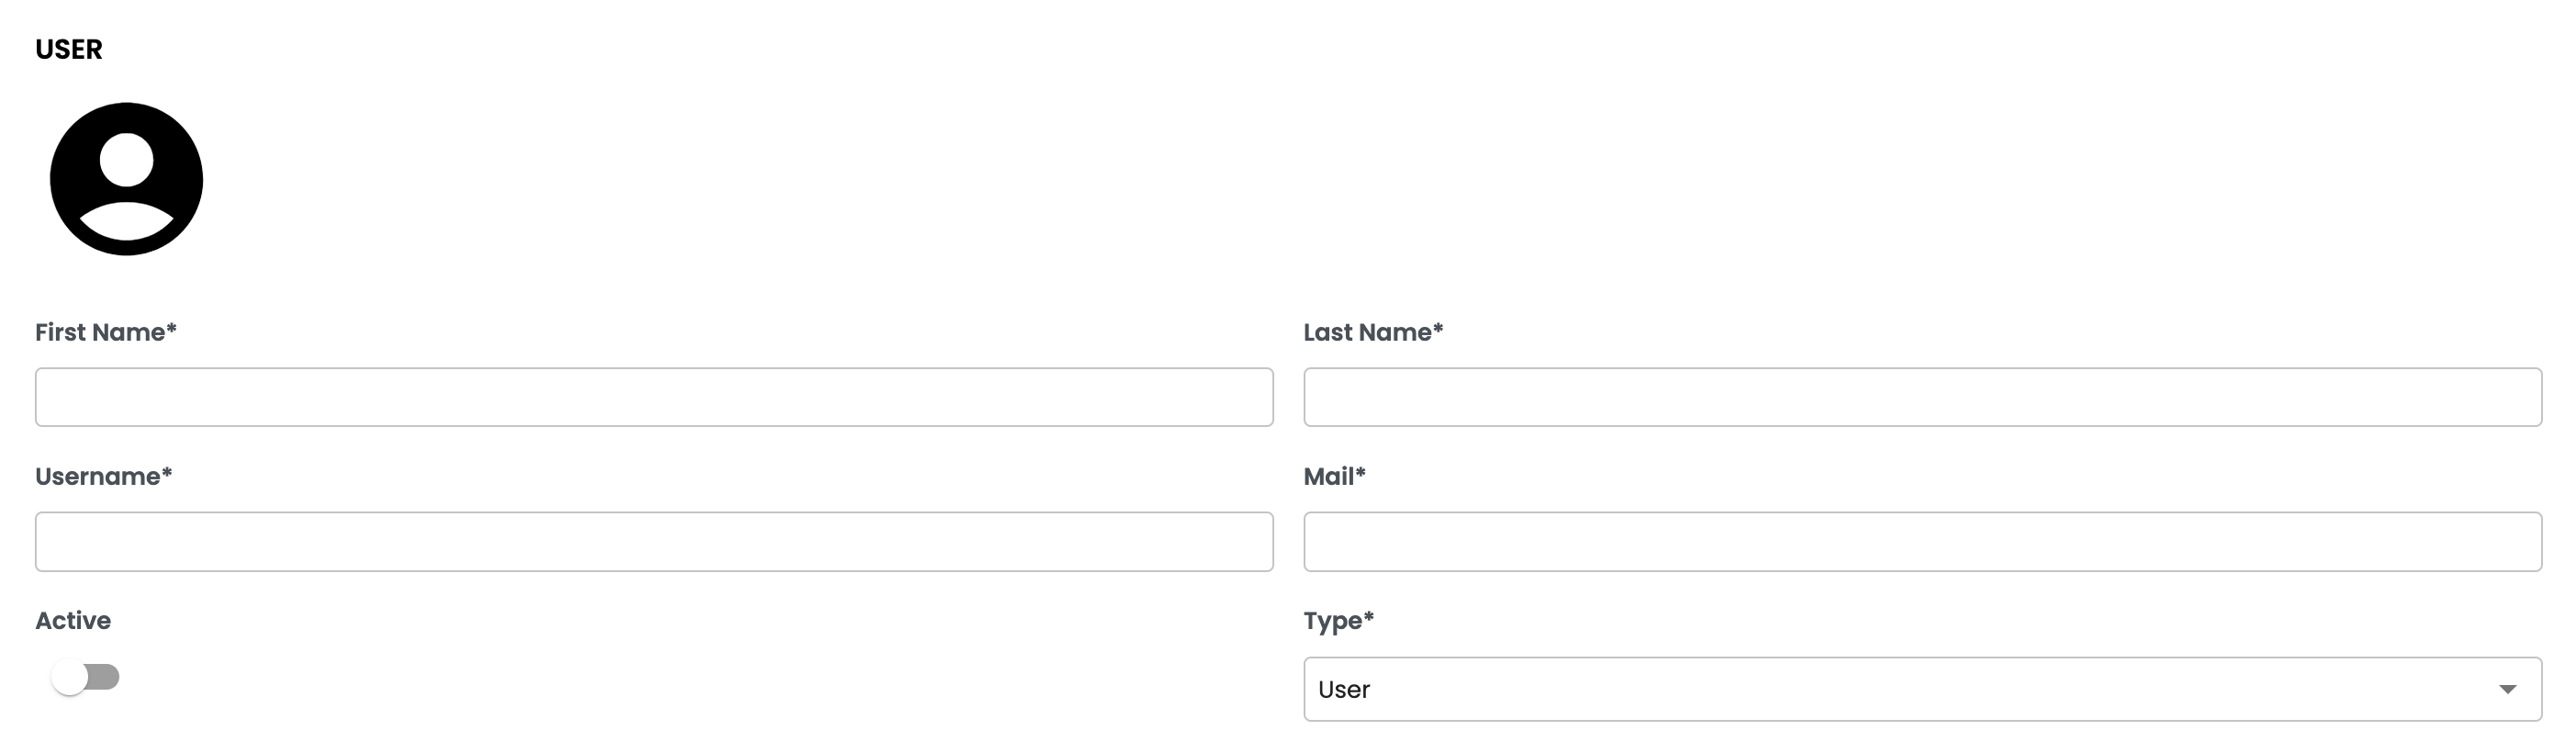
Fill in Identity Information
Enter the following details:
- First Name (Required): User’s first name.
- Last Name (Required): User’s last name.
- Username (Required): Unique login name. Once created, this cannot be modified.
- Mail (Required): Email address for notifications.
- Active: By default, the account is Inactive. Activate it if needed using the toggle button.
- Type (Required): API user or human user. (Only human users are counted.)
Set the Password
- Do not leave the field empty; create a random password.
- ⚠️ The password will not be sent to the user by email! You will need to share it manually.
- The user must later change and personalize their password.

How Can a User Change Their Password?
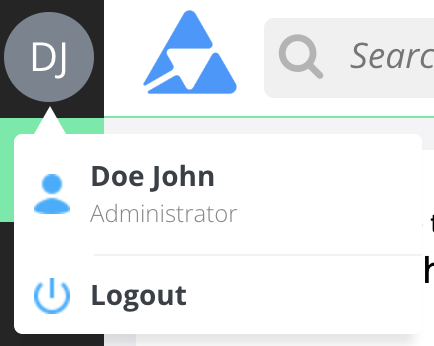
- Log in to the PIM using their credentials or another login method.
- Access the user profile by clicking on the icon at the top left of the PIM, then selecting their name.
- The My Account window opens. Enter a new password in the password field.
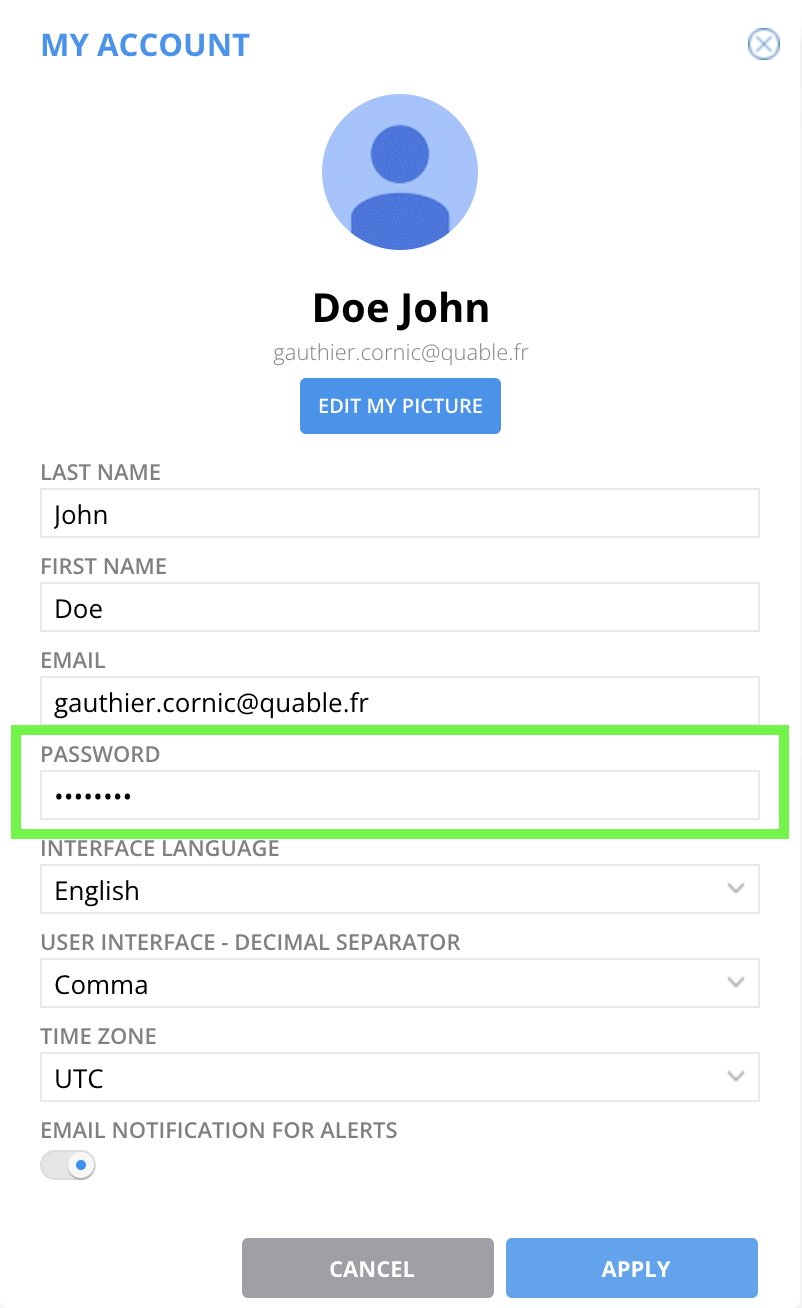
- Click Apply to apply the changes.
Good to knowFor logins via Social Login or SSO SAML, changing the password does not affect authentication.
Configure Languages
- Available Languages (Required): Select at least one locale.
- Set the Default language, used when accessing product sheets.
- Specify the Translation language, used for translations in the PIM.

Assign Permissions
| Term | Definition |
|---|---|
| Permissions | Rights assigned by the administrator to allow users to perform specific actions. |
| Role | A way to group users with similar permissions, ensuring access to relevant information based on predefined rules. |
- Roles (Required, except for administrators): Assign a predefined role with specific permissions.
- Admin: Check this box if the user should have full administrator rights.
- Attribute Access: Defines which attributes the user can edit.
- Classification Access Profile: Determines accessible folders.
Good to know:Administrators are not subject to role or access profile restrictions.

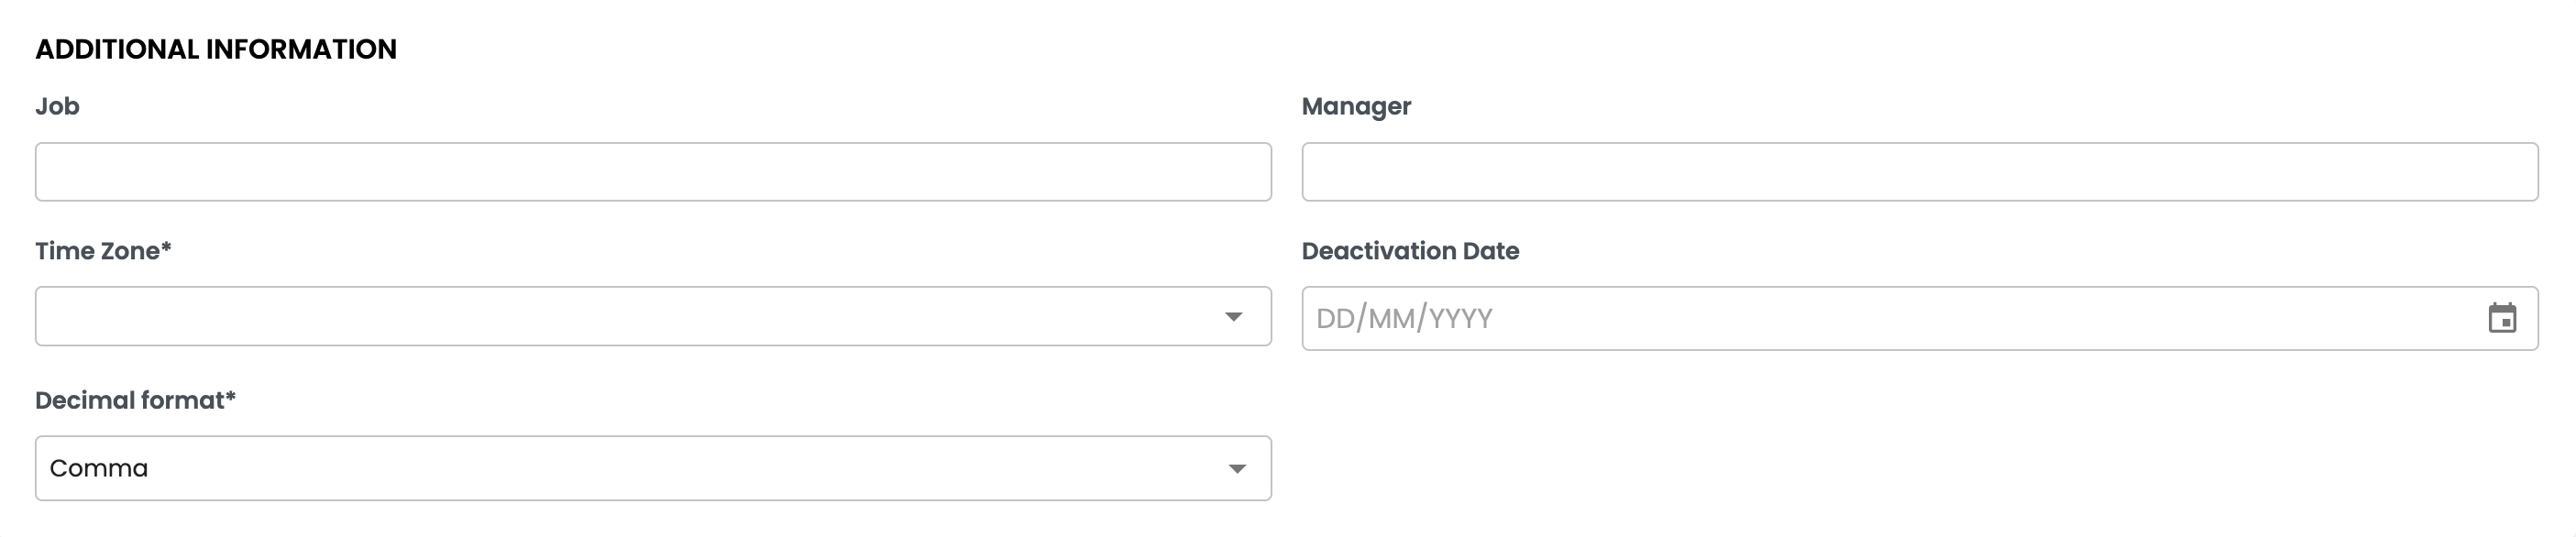
Add Additional Information
Enter additional details, such as:
- Job: The user's job position.
- Manager: The direct supervisor.
- Time Zone (mandatory): Defines the date field display format (default: UTC).
- Deactivation Date: Schedule automatic account deactivation. Leave empty for a permanent user account.
Save the New User
- Once the form is completed, click Create to save the new user.
- If you want to cancel the creation, click the Users breadcrumb link at the top right of the form.
Good to knowYou can modify, activate, deactivate, or reset a user at any time from the Users page in the administration menu.
Summary
- Access the Users page: From the dashboard, go to the "Users" menu to see the list of current users and their details.
- Create a new user: Click "Create a user" and fill in the required information such as first name, last name, username, and email.
- Set the password: Create a temporary password.
- Configure languages: Select available languages, the reference language, and the translation language.
- Assign permissions and roles: Define roles, attribute access, and classification access to customize user rights.
- Add additional information: Enter details such as job title, manager, and time zone.
- Save the user: Click "Create" to save the information.
Next Chapter
Now that you know how to create a new user, let's explore how to Manage user access rights.
Updated 10 months ago