Advanced Search (Legacy version)
Find your content quickly!
Old VersionThis page introduces the old version of the advanced search, which has become obsolete following the visual redesign of our platform.
You can access the new version of the advanced search by clicking on "Access to new search page" located at the top right of the screen:
Advanced Search is a central element of Quable PIM. It not only allows you to quickly locate and access your documents using multiple criteria, as well as:
- controlling the sort order and number of the results displayed,
- performing bulk edits on your classifications, documents, assets, and variants,
- creating dynamic widgets for your dashboard, and/or
- exporting your search results or translations.
Advanced Search Page
The Advanced Search page is where you can perform all of your advanced searches. It can be accessed from:
- the Quick Search bar and pressing the Enter key.
- the Search icon in the left menu.
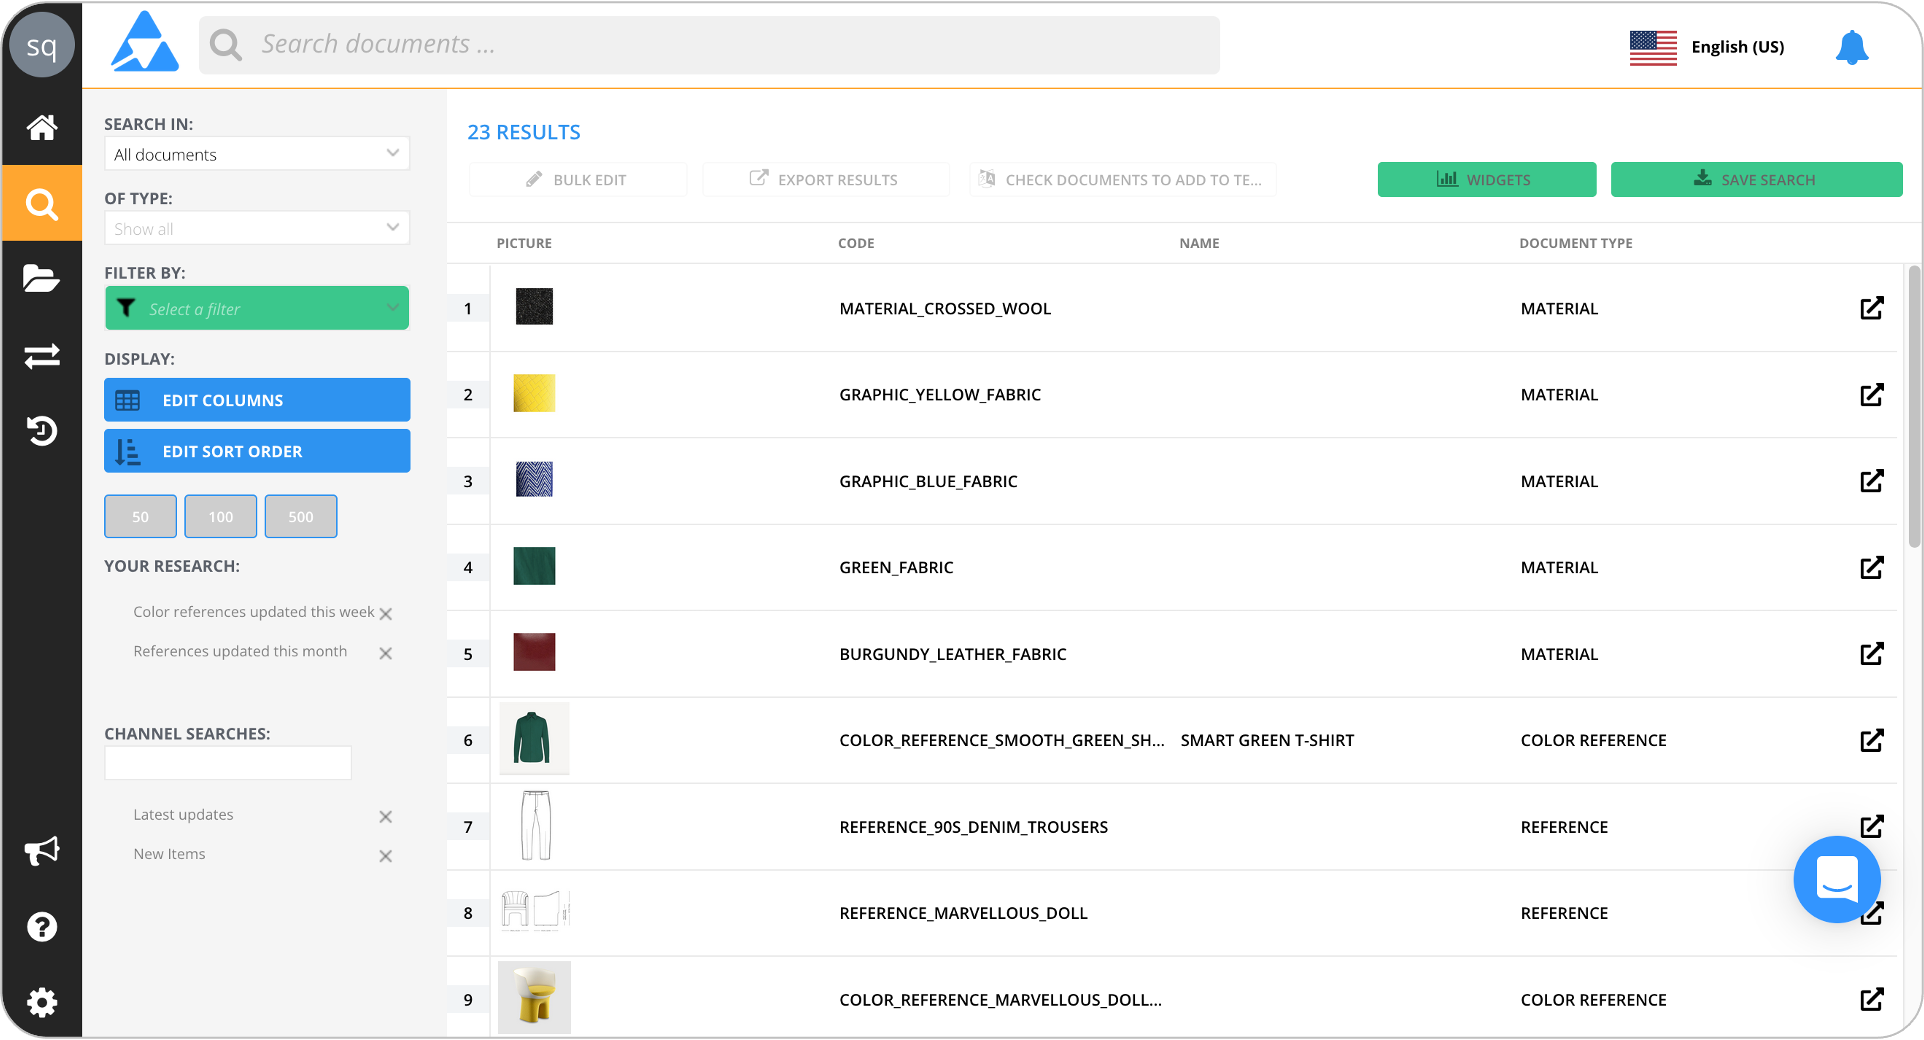
The initial view is a list of your existing documents.
The page is divided into two panels:
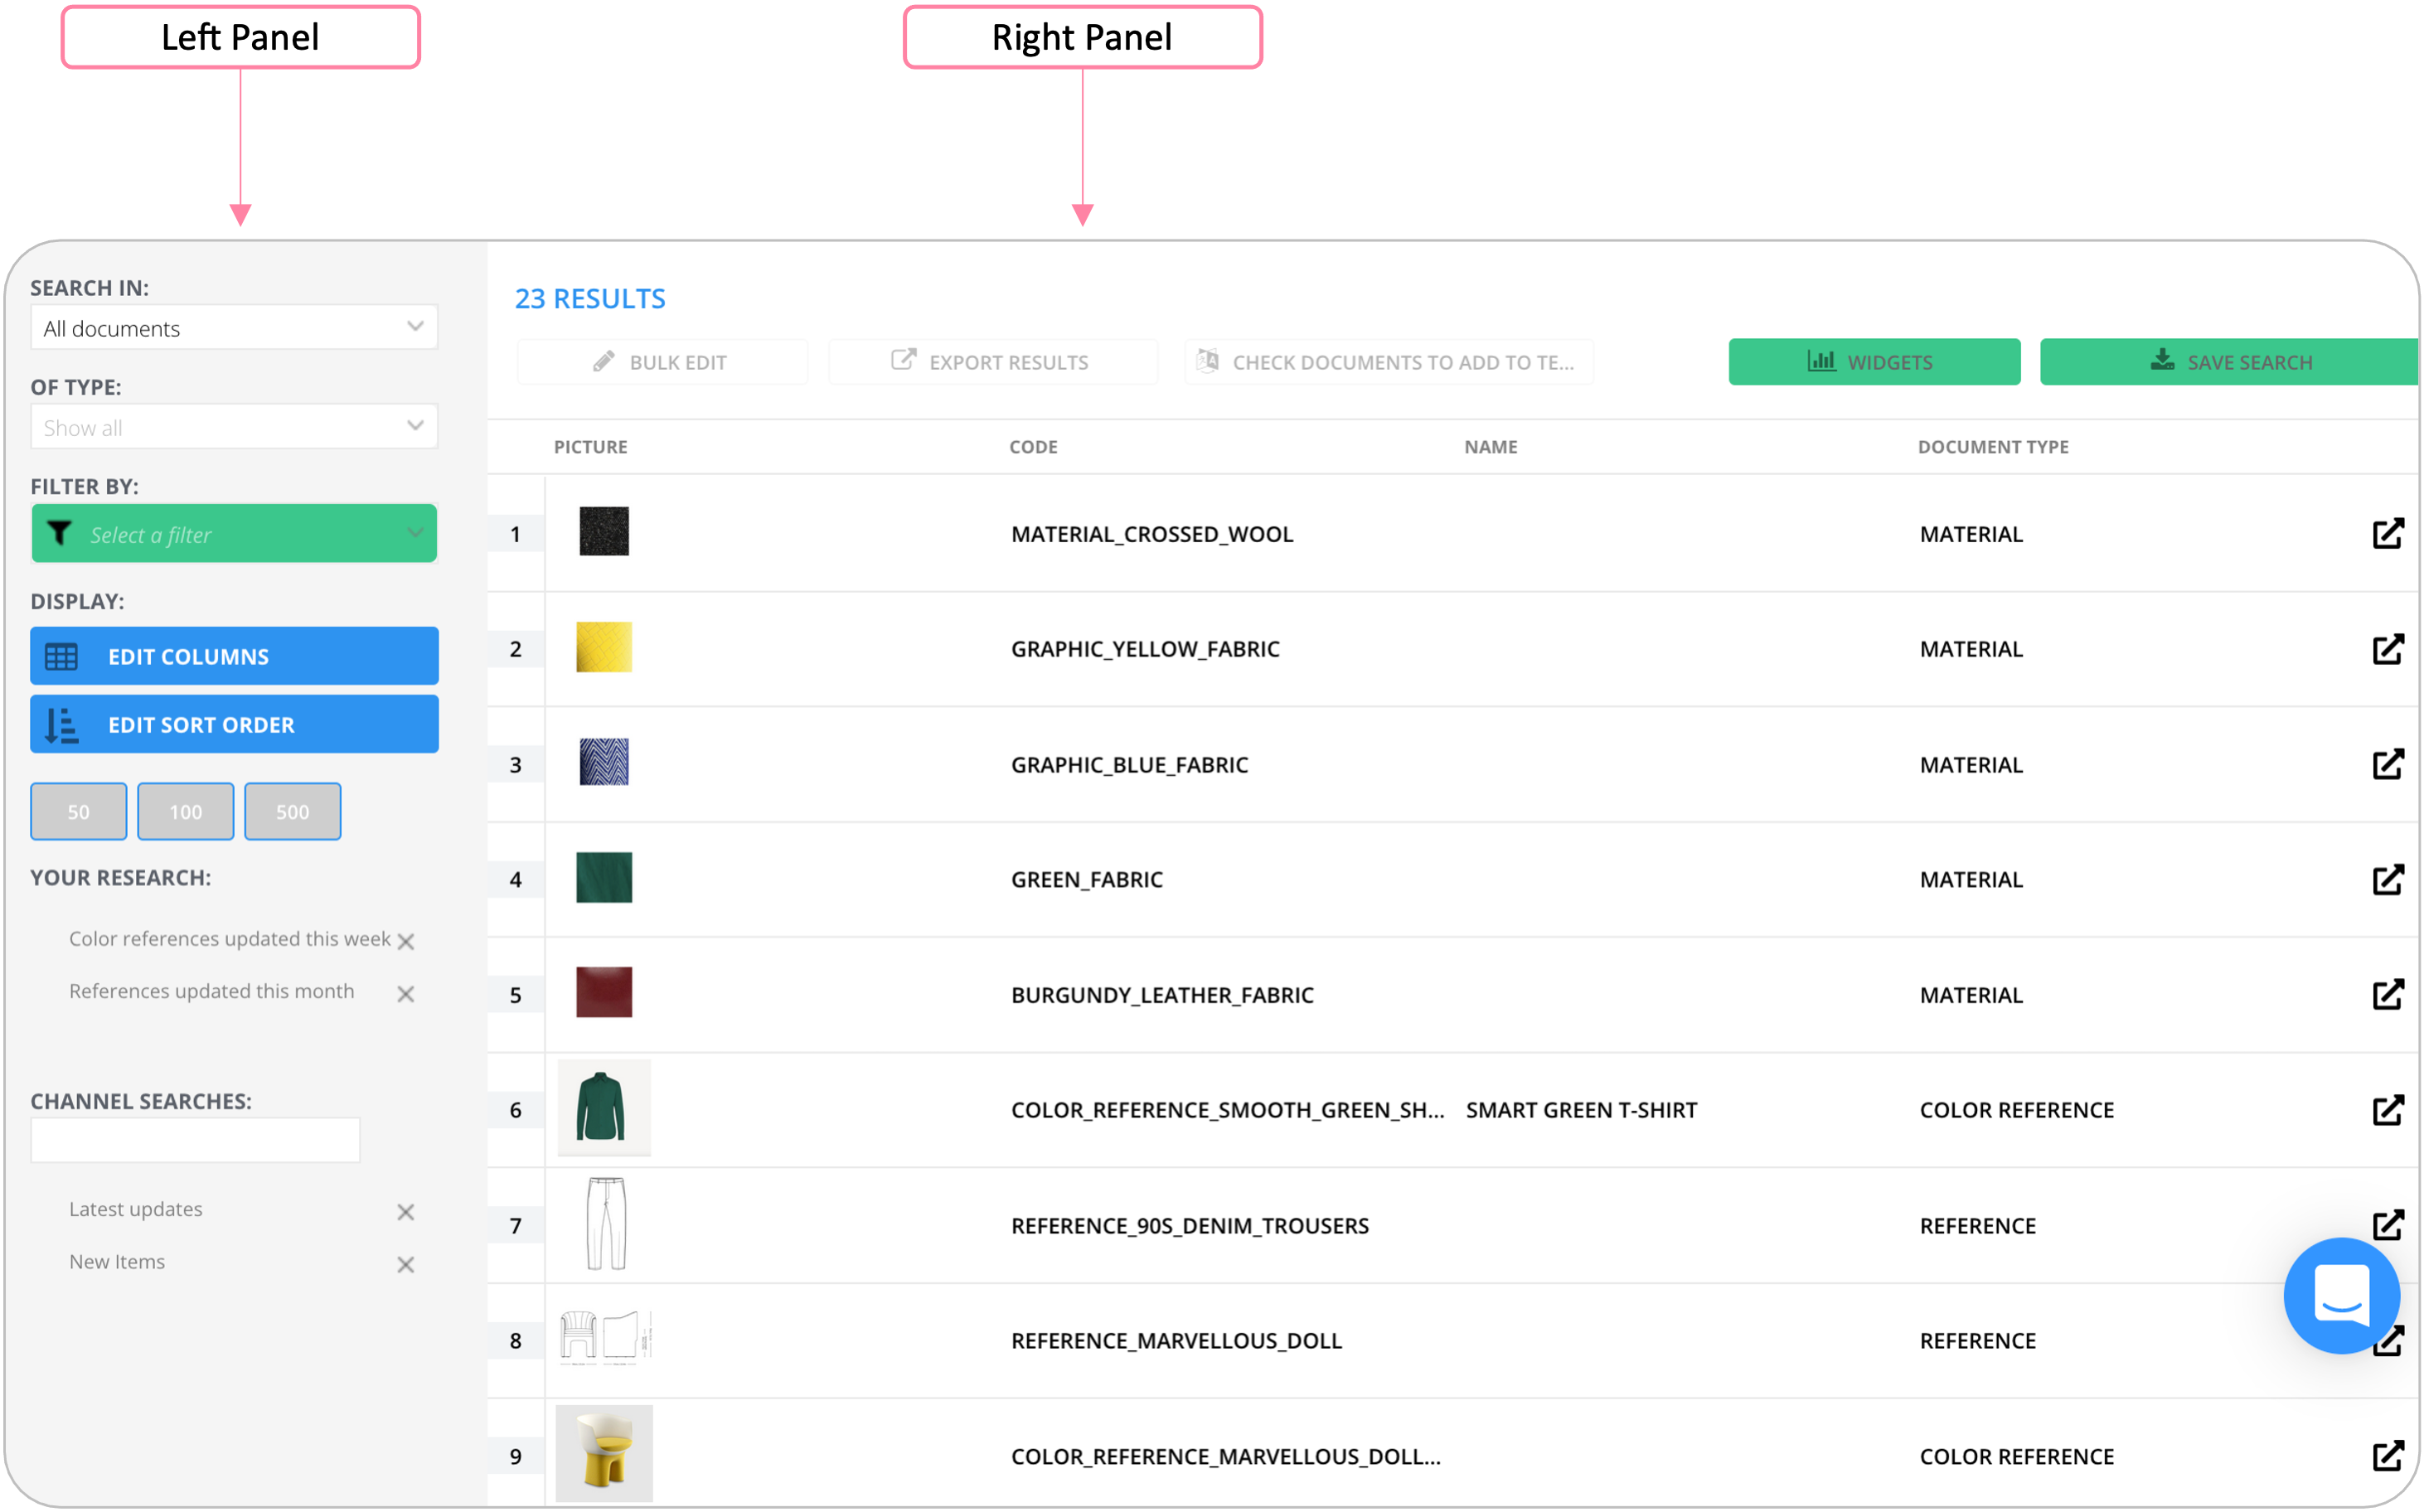
Left Panel | Right Panel |
|---|---|
The Left panel includes the following sections:
| The Right panel displays your search results and the following action buttons for your search results : |
Search Options
To run a search, you must specify at least one search option in the Left panel. Search options are instantly applied as you select them, so the more options you use, the more precise your results will be.
The following sections describe each of the available options.
Search In
The Search In parameter allows you to direct where Quable PIM performs the search.
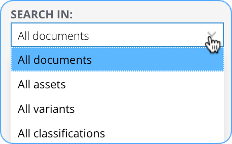
Option | Description |
|---|---|
All documents | (default) The search is performed only on documents. When selected, the Of Type option becomes available to specify the type of documents to search. If you use this option, Type is displayed in the Active Filters section. |
All assets | The search is performed only on assets. |
All variants | The search is performed only on variants. |
All classifications | The search is performed only on classifications. |
Filter By
To refine your searches, you can designate attributes to your search criteria. These attributes can be global attributes (e.g., Name) or specific to your Search In selection.
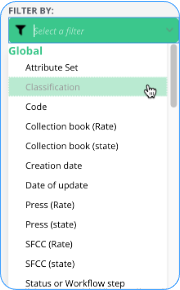
For example, if you Search In a specific document type, you can filter the search by:
- one of the document type's attributes or
- an attribute of one of its related documents
In addition, if you Search in a specific type of document, you can filter the search by Tags, by Completions (in the "General" category) or by Workflows (in the Workflow category)."
When you select an attribute, a dialog is displayed to define the value or condition as a Rule (equal, greater than, less than, etc.). The choices vary depending on the filter selected.
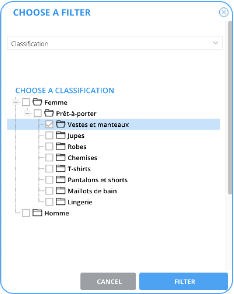
Product News (08/22) :The "Status or Workflow step" filter has been split into "Tags" filters and Workflows filters (one per existing workflow, designated by their names in the current interface language). "Status or Workflow step" is still usable, but we encourage you to use the new filters."
For your informationYou can combine multiple filters to refine your search.
For your informationIn the case of a search on a text type attribute allowing an input of more than 255 characters (text area and html field), then the search for an element in the latter will only be carried out on the first 255 characters.
Active Filters
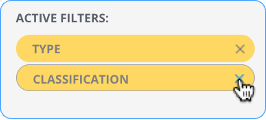
When filters have been selected, the Active Filters section is displayed to show the filters applied to the search. To remove a filter, click on its X.
Display Options
The Display section allows you to define the columns to display, the order of the columns, and the number of results per page.
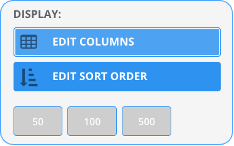
Edit Columns
Clicking the Edit Columns button opens a dialog where you can select the columns to display in the search results.
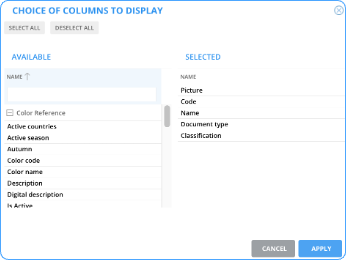
To select columns, you can drag and drop individual column headers from the Available list (on the left) to the Selected list (on the right) or you can search for a specific column header by typing at least three characters of the attribute name in the search bar. A scrollable list is automatically displayed. The list will display fewer and fewer results as you continue to enter text in the search bar until nothing matches.
Once you've selected all of the columns you want to display, click the Apply button to save your selections or the Cancel button to exit the dialog without modifying the columns displayed.
You can select or deselect all columns at once by clicking the Select All or Deselect All buttons.
Edit Sort Order
Clicking the Edit Sort Order button opens a dialog where you can select the direction that the individual columns are sorted in the search results.
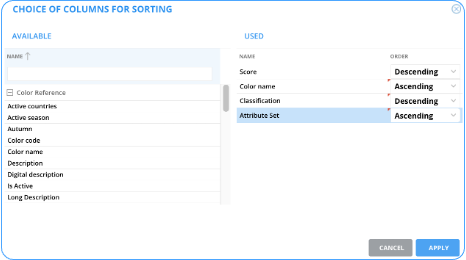
To select columns, you can drag and drop individual column headers from the Available list (on the left) to the Used list (on the right) or you can search for a specific column header by typing at least three characters of the attribute name in the search bar. A scrollable list of is automatically displayed. The list will display fewer and fewer results as you continue to enter text in the search bar until nothing matches.
Once you've selected sort direction for the columns, click the Apply button to save your selections or the Cancel button to exit the dialog without modifying the sort order.
Number
You can define the number of results displayed by clicking on one of the available quantity buttons. 100 is selected by default.

The selected option changes color to remind you of your choice.
Search Results
Once you've finished configuring your search in the Left panel and the results are displayed in the Right panel, there are several actions you can perform.
The following sections describe each of the actions that can be performed.
Save Search
Best PracticeSaving your searches ensures consistency when performing the same search in the future, as well as enables creating widgets.
You can save your search options to reuse them in the future. To save a search, click on the Save Search button. This opens the Save Search form.
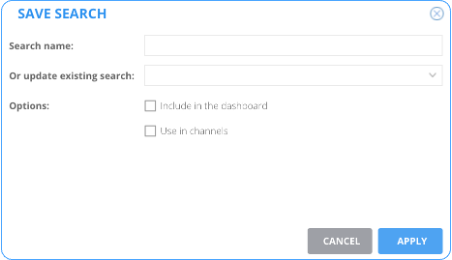
Enter the following information:
Information | Description |
|---|---|
Search name | Enter a name for the search.
|
Or update existing search | Select an existing saved search to update with the current search options.
|
Options | (optional) Enables additional uses for the saved search:
|
When you've finished with the form, click the Apply button to save the search or the Cancel button to return to the search results without saving.
Saved searches automatically appear in the Left panel in the Your Searches section. If the Use in channels option was selected, the search appears in the Channel Searches section. To reopen your search, click on its name. To delete it, click its X.
Widgets
Quable PIM chart widgets present your data graphically to help you easily see and understand it, resulting in improved time management, and better collaboration and efficiency.
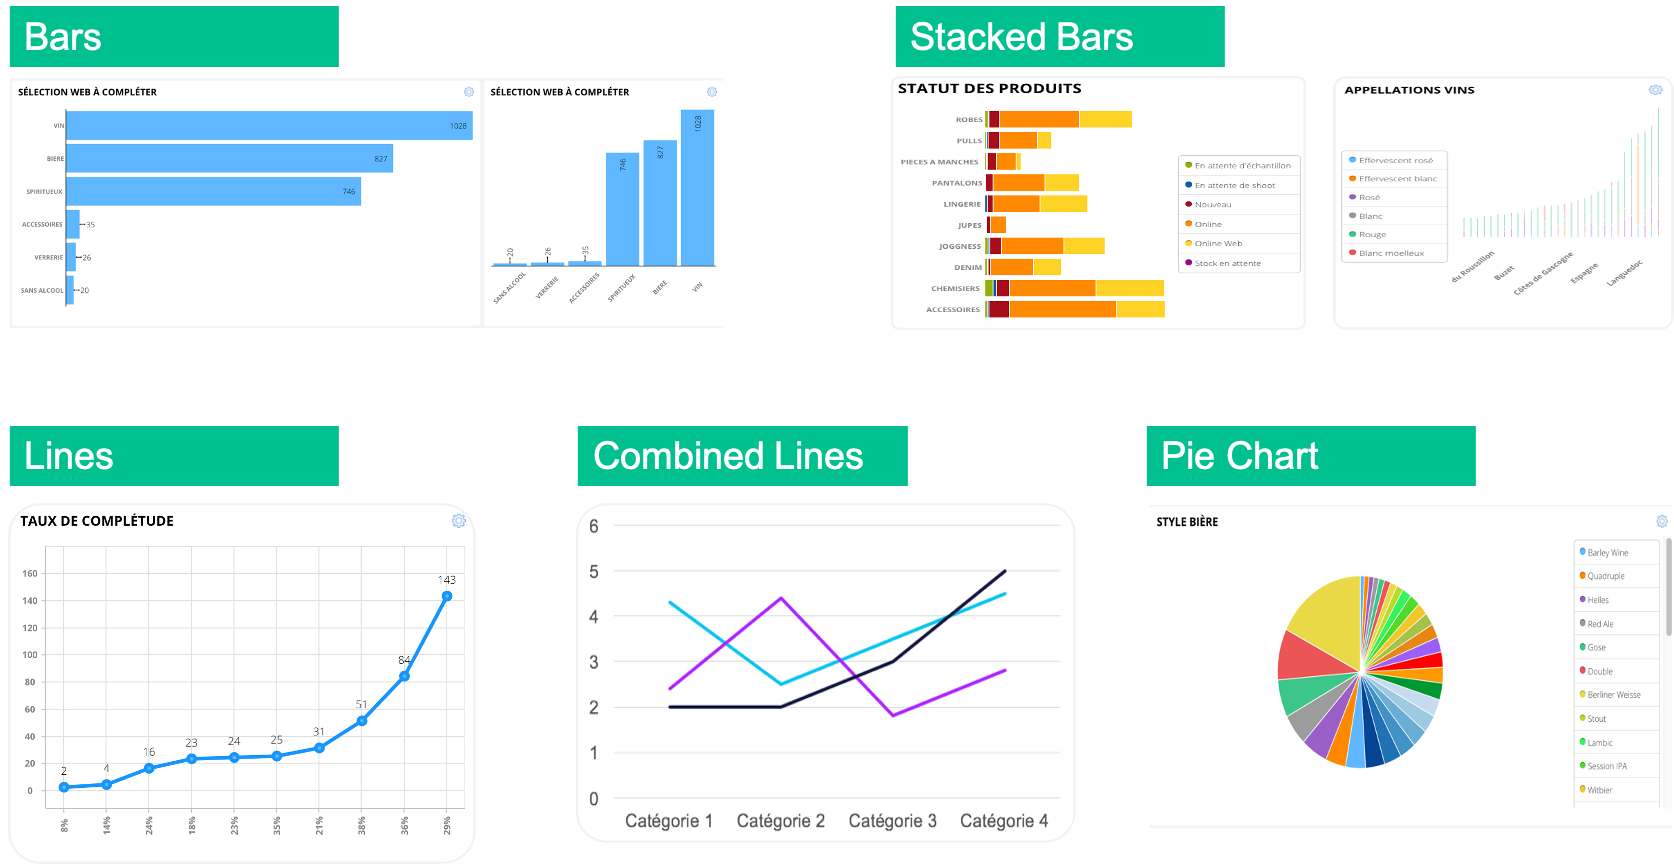
To create a new chart widget using your search results, click the Save Search button (do not select the Include in the dashboard option), then click the Widgets button and complete the New Widget dialog.
For detailed information about creating chart widgets, see Charts.
Bulk Edit
Selections & Permissions RequiredThis feature is not active unless the user has update rights AND selections have been made via the checkboxes.
Bulk editing runs in the background and the application time of your changes will depend on the number of objects edited.
Bulk Edit allows you to update up to three attributes on multiple objects (documents, assets, or variants) at the same. Note that, for documents, you must select a document type from the Of Type option.
Select the objects you want to modify by clicking their checkboxes. If you want to select all objects, click the checkbox in the header. Once you've made your selections, click the Bulk Edit button to open the Bulk Edition form.
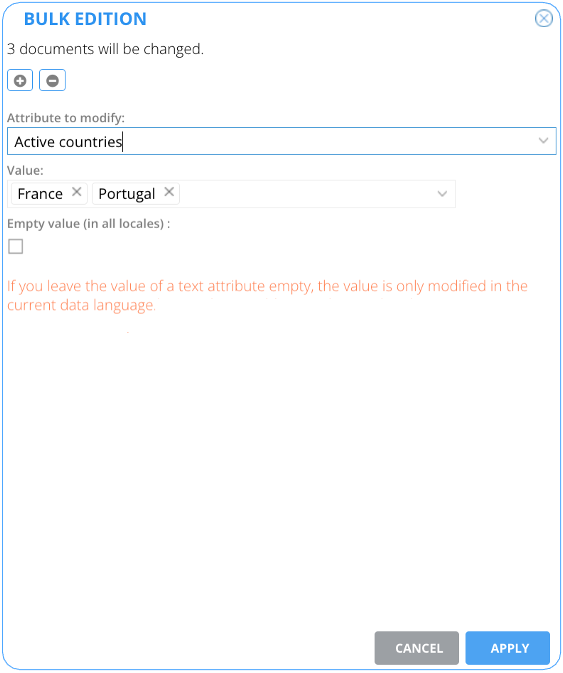
You can add or remove attributes by clicking on the + or - buttons.
Enter or select the following information:
Options | Description |
|---|---|
Attribute to modify | Select a attribute to modify from the dropdown list. |
Value | Select or enter a new value for the attribute. |
Empty value (in all locales) | Removes the value of the attribute in all locales.
|
Once you've finished your selections, click the Apply button to update the attributes or the Cancel button to exit the dialog without modifying the attributes.
Export Results
Selections RequiredThe feature is not active unless selections have been made via the checkboxes.
Select the objects you want to export by clicking their checkboxes. If you want to select all objects, click the checkbox in the header. Once you've made your selections, click the Export Results button to open the Export Results form.
Depending on Search In object used, the Export Results button provides up to three options for the export's Output type. The following sections describe each of the available options.

Translation
The Translation output type allows you to export the text content in your selected documents or variants in a translation file. When selected, additional options are displayed to define your export.
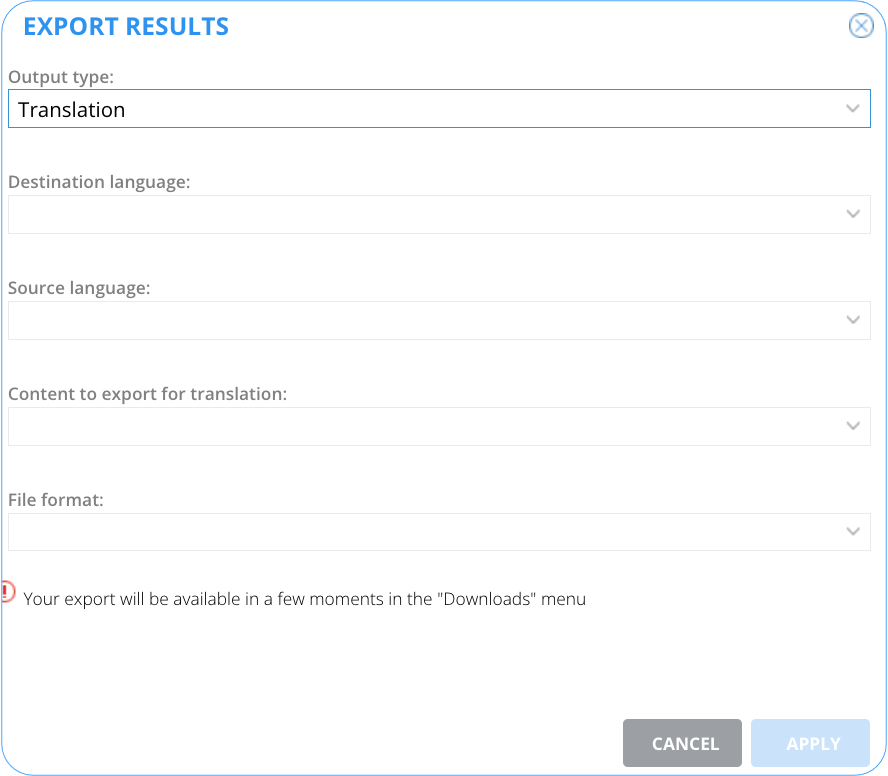
Select the following information:
Information | Description |
|---|---|
Destination language | Indicates the language the content should be translated into. |
Source language | Indicates the language the content should be translated from. |
Content to export for translation | Defines which content to export. The following options are available:
|
File format | Defines the format for the export file. The following options are available:
|
Once you've finished your selections, click the Apply button to export the translation content or the Cancel button to exit the dialog without exporting.
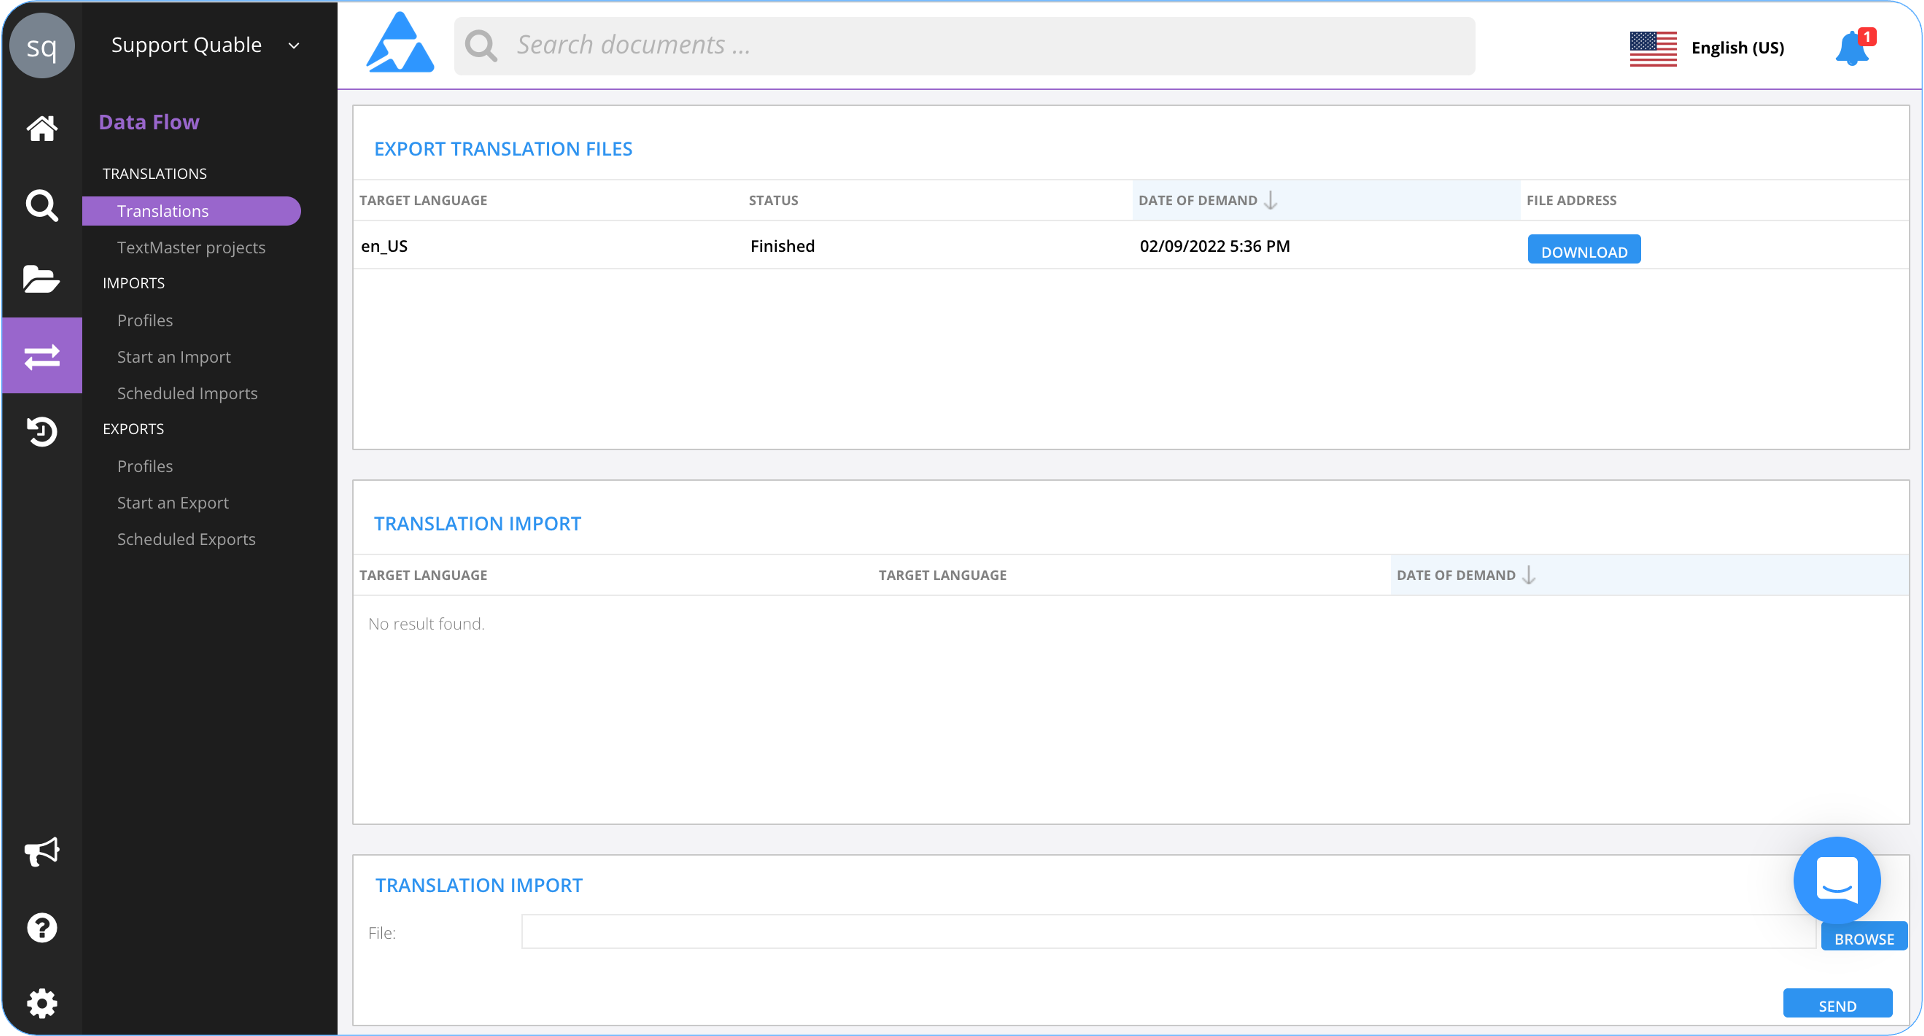
The generated export file contains a column with text content in the Source language and an empty column for translation into the Destination language. It can be found and downloaded from the Export Translation Files section of the Translations page in the Data Flow > Translations menu.
Assets
The Media output type allows you to export the assets of your selected documents or assets.
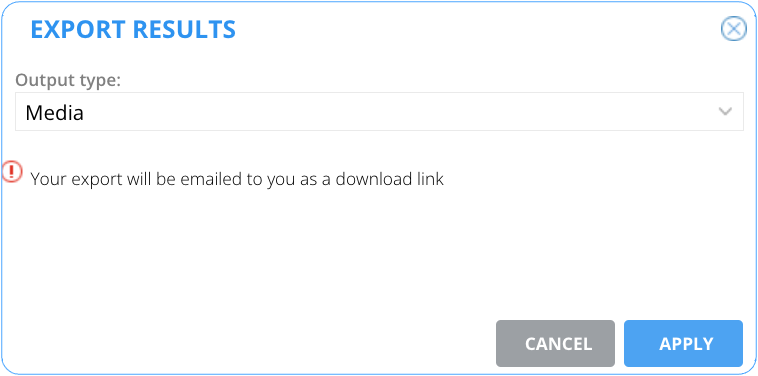
Once you've selected the Media output type, three fields appear:

Image studio profile - Select a profile from those available for your media:
By default, Quable PIM includes two standard profiles:
- Original - Media are uploaded in their original format.
- 600x600 - Media are downloaded in 600x600 format (standard profile used for thumbnails).
If one or more profiles have been created, they will be displayed in sequence:

Export file type - Select a file type:
- Files - A compressed file (.zip) with the exported media.
- URL - A text file (.txt) with URL links to download the exported media.
- Files & URLs - A compressed (.zip) file with the exported media and a text (.txt) file with URL links to download the exported media.
Link Type - Select one or several media link types:
The link types that appear in this list correspond to the media links for the document type concerned.
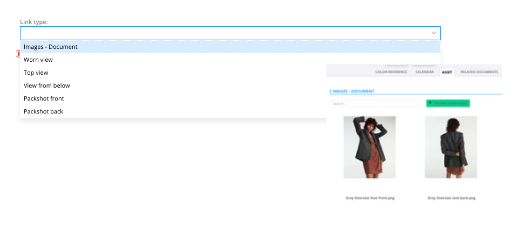
Once you have filled in these three fields, click on the Apply button to export the resources or on the Cancel button to exit the dialog without exporting.
Because the media files can be quite large, an email is sent to your account profile address containing the download links. If the total weight of the exported media is more than 2 GB, a link to a text file (.txt) with URL links to download the exported media is sent.
Download links are valid for 2 days. After 2 days, the links will no longer be active.
You can use the Tab Save Chrome extension to facilitate downloading the assets from the emailed text file.
CSV
This option is limited 5,000 records. To export more records, use to the Export platform.
The CSV output type allows you to export the text content in your selected objects (documents, assets, variants, or classifications) in a .csv file. When selected, additional options are displayed to define your export.
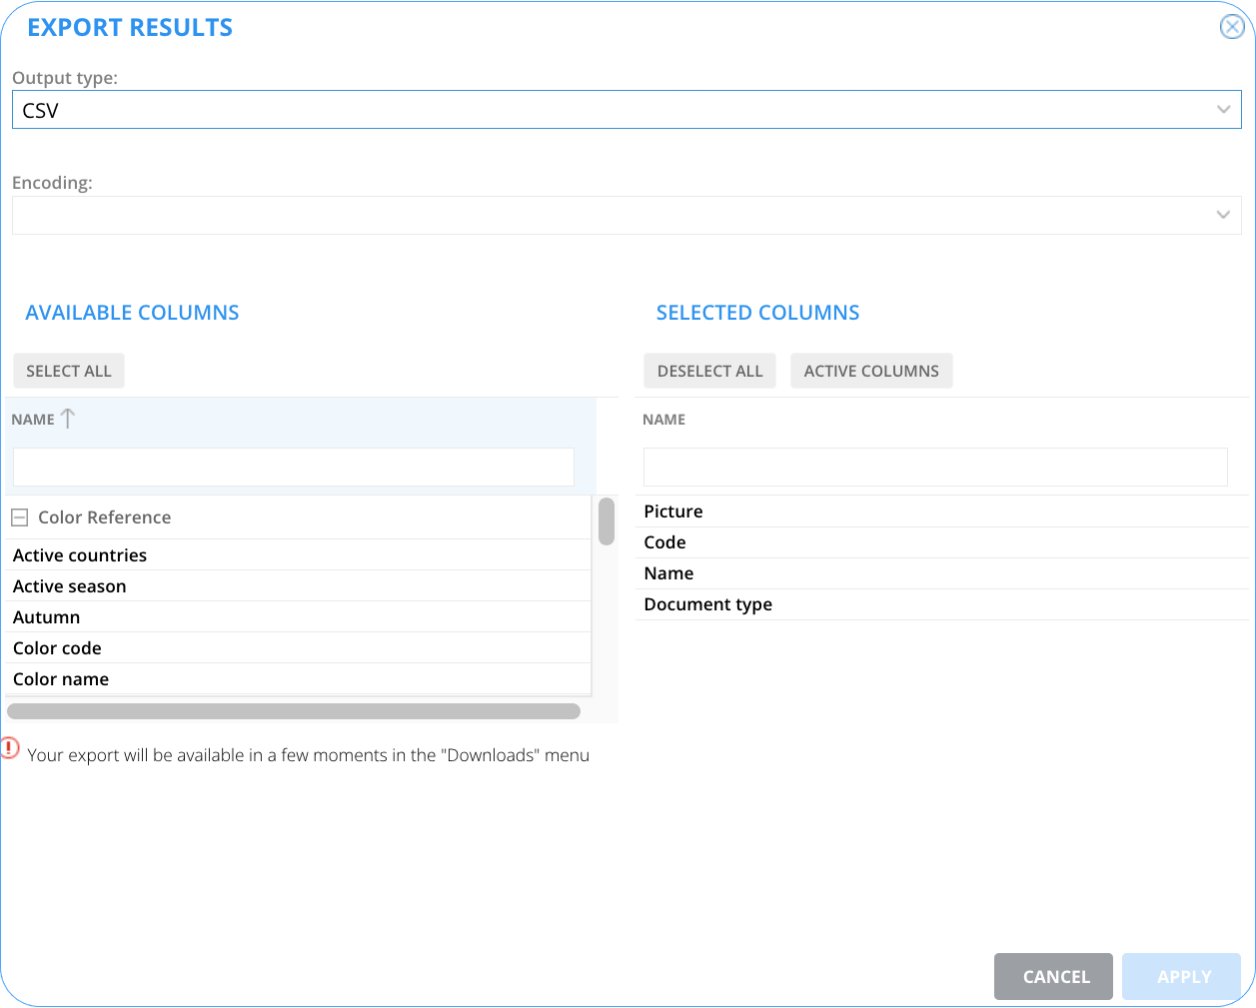
Select the following information:
Information | Description |
|---|---|
Encoding | Defines how to transform the data for a specific usage. The following options are available:
|
Columns | Designates the columns to be exported. To select columns, you can drag and drop individual column headers from Available Columns (on the left) to the Selected Columns (on the right) or you can search for a specific column header by typing at least three characters of the attribute name in the search bar. A scrollable list is automatically displayed. The list will display fewer and fewer results as you continue to enter text in the search bar until nothing matches. |
Once you've finished your selections, click the Apply button to export the .csv file or the Cancel button to exit the dialog without exporting.
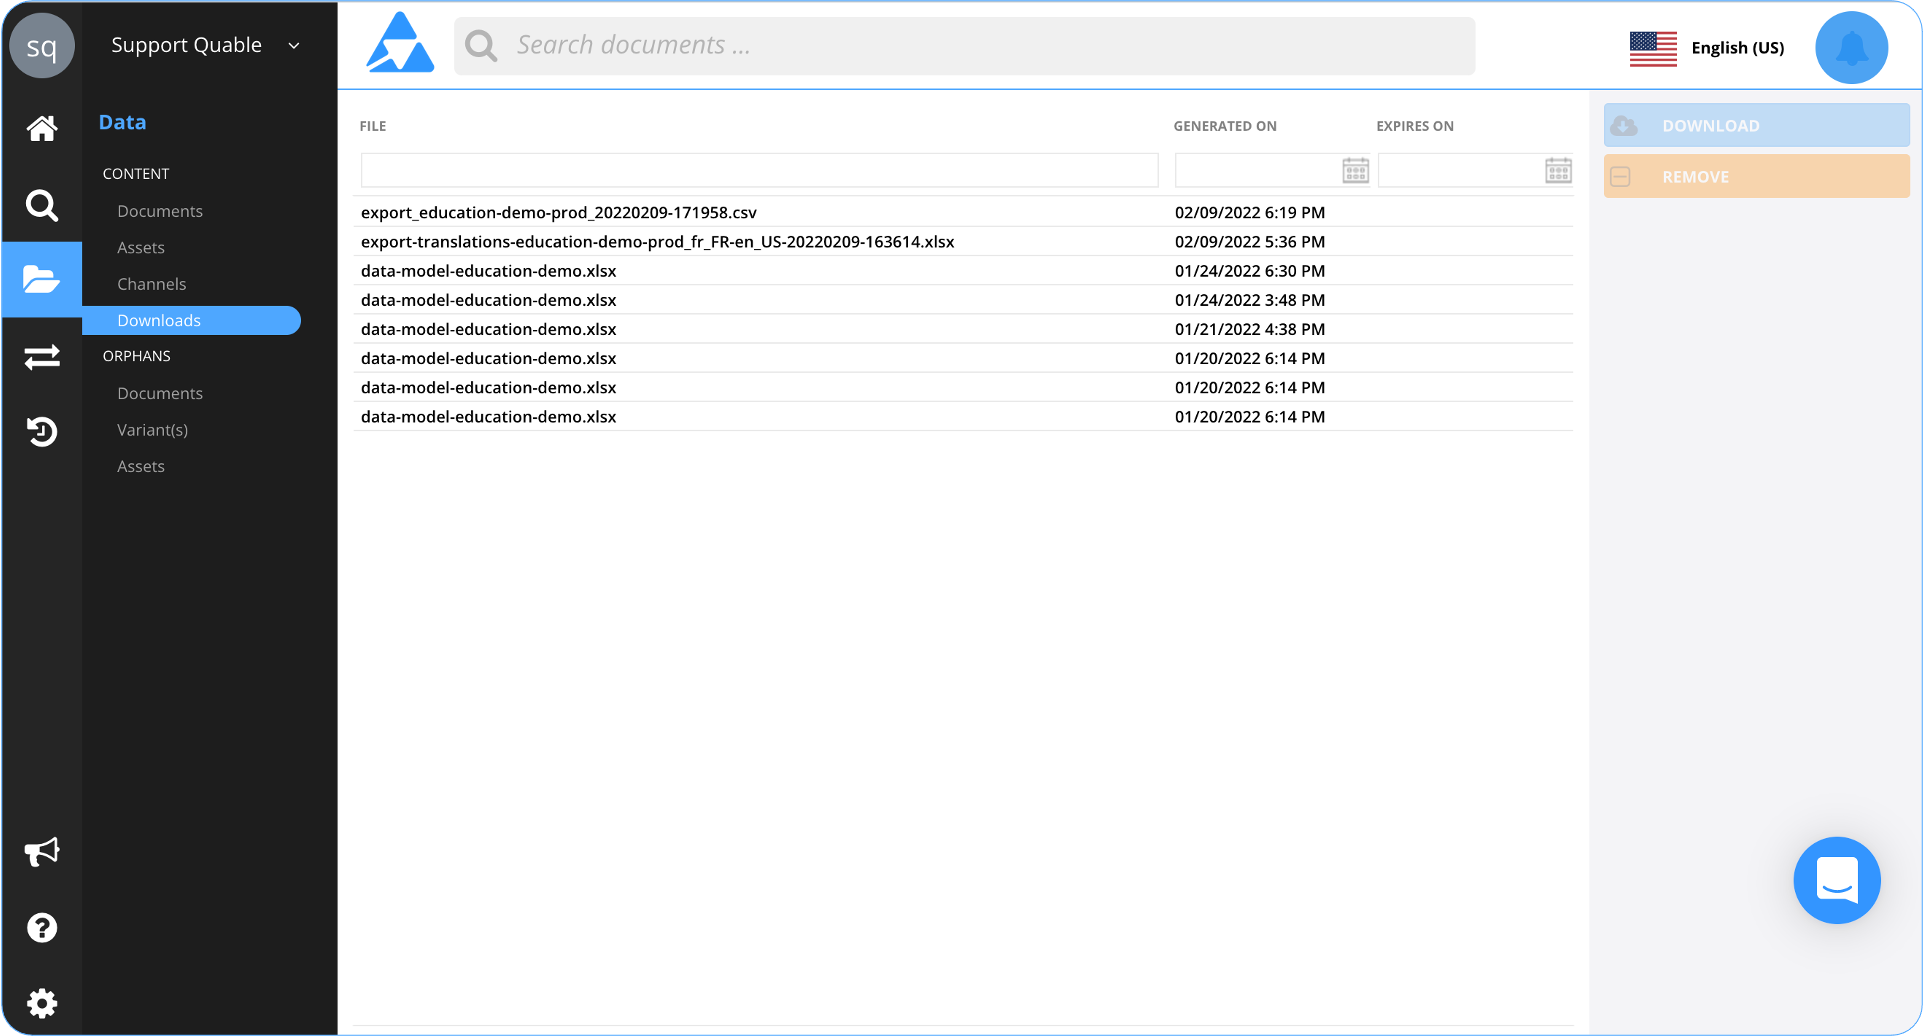
The generated export file can be found and downloaded from the Downloads page in the Data > Content menu.
QuableApp
Selections RequiredThis feature is only available:
- if the Quable PIM administrator has integrated a QuableApp and
- the document type defined for the QuableApp is selected.
The QuableApp button allows you to use an integrated external application with your selected documents.
To use a QuableApp, click the QuableApp button and select an application from the dropdown list. This opens a window for you to interact with the external application.
Follow any instructions or procedures in the window. When you're finished, you can close the window by clicking on the X in the upper right corner.
The window opened by the QuableApp and all the content in it is managed entirely by the external application, not directly by Quable.
Available QuableApp
The following QuableApp can be integrated with Quable PIM:
- J2S - Communication and marketing services
- CraftMyPdf - Design & Generate Pixel-Perfect PDF Documents
Add to TextMaster
Selections RequiredThis feature is only available:
- if the Quable PIM administrator has integrated TextMaster and
- documents are selected.
The Add to TextMaster button allows you to use TextMaster to translate your selected documents directly from Quable PIM.
To use TextMaster, click the Add to TextMaster button and select an application from the dropdown list. This opens a window for you to add your specifications for the translations.
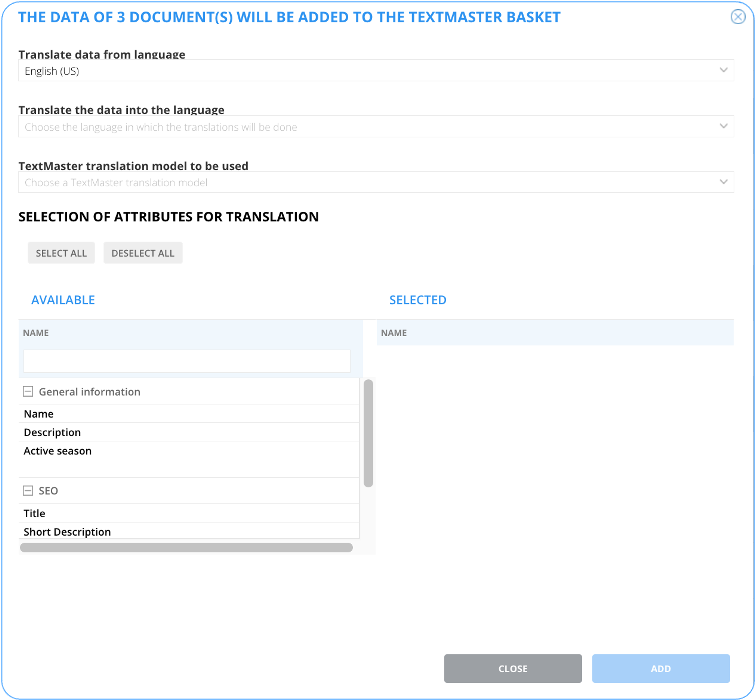
Select the following information:
Information | Description |
|---|---|
Translate data from language | Defines the data language the text will be translated from. |
Translate data into the language | Defines the data language the text will be translated into. |
TextMaster translation model to be used | Designates the predefined translation templates to use for the translation. Quable PIM automatically detects which templates are available for the selected languages. |
Selection of Attributes for Translation | Designates the attributes to be translated. To select attributes, you can drag and drop individual attributes from the Available column (on the left) to the Selected column (on the right) or you can search for a specific attribute by typing at least three characters of its name in the search bar. A scrollable list is automatically displayed. The list will display fewer and fewer results as you continue to enter text in the search bar until nothing matches. |
The selected documents are added to your Textmaster cart and can be found in the Textmaster projects page in the Data Flow > Translations menu.
Updated 5 months ago

